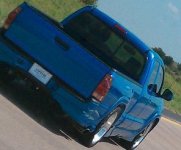
My New Toy!

Thinking of going with the Skyjacker, 3" lift, with new shocks and an AAL for the back. SHould run me around $500.00 shipped, and I can get it here NEXT DAY. The drop bracket lift is just too pricey for me... and can't see myself daily driving something that big! lol!

and your penis isnt that small...
 
Can't wait for the Skyjacker pics.

The oil looks a little dirty. You have to admit that the oil filter location is the easiest one to get to ever.
 
It's probably going to be Spring or early summer before I get that lift on the Taco. Been spending some money on the house, and have had some hour cuts at work, so not as much cash flow going around right now.

As far as the oil filter location.... very convenient, however, I couldn't figure out the little drain plug on the bottom of the oil catch tray??? Damn thing just spun around endlessly, so when I took the old filter off.... I got oil all over that tray. Still a lot less messy than doing it on the 4Runner.

As for the oil color... they had me changing it 6000km after purchase.... a little too long for my liking. I'm gonna be doing it every 5000km, and see if that clears up the oil color. :)
 
Alright, so I can't wait for funds to get collected to do my lift, and have to do some mods! lol!

Decided to take a page from the 4Runner's build, and add some underhood lights!

Do these look familiar???
DSCF7381_zpsc8418001.jpg~original


That's because they are the same lights I have on the 4Runner! lol!

DSCF6480.jpg~original


Again, I hooked everything up using a contact switch...

DSCF7383_zps694dc544.jpg~original


Ran the wires inside the hood supports....

DSCF7384_zps4fe3c908.jpg~original


Wire loom to keep things looking nice and neat

DSCF7385_zpse0463bf6.jpg~original


And a night shot...

DSCF7388_zps40fed826.jpg~original
 
Love the SWB looks good man! Heres a pic of my Xrunner SWB. Had to sell her because my wife was :preggers: and she didn't like the ride.I had the leafs flipped, and then too small for a car seat.
 

Attachments

  • Xrunner.jpg
    Xrunner.jpg
    19.9 KB · Views: 399
That sucks man! We bought this truck, in order to fit our kids in it... so no surprises there.... However.... thinking a Tundra would have been roomier for the midgets in the back! lol!

I love my Taco though.... but not quite as much as I love my 3rd Gen! ;)
 
Phase 1: Led interior mods

Well, I finally got started on swapping my interior lights, and added some lighting where I didn't have any before.

The Tacoma, like my 4Runner... had some details that were left out, during production. I felt like it could use some extra lighting, since the glove box and center console had none, which made things a little hard to see at night.

First thing I did was run some power and ground wires in the center console, so I can splice into them, and add my 5mm LED lights.

I ran power from the shift light, and grounded the entire project using the same ground already being utilized in that area. (a shot of the ground in the pic showing the vent LED location)

DSCF7418_zps0c219d6f.jpg~original


Then I ran one LED to the back of the center console to the rear vent area, and another to the inside of the console:

DSCF7420_zps4c69a73b.jpg~original


Here's a shot of the vent area at night:

DSCF7429_zps233f8b21.jpg~original


Here's a shot of the center console:

DSCF7423_zps80281fce.jpg~original


Then I decided to run 2 LED's to the front cupholder area:

DSCF7413_zps2800d071.jpg~original

(Note the little black grommets... they are actually called LED holders... I got 50 of them for around a dollar on E-bay).

Here's a day shot of them installed:

DSCF7414_zps14274379.jpg~original


I wanted them to be concealed, so I located them beneath the cupholder divider. The only problem with this, is the light output wasn't that great, so I modified the underside of the divider, so it would reflect the light a little more.

I used some mirror tape and cardboard to make the reflector:

DSCF7415_zpsf843c789.jpg~original


DSCF7416_zpse0571194.jpg~original


DSCF7417_zps62c58deb.jpg~original


Here's the finished product....

DSCF7432_zps2c6d94fa.jpg~original


Next, I ran 2 more to the glove box area.... really ticked me off that a $30,000 + pickup truck didn't have a glove box light! lol!

First thing I did was drill out 2 holes for the LED's on both sides of the latch cut out and one for the contact switch.

DSCF7424_zpsea3c9e85.jpg~original


And a night shot:

DSCF7431_zps5d3602f8.jpg~original


Next... I had 2 more LED's left from the pack I bought at Walmart... so I decided to add some foot well lights! :D

DSCF7430_zpsd2bfcc7d.jpg~original


You'll notice I swapped the shifter light too.... I simply used one of the spare LED's I had left over from the 4Runner's LED swap... same 74 Wedge as the 4Runner.

Now.... what's next?? Well I want to swap out the gauge lights... but they are Surface mounted LED's, which means I need to either learn how to remove and re-solder 10 LED's! lol! I've already got them on order from LEDs: DIY, Superflux, 12V Prewired LEDs, LED Kits and more , so just waiting for them to come in! :D

 
Last edited:
Well, finally got around to wiring the grill lights, with the help of a friend. "The help of a friend"?? YUP!

You see... I didn't want to run it to a toggle or rocker switch in the dash... so I had a friend of mine help me hook it up to my stock switch!

The key to doing it, is to tap into the power wire on the back of the headlight housing plug and then running all the other wires to a relay with a fusible link for the constant power wire from the battery. Here's a shot of the T-tap into the power wire:

DSCF7426_zpse23f1701.jpg~original


I cleaned up all the wiring with some Wire loom...

DSCF7427_zpsdf728291.jpg~original


A night shot:

DSCF7433_zps06ba9667.jpg~original


I'd give more detail about this... but I'm no Electrical scientist... and my buddy Lee is the guy who really knows all the details for this one... lol!
 
Lights look good! I bet they look even better in person. So hard to get a decent shot of interior lights that do them much justice.
 
Thanks man! They did turn out pretty slick... the pics definitely don't do it justice! :) I'm running out of cheap mods to do with this truck though.... gotta start making some good money again, so I can save up for that lift and new tires! :D
 
PHASE 2: LED Interior mods

Well, I got my order from Oznium.com the other day, and after canvasing some friends on Facebook, I got a volunteer to Solder the Surface Mount LED's into my gauge cluster! :)

First thing I did, was take the gauge cluster out, and take it all apart.


Then decided, since I had the whole cluster apart, why not mod the pods with some Carbon Fibre Wrap! :D So I took the trim rings out....


Closeup of the Gauge Cluster Circuit Board, and the TINY LED's that were replaced!


The master at work!


Tools of the trade:


Before shot, without the carbon fibre...


After:


Dayshot with the Carbon Fibre and Blue lighting:


Not my pic... but here's one of the stock setup:


Night shot!


I freakin love it! Much nicer than the stock Orange lighting! :D
 
Last edited:
Looks good Fightman. Never have been a big fan of the orange lighting. The CF is a nice touch.

Any more night pics with the front lighting?
 
Looks good Fightman. Never have been a big fan of the orange lighting. The CF is a nice touch.

Any more night pics with the front lighting?

I'm assuming you mean the headlights??? If so... no other night shots.... could get some... if it freakin stops snowing!!!!! :(

We're supposed to be full swing into Spring... but getting a small Snow Storm today! :(
 
Alright! So, after many months of procrastination, I decided to get my bed lights wired up!

First thing I did, was research the crap out of this mod.... and decided to put my own twist on it. Most guys, have used a toggle, or some kind a water proof switch, which they mounted in the bed. I opted to go a different route, and went with a contact switch! :) This way, when the tail gate is down, the lights turn on!

Here's some pics of today's work:

Here's the power wire which runs from the battery to the rear of the truck:


I ran the wire along the inner fender, down the firewall, and along the frame rails, with the brake lines:


THen I ran the wire up the rear quarter panel, over the inner fender:


The power wire comes out of the box, next to the anchor system rail along with the ground wire, and wired up to the LED strip:


The end of the ground wire, was run to the tail light recess of the rear quarter panel, through the latch post, to the back of the contact switch:


I used an existing hole in the pillar, and just drilled it out, so the contact switch backing would go through.


Basically, you get constant power from the battery, but the lights only go on, when the tail gate is down, and the ground makes contact with the switch.

Here's a night shot....


I like how it turned out.... almost looks OEM! :) Let me know what you think??
 
Last edited:
Thanks man.... I'm really stoked about this mod! Helps with unloading stuff at night! :)

I'm planning on running an in-line fuse, but not sure what size to buy.... does anybody know which one I'd need for a 6 ft roll of LED rope lights??

 
Last edited:
Before.... (already started taking off the badges..)


AFTER:


Closeup:


It's hard to see from the pic... but I plasti-dipped the emblem, painted all the chrome part, gun metal like the front grill emblem, and cleared over all of it.

You guys think I should do the "TACOMA" emblem too???
 

Members online

Forum statistics

Threads
278,316
Messages
3,554,105
Members
248,016
Latest member
Advally Service

Trending content

Back
Top