My very abbreviated plasti dip thread

KCcarguy

New member
Well, fact is I was really pushed for time with this project but I wanted to take advantage of the nice weather this weekend, so I gave it a try. Because of that I don't have a ton of pics, but I'll do my best to sum it up for those who are curious.

First, I ordered 5gal of dip from dipyourcar.com along with a Wagner control sprayer from amazon. I also bought about 4 rolls of 2" frog tape and some plastic sheeting at Home Depot. You'll need some newspaper and a retractable razor as well
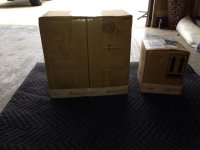
image.jpg
 

Attachments

  • image.jpg
    image.jpg
    122.5 KB · Views: 5,480
Last edited:
Register to hide this ad
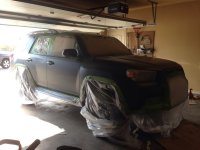
Masking took a solid 3 hrs. I basically followed instructions on youtube posted by dipyourcar.com. As you can see, I didn't tape the headlights, tail lights, or rear side glass. I didn't tape the side mirrors either. Basically, if the plastic or glass doesn't have any rubber trim around it and there is a gap between it and the body panel, you can peel it cleanly at the end. Fast-forward and here it is all masked up with the first coat applied. Notice how thin the coverage is. I did about 10-12 thin coats. You have to tape over any black textured plastic because the dip sticks to that stuff and won't peel cleanly.

image.jpg
 

Attachments

  • image.jpg
    image.jpg
    126 KB · Views: 8,014
Last edited:
Here's the problems I had during the project:

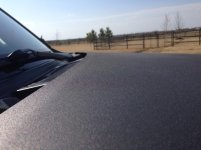
1) a consistent texture depends on the sprayer being at a constant distance from the surface and always perpendicular. This can be a bit tricky on our curvy trucks. It was especially tough on the hood because I just didn't have the reach (even with a step stool) to always keep the sprayer where it needed to be. Because of this, I have some rough patches in spots where it is more dimply, almost like rhino-liner on the hood near the windshield.

2) More tips for a nice texture: You have to start the spray on non permanent surface (ie a masked off area like a window) because the first little bit comes out in bigger drops and will cause rough texture. You also need to keep an eye out for drips coming off the hopper.

3) Some areas, like the insides of the door handles and side mirrors are very hard to get to. If you try too hard you'll just cause running, so I just did the best I could. I've noticed the lightly-sprayed area on the back if the door handles is already starting to peel, so I'll probably end up just peeling the door handles and leaving them uncovered (black, in my case).

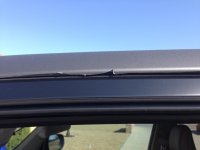
4) The biggest problem I ran into was the weather stripping on the doors. I did my best to tape it off, but it's really tough to get just right. The dip stuck to some of it and when I opened the door it started to peel away from the roofline just above. I got a razor and tried to separate it the best I could, but it's pretty visible up close and I'm afraid it may peel more in the future...we'll see. I would try and find a better way to do this next time.

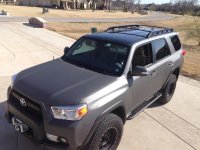
5) I masked-off the entire roof along the gutters and roof rack because I didn't want to deal with masking off the rack or sunroof. I think it actually looks pretty good in gloss black against the grey, but this might be a big issue for those of you with other colors.

6). The roof rack was another area that I had some trouble with creating clean lines. The dip really stuck to the rubber gaskets around the rack and it didn't peel cleanly. I used a razor to salvage it the best I could
 
Last edited:
Whoa! First fully dipped 5th gen? Can't wait for the continuation and the long term review. Even though it can be peeled off if you don't like it, this is still ballsy. Edit: just saw yourpost in the "What did you do in/to your 5th gen today" thread. Looks good!
 
Last edited:
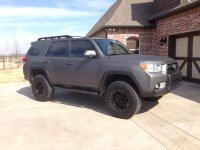
After 10-12 coats with about a 10 min break in between, it was time to unmask it. I got a razor and ran it along any tight seems or any edges where there was not a true gap.....basically along the edges of all the black trim and windows as well as lights. DO THIS AT YOUR OWN RISK if you are super anal about your paint DONT DO THIS, I used a light touch, but I'm sure there are some scratches from the razor. If your really worried, you'll just have to find another way. So....after 10 hours of work:

image.jpg
 

Attachments

  • image.jpg
    image.jpg
    130.4 KB · Views: 45,015
Last edited:
Would I do it again? I'm not sure. The cost was about $400 including dip, tape, a respirator, and spray gun. It took a LOT of time and I'm not sure how long it will last. I did this primarily for paint protection on the trail and I'll be curious to see how it holds up on our K trail run next month. FWIW, I was quoted $800 for a local installer to do it...is it worth the savings? :shrug: it was a big mess and took a lot of time....maybe so.
 
Would I do it again? I'm not sure. The cost was about $400 including dip, tape, a respirator, and spray gun. It took a LOT of time and I'm not sure how long it will last. I did this primarily for paint protection on the trail and I'll be curious to see how it holds up on our K trail run next month. FWIW, I was quoted $800 for a local installer to do it...is it worth the savings? :shrug: it was a big mess and took a lot of time....maybe so.

Very impressive! You win the "Balls of Steel" award for the month of March lol! Good job and while I'm sure it looks better from 10 feet than up close that's really all that matters. Again, good job!
 
Great job! I did the same on mine with about 8 cans and did the sides. But after a few months I didnt like it anymore. I didnt get as many layers as you did so it was a pain to come off. I used almost a gallon of WD40 to dissolve the Plast Dip then a pressure washer to get it off.
 
Great Job!!! I think it turned out really well! What exact color did you use and how much of the 5 gallons did you go through?
 
Very impressive! You win the "Balls of Steel" award for the month of March lol! Good job and while I'm sure it looks better from 10 feet than up close that's really all that matters. Again, good job!

Thanks! I do really like the look. Matter of fact I think I might get the whole thing bed-lined that color at some point. Now THAT will take some balls.

Great job! I did the same on mine with about 8 cans and did the sides. But after a few months I didnt like it anymore. I didnt get as many layers as you did so it was a pain to come off. I used almost a gallon of WD40 to dissolve the Plast Dip then a pressure washer to get it off.

Yeah, it definitely is easier to peel with more layers. Hopefully it will hold up better too.

Great Job!!! I think it turned out really well! What exact color did you use and how much of the 5 gallons did you go through?

Thanks! I used anthracite metallic top coat (3 gallons) over gunmetal grey (2 gallon) base coat. I used every bit of it and probably could've done one more gallon for extra protection. It's a great color. Sort of has a slight metallic sheen in the sun. It's lighter than Mag grey with just a hint of tan. I love the look.
 
Last edited:
Finish looks great and I love the color. However I don't think I'd ever use Plasti Dip as paint protection on the trail. I'm sure it won't look too good after a few rough trips. IMO, the ultimate in trail protection is Monstaliner. Rugged as hell, but it's permanent. So no more pretty OEM paint anymore. But if you wheel your rig hard the OEM paint will look terrible after a few years.

This is "Sans Panties" on my FJ80, total spent on paint was about $300

9703747759_ad5f4e7b45_h.jpg
 
Last edited:
Well done! I didn't have the time and patience so I paid a local shop to do mine in Los Angeles. They dip a handful of cars a week and move alot of plasti-dip so my OTD prices were better out here. $450 for my 4runner.

Its been almost a year and I have had to touch up a couple spots. The sun has faded the original matte black plasti-dip so you can see the newer patches of plasti-dip.

If I do it again I will tell them to put some extra layers along the door edges. Also the plasti-dip on the doors and body panels just below the windows seems to take more of a beating so just something to keep an eye on.

BTW, I wash my 4runner maybe once every 2 months. I also park outside at work next to a municipal airport so I get all sorts of lovely chemicals and dust on my 4runner. YMMV

Again, Nice job!
 
looks sharp man! for reference sake, I have 8-10 coats on my hood and it has stood up very well for a year now. There are a couple small tears (<1mm) right along the front edge of the hood, but they basically put pea gravel on the roads here in the winter, so that is to be expected and I'd much rather have rock damage to the plastidip than to my paint!
 
Here's the rough edges around weather stripping on the doors I mentioned

image.jpg
 

Attachments

  • image.jpg
    image.jpg
    145.1 KB · Views: 3,375
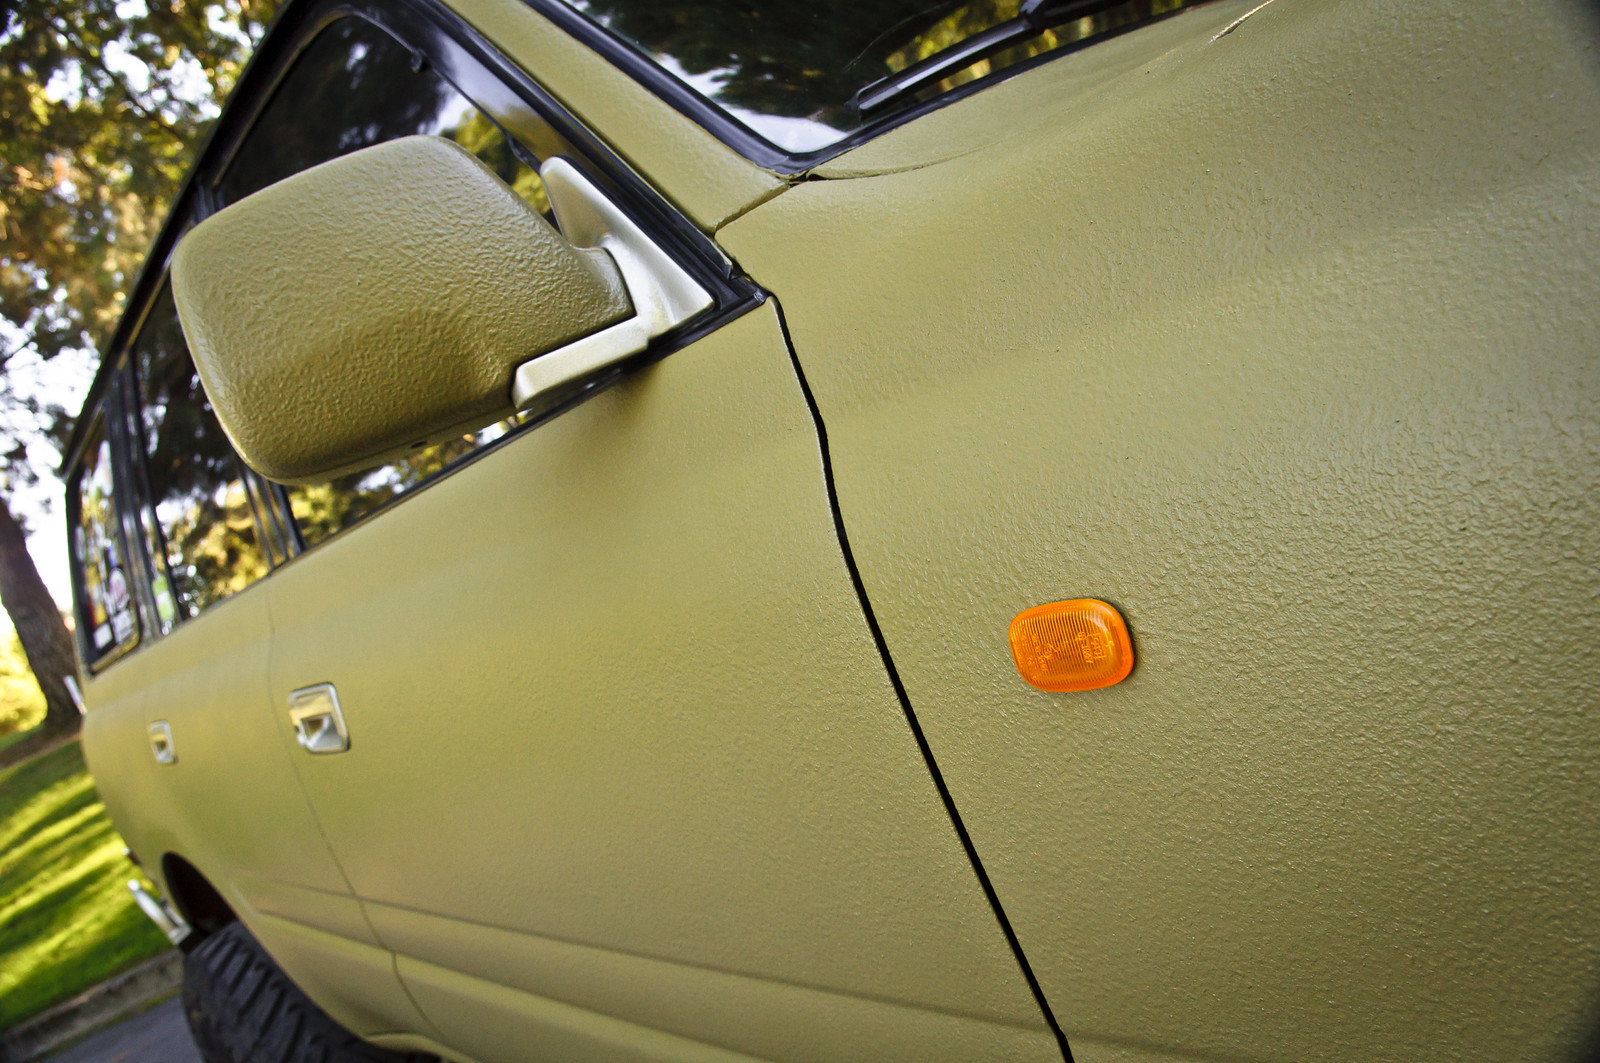
And finally, a close-up of one of the rougher spots. It's pretty textured everywhere, but a bit rougher here.
image.jpg
 

Attachments

  • image.jpg
    image.jpg
    134 KB · Views: 5,531
It’s freaking awesome!!!!!! I like a lot, Very good job!!!! I specially liked your rough edges (I’m sorry) if i did something like this, I would have a lot of those:lmao:
Even tho i don’t know if i would do it with plastidip, I am defiantly planning to do my hood now with it. And maybe something else.
thank you!
 

Members online

Forum statistics

Threads
278,312
Messages
3,554,089
Members
248,016
Latest member
Advally Service

Trending content

Back
Top