N8NAZ 2000 SR5 Build Thread

N8NAZ

Member
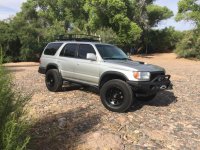
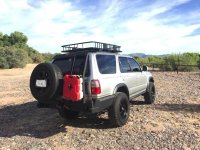
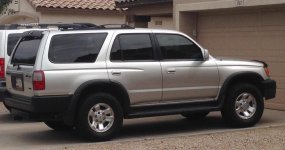
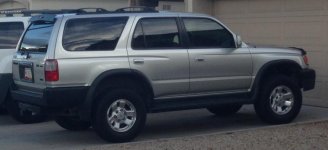
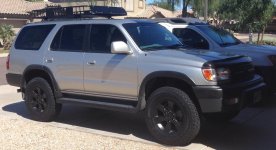
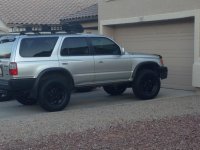
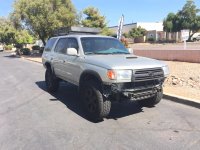
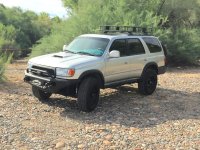
As she sits today

2000 Millennium Silver 3.4L 4WD SR5 5sp.
182,839k miles
IMG_8328.jpg
IMG_8321.jpg
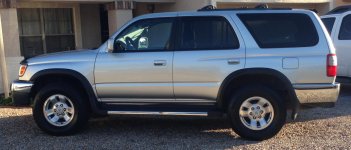
unnamed1.jpg

Suspension:

Bilstein 5100's
OME 2881 Front
OME 2966 Rear
(approx. 2.5" lift)

Tires/Wheels
265/70 R17 Yokahama Geolanders on 17x8.5 Tracker 2's

Exhaust
Flowmaster 40

Exterioir
Trail Gear 2 roof rack
Sport hood
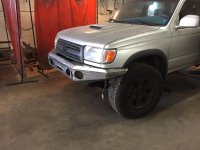
RPM FAB plate front bumper
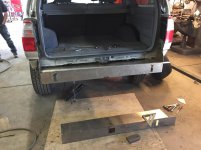
RPM FAB rear plate bumper with locking pin open/closed
-driver side swing out rear tire carrier
-passenger side ladder w/removable Rotopax mount
RPM FAB sliders

Mods
Deck plate mod
Satoshi grill mod
Horns ungraded

Other
Window tint
Plasti-dipped emblems
Smittybilt X20 remote 10k lb winch w/ synthetic rope
Fuel/ water Rotopax

Very Near Future Upgrades

Kenwood DVD w/ touchscreen & 2 camera inputs
4 new speakers
Rear back up camera
Rear flood lights
3" front fog lights
20" light bar
Seat covers

Future planned upgrades
ARB rear locker
Shift extension
Shorter wheel center caps

Wish list
Super charger (of course)

 

Attachments

  • IMG_8328.jpg
    IMG_8328.jpg
    142.5 KB · Views: 2,571
  • IMG_8321.jpg
    IMG_8321.jpg
    138.7 KB · Views: 1,628
  • unnamed1.jpg
    unnamed1.jpg
    138 KB · Views: 809
Register to hide this ad
The beginning

The day I bought her

View attachment 252071

My neighbor's dad was retiring and decided to sell his beloved 4Runner...I was fortunate to be able to purchase it. I got it early August 2015

One owner California vehicle (Menlo Park), w/165k miles...received every receipt for every service and maintenance performed since new.

I would post a picture of the dent he made sure I knew about, but its SOOO small, its tough to get a pic of. The check engine light was on when I bought it, but more about the P0420 code later.
 

Attachments

  • IMG_2918.jpg
    IMG_2918.jpg
    145.5 KB · Views: 728
Last edited:
Easy stuff

Before
IMG_2946.jpg

After 2 spray bottles of Simple Green
IMG_2947.jpg
 

Attachments

  • IMG_2946.jpg
    IMG_2946.jpg
    131.2 KB · Views: 737
  • IMG_2947.jpg
    IMG_2947.jpg
    134 KB · Views: 722
Exhaust

By late August 2015, I had taken care of the 420 code...In my case, I opted to replace the catalytic converter...I am a fan of factory parts, but when I was pricing out the work, the factory option was (and still is) financially questionable. I ended up having a muffler shop replace it with an aftermarket one, and while I was there, I went ahead and had a Flowmaster 40 installed.

I had done some research on line, and had heard about the "drone" from the exhaust, but MAN !!...it was loud...My very next internet excursion was researching sound dampening mats, but either it quieted down, or I just got used to it, so I ended up delaying the mats.
 
Chrome

I am not sure when it happened...but sometime during my 43 Arizona summers, I must had my limit of bare skin against hot chrome.

I researched painting over chrome, but even though Im not a fan, the chrome on this was perfect...I couldn't bring myself to scuff it up....somewhere along the line, I discovered Plastidip, ...I figured this would allow me to black out my chrome without destroying it...and as a bonus, if I messed it up, I could peel it off and start over!!

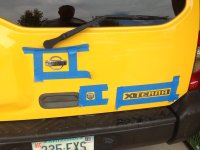
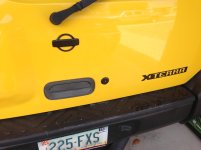
The first test was on my 01 Xterra
IMG_3239.jpg

IMG_3242.jpg

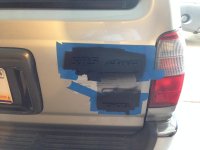
Since it worked so well, I started on the 4Runner beginning with the rear badging
IMG_3260.jpg

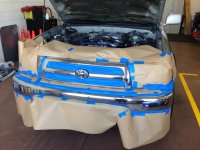
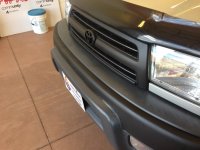
Then the front grill and bumper
IMG_3274.jpg

I was very happy with how it turned out
IMG_3293.jpg

if you look real close,you'll notice the electrical tape just above the pouty lip where the Plastidip started coming up...The tape was a quick bandaid because the idea of starting over was not an exciting option.

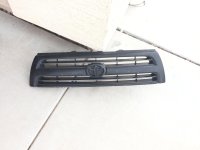
Here is the grill after 18 months and about 17k miles after I pulled it off to install my Satoshi grill mod...IMHO, the Plastidip held up fairly well
IMG_7925.jpg

I Plastidipped the chrome on the rear bumper, and repainted the plastic parts, and also the hitch
 

Attachments

  • IMG_3239.jpg
    IMG_3239.jpg
    121.7 KB · Views: 705
  • IMG_3242.jpg
    IMG_3242.jpg
    116.1 KB · Views: 710
  • IMG_3260.jpg
    IMG_3260.jpg
    139.2 KB · Views: 702
  • IMG_3274.jpg
    IMG_3274.jpg
    132.4 KB · Views: 715
  • IMG_3293.jpg
    IMG_3293.jpg
    126 KB · Views: 709
  • IMG_7925.jpg
    IMG_7925.jpg
    135.7 KB · Views: 707
The Lift

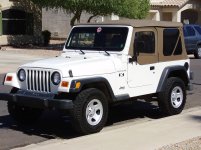
I feel compelled to interject a little history here. Since I was a kid, I always wanted a Jeep...But with no money, working long days, months, and years, raising kids etc, it just never happened...Until 2007

I found this Jeep in the neighborhood where I work...it was a 2002,with 21k miles...I asked the owner if he had it out on trails much and he said it had "been on a dirt road once."

PA060239.jpg

For the 5 years I had this Jeep, I had all kinds of plans for lifts, tires, bumpers, etc, but the Jeep remained exactly how I bought it...so when I got the 4Runner, I wanted to get as much done as possible.

Sept 22, 2015 ....Stock
IMG_3447.jpg

Sept 23rd...I had purchased a 2" (or so) lift from Daystar, through PartsGeek, but they shipped the wrong lift kit in the right box. After many emails and having to pay to ship back the order they messed up, I was much better educated about dealing with PartsGeek, and happy to never give them another dime.

I stopped at Desert Rat in Tempe and talked to Brett...quoted me OME coils and Bilstien shocks, and I couldn't have been happier with the results

IMG_3457.jpg

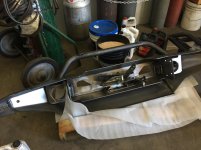
Sept 24th...A buddy from work had put some aftermarket rims on his wife's later model 4Runner and asked if I wanted the stock rims he stored and forgot about. The price was right...(free) they were 17", and a friend gave me a hook up at a powder coating place...and since it was finally lifted, I put the roof rack on.
IMG_3473.jpg

Sept 26th...The running boards had to go to enhance the look of the new lift...The truck didn't change too much after this. I was glad to have done some work on a vehicle to make it more personalized.

IMG_3508.jpg
 

Attachments

  • PA060239.jpg
    PA060239.jpg
    135.2 KB · Views: 698
  • IMG_3447.jpg
    IMG_3447.jpg
    99.9 KB · Views: 692
  • IMG_3457.jpg
    IMG_3457.jpg
    67.6 KB · Views: 699
  • IMG_3473.jpg
    IMG_3473.jpg
    140.4 KB · Views: 708
  • IMG_3508.jpg
    IMG_3508.jpg
    133.2 KB · Views: 728
I'm assuming your truck was the test mule for all of RPM's armor? It looks good. I see the owner of RPM Fab advertising on Facebook all the time.
 
I'm assuming your truck was the test mule for all of RPM's armor? It looks good. I see the owner of RPM Fab advertising on Facebook all the time.

Yes it was...Thank you!

Im glad you think it looks good. I don't do Facebook, so I haven't seen anything advertised on it. If you have any questions let me know, and I'll try and answer them for you
 
Stoked I came across your thread! Debating between Plasti-dipping and actually painting my bumpers and grill and was pretty pleased with your 18mo picture (thanks for that). Just curious, do you remember how many coats you did? How did the rear bumper hold up? Cheers.
 
Stoked I came across your thread! Debating between Plasti-dipping and actually painting my bumpers and grill and was pretty pleased with your 18mo picture (thanks for that). Just curious, do you remember how many coats you did? How did the rear bumper hold up? Cheers.

Sorry I missed your post...obviously it has been a long time since I looked at my thread!!

I don't remember the exact number of coats. I was fortunate to have been able to to the plastidip indoors, so once I had it masked off, I sprayed coats until I got tired of it....If I had t guess, it was around 5 coats.

The back help up well...the front took a beating from the road, but thats expected.
 
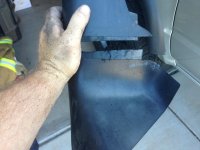
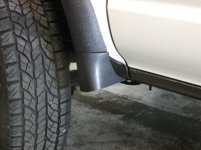
Fender trim gap

That gap in the trim bugged me, so luckily I saw in a thread about trimming the front piece off of the front of the running board
 

Attachments

  • IMG_3605.jpg
    IMG_3605.jpg
    136.6 KB · Views: 568
  • P6060006_zps8e593ad6.jpg~original.jpg
    P6060006_zps8e593ad6.jpg~original.jpg
    138.4 KB · Views: 573
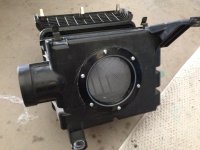
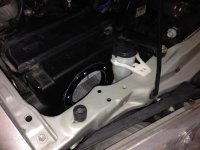
Deck Plate Mod

I kept looking at threads about the deck plate mod, so I finally decided to do it. Some of the threads I saw had some pretty chewed up openings for the deck plate, so I was a little nervous about cutting the hole. As it turned out, I was was discussing the mod with my mechanic and showing him the deck plate, when he loaned me a 4.5" hole cutting bit (am hoping that's the correct size, but it was the exact diameter of the deck plate).

I don't have pics of every step, but the hole was perfect, and I decided to add aluminum screening
 

Attachments

  • IMG_3248.jpg
    IMG_3248.jpg
    134.2 KB · Views: 566
  • IMG_3250.jpg
    IMG_3250.jpg
    124.3 KB · Views: 585
Hood Scoop Envy

At some point through this process, I realized that I wanted a hood scoop...I had read in a thread about hood scoop envy, and I had it bad.

I scoured Craigslist, but soon realized that a straight hood with a scoop was usually the first part sold. I thought about purchasing an aftermarket hood, but decided to go with OEM. I purchased all of the necessary parts from my local dealer and took it all to Mikes Body Shop in Chandler...they took care of everything. I don't know what happened to all the pics I took of that process, but I can't find any.

I am usually a pretty frugal guy, so to replace a perfectly good hood with a hood that had a non-functioning hood scoop was out of my comfort zone. Living in the Phoenix area, I did opt to cut the plastic so there is SOME functionality to get heat out of the engine bay, but truth be told...I love the scoop, and it makes me smile every time I look at it
 
RPM FAB Bumpers

Besides some maintenance items, like axle seal leaking into my left rear drum, and a new clutch, I really didn't do anything for about a year...I had saved money for a supercharger, but changed my mind on the timing of it, so I started looking for bumpers

T4R had threads with manufactures, so looking through them I noticed a lot of them weren't offering bumpers anymore. I wanted matching front and rear plate bumpers, and was leaning towards 4XInnovations. I visited a Desert Rat store, and asked if they had heard anything about 4XInnovation from buyers, but they had not.

He DID let me know that a local shop was looking for a 3rd Gen 4Runner to use as a template to develop bumpers, so I got the URL for RPM FAB

After contacting Don, I met with him and we went over ideas, he pointed out examples of work RPM does for other vehicles.
 
RPM FAB Bumpers

The process took a little longer than expected...I was impressed at the level of thought and detail RPM was putting into the design, they were always willing to answer my questions, and were as excited as I was about what they would end up looking like!

Originally I had requested a rear bumper with a swing out tire carrier. During one of my visits, Don pointed out a one off design for a 4th Gen 4Runner that had dual swing outs, one for a ladder that the spare on the other side. I decided to change my order and requested the same option. I didn't really need a ladder, but knew that if I didn't do it then, I would probably regret it.
 

Attachments

  • IMG_7206.jpg
    IMG_7206.jpg
    128.2 KB · Views: 574
  • IMG_7207.jpg
    IMG_7207.jpg
    127.1 KB · Views: 560
Satoshi Grill Mod

After RPM was done with the design and fitment for the bumpers, I got my truck home...Since I was bumpers, I was very hesitant to drive in the crazy traffic here, so during limited outings, I was able to get it to the shop for a timing belt change and a for other things that were bugging me, but not worth taking it into the shop

IMG_7756.jpg

So I keep looking at the front end, and thinking that I had been wanting to do a Satoshi Grill mod, and since it would be awhile for the bumpers to get finished up, now would be a good time

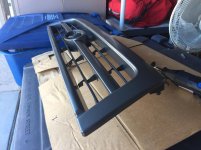
I ordered a new grill for a 1996 4 cylinder from Rock Auto because it was already black, and much cheaper than OEM!

IMG_7231.jpg

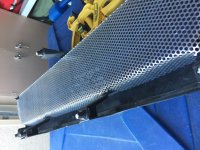
The Dremel tool worked great, but in the end, the little saw in the picture worked much better

IMG_7236.jpg
 

Attachments

  • IMG_7756.jpg
    IMG_7756.jpg
    137 KB · Views: 302
  • IMG_7231.jpg
    IMG_7231.jpg
    130.2 KB · Views: 292
  • IMG_7236.jpg
    IMG_7236.jpg
    141.7 KB · Views: 293
Satoshi Grill Mod cont.

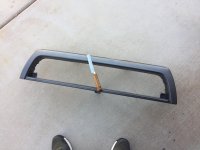
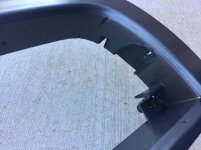
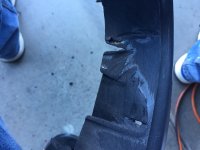
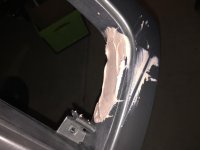
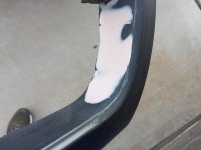
There wasn't much to patch after cutting out the center, so some pieces off of the center section epoxied to cover a couple of holes, and some bondo got the outer section finished up pretty quick

IMG_7237.jpg

IMG_7239.jpg

IMG_7353.jpg

and of course...sanding

IMG_7360.jpg
 

Attachments

  • IMG_7237.jpg
    IMG_7237.jpg
    137.1 KB · Views: 289
  • IMG_7239.jpg
    IMG_7239.jpg
    127.1 KB · Views: 291
  • IMG_7353.jpg
    IMG_7353.jpg
    120.8 KB · Views: 285
  • IMG_7360.jpg
    IMG_7360.jpg
    124.4 KB · Views: 284
Satoshi Grill Mod cont.

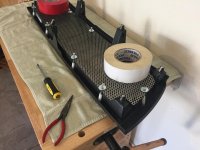
Im not sure why I thought wrapping the mesh around the inside of the grill was a good idea, but I went ahead and tried it. I believe I was thinking that I could drill through the inner part of the grill and attach with scores and nuts

IMG_7420.jpg

I was posting on the "What did you do to your 3rd Gen today thread, and lucky for me, kolet saw my post and shared pics of how he attached his grill.

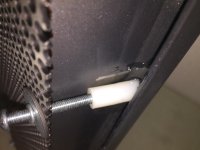
He used threaded nylon washers epoxied to the grill and used foam to position the washers while the epoxy dried
I used his idea, but found some longer washers I could rest against the "bottom" of the grill, and used longer screws

IMG_7905.jpg

After the epoxy set, I tightened the screws, and epoxied the screws to the threads, and made sure all of the washers were well adhered


IMG_7907.jpg
 

Attachments

  • IMG_7420.jpg
    IMG_7420.jpg
    138.6 KB · Views: 291
  • IMG_7905.jpg
    IMG_7905.jpg
    134.8 KB · Views: 291
  • IMG_7907.jpg
    IMG_7907.jpg
    123.7 KB · Views: 309
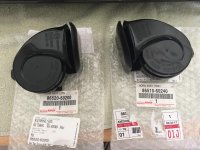
Horn Upgrade

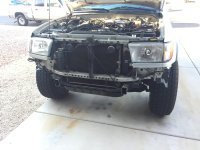
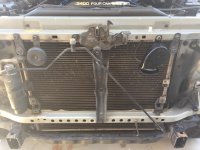
So...just to recap...I'm waiting for my bumpers to finish up, so I decide to do the Satoshi Grill mod...so now my front end looks like this and Im remembering how wimpy my horns are. I also know that NOW is the time to replace them

IMG_7857.jpg

IMG_7901.jpg

IMG_7902.jpg

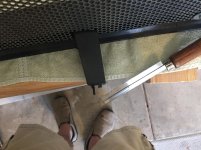
After the horns were installed, the grill was ready. There is a write of using this grill, and it mentions the round grill mounts into the oval body mounts (or the other way around)
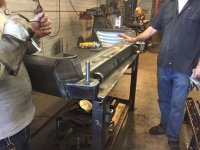
The fix was simple, just cut off the end piece that holds the clip, drill a hole, and nut and bolt them to your rig

IMG_7918.jpg
 

Attachments

  • IMG_7857.jpg
    IMG_7857.jpg
    129.6 KB · Views: 284
  • IMG_7902.jpg
    IMG_7902.jpg
    134.8 KB · Views: 293
  • IMG_7918.jpg
    IMG_7918.jpg
    129.7 KB · Views: 285
  • IMG_7901.jpg
    IMG_7901.jpg
    136.2 KB · Views: 314

Members online

Forum statistics

Threads
278,306
Messages
3,554,045
Members
248,016
Latest member
Advally Service

Trending content

Back
Top