new-to-me '99 4Runner Limited

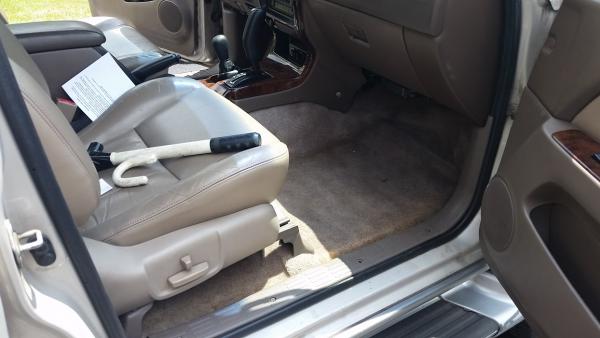
Finished it up today. I tried to buy some new felt underlayment, the carpet store wouldn't sell me the small quantity that I needed but they would give me some synthetic padding, so I went that route. The old jute was moldy and nasty and was literally falling apart in my hands. I was able to use the big chunks of the old padding as a template for the new pieces. I didn't have any upholstery spray glue on hand ( I thought that I did) so I just layed it all on the floor.
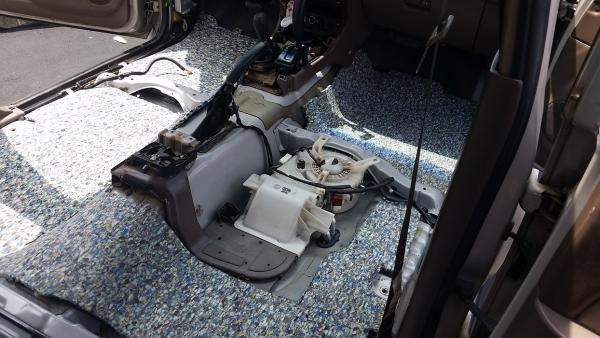

2ndhandyotaman-albums-1999-4runner-picture55700-20190706-122505-a.jpg


Laid the carpet on top of the new padding and started to fit the molded shapes in the carpet to the floor.
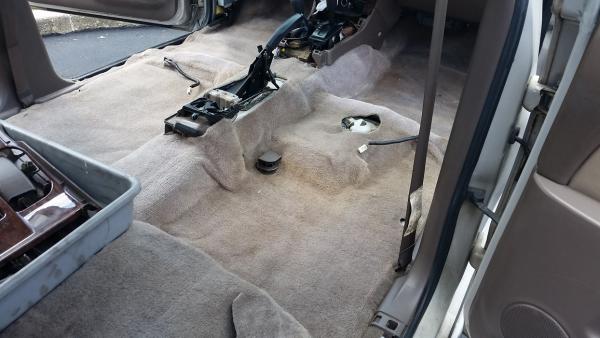
2ndhandyotaman-albums-1999-4runner-picture55701-20190706-123958-a.jpg


I got the trim and seats back in.

2ndhandyotaman-albums-1999-4runner-picture55705-20190706-135747-a.jpg


All in all, not the hardest job to do, just some physical work. The heat and humidity was tough on me. The overall result is ok for me, it's far from perfect but neither is my T4R. It's a 250% improvement visually and it doesn't stink any more.
 
Last edited:
Nice 4Runner! I think you got it for a very reasonable price and I love what you are doing with it. Great work! Oh, your dog is cute too.
 
2ndhandyotaman-albums-1999-4runner-picture55790-20190719-114314-a.jpg


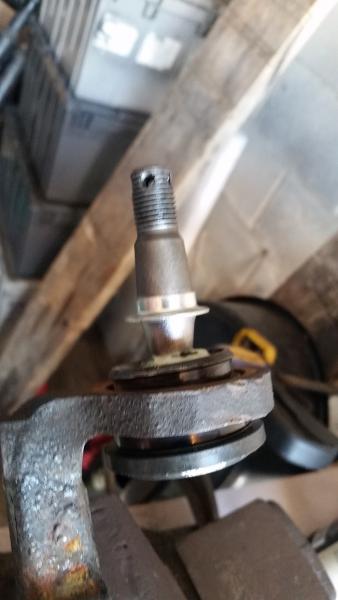
This is what I got with the cheap-o Napa ball joint, plus the fact that the taper on the shank wasn't a perfect match to the taper in the control arm. It literally took a few taps with a hammer and the BJ just fell out.

2ndhandyotaman-albums-1999-4runner-picture55791-20190719-123753-a.jpg


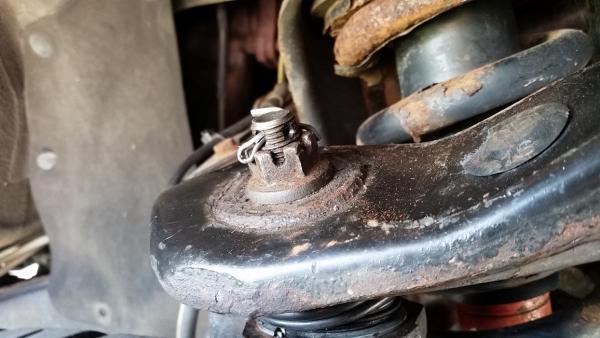
This is much better ! What a great kit from Toyota, 2 kinds of grease with very clean instructions on where the grease goes. It wasn't clear ( to me) if the upper lip on the boot was supposed to sit on top of that flange or if it needed to be stretched over the flange so that the metal surface contacted the control arm. It seems like it works with the s upper lip just sitting on the top of the flange.

I looked at Tims UBJ video and it looked like that's the way he installed his as well.

2ndhandyotaman-albums-1999-4runner-picture55792-20190719-143324-a.jpg


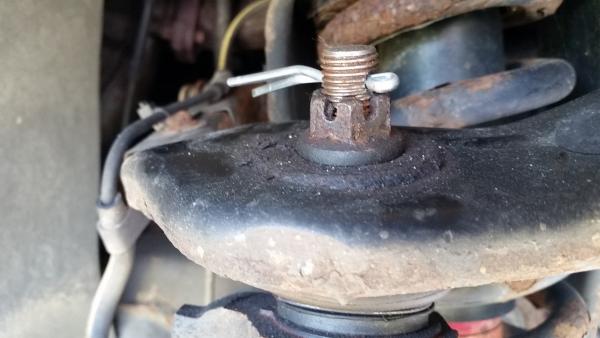
This threw me off- the castle nut goes down too deep for the cotter pin to be effective. Anyone else run into this when using a OEM UBJ? I can get a taller castle nut but that would seem to be a band-aid for the issue.
 
Last edited:
Another weekend of the summer goes by and another maintenance job gets checked off of the list!

Last Sunday was the passenger side UBJ, this Saturday was the drivers side UBJ. I got better with doing this job, it only took 1.5 hrs start to finish this time using the same hand tools/battery powered impact and the generic ball joint press tool from Napa.


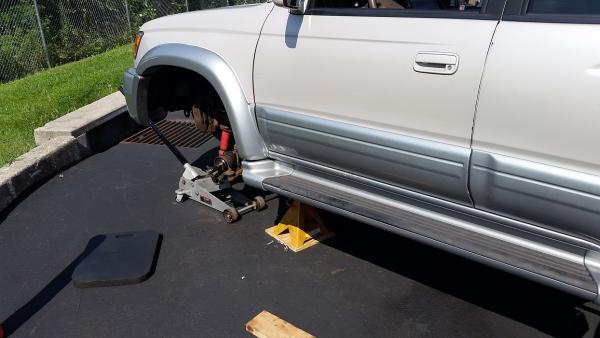
The storage unit area just got the asphalt resealed recently, so I'm trying to avoid damaging the surface so I used some 3/4" plywood under the jack stands. There's a 'no vehicle repairs' policy there, but sometimes you gotta do what you gotta do. :suspicious:

2ndhandyotaman-albums-1999-4runner-picture55866-20190727-102003-a.jpg


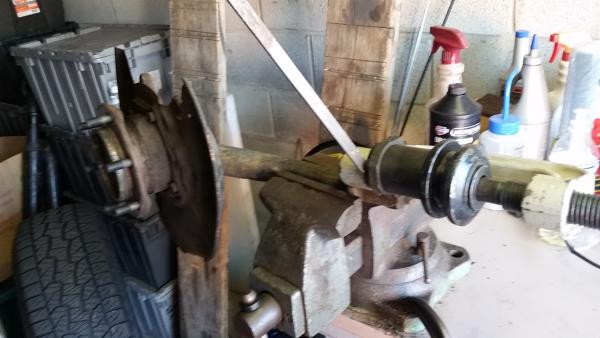
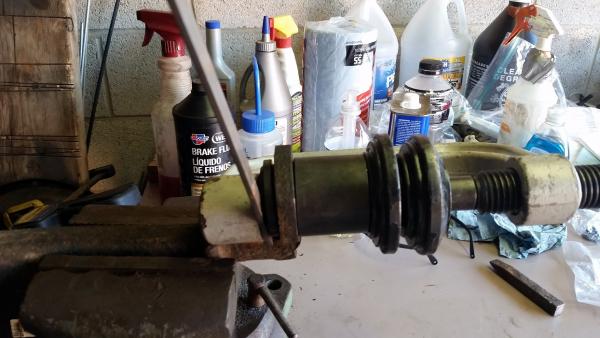
Same routine as last time- remove the entire steering arm, this time I placed it horizontally in the vise, it made it easier to operate the press.
I used a piece of 1/8" flat stock to help everything press in evenly. It looks ghetto but works perfectly!

2ndhandyotaman-albums-1999-4runner-picture55864-20190727-101632-a.jpg

2ndhandyotaman-albums-1999-4runner-picture55863-20190727-101628-a.jpg


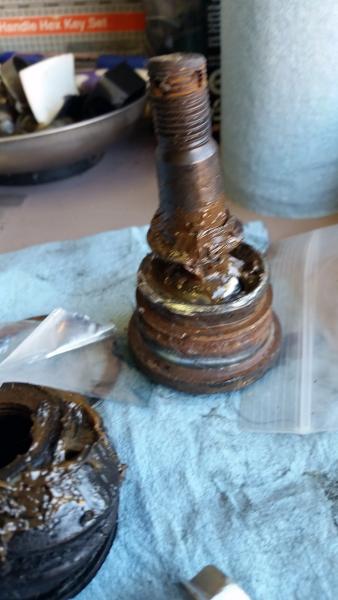
Old OEM joint- 20 years old, 215K on it. It was worn/loose but mainly full of contaminates.

2ndhandyotaman-albums-1999-4runner-picture55865-20190727-101639-a.jpg


The cotter pin hole lined up perfectly with the castle nut on this side. I'm now wondering if maybe the passenger side upper control arm was replaced with an aftermarket part sometime during it's life.

That's it for suspension and steering - the lowers were done 2 years ago when I got the truck, inner/outer TRE's were done last winter and now the UBJ's are done. BJ's are all OEM parts, the inner/outer TRE are aftermarket.

Next up is a trans fluid replacement and then the T-belt job. I want to get this done before the end of summer, I'd like to take 2 weeks and drive to CO in early Sept.
 
Last edited:
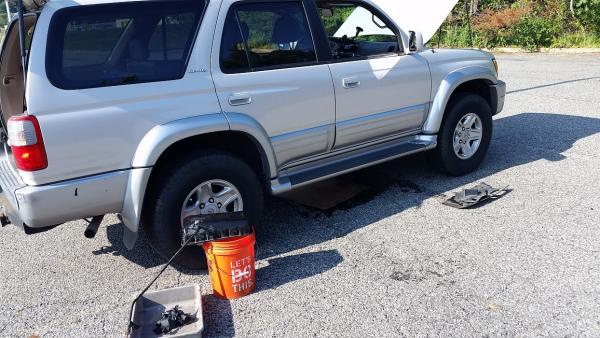
One more item checked off of the maintenance list. This time I got the trans filter and the fluid exchanged. I found an semi-abandoned parking lot that was just outside of the storage unit so that I could walk back and grab a tool if I needed to, it turned out to be a wise decision.

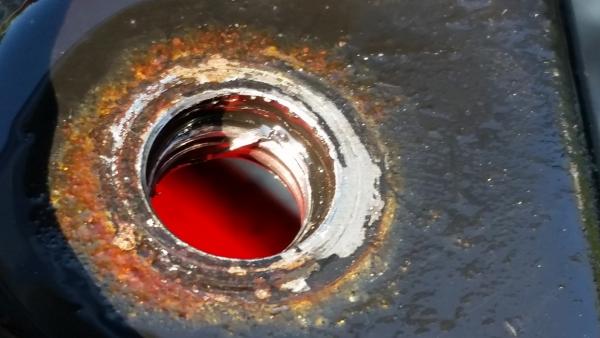
The old fluid wasn't burnt, just dark and dirty. It was time for it to be changed. I'm not going to cut open the filter screen, I'm just happy that there's a new one in the trans.

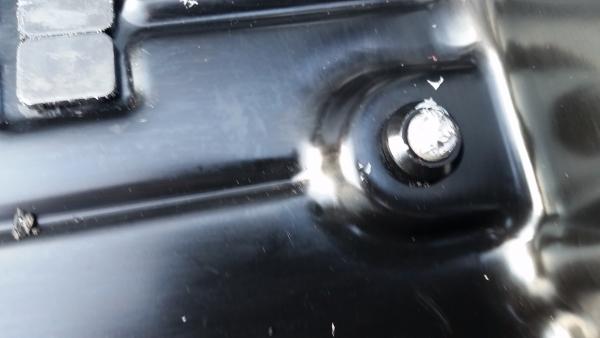
At some point this tranny was serviced and during that time, some bone head stripped the drain bolt and "fixed" it with what looked like epoxy. I can honestly say that it wasn't leaking, but it sure made my job a lot harder that it had to be.

2ndhandyotaman-albums-1999-4runner-picture55934-20190809-171619-a.jpg


2ndhandyotaman-albums-1999-4runner-picture55935-20190809-171605-a.jpg


I walked to a parts store, they didn't have any self tapping repair bolts ( which are horrible but I was desperate ) but they did have a generic M12-1.25 bolt so I grabbed it and walked the pan back to the storage unit where I had all of my tools. When I grabbed the right drill bit and M12 tap, I didn't think that there was enough wall thickness to be able to drill and tap up to the next size.

I found a M10-1.25 flange head bolt in my hoard pile, so I ran a tap down and found enough threads to tap. I cut the bolt down and test fit it, it tightened up properly so I just said " good 'nuf " for now. I used some oil resistant RTV on the threads and under the flange and tightened it together.


2ndhandyotaman-albums-1999-4runner-picture55937-20190809-185357-a.jpg


After cleaning the rails with a wire wheel on a drill, I cleaned everything then walked back to the truck, opened up the FPIG ( which looks identical to regular red RTV ) and got it back on. Everything went smoothly.

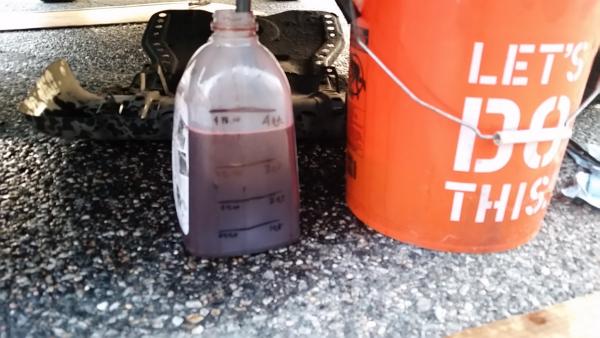
Last night I made a calibrated 1 gallon jug so that I could know how much came out so that I could put the same amount back in. I literally used a measuring cup with water to mark off where each quart leveled off in the jug.

2ndhandyotaman-albums-1999-4runner-picture55936-20190809-200339-a.jpg


I ended up using 13 qts of T-IV. Honestly the fluid going into the jug looked good only after 8 qts, I just wanted to be sure. So at least now I know what type of fluid is in there and when it was done.

next job up is the t-belt service. I ordered the Aircabinman kit from fleabay, maybe mid week next week I'll be able to start it.
 
Last edited:
Nice job on tapping that drain hole. Those are the kinds of things that we simply cannot determine at the time of purchase...

Thoughtful of you to use that plywood under those jack stands to keep the asphalt nice. That said, I'd say smart on your part also. On an especially hot summer day I had one jack stand sink into the asphalt so much that it began to severely tip. This was years ago, but I'll never forget as I had fallen asleep under the vehicle! It was so dang hot, and I was in the shade down there with a nice breeze under the car, and I dozed-off. When I woke, the underside of the car had lowered so much that I could not turn my head to get my cheek off the ground! Took a moment for me to realize where I was and slide out. Unforgettable experience...

The restoration and maintenance of your 3rd gen is going well! A good weekend to you...
 
More work started today, as my company has a "special" summer holiday which was today. Wrenches were turned, a mess was made, some curse words were spoken- pretty much a normal wrench session!

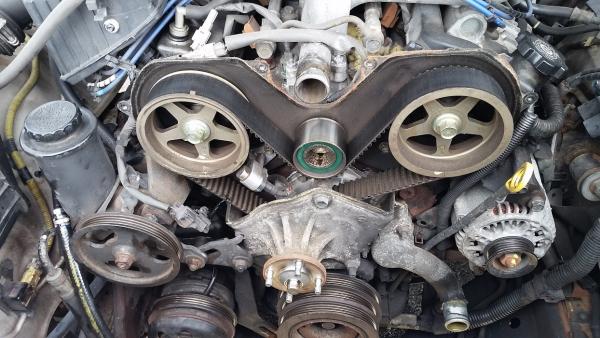
T-belt time !

2ndhandyotaman-albums-1999-4runner-picture55976-20190816-123654-a.jpg


I found a broken tensioner adjustment bolt, this one is for the A/C compressor. New parts were ordered.

2ndhandyotaman-albums-1999-4runner-picture55978-20190816-113313-a.jpg


I stated this just in time.

2ndhandyotaman-albums-1999-4runner-picture55977-20190816-123648-a.jpg


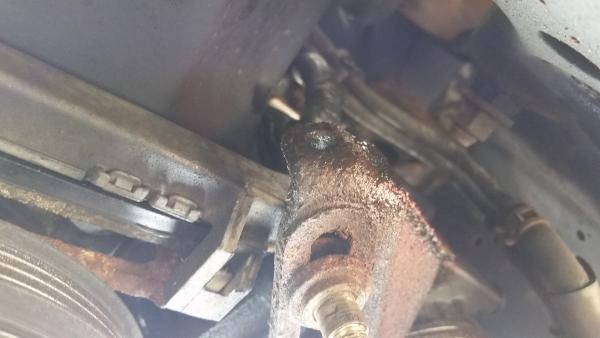
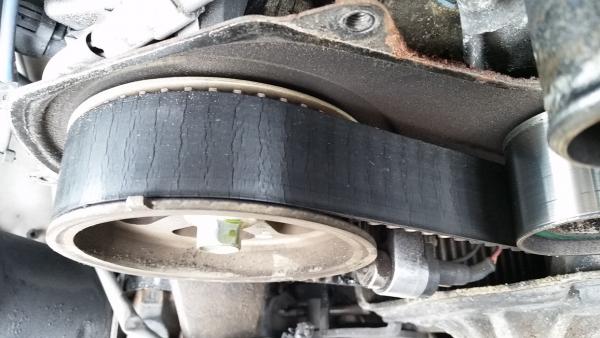
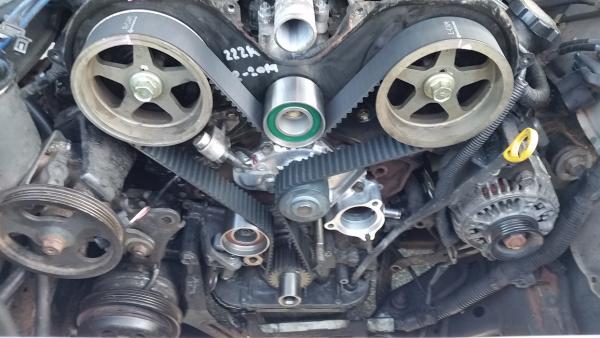
This job has been done once before, there's a leaky GMB water pump and no-name t-belt in there right now. No name t-stat with the jiggle valve pointed down! The pulleys have so much slop and wear on them, I'd guess that they were never changed. The hydro tensioner is a miserable little contraption to get at. I gave up today and will have another go at it. I can't seem to get a 3/8 drive socket on the bolt from the bottom. I got a 1/4 drive socket on it but couldn't break the bolt free. I might be stuck taking off the A/C compressor to gain access. :(

More pics tomorrow.
 
I found a decent vid on YT from a gal named Faye Hadley, she showed the trick to getting to that "hidden" bolt on the hydro tensioner. Unfortunately for me someone had rounded off the points of the hex head so I was forced to drop the A/C compressor and remove the mounting bracket. Not fun to say the least although it worked out well because I found a seized compressor mounting bolt. I snapped the bolt off and was able to get everything off of the engine and get the mounting bracket fixed. My local Ace hardware came through again with good quality metric hardware, I was able to get flange head bolts for the tensioner in the same tensile grading as the OE bolts. The new bolts have a 13mm head where the OE bolts had a 10mm head. I honestly don't care !

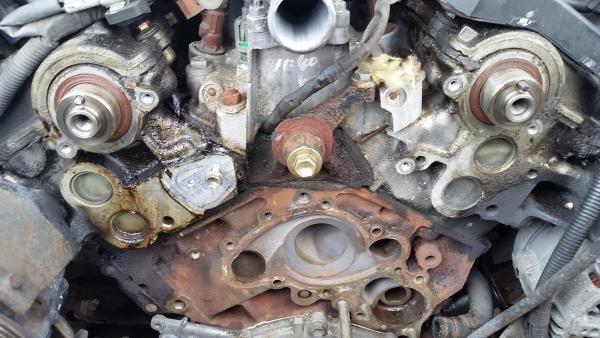
There's not too many pics as there are well documented threads and YT Videos showing how to do a T-belt job. Today was productive, I got the cam and front crank seals installed, the front of the engine degreased and the new T-belt in place.


I found where some of the oil was leaking from! The VC gasket replacement should take care of the rest of the leaks.

2ndhandyotaman-albums-1999-4runner-picture56003-20190818-123616-a.jpg


2ndhandyotaman-albums-1999-4runner-picture56001-20190818-174346-a.jpg


I'm hoping to have it back to running by Wednesday, I'll get a few hours of wrenching after work during the week. It's about a 45 minute drive from work to get to where the truck is at, then an hour drive to get back home.
 
Last edited:
Not much more to report, I picked up the rad hoses and the oil cooler hoses from the dealership. Add 2 gallons of concentrate coolant and a new crank bolt and fork over $135. Ouch !!

I got the balancer reinstalled and torqued, that's all I got accomplished for physical work today. As I took this pic, I wondered for a second if I should have taken a bit more time to clean things up and make it look "newer". Aside from the grease being gone, it doesn't look like anything was done.

2ndhandyotaman-albums-1999-4runner-picture56035-20190820-185935-a.jpg


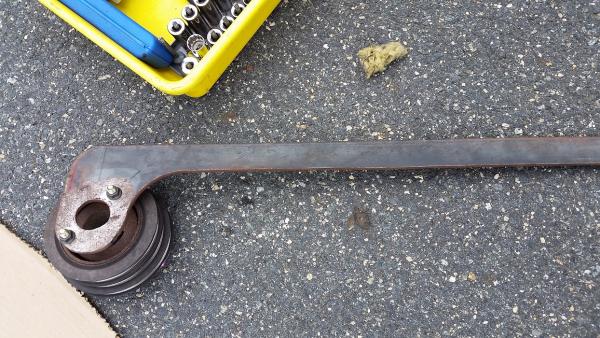
Here's the home made crank holder that has worked on a WJ Grand Cherokee 4.7 and now this 3.4. Not bad for a piece of scrap metal taken from a water jet job, eh?

2ndhandyotaman-albums-1999-4runner-picture56034-20190816-133248-a.jpg
 
No name t-stat with the jiggle valve pointed down!
Jiggle valve down is correct on the 5VZ... Though, non-OEM thermostat is a bad idea!

Good job getting to this maintenance before it was too late. (though, it is a non-interference motor, nothing really bad would have happened)

-Charlie
 
Jiggle valve down is correct on the 5VZ... Though, non-OEM thermostat is a bad idea!

Good job getting to this maintenance before it was too late. (though, it is a non-interference motor, nothing really bad would have happened)

-Charlie

Thanks for the kind words. I was trying to be sarcastic about the jiggle valve, it's hard to get that to come through in text. I was happy that at least at one point the PO had the service done. I'm happy with knowing now what mileage and what parts were used this time around. ( plus it's documented if I should decide to sell it and go for the 2011 5th Gen that I've been eyeing up !)

Today I finished it up. I used a vacuum evacuator to get the last of the green coolant out of the system. I used the vacuum to draw in about 2 gallons.I ended up using about 2.5 gallons once I topped it off.

I drove it home tonight, everything seems ok. I'll go back to the shop tomorrow and drop it off and drive the Subaru home so that when I get there on Saturday morning to do the VC gaskets, I won't have to get burned on a hot engine.
 
It has begun ! The last big ticket item on the maintenance list. Valve cover gaskets.

Pretty straight forward in getting the VC's off, I took a few pics to help with reassembly but in all honesty, it would be hard to make a mistake. Everything can really only stretch and fit on one way.


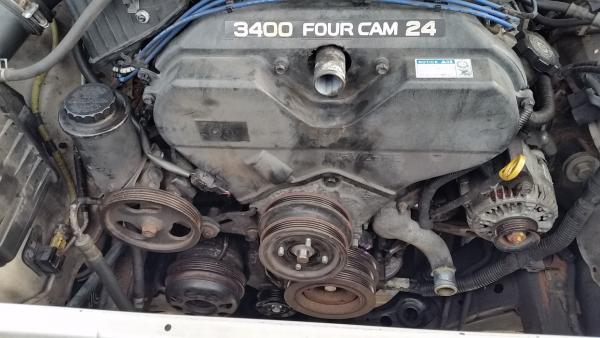
Not too bad for 222K on the odo.
2ndhandyotaman-albums-1999-4runner-picture56229-20190824-134452-a.jpg


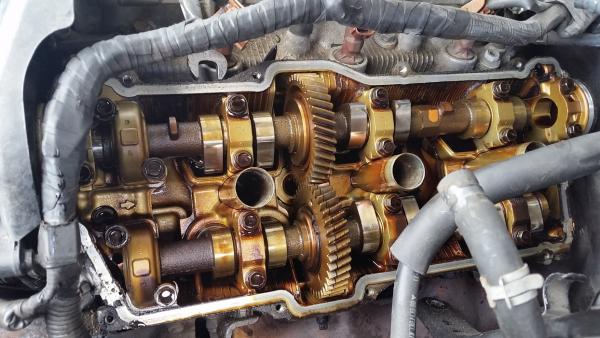
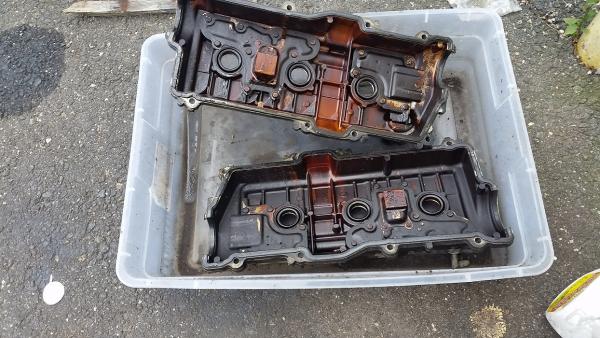
The VC's were caked over with dried/burned up oil. I used 1 gallon of "purple stuff" and a parts cleaning brush in a $3 plastic tub that I got from Target ( ghetto parts washing tank !)

2ndhandyotaman-albums-1999-4runner-picture56231-20190824-135451-a.jpg


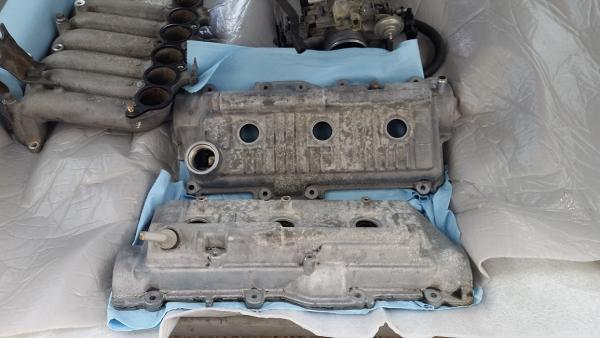
After an hour and a half of scrubbing. The inside looks just as clean now.

2ndhandyotaman-albums-1999-4runner-picture56230-20190824-154811-a.jpg


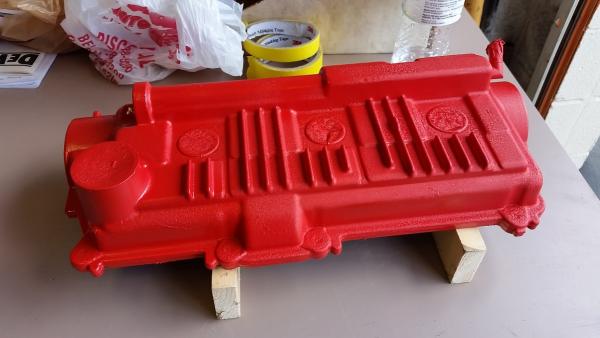
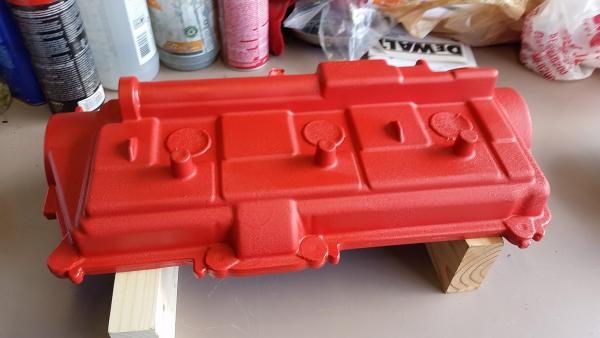
I might get a can of red wrinkle paint and add some pimp factor to the engine!

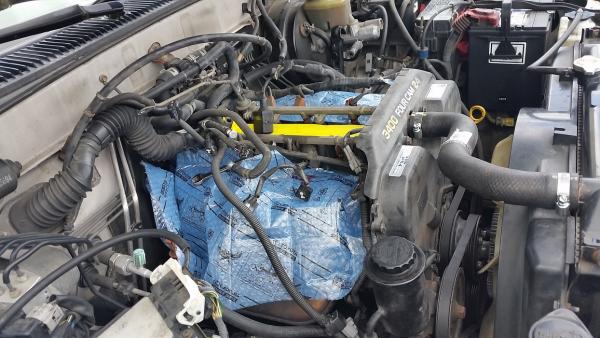
Here it waits until Monday for the rear cam seals/plug things to show up at the dealership. Kind of a bummer to not be able to finish up today because of a little part.

2ndhandyotaman-albums-1999-4runner-picture56232-20190824-135518-a.jpg


Hopefully nothing crawls under the plastic wrap and sets up camp inside of the engine.

Hopefully this will end the oil leaks and I won't have my eyes burning from the oil hitting the exhaust anymore. Labor day weekend is quickly approaching, I'm giving serious consideration to burning some vacation time to overlap my companies holiday and driving to CO for a nice road trip.

I have too many things on the schedule for September to do the trip and I don't want to go in October.

This is it for maintenance. The next thing I'll do will be a proper OME suspension but that won't be until next spring at the earliest. A sleeping platform might happen very soon, I'm still not sold on the roof being strong enough to hold the Tepui RTT and my 250 lb carcass.
 
Last edited:
Yes I did !


2ndhandyotaman-albums-1999-4runner-picture56238-20190825-133530-a.jpg


2ndhandyotaman-albums-1999-4runner-picture56239-20190825-133524-a.jpg


I'm actually impressed for the finish from a $10 can of paint. I could see the texture starting to form after I left them in the sun for 20 minutes after the last coat. One can did both of them.

I'll see how they turned out tomorrow when I go back to the storage unit. It looks better than it did. I didn't have an oven to bake them at 200°.
 
Last edited:
All righty, lets get some updates. Why is it that the most seemingly "simple" jobs end up kicking our asses the most?

After spending time making sure that the tension clamp for the fuel line didn't bounce down the intake plenum, ( it was taped prior to trying to install the lower manifold section. I forgot about the fuel line so the manifold came off for a "quick" hose connection. It went sideways on me...)

I moved forward with the re-assembly. After dropping the only 10mm socket that I had with me somewhere into the truck, it took time to find the darn thing. I learned that I installed the driver side rear cam plug in backwards after I removed the passenger side a few days later.

Today while trying to finish up, I found out that it's kinda easy to put the rear TB coolant line onto the vacuum port, then I got the plug wires out of order when I installed the new ones. Hours were spent trying to find a readable wiring diagram before I found one that had the routing color coded. That's when I realized that the truck wasn't starting because of another issue that wasn't ignition related.

A buddy came over to see how I was doing and noticed that stray rubber hose not connected (the big vac line that is next to the coolant line.) Once I realized that I had been trying to pull coolant through the TB instead of AIR, I got those 2 hoses connected correctly then turned the key.

The smoke show was impressive!! I thought for sure that I had blown a head gasket, but after a few hard runs through the industrial park and across the open field behind the buildings, the smoke cleared up. I think I'll be ok, but I need to keep an eye on the coolant level.

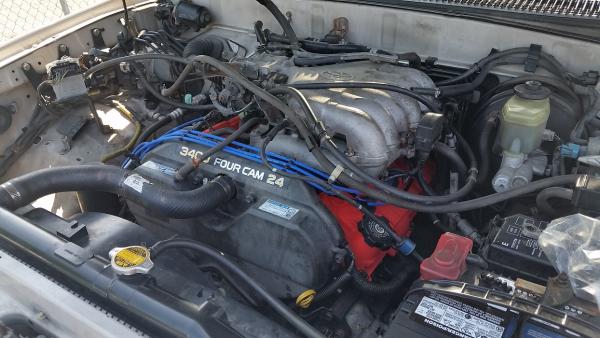
Here's what I ended up with, not as cheesy as I thought it might look. I'll be happy if the oil leaks are fixed!

2ndhandyotaman-albums-1999-4runner-picture56236-20190830-124204-a.jpg
 
Last edited:
Sundays little adventure.

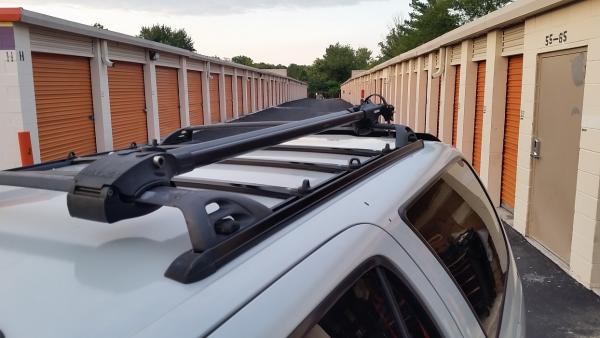
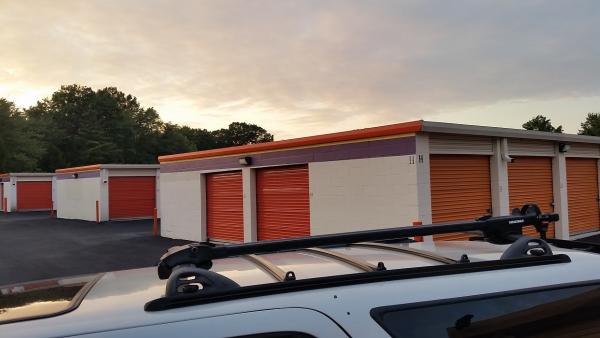
I wanted to freshen up the roof rails, they were rusty and rough looking.

I unbolted the rack from the roof, took everything apart and hit the side rails and the smaller cross rails with some of the red-/brown scratch pads, then cleaned it with isopropyl alcohol ( no residue after it dries), a few light coats of SEM self etching primer then a few light coats of Crustolium black satin.

It's not perfect but a million times better then it was. I reassembled it today and got it back on the roof. Like everything else on this truck- it's good enough for what it is.


2ndhandyotaman-albums-1999-4runner-picture56227-20190909-191453-a.jpg


2ndhandyotaman-albums-1999-4runner-picture56228-20190909-191501-a.jpg
 
man if that area behind your timing belt cover looked like that.....I can not imagine how bad mine is going to be lol It almost makes me not want to do it. Good job getting the work done!
 
man if that area behind your timing belt cover looked like that.....I can not imagine how bad mine is going to be lol It almost makes me not want to do it. Good job getting the work done!

You'll be ok! A big pump bottle of degreaser is your new best friend!

Thanks for the kind words.
 

Members online

Forum statistics

Threads
278,316
Messages
3,554,111
Members
248,016
Latest member
Advally Service

Trending content

Back
Top