Okki's Build Thread

"Pressure Gauge and Air Chuck in Cargo Area" post added and updated the index in the first post.

Okki
 
Blueridge Overland Molle Seatback Panels

Blueridge Overland Molle Seatback Panels

In the 5th gen 4Runner you can fit the following sizes and retain all the fold-down functionality of the rear bench:
14*22
12*22
14*22

8973363230_082edd82e4_z.jpg

The 14*22 panel I just added was well packed. I ordered the optional headrest adapter that you need in order to attach the panel on the rear bench without having any of the straps showing.

I ended up using the normal straps to secure my 50ft air hose, so they didn't go to waste.

8972167001_067ef7ff09_z.jpg


With the bench folded down I positioned the panel and secured the strap around the headrest posts.

8972164319_25bc1ec9dc_z.jpg

With the seatback in its upright position wrap the bottom strap around the bottom of the backrest. Make sure you run the strap behind the seat belt.

The somewhat tricky part is running the strap UNDER the center split. You can reach under the center split from the rear and feel for the buckle end and pull the strap through, making sure it is not twisted.
8973354028_7efff3bd10_z.jpg
8973338378_4c3fe8f9e9_z.jpg


From the seat side the strap will be hidden once the bench is folded back into its normal configuration.
8973350400_a634569b2a_z.jpg
8973325782_e12858c960_z.jpg


On the back side, pull the strap until the panel is securely fastened on both the top and bottom.

8972154375_60a0d07db9_z.jpg


You are now ready to strap whatever pouch or item to your Molle panel. In my case I secured my air hose to it so it's off the cargo floor. My 12*22 panel holds several pouches.

8972140889_3856576f43_z.jpg
8940264407_87f2b6e81d_z.jpg


Okki
 
INSTALLING THE GOBI RACK
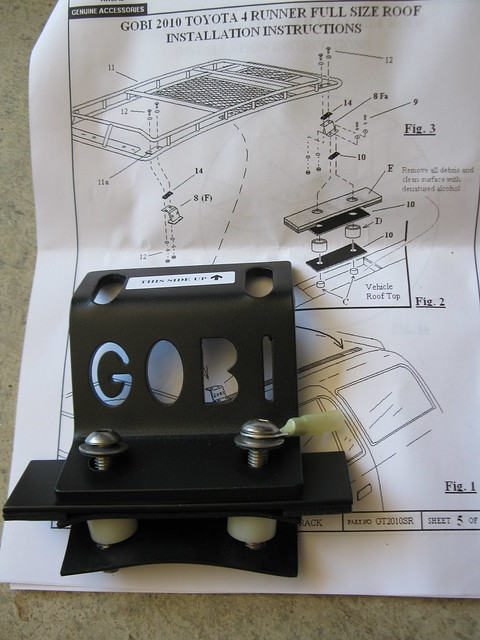
I preassembled all the pieces as much as possible so I knew I had all the required pieces when working on a corner. On the passenger rear I included a ground point for the roof lights. If you include that now, you will not have to undo the bolt and break your seal later.
5989508220_58ed4330ba_z.jpg


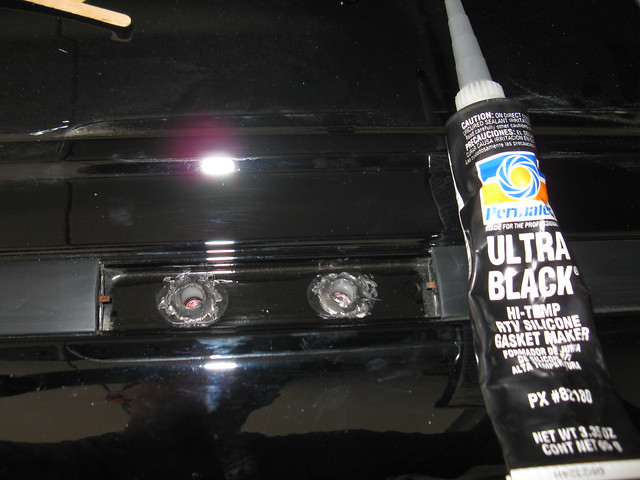
Next prep the corner you are working on. I used a liberal helping of silicone, but be sure NOT to block the drainage channel.
5989508742_fa8cd0603e_z.jpg


Repeat the above step for all factory mounting locations. Once completed grab a buddy and lift the rack in place. You can start bolting it down, but you will need some slack to align the front legs and you will want to make sure the rack sits straight on the truck.

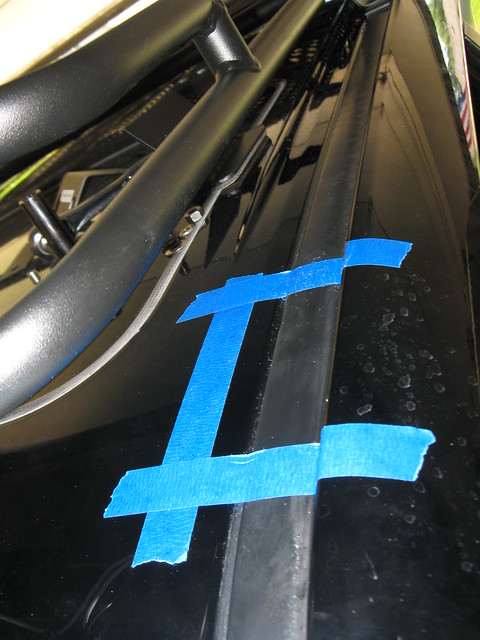
For the far front support legs, determine where the support leg will contact the rain gutter and thoroughly clean the rubber cover. This way the double sided tape will take good hold. The downward force of the rack will also aid in keeping it in place.
5989509312_5973b84503_z.jpg


At this point your roof rack is secured to the vehicle.

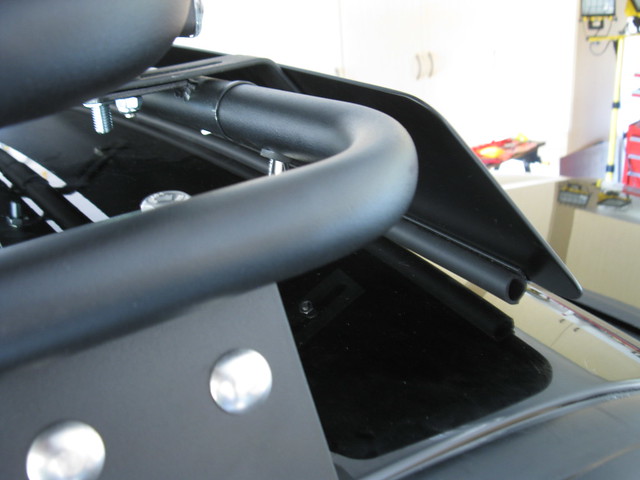
Before you install the fairing, affix some clear automotive protection film under where the bottom of the fairing touches the roof. This will prevent damage to the paint later on due to wind pressure and dirt that settles underneath the rubber weather strip (Tip courtesy of Antman).

You will be able to get the fairing to touch the roof for almost the entire length, but the edges will likely stick up a little.
5932171570_d172da64c8_z.jpg


If you are planning on installing some Rigid Industry lights, you may want to consider installing them under the fairing like Ducmonsta did on his vehicle. This reduces the overall height of the rack/light combination and eliminates the rubbing issue of the fairing. It also looks pretty darn awesome.

did you let the silicone cure before putting the rack on?
 
Nope; I laid the bead down and then installed the rack. I figured it would push appropriately between the parts and keep things sealed.

So far it has worked well for me; no leaks or problems.

Okki

Thanks man! I just installed my rack and did the silicone and now I have a leak in the driver rear.:ybrick:.

do you have any more pics with the lift? truck looks sick man
 
Thanks! ... Yeah.. I have some more pics and hope to have a full write up posted here by the weekend. Still need to take a new set of height measurements.

Okki
 
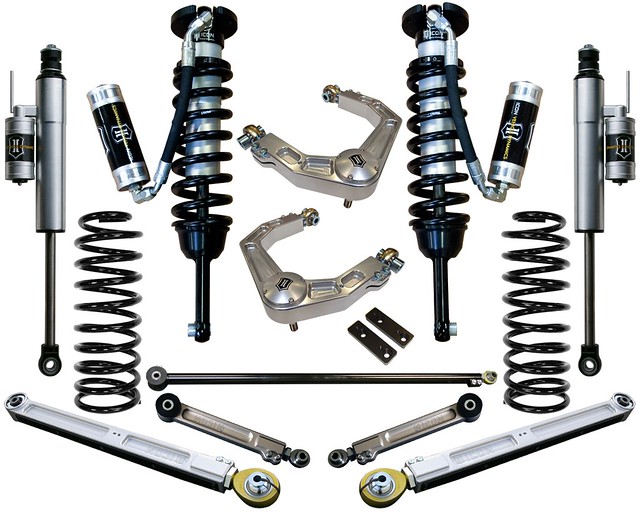
Icon Stage 6 Suspension 1/3

Icon Stage 6 Suspension
Icon Stage 6
1 x ICON-5-8550 03+ 4Runner, 05+ Tacoma, 07+ FJ Cruiser Billet Upper Control Arm Kit $ 1,192.01 Metal Tech
1 x Icon-5-8747 IVD 2010+ Icon remote reservoir front coil overs with IVD coating $ 1,399.00 Metal Tech
1 x ICON-5-2700 07+ FJ Cruiser Rear Spring kit one pair 22x14x6 26lb $ 219.45 Metal Tech
2 x ICON-5-7710 (1) 07-Up FJ Cruiser Rear 2.5" Diameter Piggy Back Reservoir Shock 27x12x6 25 lb $ 796.00 Metal Tech
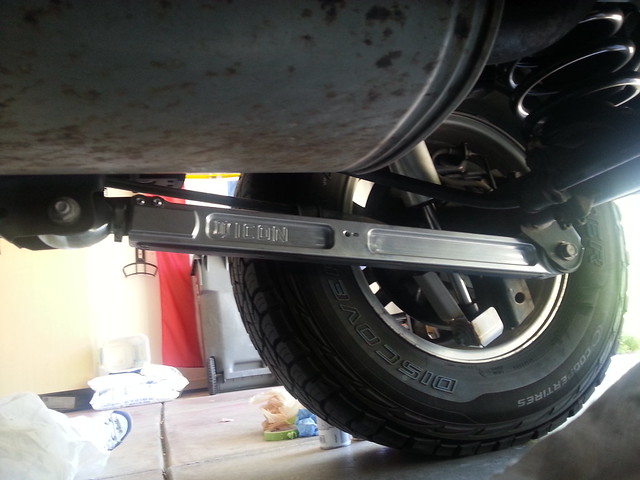
1 x ICON-5-4000 07-Up FJ Cruiser Billet Aluminum Rear Trailing Arm Kit 30x8x4 30lb $ 693.26 Metal Tech
1 x ICON-5-4100 07-Up FJ Cruiser Billet Aluminum Upper Link Arm Kit 12x13x8 20lb $ 398.00 Metal Tech
1 x ICON-5-4200 07-Up FJ Cruiser Rear Adjustable Track Bar 4x4x40 12lb $ 248.38 Metal Tech
Total $ 5040.86 (Regular retail)

Icon Stage 6 Installation & Body Mount chop
ICON Stage 6 Installation $ 1254.45 High Tech Auto and Truck
Body Mount Chop $ 160.80 High Tech Auto and Truck
Total $ 1460.54 (Regular retail)

WHY:
The reason for my upgrade from the factory XREAS suspension to the ICON stage 6 is pretty straight forward. With the additional weight I’m planning on adding (full skids, front bumper, winch, dual battery, rear bumper w/ tire carrier), the stock suspension would simply not keep the truck handling in a safe manner and would lose some ground clearance due to spring compression.

WHAT:
I’m a big believer in doing things right the first time. After a good bit of time saving up I ordered my Icon Stage 6 from Metal Tech. I had talked to Brandon at the 2012 FJ Summit and when they offered a good discount, it was a great time to pull the trigger.

I selected to go with the full Stage 6 kit, as put together by Icon. It does everything I need it to do at this point and allows me to do more if I ever decide to push my truck’s capabilities.


9386631549_f63937bf2f_z.jpg


INSTALLATION:
Since we were taking a trip towards the East coast, I contacted [MENTION=68685]Ducmonsta[/MENTION] at High Tech Auto and Truck and was able to coordinate my travel schedule with an appointment to get everything installed. Since they were putting my truck on a lift to give it a lift, I also asked them to perform a body mount chop on it. While I’m still running the 265/70/17 tires it’s not needed, but once these wear out I’ll likely upsize and it’s nice to have the chop already done by a qualified shop.

So while I can’t tell you anything DIY installation specific, the crew at High Tech Auto and Truck did a great job. Bobby coordinating everything and getting me both the shop tour and loaner vehicle and Scott doing an amazing job on my truck.

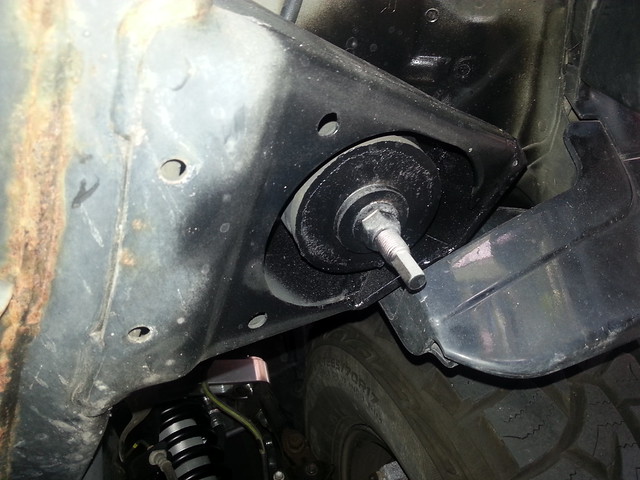
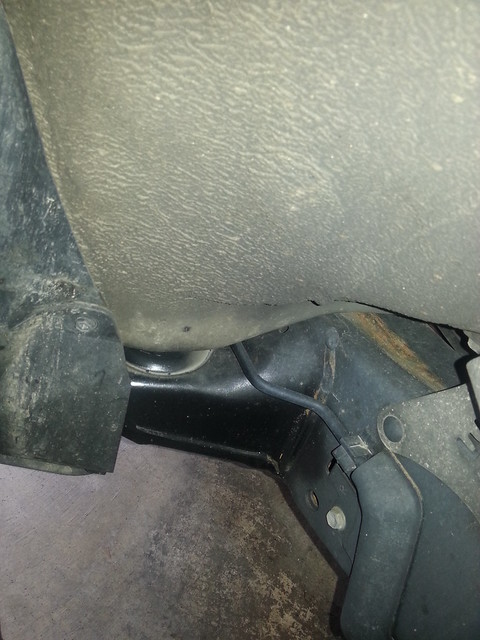
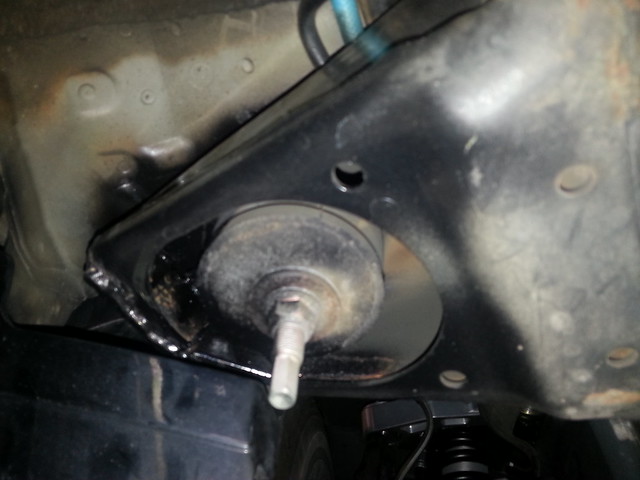
Body Mount Chop
Passenger Side:


9282949779_621606c47f_z.jpg


9285771590_e19b8307ed_z.jpg


Driver Side:
9282951929_92bd541516_z.jpg


9285744486_9da37f400d_z.jpg
 
Last edited:
Icon Stage 6 Suspension 2/3

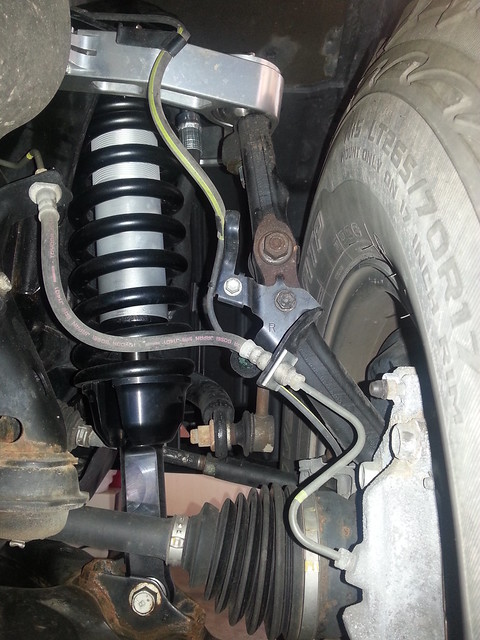
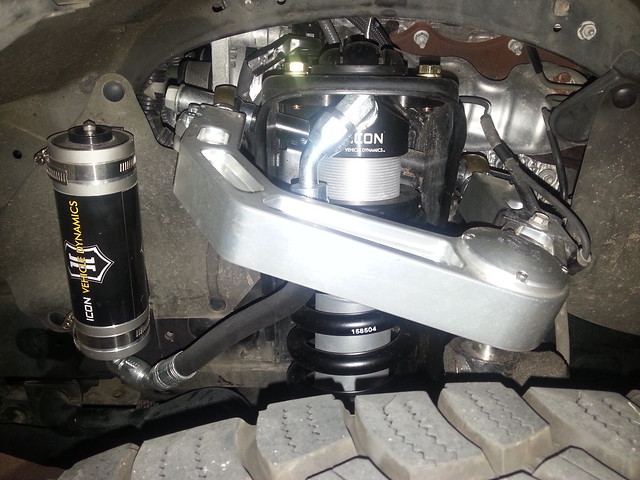
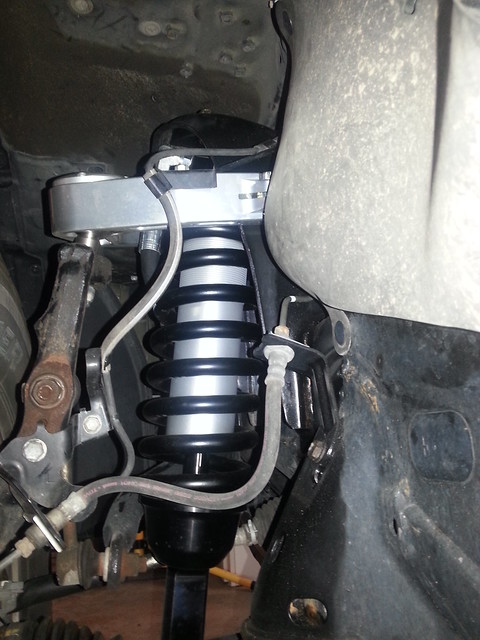
Front Suspension:
Passenger Side:

9285762268_4103fe938c_z.jpg


9282989989_94766ab44c_z.jpg


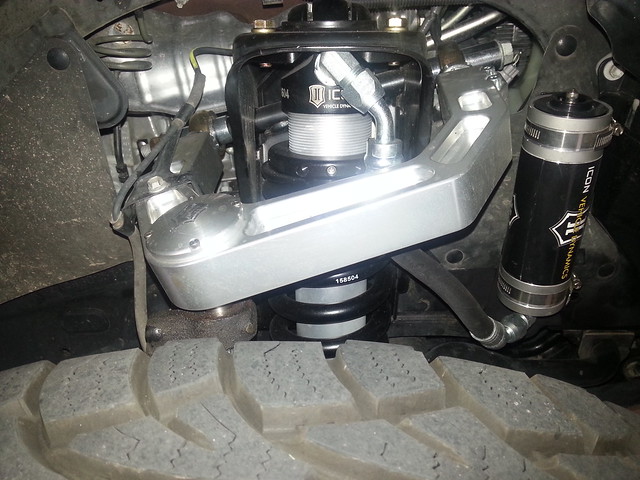
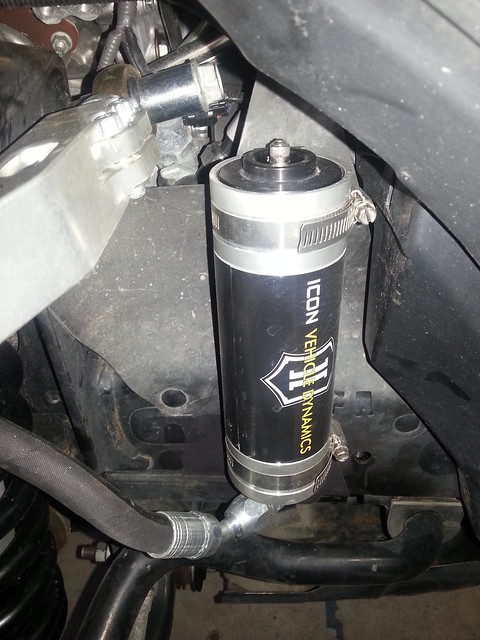
Scott did a great job adjusting the Icon mounts for the reservoir so it creates more clearance with the washer bottle and positions the reservoir upright for a more pleasing look.
9282976613_8fee3d1d69_z.jpg


Driver Side:
9282971641_96a0def9b1_z.jpg


9282962487_1e0d351595_z.jpg


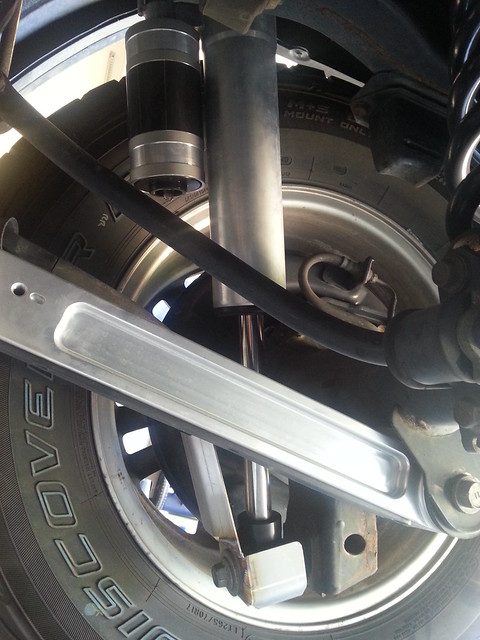
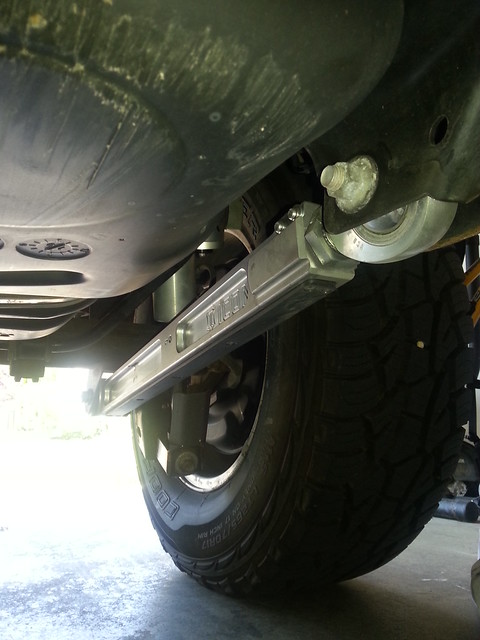
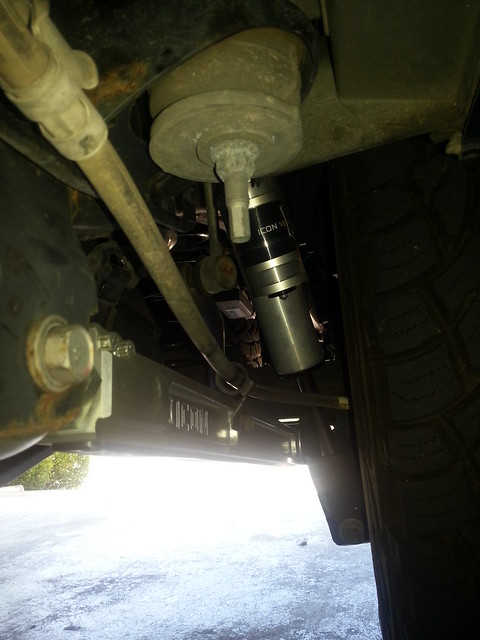
Rear Suspension:
Passenger Side:

9285775998_a7bfa5af7d_z.jpg


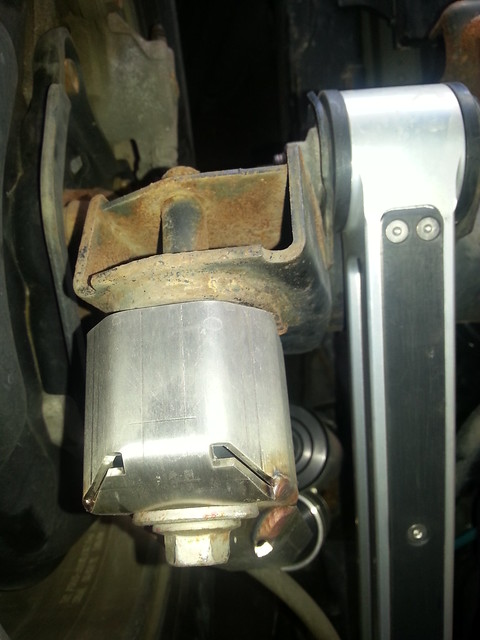
The picture below also shows the shin guards that I ordered for the rear. Ideally I would have painted them black, but since everything got shipped directly to High Tech, that didn’t happen. Since it requires the bolt that holds the shock to be removed and the shock disconnected to take them off, I’ll likely paint them at some point but I haven’t felt like masking everything off so far and not having any use of the vehicle until two coats of paint are dry.
9282994575_029e0e76ec_z.jpg


Driver Side:
9282955967_c26e5f33c1_z.jpg


9285739912_fd9a97eb7f_z.jpg


And a closeup of the shin guard from below.
9285733536_140d9ebe3a_z.jpg
 
Last edited:
Icon Stage 6 Suspension 3/3

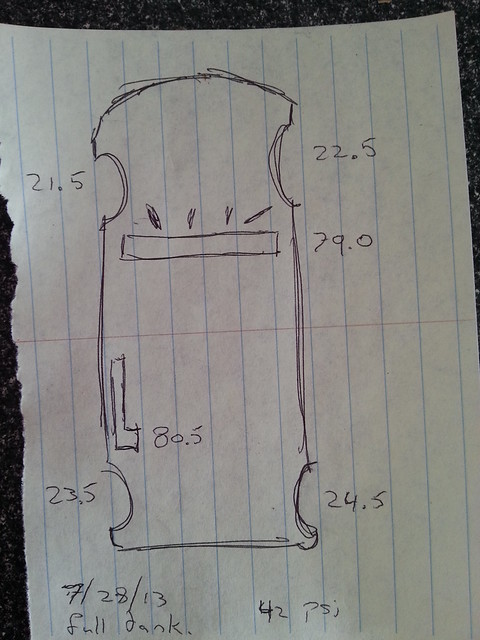
THE MEASUREMENTS:
Variables:

Full tank of gas.
Tire Pressure: 42psi
Vehicle Weight: No additional weight in truck.

Passenger side:
Front: 22.5” (+3)
Rear: 24.5” (+3)
Top Roof Lights: 79” (+3)

Driver side:
Front: 21.5” (+2.25)
Rear: 24.5” (+3.25)
Top High-Lift: 80.5”

9384905185_c3e91c8053_z.jpg


I was a bit in a hurry measuring the driver side so I’m remeasuring the driver side here shortly since the measurements seem a bit off. The interesting thing is that the coils are adjusted the same, so it may be that the extra weight on that corner of the vehicle (mainly the battery) is causing the difference.

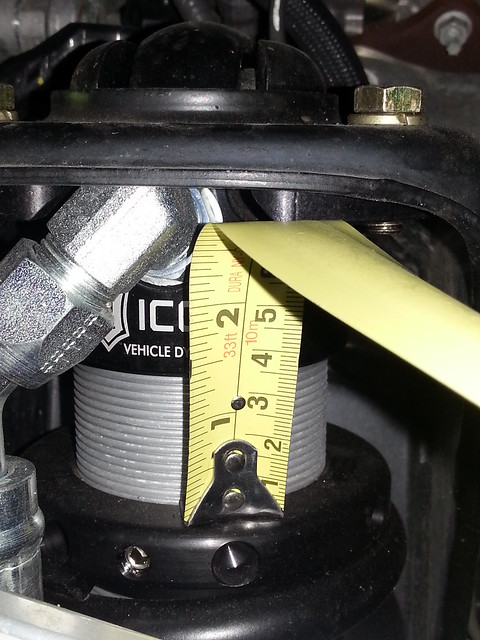
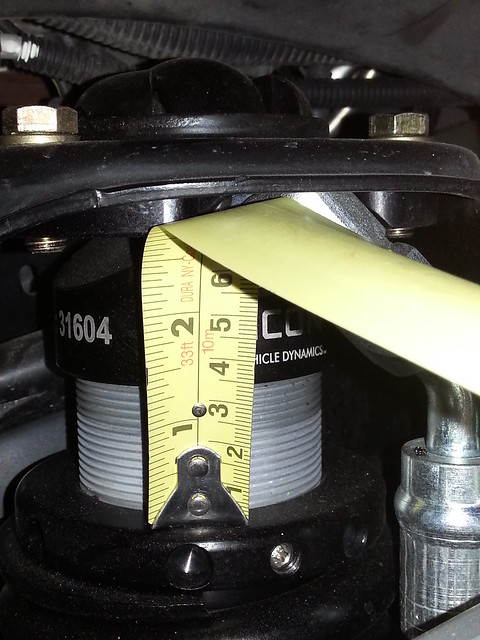
Coil Measurements:
The passenger front: 1.4375

9384908115_bfe76b3a20_z.jpg


The driver front: 1.4375
9387685834_b2040801a3_z.jpg


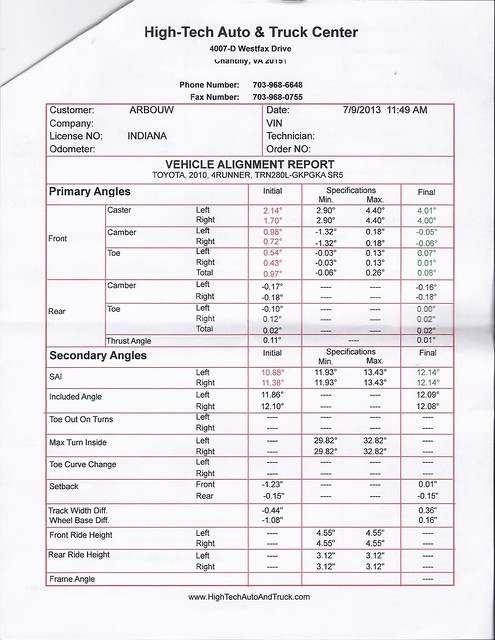
Alignment data:
9386631567_074e263674_z.jpg


Okki
 
Last edited:
Okki, where you measure from and too that you are getting 22.5" on passenger side from and about the same on drivers?
Thanks!
 
THE MEASUREMENTS:
Variables:

Full tank of gas.
Tire Pressure: 42psi
Vehicle Weight: No additional weight in truck.

Passenger side:
Front: 22.5” (+3)
Rear: 24.5” (+3)
Top Roof Lights: 79” (+3)

Driver side:
Front: 21.5” (+2.25)
Rear: 24.5” (+3.25)
Top High-Lift: 80.5”

9384905185_c3e91c8053_z.jpg


I was a bit in a hurry measuring the driver side so I’m remeasuring the driver side here shortly since the measurements seem a bit off. The interesting thing is that the coils are adjusted the same, so it may be that the extra weight on that corner of the vehicle (mainly the battery) is causing the difference.

Coil Measurements:
The passenger front: 1.4375

9384908115_bfe76b3a20_z.jpg


The driver front: 1.4375
9387685834_b2040801a3_z.jpg


Alignment data:
9386631567_074e263674_z.jpg


Okki

Okki-- what are your initial impressions of stage 6?
 
THE MEASUREMENTS:
Variables:

Full tank of gas.
Tire Pressure: 42psi
Vehicle Weight: No additional weight in truck.

Passenger side:
Front: 22.5” (+3)
Rear: 24.5” (+3)
Top Roof Lights: 79” (+3)

Driver side:
Front: 21.5” (+2.25)
Rear: 24.5” (+3.25)
Top High-Lift: 80.5”

9384905185_c3e91c8053_z.jpg


I was a bit in a hurry measuring the driver side so I’m remeasuring the driver side here shortly since the measurements seem a bit off. The interesting thing is that the coils are adjusted the same, so it may be that the extra weight on that corner of the vehicle (mainly the battery) is causing the difference.

Coil Measurements:
The passenger front: 1.4375

9384908115_bfe76b3a20_z.jpg


The driver front: 1.4375
9387685834_b2040801a3_z.jpg


Alignment data:
9386631567_074e263674_z.jpg


Okki

Toyota Tacoma's driver side front coil springs are about 1/4" taller than passenger side to compensate for the "Taco Lean" that comes from having the battery on that side. If you replace the coil springs w/ aftermarket springs like the Eibach models I put on my '12 Tacoma you have to get a 1/4" trim spacer for the drivers side to keep it level.

I do NOT know for a fact that is the case w/ the 5th gen 4Runners, but it seems like it makes sense. In any case the part is listed with the 5th gen 4runners on Toytec's site:

Front Top Plate Spacer (One - 1/4")

With coil overs, obviously, you don't need a spacer. Adjust the coil over a little more...

David
 
Toyota Tacoma's driver side front coil springs are about 1/4" taller than passenger side to compensate for the "Taco Lean" that comes from having the battery on that side. If you replace the coil springs w/ aftermarket springs like the Eibach models I put on my '12 Tacoma you have to get a 1/4" trim spacer for the drivers side to keep it level.

I do NOT know for a fact that is the case w/ the 5th gen 4Runners, but it seems like it makes sense. In any case the part is listed with the 5th gen 4runners on Toytec's site:

Front Top Plate Spacer (One - 1/4")

With coil overs, obviously, you don't need a spacer. Adjust the coil over a little more...

David

That would be an interesting question for [MENTION=68685]Ducmonsta[/MENTION] to answer next time Scott has the suspension off a stock 4Runner. Which reminds me... Bobby, Did Scott ever register a username?

How about some pix of the truck all finished.

Hahahahaha you'll have to be patient for a coupe more years then, because my truck is far from done! LOL. But since it looks like a pig at the moment, I'll snap some pics later today and post them here.

Okki-- what are your initial impressions of stage 6?

So keep in mind this is comparing against the XREAS suspension of a Limited. I've been very happy with the XREAS and the main reason I switched is for the coming weight in bumpers, skids, battery, etc.

With the weight not yet having been added, there is a little bit of bounce when you get to a full stop (rocking back and forth). I knew this would be the case and I expect it to be gone once my Shrockworks skids are delivered and I install those.

That said, I'm digging it. Especially going over crappy surface at speed there is a noticeable difference where the stage 6 just handles it way nicer. Through corners the truck feels solid and stays pretty flat, but that does not feel very different from the XREAS.

Last but not least, the lifted stance just looks awesome and gives me some more room over the trails.

So it was a hefty chunk of change.. but I'm very happy with things and consider it money well spent.

Okki
 
Hi Alex,

I'm following the process as I've outlined here: http://www.toyota-4runner.org/5th-gen-t4rs/94578-okki-s-build-thread-7.html#post1335626

I cross-tape the rims from the lugs and use a plumb-line to determine the straight up line to the fender. I then use from the center of the cross-tape to the bottom of the fender.

Okki

Hey Okki! Thanks, i just wanted to double check because i measured from ground to the fender and got 39" and when i saw you only had 24.5". I was wondering why such a difference but now i know.
 

Members online

No members online now.

Forum statistics

Threads
278,309
Messages
3,554,068
Members
248,016
Latest member
Advally Service

Trending content

Back
Top