Okki's Build Thread

dont be surprised is i dont bug you about those brackets. Did you have someone make them for you?

They are pretty simple to make. I did it in my garage with simple tools. The other option you can take is the [MENTION=65614]Antman[/MENTION] cutting board. Check out his thread for details on how to use that cheap and simple solution.

Okki
 
They are pretty simple to make. I did it in my garage with simple tools. The other option you can take is the [MENTION=65614]Antman[/MENTION] cutting board. Check out his thread for details on how to use that cheap and simple solution.

Okki
would you happen to have those in some sort of electronic document that you could send me so i can try and mock it up. thanks
 
would you happen to have those in some sort of electronic document that you could send me so i can try and mock it up. thanks

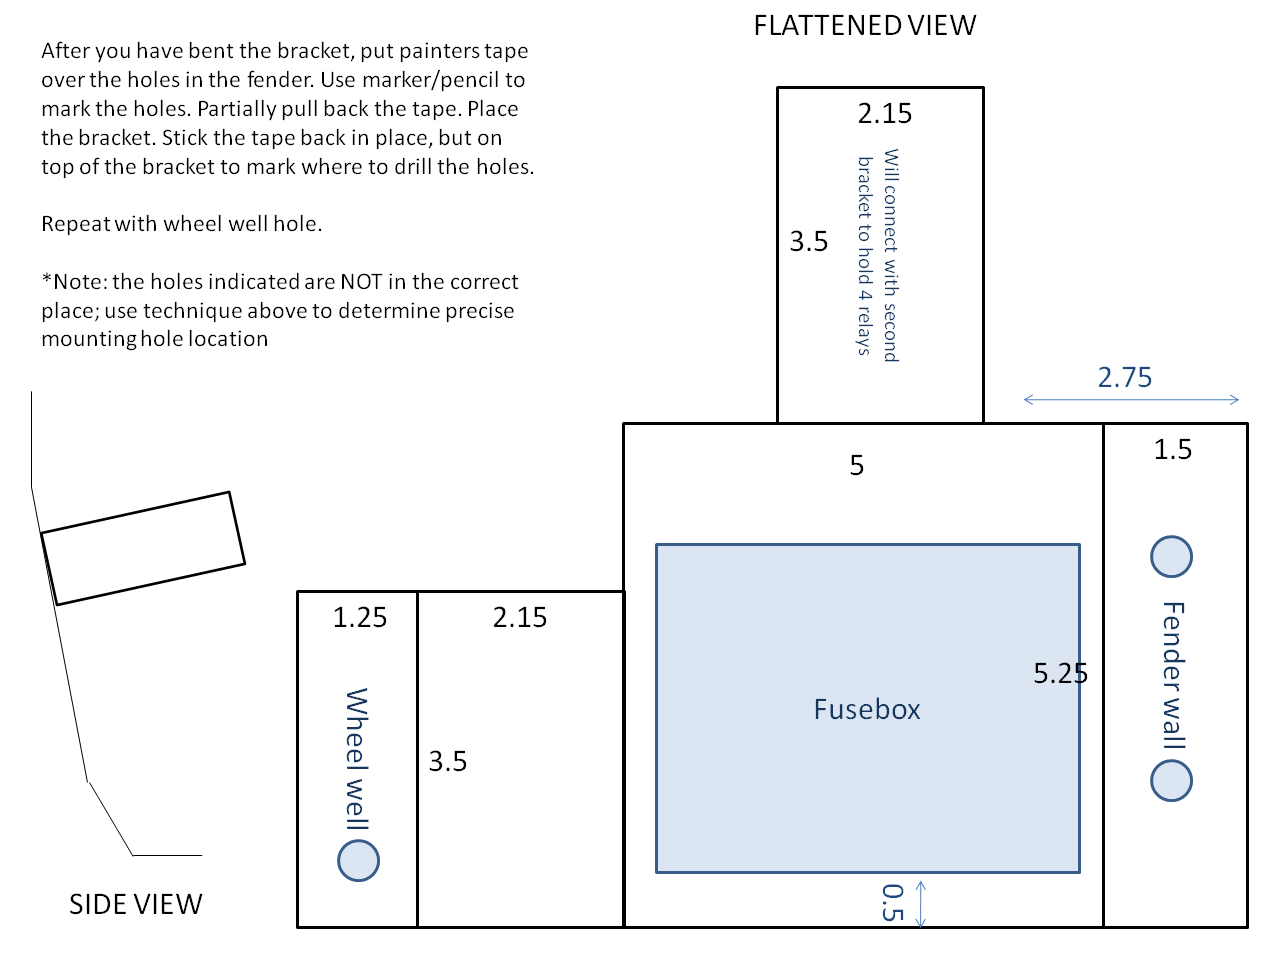
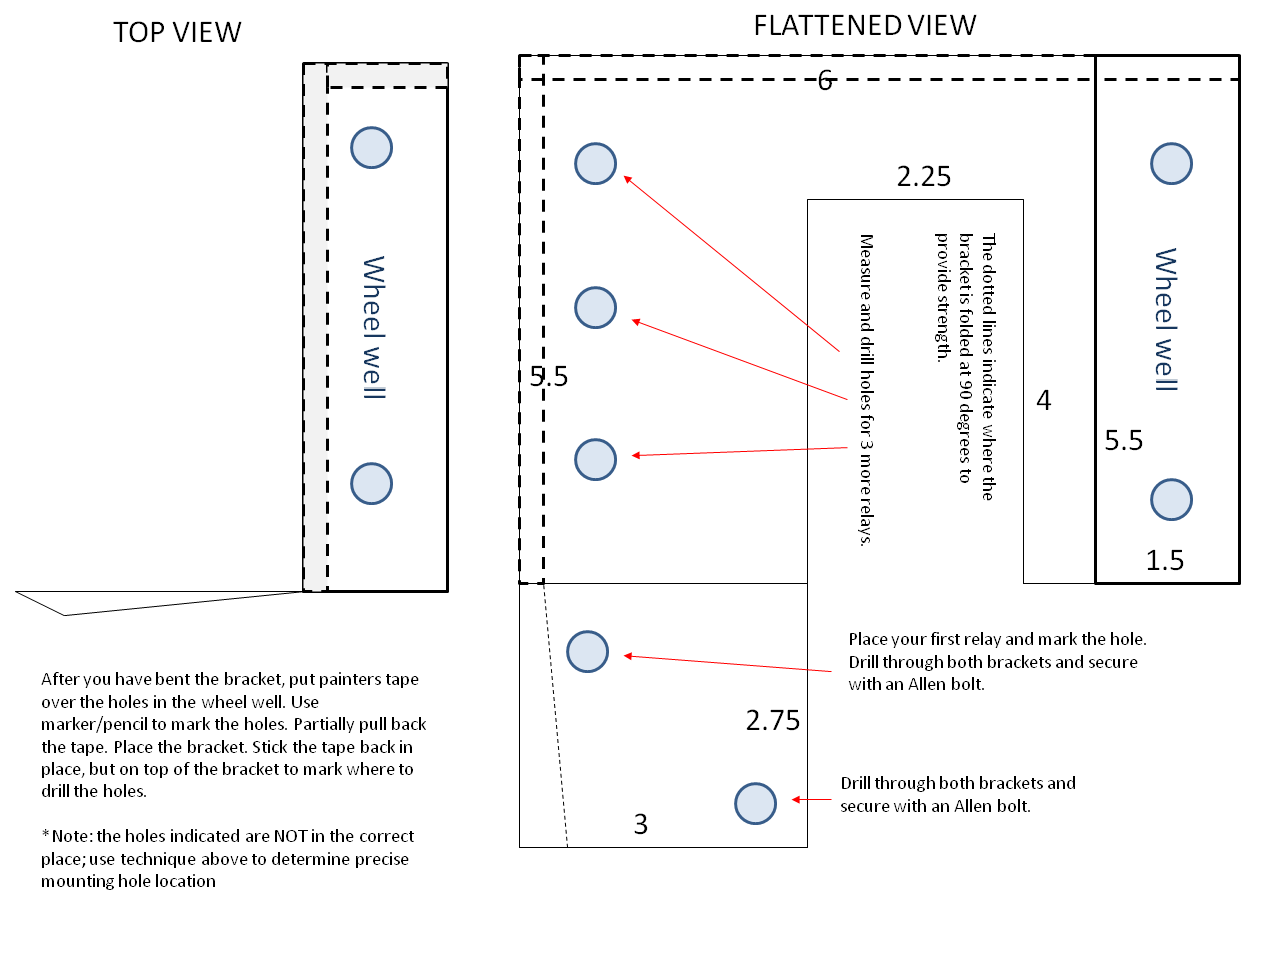
That's as electronic as it comes. Just print them off and all your measurements are on there.

Fuse Box Bracket:
6000271464_a7f6d315a4_o.png


Relay Bracket:
5999723725_016f2371a2_o.png


Okki
 
Great thread, and thanks for putting in so much detail.

I'm looking to mount a radio faceplate and mic attachment using the mods to the center cubby that you did on pages 2-3. I started the disassembly of the dash, removed the two screws, but it seems like the cubby is secured on its lower edge. Does the center tunnel where the 4H/4L dial sits need to be removed to get the cubby out? I can't get the manuals to open and I'm afraid of just yanking the cubby up and out. Thanks!
 
Great thread, and thanks for putting in so much detail.

I'm looking to mount a radio faceplate and mic attachment using the mods to the center cubby that you did on pages 2-3. I started the disassembly of the dash, removed the two screws, but it seems like the cubby is secured on its lower edge. Does the center tunnel where the 4H/4L dial sits need to be removed to get the cubby out? I can't get the manuals to open and I'm afraid of just yanking the cubby up and out. Thanks!

Yup... most pieces overlap to a certain extend, so you'll have to remove the center tunnel trim in order to remove the cubby.
The attached PDF should help some :)

Okki
 

Attachments

Thanks Okki! Finished my ham radio install, running the face plate thru the cubby to a mount in between the two cubby holes. Just need some double-sided tape to finish it up.
 
Pelfreybilt Group 31M Battery Cage

Pelfreybilt Group 31M Battery Cage
Diehard Group 31M Battery Cage for Main Battery Location $125 Stainless steel Pelfreybilt.com
Total $125

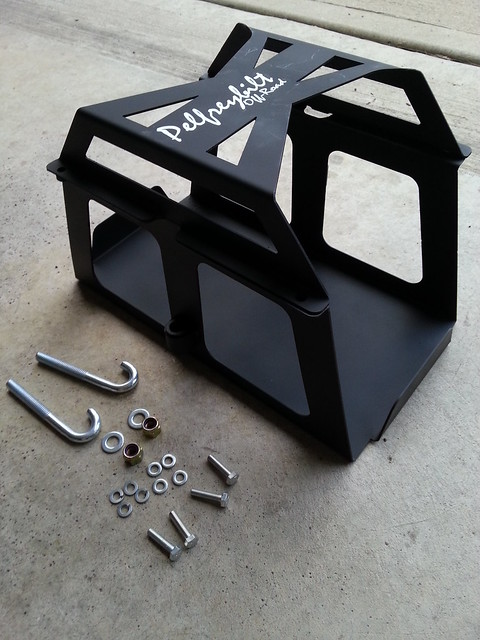
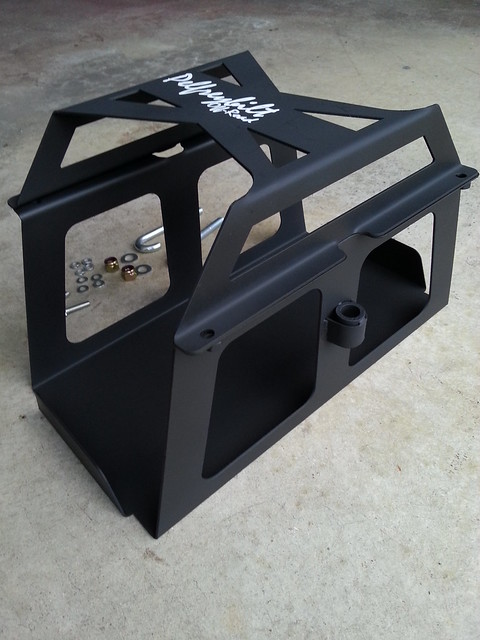
There was no readily available battery cage for the 5th gen 4Runner when I installed my Diehard Group 31M battery. Satin and Tyler from [MENTION=111262]pelfreybilt[/MENTION] were awesome to work with and turned out a very solid product. The installation is very straightforward, utilizing similar J-Hooks to the OEM tie-down (but heavier quality). When tightening the J-Hooks, make sure you do NOT over-tighten them. If the sides of the cage are starting to deform outwards, back off the nut a couple rotations.

From initial design to final installation:

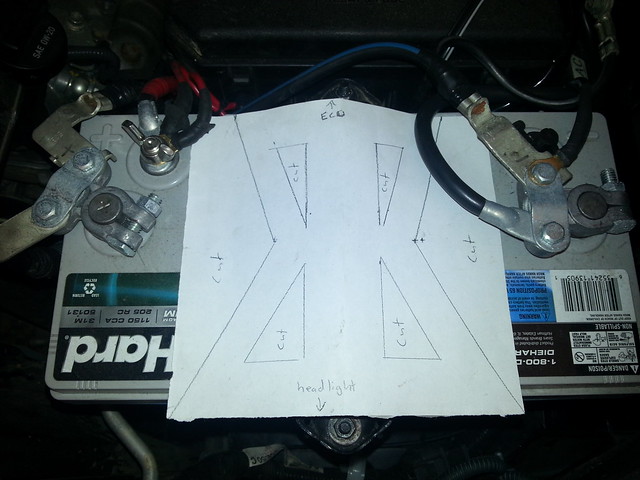
I drew up a quick top plate design with dimensions for Tyler to work from. It was designed to provide as much metal clearance from fleet terminals that may be used to tie accessories into the battery
13608522523_457a3bd1a9_z.jpg


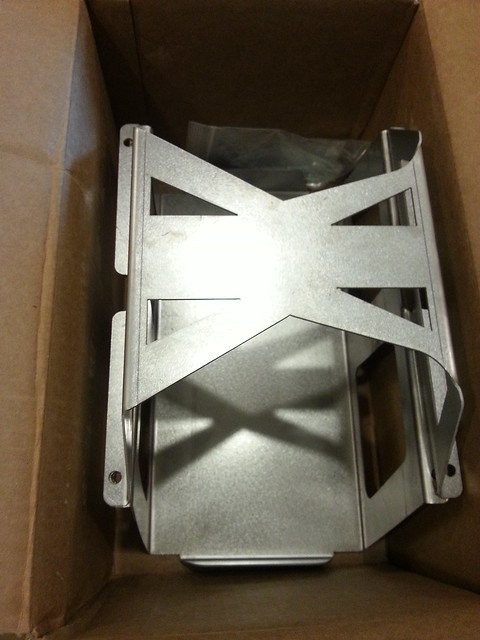
The top plate as cut from metal.
13832827783_651e0b15f0_z.jpg


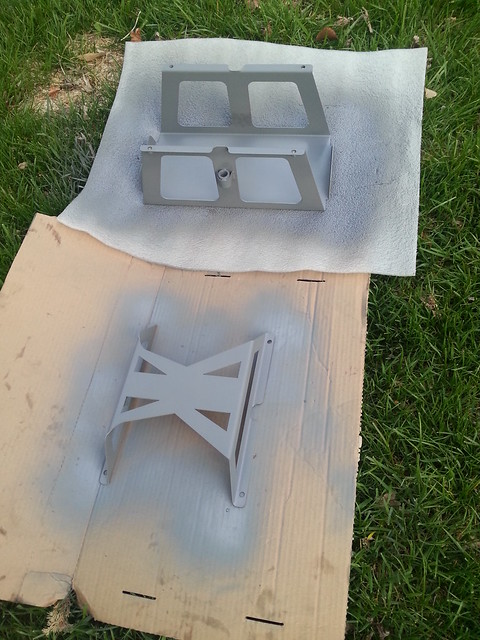
The full cage arrived. It comes in bare stainless, but I opted to paint mine.
14103047026_0f2fd33bd1_z.jpg


First coat of primer is on.
14134217854_b72a51274f_z.jpg


Beefy J-Hooks are provided with the cage. Painted and ready for installation.
14148200102_cef382f4b3_z.jpg


14152074145_6c336e1c16_z.jpg


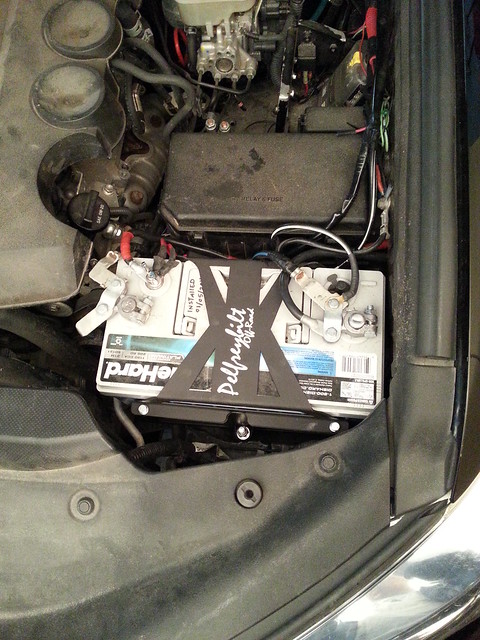
And installed....
14147922361_2cfa7735e1_z.jpg


It's solid! ... I'm really happy with how it turned out.

Okki
 
Last edited:
Diehard Platinum 31M Battery Tray

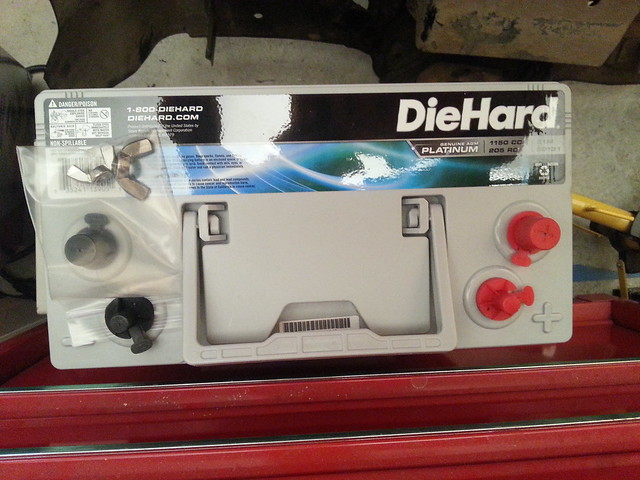
Diehard Platinum Group 31M Battery in OEM Main Location

Description:
Item # 02850131000P Model # 50131
The DieHard Marine Battery Size 31m has tin-coated brass terminals and 99.99 percent pure virgin lead plates, that make it durable, powerful and reliable. Safety first design features a non-spillable and sealed design with an Absorbed Glass Mat construction. These glass mats are instrumental in keeping the acid in place to make the battery vibration-resistant and easy to mount. Sail away on a sunny day or as the rain lashes at the shores with this weather-resistant battery.

Maintenance-free this Group Size 31m battery is ideal for use on your recreational marine vehicle
Features 1150 CCA that delivers quick ignition
Container is made from high-quality polycarbonate/polyester
Has a long off-season storage power and a reserve power of 205 minutes
An AGM construction offers the battery longevity and mounting flexibility
The battery is vibration-resistant and sports a military-grade construction
Item Weight: 75 lbs.
Dimensions: 13"(L) x 6.8"(W) x 9.5"(H)
Three-year free replacement limited manufacturer's warranty

Specifications:
Dimensions:
Height (in.): 9.5
Item Weight (lbs.): 75
Length (in.): 13
Width (in.): 6.8
Battery Type:
Group Size: 31M
Power Configuration:
Number of Cells: 6
Power Ratings:
Amp Hours at 20 Hour Rate: 100
Capacity Amp Hours at 10 Hour Rating: 92
Cold Cranking Amps (CCA at 0 deg.F): 1150
Reserve Capacity (RC): 205 min.
Design & Construction:
Battery Design:Absorbed Glass Mat
Container Material: Polycarbonate/polyester
Maintenance: Maintenance Free
Overall Type: Deep-cycle
Temperate Zone: North or South
Positive Terminal Side: Right
Terminal Post Location: Top
Warranties & Coverage:
Free Replacement Warranty Term: 36 months

NOTES
It is important to note that the Diehard Group 31M has 2 DIFFERENT SIZE terminal posts.
POSITIVE: 3/8-16 : This will fit a normal Fleet Terminal.
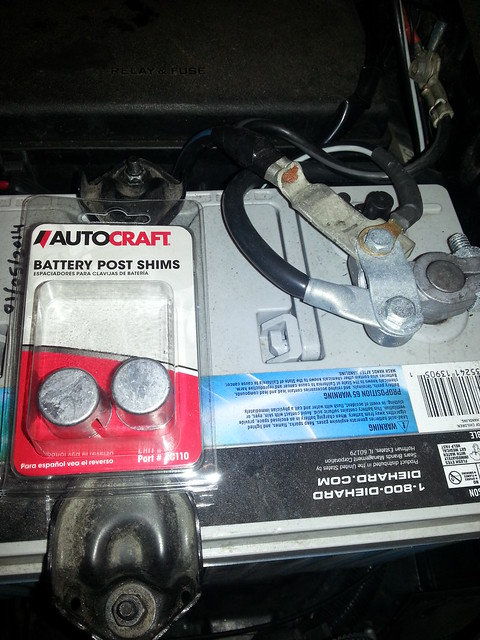
NEGATIVE: 5/16-18 : This will need a shim to fit a Fleet Terminal

Parts:
Diehard Platinum Group 31M, $231, Sears
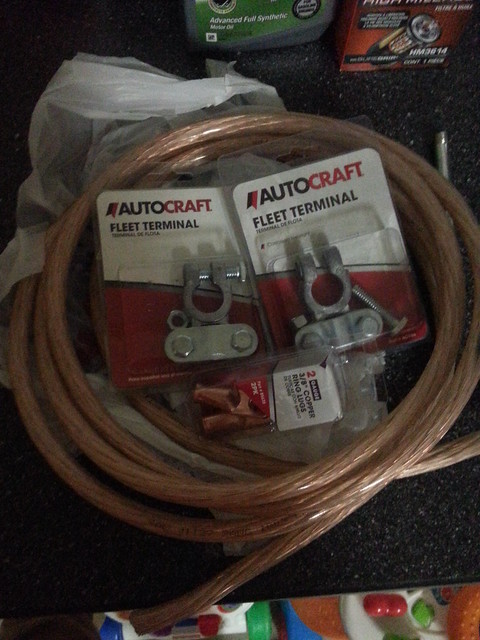
Fleet Terminal (AC166), ~$12, Advance Auto Parts
Fleet Terminal (AC166), ~$2.5, Advance Auto Parts

11159298894_f3aa31cbec_z.jpg

11159318184_b88b51a137_z.jpg
13832070884_05171fbd5f_z.jpg


Installation:
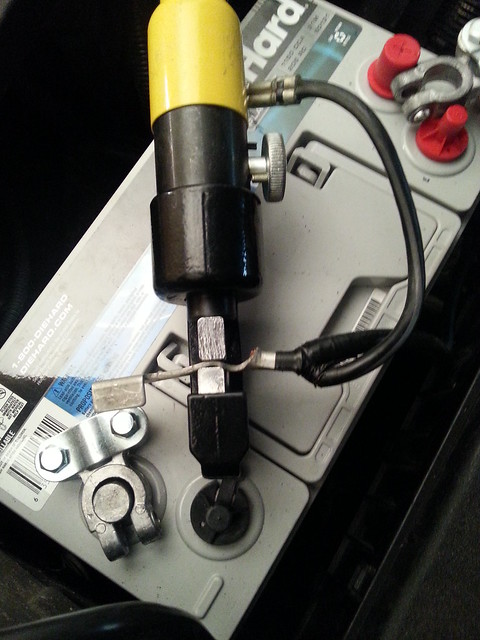
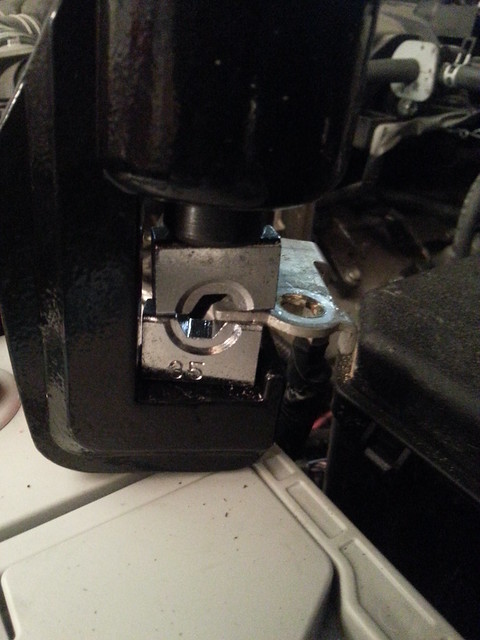
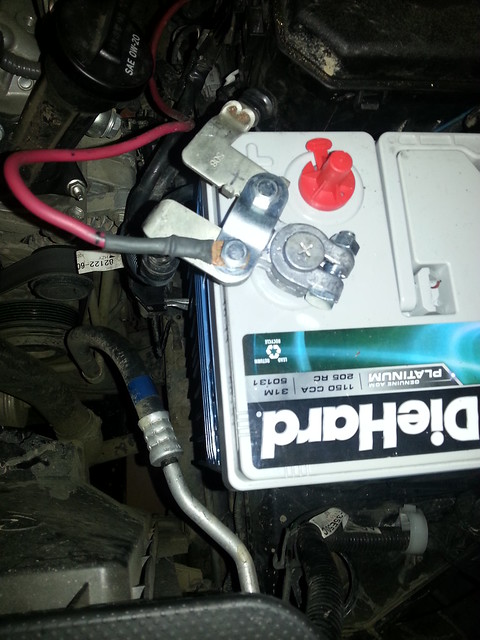
The Group 31M fits in the OEM Main Battery location with only a few modifications to the terminal ends. The L-shaped cable ends need to be flattened out in order for them to clear the battery. Because the fleet terminals stick out a little more I felt that made things a tad easier as well.

I used my hydraulic crimper to flatten out the cable ends. This was relatively easy to manage by one person and created flatter ends than I would have been able to achieve by using pliers.
11785578106_03bb0fae28_z.jpg


You also will need to flatten out one of the little wings on the positive cable so it can be connected to the fleet terminal.
11784805485_7f82525fab_z.jpg


With the cable ends adjusted, you can now place the battery. The OEM plastic battery tray won't fit the battery, so you'll either have to upgrade to an aftermarket universal tray or battery cage. You can install it without, but you have a higher risk of the battery twisting under the battery tie-down.

The positive wires hooked up to the fleet terminal.
11785193274_c96cb1a43a_z.jpg


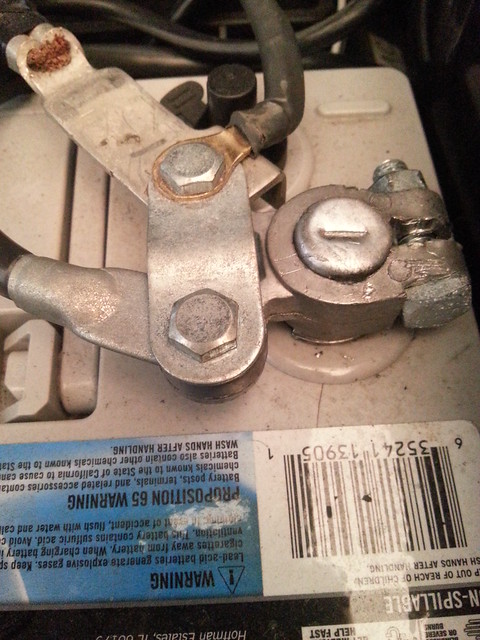
The negative (ground) wires hooked up to the fleet terminal (using a post shim):
13831691965_48409b4fc7_z.jpg

I used a large screwdriver to emboss the minus sign into the shim.

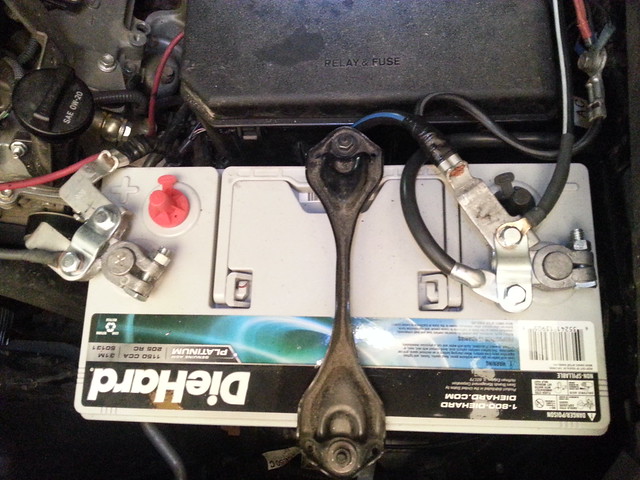
Once fully tied down, your end result should look something like this:
11785208324_17fbb4a32a_z.jpg


Make sure you check your suspension measurement, because the Group 31M is significantly heavier than the OEM battery. I had to crank my adjustable coil quite a bit for it to match the passenger side lift once again.

Also, take a picture of your radio settings (stations etc) before you disconnect the old battery, because you will have to reset everything. Having a picture of the various screens will allow you to set your stations quickly and efficiently.

Lastly, write on your battery with a sharpie when you installed it. Makes it easy for both replacement and possible warranty information.

EDIT:
You can buy terminal studs for the threaded posts here: Stud to Post Conversion Adapters - Remy Battery
Make sure you get one each of the following sizes: 5/16-18 and 3/8-16.
5513_5514_Stud_Post_Adapters_LG.jpg


Okki


Hi Okki,


1. Did you use any battery tray for this installation? If you use any aftermarket battery tray. What is the brand? Is that secured to have this heavy monster under the hood during this period of time?


2. Have you drive any off-road or bumpy roads, did the battery lose out of its original position?


It would be great to share your experience by trimming the stock battery tray !


Thank You
 
1. Did you use any battery tray for this installation? If you use any aftermarket battery tray. What is the brand? Is that secured to have this heavy monster under the hood during this period of time?
Originally I just removed the OEM plastic tray and used the OEM battery tie-down to secure the 31M. while this works, I would not recommend it for any offroad use because the battery can twist under the tie-down and put additional stress on the terminal connections. I was working at the time with [MENTION=111262]pelfreybilt[/MENTION] to get a 4Runner compatible version of their battery cage developed and the end product has been awesome.

2. Have you drive any off-road or bumpy roads, did the battery lose out of its original position?
With the Pelfreybilt cage installed I have done the Overland Expo (wife did as many driving classes in the truck as she could) and we took it out into the Utah wilderness around Moab.

It would be great to share your experience by trimming the stock battery tray !
I never trimmed the OEM tray; I just removed the plastic tray and had the battery sitting directly on the metal fender platform before getting the battery cage.

Details on the battery cage can be found here: http://www.toyota-4runner.org/5th-gen-t4rs/94578-okkis-build-thread-13.html#post1923868

Okki
 
Originally I just removed the OEM plastic tray and used the OEM battery tie-down to secure the 31M. while this works, I would not recommend it for any offroad use because the battery can twist under the tie-down and put additional stress on the terminal connections. I was working at the time with [MENTION=111262]pelfreybilt[/MENTION] to get a 4Runner compatible version of their battery cage developed and the end product has been awesome.


With the Pelfreybilt cage installed I have done the Overland Expo (wife did as many driving classes in the truck as she could) and we took it out into the Utah wilderness around Moab.


I never trimmed the OEM tray; I just removed the plastic tray and had the battery sitting directly on the metal fender platform before getting the battery cage.

Details on the battery cage can be found here: http://www.toyota-4runner.org/5th-gen-t4rs/94578-okkis-build-thread-13.html#post1923868

Okki

Thanks so much for repping our battery cage! So glad you like it... it's a hot ticket for us-so thanks for all your help with it! :)
 
Thanks so much for repping our battery cage! So glad you like it... it's a hot ticket for us-so thanks for all your help with it! :)


Great simple plug and play solution with Pelfreybilt cage, Remy Terminals. Non-tech guys are especially appreicated for this design and diy at home !!!
 
Size of bolts for factory threaded holes?

INSTALLING THE BRACKET FOR THE FILTER:
The bracket is a simple L-shape with a small hole to allow it to be bolted to one of the factory threaded holes in the driver side fender wall. I used the hole under the hood hinge.
7193069504_b477512e2c_z.jpg


RUNNING THE HOSE:
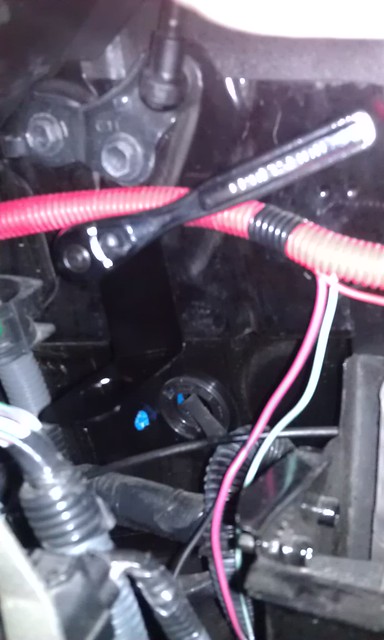
I ran the extension hose from the engine bay to the back of the vehicle. The major steps are as follows:
1 – Along the firewall to the back of the wheel well.
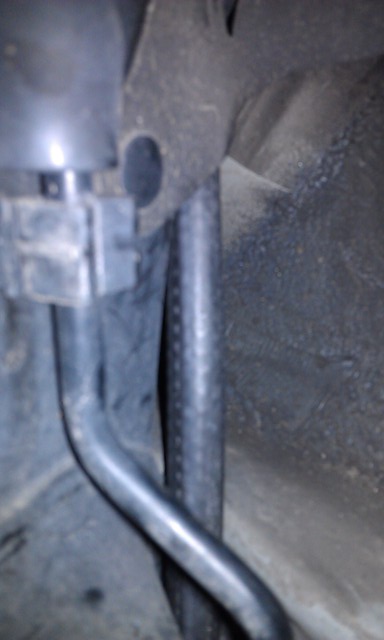
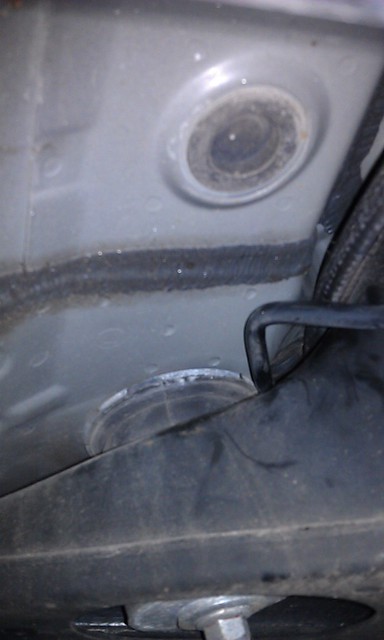
2 – From the back of the wheel well through the front driver side body mount to the frame rail.
3 – Along the frame to the start of the rear wheel well.
4 – Back between the gas tank and the wheel well to the center of the vehicle.
5 – Over the differential and along the center frame reinforcement (above the spare).
6 – Loop back and down to the rear differential.

Below you can see the hose being fed along the firewall down into the back corner of the wheel well.
7193096312_a337be79f6_z.jpg


As the hose exits the engine bay it is exposed for a short section before it turns under the body mount and moves along the frame between the frame and the body.
7193095388_2f28a5236d_z.jpg


Below you can see the hose come from the wheel well/engine bay and through the body mount to the outside driver side frame rail.
7193087268_e2ed446e90_z.jpg


You basically just follow along the frame and use the large zip-ties and existing holes to secure the hose. Make sure you do not snug them down too tight; you do not want the hose to kink or be restricted.

Do you know what size of bolt is used in the threaded holes in the engine bay to attach your bracket? I'm hoping to do this mod within the next week or so. Also, do you have a picture of the bracket you made showing the hole that the breather sits in and/or other details? Thanks!
 
Answered my own question

I ended up at Lowe's and figured out what size bolt fits in those holes in the engine bay, I thought I would share for those looking to do this mod as well. They are M8-1.25 bolts I got the M8-1.25x20 stainless.
 
Okki, Can we get an update on the fumoto plug and how it's holding up? Looking at getting one for a 2015.

Also, I'm planning to add a second Blue Sea fuse block that is accessory switched. Part of my plan is to use an "add a circuit" to the P Outlet in the interior fuse panel for the switched circuit, similar to your install. Were you able to replace the fuse box cover when you tied into yours?

From what I can see it is not possible...
 
Okki, Can we get an update on the fumoto plug and how it's holding up? Looking at getting one for a 2015.

Also, I'm planning to add a second Blue Sea fuse block that is accessory switched. Part of my plan is to use an "add a circuit" to the P Outlet in the interior fuse panel for the switched circuit, similar to your install. Were you able to replace the fuse box cover when you tied into yours?

From what I can see it is not possible...

The futomo valve is working like a charm. The shop that does my oil changes says it drains a little slower than the normal plug, but it works otherwise fine.

The fuse cover does NOT fit back on once you use an add-a-circuit. I've not had any issues with that. The lid now lives in the glove box.

Okki
 
The futomo valve is working like a charm. The shop that does my oil changes says it drains a little slower than the normal plug, but it works otherwise fine.

The fuse cover does NOT fit back on once you use an add-a-circuit. I've not had any issues with that. The lid now lives in the glove box.

Okki

I add Fumoto valves to all my vehicles. They make oil changes so much easier for me. No, more hot oil on me when draining oil. No more mess on the floor.
 
Next set of upgrades on the calendar

Winch (Warn Zeon 10) - on site and ready for installation.
Front bumper - currently in production.
Front 30 inch Rigid - On site and ready for installation.
Rear bumper with swing out - Currently in production.
Coil over upgrade - ordered and en route.

My visit to [MENTION=64712]CBI OffRoad Fab[/MENTION] will be exciting!

Okki
 

Members online

Forum statistics

Threads
278,309
Messages
3,554,068
Members
248,016
Latest member
Advally Service

Trending content

Back
Top