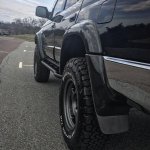
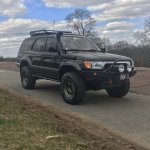
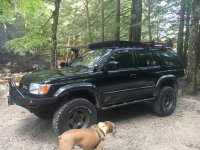
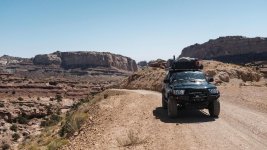
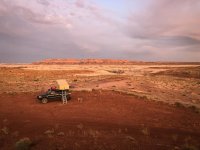
OldRigNewParts Build Thread

I used very thin-jawed needle nose pliers to get the chunks out. They sit on top of a little cover/shield and are generally reachable through the PCV hole.

-Charlie
 
I used very thin-jawed needle nose pliers to get the chunks out. They sit on top of a little cover/shield and are generally reachable through the PCV hole.

-Charlie

I wasn't aware that little shelf/chamber was even there haha. because I couldn't really get a good look inside, I just assumed that everything was just falling into the cam. Had I known earlier, I would've just vacuumed everything out.
 
I've joined a few facebook groups; New England Overland, Exploring NH, and a friend of mine started a group called NE-OVEX, which is a group dedicated to multi-day, point A-B overland trips in New Hampshire, Maine, and Vermont. A lot of the groups around here are mainly jeep people who are only interested in day trips, rock bashing, or mudding. There's definitely a shortage of Toyota specific groups around here.


It's not a Toyota specific group, but I did sign up for the Vermont Overland Rally this year. I know that there are a lot of 4runners, FJ Cruisers and Land Cruiser that have attended past events, so hopefully I'll meet a few new peeps there.


Honestly, I've never really cared for vehicle specific groups, but more for just common interests of overlanding, off-grid living, well built machines and legit exploration. Though It would be nice to meet a few 3rd gen owners around here for part swapping and knowledge sharing.



I signed up for Vermont Overland Rally too - first time, I’m coming up from Brooklyn, glad to hear I won’t be the only first timer + t4r member


Sent from my iPhone using Tapatalk
 
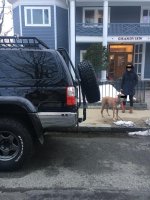
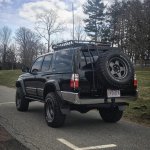
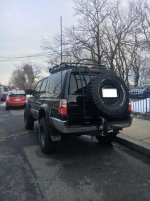
Small update to the build. I wanted a way to relocate my spare tire for this year's trips and didn't want it on the roof or taking up space inside the cabin, so I decided I would give a hitch mounted tire carrier a try.

Before anyone tries to jump on my case for being a poser or telling me how crappy these things are, I decided to go this route for now for two reasons:

1)After a few trips last year, I am nervous about my spare dragging on rocks or something finding it's way into the sidewall and I'd rather not add more weight up top or have it taking up precious space in my cabin.

2)My ultimate plan is to add a CBI hybrid bumper with a swingout, but due to the work I've put into this rig this year and other expensive life events, that will have to wait. I also wanted to see what it's like to have a spare tire filling up the back window before dropping $2000 on a bumper only to find out that I hate it. This was a relatively cheap way to find out.

I've heard good things about the Wilco hitch system, but they're stupid expensive for what they are. This carrier is made by Detours Off Road and uses a similar mounting system as Wilco. It's super sturdy, no wobble, and sits nice and close to my hatch. I'm quite pleased with the quality of this product and would recommend it to anyone who want's to go this direction.
 

Attachments

  • IMG_4488.jpg
    IMG_4488.jpg
    138.3 KB · Views: 499
  • IMG_4489.jpg
    IMG_4489.jpg
    137.7 KB · Views: 486
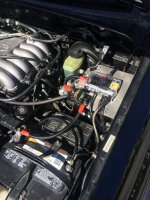
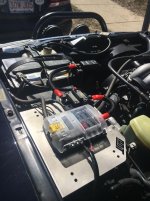
Decided that I wanted to clean up my accessory wiring and have a dedicated spot to tie in any future accessories. I went through all of my sloppy wiring and trimmed, soldered, and shrink wrapped everything. Then I routed everything to a 6 fuse Bluesea fuse block and mounted to a MJT fuse block bracket made by [MENTION=135677]michaeljtomey[/MENTION]. Right now I'm only running my bumper spots and ditch lights off of this setup, but need to find time to reroute my CB. Really happy with the way everything looks!
 

Attachments

  • IMG_1417.jpg
    IMG_1417.jpg
    138.4 KB · Views: 486
  • IMG_5665.jpg
    IMG_5665.jpg
    133.8 KB · Views: 477
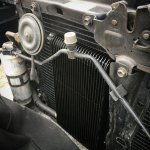
I did a little more work last weekend by adding an external transmission cooler. While I was down there I discovered a small leak coming from my front diff. I wasn't able to determine the source of the leak, but I'm taking it to a shop next week and will ask them to take a look.

Forgive me for not taking enough pics...
 

Attachments

  • 30411593_10216134984548484_3033709274325843968_o.jpg
    30411593_10216134984548484_3033709274325843968_o.jpg
    134.9 KB · Views: 434
I also got my Savage sliders painted and installed. I used Rustoleum self etching primer and Rustoleum rattle can bed liner. I think it came out pretty good and holds up very well so far! It's all about proper prep.
 

Attachments

  • 30531164_10216134983148449_4596427309589725184_o.jpg
    30531164_10216134983148449_4596427309589725184_o.jpg
    137.7 KB · Views: 413
  • 30415377_10216134984908493_7455294508314394624_o.jpg
    30415377_10216134984908493_7455294508314394624_o.jpg
    138.2 KB · Views: 430
Oh, and I finally was able to get my hands on a Stealth Custom Series F5 wheel for my spare. I tried ordering one when they got a fresh batch in, but couldn't make it to the checkout screen before they were sold out. About 2 weeks later Vin from SCS emailed me saying that someone canceled an order for a single wheel and I jumped on it.
 

Attachments

  • 30441784_10216134983548459_2319946492107816960_o.jpg
    30441784_10216134983548459_2319946492107816960_o.jpg
    138.7 KB · Views: 430
Full-length Front Runner rack on the way!

A little update since its been a while. After growing tired of my hacked together cheap Amazon rack setup, and noticing that it's starting to rust and I don't feel like battling that, I decided to start shopping for a new rack.

I've always loved the build quality and modularity of Front Runner products and was surprised to find out that they have a custom order for the 3rd gen 4runner!

I will update you guys with photos once installed.
 
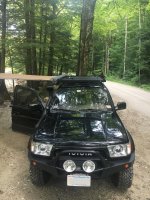
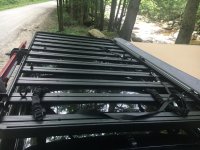
I finally installed my full-length rack!

After some shipping hiccups, I finally had all of the parts to build and install my new Front Runner rack this weekend.

Front Runner themselves don't offer this rack on their website, but if you call or email them, they've put together a parts list specifically for the 3rd gen 4runner.

It does require cutting down their roof rails to size and drilling into your roof, but it wasn't that hard of a job.

I'm really bad about taking process pics, so I'll try to explain what all it took.

1. Build the rack and install the top portion of the feet.
2. Remove your factory rails and measure the length you want your new rails to be. I knew I was going to use the factory rail mounting points, so I measured about an inch past the last hole to right where the front of the sunroof started to curve towards the back.
4. Cut the new rails to length
5. Measure out the factory mounting points and drill holes in the new rail.
6. Drill a hole for the front, about an inch back on the new rail.
7. Install the back portion of the rail to the factory mounting points
8. Use the new front hole of the rail to mark where you're going to drill into your roof. (Be careful not to mark too close to the sunroof because there is a thick piece of metal that makes up the sunroof frame and can be hard to make a clean hole—ask me how I know...)
9. Place a gob of silicone into the new roof hole, insert a 6MM rivnut, and clamp that puppy down.
10. Measure out where you want your feet to go and insert the T-nuts into the track (The T-nuts will not slide once the roof mounting screws are in place—again, ask me how I know...)
10. Add more silicone on all holes in the roof.
11. Install the new rail.
12. Do the other rail now
13. Install the bottom portion of the feet, measured out the location of the top portion of the feet that you installed on your rack earlier.
14. Make a friend that will help you lift the rack into place (I hear beer can attract friends...)
15. Adjust everything so that your rack is level and centered and bolt everything down.
16. Enjoy your rack!
 

Attachments

  • IMG_3867.jpg
    IMG_3867.jpg
    141.2 KB · Views: 348
  • IMG_1535.jpg
    IMG_1535.jpg
    140.7 KB · Views: 351
  • IMG_5221.jpg
    IMG_5221.jpg
    135.1 KB · Views: 351
I've joined a few facebook groups; New England Overland, Exploring NH, and a friend of mine started a group called NE-OVEX, which is a group dedicated to multi-day, point A-B overland trips in New Hampshire, Maine, and Vermont. A lot of the groups around here are mainly jeep people who are only interested in day trips, rock bashing, or mudding. There's definitely a shortage of Toyota specific groups around here.

It's not a Toyota specific group, but I did sign up for the Vermont Overland Rally this year. I know that there are a lot of 4runners, FJ Cruisers and Land Cruiser that have attended past events, so hopefully I'll meet a few new peeps there.

Honestly, I've never really cared for vehicle specific groups, but more for just common interests of overlanding, off-grid living, well built machines and legit exploration. Though It would be nice to meet a few 3rd gen owners around here for part swapping and knowledge sharing.
The build is looking great!

I finally got around to joining the FB New England Overlanding group, just did it today. I'm going to post up an intro soon.

I haven't gotten a 4R yet, I spent most of the summer laid up from a mountainbiking injury, so motivation to even look was non-existent.

Might be about time to get back into the hunt though!
 
The build is looking great!

I finally got around to joining the FB New England Overlanding group, just did it today. I'm going to post up an intro soon.

I haven't gotten a 4R yet, I spent most of the summer laid up from a mountainbiking injury, so motivation to even look was non-existent.

Might be about time to get back into the hunt though!
Hey I've seen bunch of clean ones, since we talked last. Didn't know you were still in the market. Still want a Jade 99-00 auto, hood scoop, with e-locker?
 
Hey I've seen bunch of clean ones, since we talked last. Didn't know you were still in the market. Still want a Jade 99-00 auto, hood scoop, with e-locker?

I wasn't for a while, but kind of leaning that way again now. Def want a 99-00 w/locker, color and scoop are less important. I do like the green though!
 
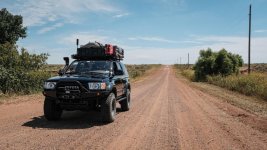
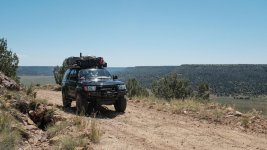
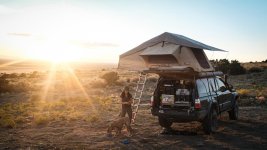
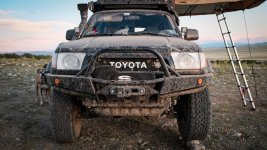
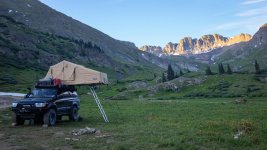
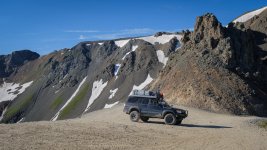
I just completed my Trans America Trail trip, here are some pics for you guys!

My wife and I decided to move from Boston to San Diego and figured a great way to migrate would be to do none other than the Trans America Trail. Roughly 6,000 miles of American backroads.

I'm planning on doing a full writeup soon with all my pictures and videos, but wanted to give you guys some 3rd gen love.
 

Attachments

  • 018_Small.jpg
    018_Small.jpg
    137.5 KB · Views: 233
  • 029.jpg
    029.jpg
    139.1 KB · Views: 245
  • 034.jpg
    034.jpg
    136.1 KB · Views: 240
  • 036.jpg
    036.jpg
    144 KB · Views: 242
  • 052.jpg
    052.jpg
    139.8 KB · Views: 253
  • 058.jpg
    058.jpg
    141.9 KB · Views: 241
  • 076.jpg
    076.jpg
    141.2 KB · Views: 238
  • 084.jpg
    084.jpg
    136.1 KB · Views: 231
Jeez bro what a trip!! Just finished reading through this thread and you got a nice rig!! Best of luck in San Diego, I just moved up to LA from there!


Sent from my iPhone using Tapatalk
 

Members online

Forum statistics

Threads
278,310
Messages
3,554,080
Members
248,016
Latest member
Advally Service

Trending content

Back
Top