post apocalyptic build thread

monolithmotors

New member
Howdy folks,

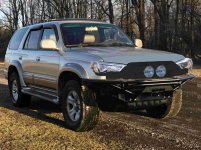
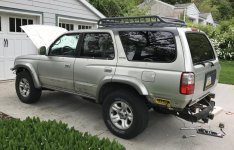
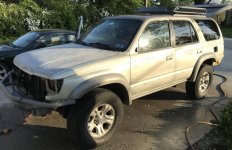
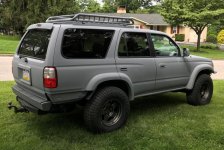
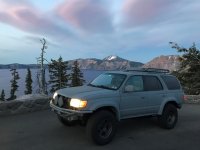
The starting point is a 2001 Limited with 200K miles and a solid frame. Going for a overland/post apocalyptic vibe.

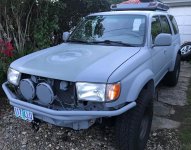
In addition to the bigger tires, a roof rack, rock sliders tubular front and rear bumpers, I want to upgrade to the 2014 and later headlights from a 5th gen 4runner. I did a quick mock up in Affinity Photo and I think it looks cool - I like the 'angry eyes' look of the headlights. Will need to graft on the front part of the Gen 5th gen hood to make headlights look right.

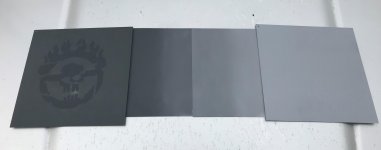
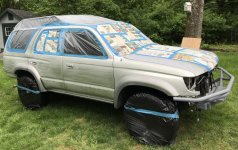
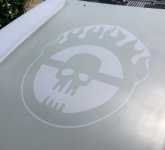
I mixed up and sprayed a few samples of flat black and flat white paint. Looking to get something like cement grey / battleship grey / the post apocalyptic world covered in ash grey - leaning towards the darker shades. And yes, there will be a big skull on the hood...

Will post more pics as things progress.
 

Attachments

  • 4runner front mock up 6LowQ.jpg
    4runner front mock up 6LowQ.jpg
    144.4 KB · Views: 2,955
  • IMG_4890 (2).jpg
    IMG_4890 (2).jpg
    130.2 KB · Views: 2,085
Register to hide this ad
OK , I actually like the post apocalyptic , darker shades of gray idea . But 5th gen headlights ? Is it time or money you have a excess of ? :target:
 
I saw a long travel 3rd with a newer tacoma front end on ig which looked legit.
da679b4464afeee9024bf8bc8d3d7d3b.jpg
just incase @rednose1 is on here

ill save any opinions until after its done, Im all for something different when executed well


Sent from my iPhone using Tapatalk
 
Sounds about how my 2nd gen has become. Don't underestimate the power of some custom TRD quarter panel decals
9629e1c30889f241313454d695bf2808.jpg


And matching custom door panel patches ($5 per on eBay, and the driver's door one actually covers up a damaged area of the door panel)
22da772d89ed49504efc4694c48ee915.jpg


Then there's also the "zombie lights" and "apocolypse light" switches on eBay as well. A bit cheesy but might as well go all in.

The whole end-of-the-world vibe is a slick slope so be ready to go down a rabbit hole!
 
Thanks for all the comments. Bought some used 5th gen headlights off ebay and a cheapie aftermarket hood - I am in for about $450 on that which is not bad compared to the other costs in the build. The time to make the headlight mod look good may be prove to be unreasonable - we'll see soon...

@4Rreak Show - awesome sticker - agree on slick slope with this look - will aim for a clean look initially. This build is for my sister in law, Marilyn, so she can add more details over time...

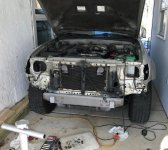
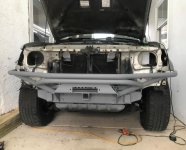
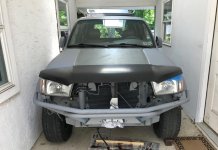
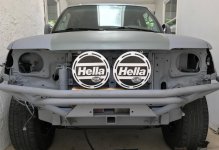
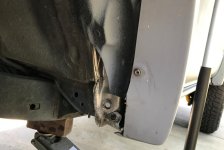
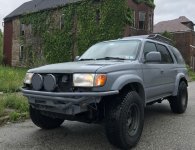
I did make some progress over the last two weekends. Bought a Trail Gear Rock Defense bumper for a 95-04 Taco. It fits the 4Runner with a few mods - needed to break out the plasma cutter, angle grinder, and the sledge hammer (perhaps my fav tool) to get the bumper support on. I had to trim down the plates on the end of the frame rails and notch the TG bumper support for the AC line and then run a longer ground wire from the frame to the body. The TG bumper support was too narrow to fit about the flanges outboard of the front body mounts - I stretched the support a bit with a bottle jack and some round bar and then hammered her home once she was close to fitting. I put a primer coat and then settled on the apocalyptic grey shade for the truck and sprayed that on the new parts. Took about 2x the time I expected.
 

Attachments

  • IMG_5001 (2).jpg
    IMG_5001 (2).jpg
    129 KB · Views: 1,993
  • IMG_5007 (2).jpg
    IMG_5007 (2).jpg
    129.9 KB · Views: 1,934
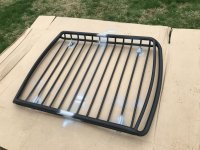
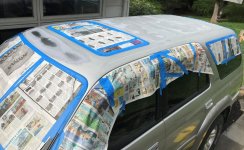
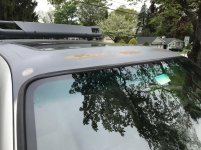
Making steady progress. I bought a Rola roof rack and welded the two halves together and cut down the supplied brackets and welded those on to make it low profile mount directly to factory rails without using the stock cross bars. I sanded down the flaking clearcoat off the roof and painted it. I purposefully made a few rust spots on the roof - there will be more on hood too.

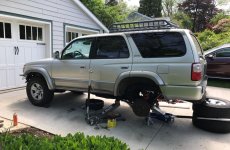
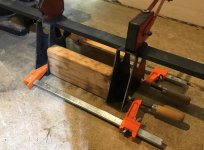
Then I moved on to the suspension rebuild. I just finished the rear. Keeping stock height, I did the OME 60073 shocks with the softer valving, WhiteLine UCA and LCA poly bushings and Prothane sway bar bushings (end links look ok). I am amazed how much stuff of this I could get from Amazon. I bent up a C clamp pretty good pressing the upper arm bushing. So, I improvised a press from my Harbor Freight tubing bender to push the rest of the old bushings out. On the lower arms, I used a saws all on the metal part and pried that out with big screwdriver. Not pretty, but effective. Took me two full days...
 

Attachments

  • IMG_5014s.jpg
    IMG_5014s.jpg
    134.7 KB · Views: 1,829
  • IMG_5033s (2).jpg
    IMG_5033s (2).jpg
    142.6 KB · Views: 1,806
  • IMG_5056s.jpg
    IMG_5056s.jpg
    137.8 KB · Views: 1,752
  • IMG_5058s (2).jpg
    IMG_5058s (2).jpg
    141 KB · Views: 1,839
Paint

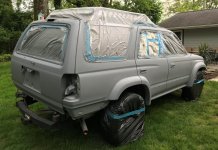
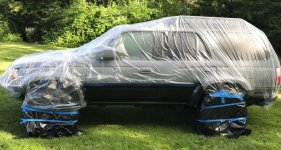
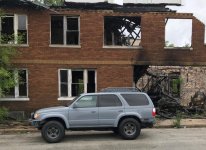
I took a few days to prep and paint the rest of rig. First up was removing the rear bumper, running boards and the Limited cladding on the doors. I just cut along transition between the fender flare and the cladding on the rear door. I will make a piece out of steel to fill in the gap that is left between the flare and the door later. I think it looks much better without the cladding - I did keep the Limited trim over the rocker panels - I think that looks cool and blends into the fender flares. Then I sanded down all the failing clearcoat from the hood and removed the side mirrors and a bunch of the trim before paint. I decided to leave the flares on for the painting so the pads between the flares and body would get painted the same color - it looks good, hope it holds up well. I also got some .5" aluminum foil circles and covered the holes in the doors. They arrived halfway thru the paint job, so there is paint both over and under them. Turned out pretty good for a backyard paint job. Front suspension rebuild next...
 

Attachments

  • IMG_5064 s.jpg
    IMG_5064 s.jpg
    141.4 KB · Views: 1,644
  • IMG_5065 s.jpg
    IMG_5065 s.jpg
    139.6 KB · Views: 1,707
  • IMG_5074 s.jpg
    IMG_5074 s.jpg
    143.3 KB · Views: 1,660
  • IMG_5078 (2) s.jpg
    IMG_5078 (2) s.jpg
    138.6 KB · Views: 2,138
Last edited:
Immortan Joe approves this thread
 

Attachments

  • 653feccf926e9f3f2edb49011bb75c26e70300355599924ef6196f43c4a09c2c.jpg
    653feccf926e9f3f2edb49011bb75c26e70300355599924ef6196f43c4a09c2c.jpg
    56.5 KB · Views: 1,553
More Progress

After doing the rear suspension bushings in my driveway, I asked my mechanic friend to tackle the front control bushings and ball joints - did uppers and lower of everything because the front end felt pretty loose over bumps. It took him about a week and half with a bunch of interruptions - the upper and lower control arm bolts were really rusted in - glad I got help. The good news the truck is transformed - the ride is so much better. There is poly everywhere including the sway bar bushings.

Next I replaced the alternator with a high output one and did the big 3 wiring update per Performing the "Big 3" Wiring Ugrade on a 3rd Gen T4R - A How To - from BigFishAllDay. I flushed the power steering reservoir out, cleaned the screen and flushed the power steering system by turning the steering wheel with the engine off - seemed to work well. I cut the o-ring at the bottom of the reservoir when I put it back on. I got a new one from the local stealership so that is all good now. I replaced the radiator with a denso part from Amazon - wanting to avoid the dreaded pink milshake. It did not fit great, I had to elongate some holes in the core support to get the bolts to line up. When I was finishing filling it up, I noticed the nipple going to the overflow bottle was broken off - crap. So I ordered another one which fit much better and had all its appendages intact. I used to get upset when stuff goes wrong - not so much anymore - life would be boring if everything was easy...

Speaking of not easy - next up was the starter motor rebuild. I decided on the starter out the fenderwell method and followed Timmy The Toolman's excellent video YouTube Every bolt was rusty and hard to break away, but the worst was the transmission dipstick tube. The two parts were rusted together hard. I wound up getting a MAP gas torch on it and then vice grips to twist and finally got it apart - needed another o-ring from the stealership after that. I have the starter brushes replaced and am waiting for a new plunger before I put that back together.

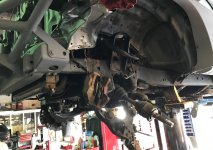
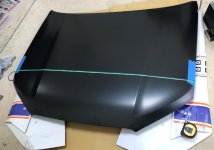
So then I had some time to start looking at how to install the 5th gen headlights. I cut the hood down and mocked up how to put it together. The hood is a couple inches too wide, so I figured I could cut a section out of the center without creating much of a peak when I weld the two halves back together, but the headlights themselves require hacking out a bunch of the fenders and radiator core support. After looking at the work involved, I am going to skip it for this build. Kind of a bummer, but I have the parts and am going to put these lights and hood section on some future build - they are so cool looking. I am on a deadline for this truck - leaving to drive her to Oregon in less than a week and there is still a bunch to do...

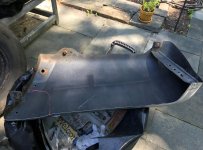
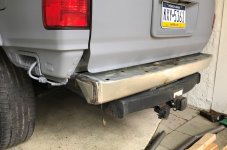
My other fabrication task was to make a new rear bumper. I looked at some options to buy, but they were pricey so I figured I would do something low buck. After agonizing about it for a few days, I decided to keep the low hanging bumper hitch. Because the low hanging spare tire is just a bad as the hitch and I was not up for relocating the spare to any of the possible options (inside, swing out or on top or freeballing with no spare). So then I mocked up some tubular tubular designs and I did not like the gaps they would leave to the hatch area. Then I stuck the center section old bumper back on and I kind of liked it. I trimmed the ends down of the center section and cut some pieces out of the side extensions to clean up the exposed ends and I cut down the plastic tread part which will be nice for Ava (dog) for jumping in and out. Welded that up today and just need some paint to finish.

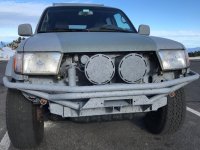
And I mocked up the driving lights. I went with some big ass Hella Rallye 4000s. Then need to be mounted about 6" above the winch mount in the front bumper - bracket fab coming...

 

Attachments

  • IMG_5096 (2).jpg
    IMG_5096 (2).jpg
    131.4 KB · Views: 1,595
  • IMG_5131 (2).jpg
    IMG_5131 (2).jpg
    112.8 KB · Views: 1,546
  • IMG_5141 (2).jpg
    IMG_5141 (2).jpg
    135.1 KB · Views: 1,549
  • IMG_5146 (2).jpg
    IMG_5146 (2).jpg
    133.2 KB · Views: 1,521
  • IMG_5152 (2).jpg
    IMG_5152 (2).jpg
    133 KB · Views: 1,571
  • IMG_5162 (2).jpg
    IMG_5162 (2).jpg
    124.7 KB · Views: 1,578
This is definitely getting interesting. I was excited to see the 5th gen headlights going on. Hope to see that in the future.

Continuing to follow this as it comes together. Props for making it your own and doing something’s different than most.
 
ready to drive to Oregon

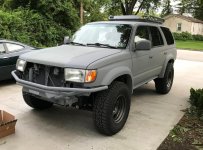
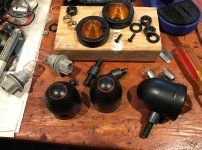
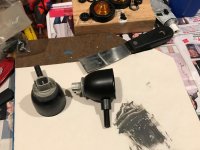
Been busy this last week finishing and redoing some things. The foil tape circles covering the holes from the Limited cladding were a bit too visible, so I painted on some aerosol can bed liner and then repainted that area grey. I also filled in the gap in the fender flare on the rear door with some sheet aluminium and big rivets - also put the bedliner over that to help it blend in. And I got a set F5 16x8 -25mm in matte gunmetal from SCS and Falken Wildpeaks 265/75R16. The tires are right out to the edge of the fender flares with that offset, so that worked out well alhtough I did have to trim the front fender flare and fender liner and bash the sheet metal seam back pretty far with a sledgehammer to get rid of the interference when turning all the way. I modified some motorcycle turn signals from Amazon to fit the 4runner bulb socket and JB welded them together - nice to keep the stock bulb so the blinkers work properly. And I am nearly done the driving light bracket - started with some 2x6 box steel. My last mod today was a stainless steel cat back system (and fixing leak at the flange between the cats) at a local shop. They screwed up the rear O2 sensor location and the wire was pulled tight. Threw the check engine and VSC lights on my way home - code is for the downstream O2 heater - nice. I am mounting all the lights tomorrow morning, heading back to the exhaust shop to relocate the bung and then heading west. I ordered a denso replacement sensor and am having it shipped to Oregon.
 

Attachments

  • IMG_5167 (4).jpg
    IMG_5167 (4).jpg
    147.4 KB · Views: 1,358
  • IMG_5171 (2).jpg
    IMG_5171 (2).jpg
    137.5 KB · Views: 2,934
  • IMG_5178 (2).jpg
    IMG_5178 (2).jpg
    133.2 KB · Views: 1,458
  • IMG_5170 (2).jpg
    IMG_5170 (2).jpg
    138 KB · Views: 1,422
  • IMG_5174 (2).jpg
    IMG_5174 (2).jpg
    126.8 KB · Views: 1,429
  • IMG_5177 (2).jpg
    IMG_5177 (2).jpg
    131.4 KB · Views: 1,423
On the road

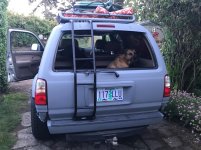
In Saint Cloud Minnesota this morning. The 4Runner is running well. The shop relocated the rear O2 sensor before I left, but the wire is broken, so I have a bunch of dash lights on. I had a denso sensor shipped to Oregon, so I will install that and a handful of other projects when I get there. Some 55W H1 bulbs for the driving lights are heading to Oregon - I am using the stock relay and wiring and just spliced the hella wiring connector on, so I don't want to run too much current through that circuit. Installed the turn signals and driving lights yesterday morning just before hitting the road. I had to paint the hella light covers - there will be no corporate logos after the apocalypse. At the rear, I got the painted bumper on, painted and installed the rear delfector, and cut down some mud flaps and put them on - the fender law in Oregon says they must be within 27" of the pavement - I was at about 31 and now the mud flaps are close to 25" above the ground. The Gobi ladder did not make it in time and is shipping to Oregon. And the big Mad Max skull decal arrived from Russia just before I left - will get that on the hood in Oregon.
 

Attachments

  • IMG_5190 (3).jpg
    IMG_5190 (3).jpg
    141.1 KB · Views: 4,865
  • IMG_5201 (4).jpg
    IMG_5201 (4).jpg
    138.5 KB · Views: 1,332
  • IMG_5215 (2).jpg
    IMG_5215 (2).jpg
    139.3 KB · Views: 1,266
  • IMG_5228 (2).jpg
    IMG_5228 (2).jpg
    139 KB · Views: 1,429
i would have trouble going to the new headlights and hood from here, it looks really good as it sits
 
Yeah it looks really good man! Any overheating issues with those lights? Looks like a good amount of airflow blockage haha


Sent from my iPhone using Tapatalk
 
Crazy build man, I like it. You shouldn't have to pound any steel with those tires. I might have missed it but you should have done new shocks & springs with all of those bushing upgrades.
 
Thanks for all the positive feedback. This truck will keep the stock headlights - some future build will get the 5th gen lights. I am pretty happy with the way the front end looks. The truck is staying on the west coast with my sister in law, but I will be camping in it for a few weeks before heading back to PA. In Billings MT today. Doing some hiking here then heading to Coeur d'Alene. I was a bit worried about overheating from the driving lights. The temp gauge sits exactly the same as before I installed the lights. I think there is a good path for the air to go around the lights, hit the rad support and funnel in behind the lights. Yup, I was surprised I had to cut and bend for front tire clearance. I did have the front struts replaced with all the other suspension work - they were complete with springs - stock height. Rear stock springs were done by previous owner and I did OME shocks back there - it sits pretty level. Maybe it was the offset change to the wheels caused the issue. I had to move sheetmetal seam quite a bit to clear when the wheels are fully turned.
 

Attachments

  • IMG_5234 sm.jpg
    IMG_5234 sm.jpg
    138.4 KB · Views: 585
Build Done

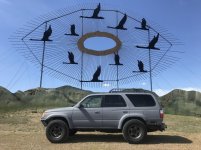
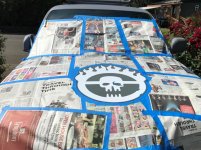
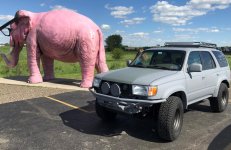
Had a blast travelling around Oregon the past few weeks. Went from Seaside down to Coos bay along the coast then Eugene and then Crater Lake. Crater Lake is a special place for sure. I drove just over 3000 miles in total - the layer of dead bugs on the front end was impressive. Spent the last few days with my sister in law finishing up the build. We got the rear ladder on, put in new carpet, changed the headlights to LEDs and cut the wire to disable the daytime running lights so they would not flicker. I also put some 50W halogen bulbs in the Hella driving lights so it wont blow a fuse (using the stock fog light wiring, switch, and fuse to power them) I changed out the rear O2 sensor that the guys broke when they did the exhaust. And we painted the skull on the hood!!! We used the sticker that I bought on the interweb as a template and then taped an outline around it and then painted and peeled the stick up - turned out pretty nice. The 4Runner ran flawlessly the whole trip but then one of the steel brake lines above the differential sprung a leak just as we finished up the build. Getting that line redone at a local shop here and then I am flying back to PA. The 4Runner will live out here on the coast and should rust up a bit in the coming years and will look even more menacing. I left the paint really thin over bare metal in a few areas to accelerate that. Will be cool to see how it ages...
 

Attachments

  • IMG_5357 (3).jpg
    IMG_5357 (3).jpg
    131.1 KB · Views: 550
  • IMG_5376 (2).jpg
    IMG_5376 (2).jpg
    135.1 KB · Views: 541
  • IMG_5394 (2).jpg
    IMG_5394 (2).jpg
    137.2 KB · Views: 557
  • IMG_5387 (4).jpg
    IMG_5387 (4).jpg
    142.2 KB · Views: 538
  • IMG_5395 (3).jpg
    IMG_5395 (3).jpg
    137.3 KB · Views: 537

Members online

Forum statistics

Threads
278,304
Messages
3,554,041
Members
248,016
Latest member
Advally Service

Trending content

Back
Top