
You are using an out of date browser. It may not display this or other websites correctly.
You should upgrade or use an alternative browser.
You should upgrade or use an alternative browser.
Post pics of your drawer/storage system
- Thread starter e60ral
- Start date
I used the Accuride 3640 28" 200 lb Glides with 1" over travel. I needed heavy glides because of the items to be placed in the drawer and the distance of travel (28") when extended.All you guys that have already built one, do you have any reviews on the slides that you used?
I am looking specifically at which ones were the best (and/or which ones to avoid).
Cheers!
The drawer can be removed without disassembly just lift and pull. A nice feature if something falls behind the drawer. There are other companies that make drawer glides. I found these at a good price for 28". These get real spendy above 28" in length. I reconfigured the cabinet to allow for the 28" glides and the drawer extends fully out of the cabinet. This is important with a small cabinet if you intend to remove the drawer occasionally .Also the heaver glides require more room on the sides (1") which will impact the width of the drawers. Build the cabinet first install the glides and measure for the width of the drawers.
Last edited:

007Tacoma
New member
I used the Accuride 3640 28" 200 lb Glides with 1" over travel. I needed heavy glides because of the items to be placed in the drawer and the distance of travel (28") when extended.
The drawer can be removed without disassembly just lift and pull. A nice feature if something falls behind the drawer. There are other companies that make drawer glides. I found these at a good price for 28". These get real spendy above 28" in length. I reconfigured the cabinet two allow for the 28" glides and the drawer extends fully out of the cabinet. This is important with a small cabinet if you intend to remove the drawer occasionally .Also the heaver glides require more room on the sides (1") which will impact the width of the drawers. Build the cabinet first install the glides and measure for the width of the drawers.
My next build will have a shallow drawer on one side and a table top on the other. My current system is too tall for my dog's bigger kennel. Do you mind if I ask where you found a good deal on your slides? I really don't want to cheap out on the one moving component of my new drawer system.

brian0128
New member
All you guys that have already built one, do you have any reviews on the slides that you used?
I am looking specifically at which ones were the best (and/or which ones to avoid).
Cheers!
Accuride 9308 slides with lock-in and lock-out are one of the best slides. I used those on my last setup in my Cherokee XJ.
If money was no object you could go up to KV 8900 series. Both those are overkill unless you plan on lots of weight like a fridge slide.
Cabinetmakerssupply.com I got these in two days but they were shipped from a local supplier. there are some great builds here. PM me if you need any further assistance.My next build will have a shallow drawer on one side and a table top on the other. My current system is too tall for my dog's bigger kennel. Do you mind if I ask where you found a good deal on your slides? I really don't want to cheap out on the one moving component of my new drawer system.

mcox522
New member
I used these and have some decent weight in my drawers, no issues yet and been in action for a couple months.All you guys that have already built one, do you have any reviews on the slides that you used?
I am looking specifically at which ones were the best (and/or which ones to avoid).
Cheers!
KV Anochrome Drawer Slide Full Extension With Overtravel 30" 150lb Load Rating https://www.amazon.com/dp/B0006FKXGU/ref=cm_sw_r_cp_apap_X9wwe6n5kOte5

If you are doing a cooler or significant weight I would use one of the slides mentioned in the posts above.
Last edited:
007Tacoma
New member
Accuride 9308 slides with lock-in and lock-out are one of the best slides. I used those on my last setup in my Cherokee XJ.
If money was no object you could go up to KV 8900 series. Both those are overkill unless you plan on lots of weight like a fridge slide.
Cabinetmakerssupply.com I got these in two days but they were shipped from a local supplier. there are some great builds here. PM me if you need any further assistance.
I used these and have some decent weight in my drawers, no issues yet and been in action for a couple months.
KV Anochrome Drawer Slide Full Extension With Overtravel 30" 150lb Load Rating https://www.amazon.com/dp/B0006FKXGU/ref=cm_sw_r_cp_apap_X9wwe6n5kOte5
If you are doing a cooler or significant weight I would use one of the slides mentioned in the posts above.
:thumb:
Thanks, Everyone! I have some research to do this weekend now. We must build a new storage system (or at least budget for one) before our next trip which looks like it will be in March(ish).

atchcraft
New member
Great ideas!
I’ve gathered the slides, latches and wood working tools for my syste, so, I’m getting ready to do mine, hopefully this weekend. I’m incorporating a 10” subwoofer into one, so that will be interesting. Hopefully I can find a good substitute for Photoshop to post pics.
BTW, 500# slides are freakin massive and a bit overkill IMO... we’ll see.
I’ve gathered the slides, latches and wood working tools for my syste, so, I’m getting ready to do mine, hopefully this weekend. I’m incorporating a 10” subwoofer into one, so that will be interesting. Hopefully I can find a good substitute for Photoshop to post pics.
BTW, 500# slides are freakin massive and a bit overkill IMO... we’ll see.

cbevington6
New member
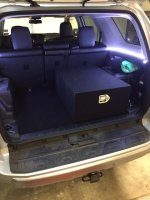
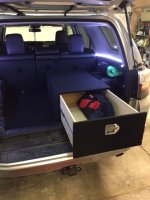
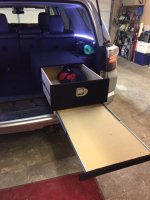
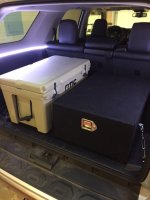
Finally got my drawer done and installed. I am definitely no carpenter so its not perfect, but it works and its good for me doing it myself! Thanks to everyone for posting up here with ideas, and to [MENTION=147480]aelarson[/MENTION] for answering my questions! I used amazon 28" slides, and picked up some black felt from a fabric shop for around $10 instead of ordering auto carpet.
Attachments

aelarson
New member
Finally got my drawer done and installed. I am definitely no carpenter so its not perfect, but it works and its good for me doing it myself! Thanks to everyone for posting up here with ideas, and to [MENTION=147480]aelarson[/MENTION] for answering my questions! I used amazon 28" slides, and picked up some black felt from a fabric shop for around $10 instead of ordering auto carpet.
Looks great! I am glad I was able to help out!
Okay, finally making some progress, albeit frustratingly slow when you are working 45 minutes at a time over lunch breaks at work.
The plan…

Two independent modules with two drawers each. This will allow one to be removed for use with a third row seat. Driver side will get a sliding cooler tray mounted atop.
Construction is all 1/8” aluminum…

My original plan was to design both of the top drawers in the fashion below, with the drawer base having tabs that penetrate the vertical sidewalls for strength, and the vertical sidewalls mounting the drawer below, allowing it to be extended with the top drawer fully extended, but I switched gears and am just incorporating this design on one side now. This is the driver side module.


For the passenger side module, I somehow stumbled on a YouTube video of the set-up available from JeepKitchen.com (appears to now be OverlandKitchen.com) and loved the lower drawer “cover” that doubles as a prep/work surface. This work surface extends first, then the lower drawer housing the stove or whatever is mounted below that and can be extended out beyond there. Seems like an ideal use of space!

Mounts are 1/8” thick steel which will be bolted to the factory tie-down points on the outsides. I am using carriage bolts in the slots to allow for one-side-only fastener tightening and of course, tolerance. Despite the photo/test fit, looks like I will have to nix the tie-downs as they sit just a bit too high with the steel brackets below and are going to interfere with the cabinet base. The plan for the center mount is an extended length version that will hopefully share some mounting space with floor bolts for the third row seats. Hoping to have some time to check out that potential this weekend.


That’s it for now. I am just starting on the “cabinet” portion of the project. Might seem a little backwards or atypical, but I wanted to work from the inside >>> out in case my drawers were a little out of spec, it’d be easier to make adjustments to the cabinet frame size rather than trying to cut the drawers down. Would hope to complete the driver side module in another week or two, then I can roll into the passenger side unit. More to come…
The plan…
Two independent modules with two drawers each. This will allow one to be removed for use with a third row seat. Driver side will get a sliding cooler tray mounted atop.
Construction is all 1/8” aluminum…
My original plan was to design both of the top drawers in the fashion below, with the drawer base having tabs that penetrate the vertical sidewalls for strength, and the vertical sidewalls mounting the drawer below, allowing it to be extended with the top drawer fully extended, but I switched gears and am just incorporating this design on one side now. This is the driver side module.
For the passenger side module, I somehow stumbled on a YouTube video of the set-up available from JeepKitchen.com (appears to now be OverlandKitchen.com) and loved the lower drawer “cover” that doubles as a prep/work surface. This work surface extends first, then the lower drawer housing the stove or whatever is mounted below that and can be extended out beyond there. Seems like an ideal use of space!
Mounts are 1/8” thick steel which will be bolted to the factory tie-down points on the outsides. I am using carriage bolts in the slots to allow for one-side-only fastener tightening and of course, tolerance. Despite the photo/test fit, looks like I will have to nix the tie-downs as they sit just a bit too high with the steel brackets below and are going to interfere with the cabinet base. The plan for the center mount is an extended length version that will hopefully share some mounting space with floor bolts for the third row seats. Hoping to have some time to check out that potential this weekend.
That’s it for now. I am just starting on the “cabinet” portion of the project. Might seem a little backwards or atypical, but I wanted to work from the inside >>> out in case my drawers were a little out of spec, it’d be easier to make adjustments to the cabinet frame size rather than trying to cut the drawers down. Would hope to complete the driver side module in another week or two, then I can roll into the passenger side unit. More to come…
Rear center mount done. Probably will not worry about an additional center mount near the hatch; I think two mounting points front & rear on the outside, and two points on the rear half on the inside for each module will be sufficient, but we’ll see when I get the drawers completed. When both drawer modules are installed together (most of the time) they’ll be bolted together anyway.
I had not originally planned on pulling out the whole unitized third row seat, but it quickly proved necessary, came out with only 4 bolts, and turned out to make working in there much simpler anyway.

Floor plate, mounting location.

Mocking things up. Added some weight to flex the third row seat down some to simulate the installed drawer module.

Completed bracket.

Installed.

I had not originally planned on pulling out the whole unitized third row seat, but it quickly proved necessary, came out with only 4 bolts, and turned out to make working in there much simpler anyway.
Floor plate, mounting location.
Mocking things up. Added some weight to flex the third row seat down some to simulate the installed drawer module.
Completed bracket.
Installed.



Fireguy25
New member
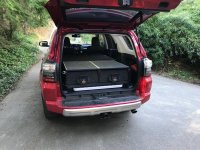
Drawers version 2 on sliding cargo deck!
Finished these up recently and continually tweaking but am now confident these are in for the long haul. Sorry about rotation of pics, I'm lost!
Finished these up recently and continually tweaking but am now confident these are in for the long haul. Sorry about rotation of pics, I'm lost!
Attachments
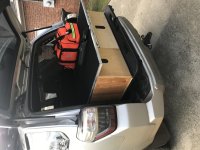
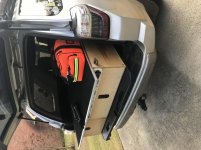
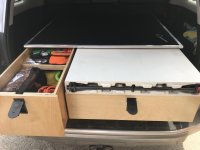
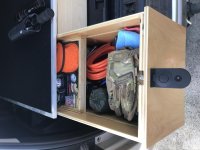
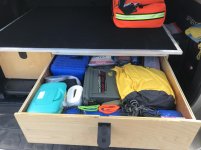
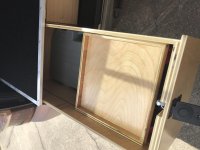
Finished this today. Pretty happy with how it turned out. Rubber gym flooring on top so the dog doesn't fly around the car. Drawer can support up to 500lbs; plan on using it as work station while camping or seat when needed.
Attachments
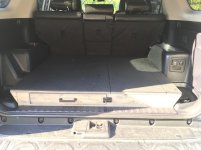
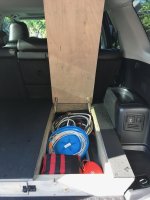
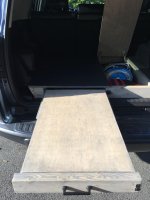
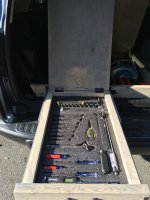
Figure I'll post mine since I'm relatively new here (posting, at least)
My goals for this platform were to: create a flat sleeping area (since no 3rd row or sliding tray), leave as much headroom as possible both for camping and for bike storage inside the vehicle, have a little space underneath for minor tools like ratchet straps, tire iron, small wrench rollup, etc., incorporate a sliding table for picnics/camping, and not drill or cut any plastic because hopefully one day I'll upgrade to a bigger platform and it would be nice to be able to start from scratch (basically back to stock just in case certain trim pieces are needed)
My favorite part is the modular rail. If it's not being used, it's all totally flush and you can still easily slide gear, coolers, etc. in and out without hanging up on anything, and if you're sleeping back there, there is nothing poking at you. Hides flat under the floor mat. I have made a few tie down accessories and a bike mount for it that all work really well, and the T-nuts underneath the rail can move to wherever you feel like placing them.
The whole thing bolts up to the factory tie down points, and just relocates the D-rings to the top of the platform, so those are all still usable as well. It installs/uninstalls really easily, and looks factory.
Awesome build! Looking to do something similar. What is the fabric you used on this?
Finished this today. Pretty happy with how it turned out. Rubber gym flooring on top so the dog doesn't fly around the car. Drawer can support up to 500lbs; plan on using it as work station while camping or seat when needed.
Pops,
Does this sit flush with the rear seats when they are down? I've been looking at making a platform to sit flush so I can sleep in the back, but that pull out tool storage is perfect. What kind of rails did you use on the drawer?
Similar threads
- Replies
- 0
- Views
- 1K
- Replies
- 0
- Views
- 3K
- Replies
- 0
- Views
- 492
- Replies
- 0
- Views
- 1K


