ramonortiz55 4runner build: La Venenosa

ramonortiz55

New member
I've had this build thread on other forums. Figured I'd start moving this puppy over here.


***********************************************************


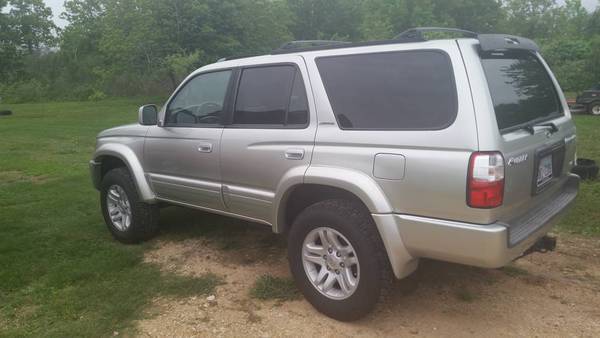
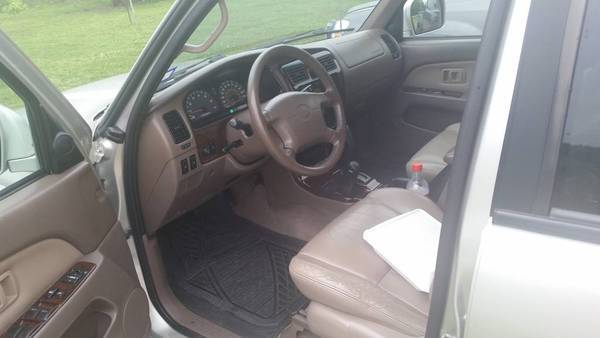
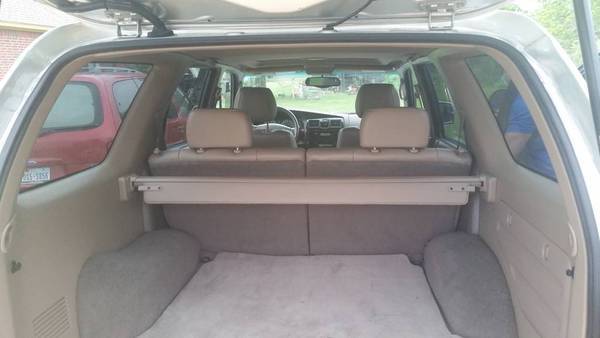
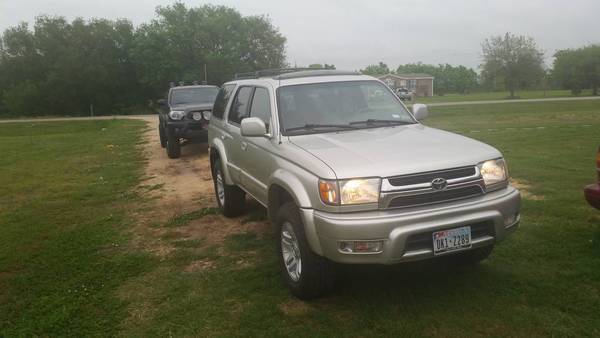
So I just bought another project truck.

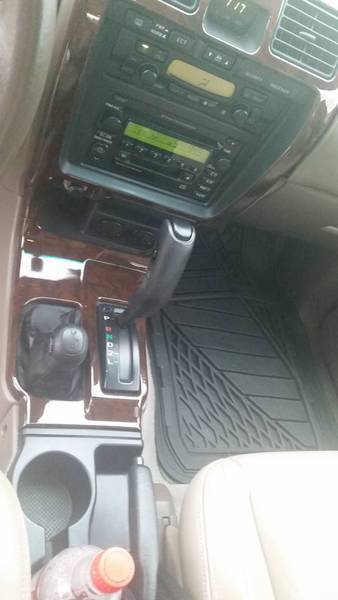
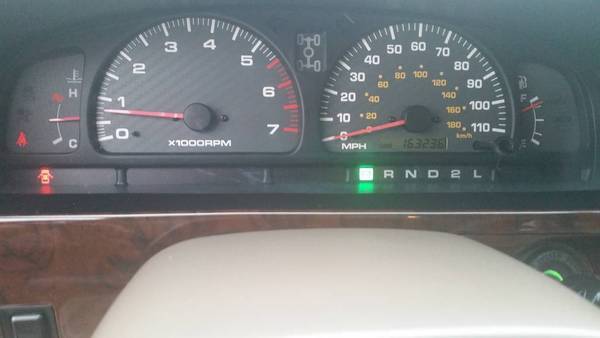
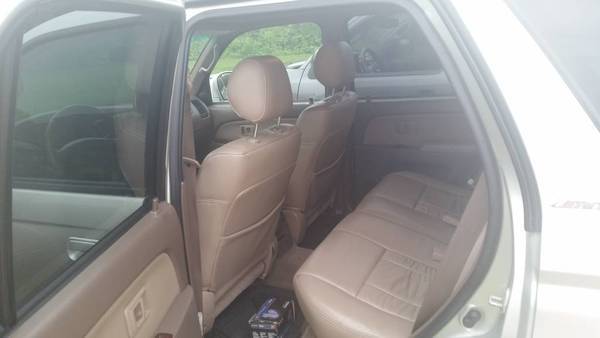
2001 4runner limited.

I am looking to building my first serious offroading rig.

I know there are a few of 4runner forums, but you guys here have treated me well.

Any of us have 4runner builds, preferably 3rd generation?

Also, which of all the 4runner forums are most active?

If so, I am looking for ideas
rolleyes.gif
biggrin.gif


Order of mods:

1. Replaced factory stereo with single din radio and @paranoid56switch panel: Here

2. Removed annoying door chime: Click this

3. Replaced spark plugs: June 6th, 2015

4. Replaced auto antenna with whip antenna: Guess what to click

5. Always on power outlets: Not found by clicking here

6. Installed [MENTION=82707]skygear[/MENTION] fuse box on @Yotamac panel: Click me!

7. Replaced fuel filter, PCV valve, and air filter: Write up

8. Combined both radio antennas into one for better reception: Love my AM radio

9. Installed deep cycle Excide battery and [MENTION=131163]Bamatoy[/MENTION]1997 stage 1 wiring upgrade: Power!

10. Had sliders fitted and installed transmission cooler: Cooler write up

11. Scooped hood: got skewp?

12. @BeeRadd antidark hood lights: bright!

13. Replaced the lower ball joints: September 5th, 2015

14. Installed hood struts, switches, and primered my savage front bumper, final coat of paint on my sliders: Clicker

15. Installed a high output alternator to accompany my deep cycle battery: love the red

16. Installed ditch lights: every build needs these

17. Installed ARB compressor for rear locker: Slick install

18. Replaced radiator and condensor radiator: fun..

19. Installed savage front bumper: Bump this

20. Purchased Whynter fridge: Whynter FTW

21. Installed Icon lift: Finally

22. Installed scangauge II: Originally here but now here

23. Installed Baja Designs lights: Love these lights

24. Relocated rear differential breather: Slick write up

25. Water leaking into my cabin onto passenger floorboard: ughh

26. Disabled ABS, TRAC, VSC: Best mod yet

27. End Cap mod: pics

28. Slider Install: click for more pics

29. Bajarack install: this thing is huge

30. Powdercoat bumper: moar pics!

31. Install bumper and winch: even more pics

32. Install CB radio and run coaxial cable: another slick writeup

33. Fit testing the new RTT!: click bait

34. Installing new overhead console by [MENTION=124706]3378jakesr5[/MENTION] : click to love

35. Differential and transfercase oil changes: write up

36. Installing winch box: click this more pics here

37. Another light! clickity

38. Installed rear swingout here

39. Cleaned throttle body: click me

40. Replacing illumination bulbs light it up!

41. Valve cover gasket job - stahp the leak

42. OBA - Air it up

43. New King Coils - Blueee

44. Molle Panels - Yes!

45. Additional Savage Swingout - Water Cans
 
Last edited:
Register to hide this ad
Maintenance log:

Spark plugs and spark plug wires:

Fuel filter:

Timing belt and water pump:

Rear/front differential and transfercase fluid:

Front wheel bearings:

Radiator, radiator hoses and thermostat:

AC condenser:

Transmission oil drain/refill and filter replace:


I'm going to create a list tools that I'm using to do maintenance/repairs on the 4Runner. This list will help me compose a list of tools to keep in my 4runner for offroading.

Lower ball joints: pickle fork, tie rod end puller, 24 mm socket for lower ball joint nut (105 ft-lbs), 14 mm long socket for lower ball joint mounting bolts (59ft-lbs), 19 mm socket for tie rod end (53 ft-lbs), torque wrench, and breaker bar.

All Pro UCAs: Spindle to uniball bolt 1-1/8" socket @ 90ft-lbs

Icon coilovers, three bolts on top of coilovers: 30ft-lbs

Sonoran steel adjustable panhard bar: 62ft-lbs
 
As I was doing my daily scroll of tacomaworld I stumbled upon @paranoid56 6 switch plate that goes under the radio:

https://www.tacomaworld.com/threads/6-switch-plate-under-radio-location.315089/

I figured this would be a great location to install some clean switches on the 4runner. I know I have a lot of goodies planned out for my build, so why not?

In order for this to work I had to get rid of the factory double din radio and purchase a single din aftermarket radio. I had never installed an aftermarket radio, but what the heck, I wanted that switch panel!

This past saturday I stopped by fry's and picked me up this Pioneer radio with bluetooth.


Ignore the LED bar, that's for a future mod ;)


Aha! The switch panel came in. It's a nice sturdy aluminum plate, very well made.


After plasti-derp:


Next step was to solder all the wiring in the radio harness and OEM adapter harness. This OEM adapter harness allows my radio to be plug and play to the existing OEM wiring the in 4runner. The adapter harness comes with the radio and is provided to me depending on the vehicle application.

I solder all the wiring, making sure all colors match and use shrink wrap for a nice clean finish.


Any unused wires were plugged. The blue wire with the flag reads "for remote", I guess this is some sort of antenna for the radio remote.

The fry's representative told me NOT to connect the orange wires. These are for the dimmer. If I try to dim the radio using the factory dimmer, the radio will flicker. So I just sealed these off with shrink wrap and tape.

The other blue wire is for an automatic antenna, which I do not have.


Next comes the fun stuff!

I grabbed some kitcken knives and wrapped them in tape to not scratch the 4runner's interior.


Pried on the center trim piece around the shifter:


Remove and swivel away:


I did not remove the 4x4 shifter leather wrap. I didn't want to mess with it.

Next I carefully removed the radio trim. This is very brittle!


I was careful with the radio trim since there is a lot plugged into it.

1. three power points
2. hazard lights
3. defroster switch
4. clock
5. ECT button


Now I can pull the radio out.


Notice there is TWO antenna cables. The bigger one is for the front antenna, the smaller one is for the rear antenna.


I then remove the brackets that hold the radio housing in place. I will need to install these to my Pioneer.


One thing I noticed was that my radio harness had TWO plugs.


While the plug that was on the factory radio was one small plug. CRAP!


No sweat! See that box? That's an amp. I unplugged the wires to the amp, and abandoned the amp in place.


I pulled the casing off the Pioneer and mounted my brackets.


Now, I mounted @paranoid56 switch panel:


The holes were a little misaligned, so I grabbed a drill and fixed it.


I connected the amp wiring to my radio harness, plugged the front antenna cable (abandoned the rear antenna cable plug) and dropped the headunit back into its location:


I carefully put all the trim back in place. :D


Finally, added the carling switch blanks:

 
So today I decided I needed to get rid of that annoying door chime!

This is my write up, applies to 3rd generation 4runners.

First, remember to disconnect the negative side of the battery. We will be dealing with the instrument cluster here.

Second, remove the bottom kick panel under the steering wheel.


Carefully unplug all the switches that are attached to that kick panel. In my case it was the following three plugs:


Next, carefully lay the kick panel on the driver side floor. I didn't remove the hood lever nor the gas door lever.


Then I removed the trim around the key tumbler. Gave it a nice tug.


This starts to reveal the screws that hold the trim around the instrument panel, two at the bottom, on the right side of the steering wheel.


Two on top above the instrument panel:


And one on the left side of the steering wheel, sorry for the bad picture, but its hidden in there.


The trim is removed, along with any switches:


Then the instrument panel is revealed. This is being held with four screws.


Now the instrument panel can be pulled away:


Unplug very carefully!


Take it to a nice comfortable location to lay it down.


Remove the white backing and voila! Here is the bell chime!


Carefully rip that bastard off. I twisted it.. slowly and carefully.


This takes care of it!

I installed everything back in, and NO MORE DOOR CHIME!
 
The 4runner limited has a power antenna. This is not a good idea for offroading because power antennas are very flimsy. So what I decided to do is install a regular whip antenna from the 4runner base model of the same year.

I called camelback Toyota and they shipped me regular antenna assembly without the whip. I already have a Toyota whip antenna here at the house.


Part number:


Antenna assembly:


Next thing to do is find a way to access the existing power antenna assembly. I do this by removing bolts and clips that hold down the plastic splash guard in the fender well, the amount of bolts and clips removed depends on how comfortable you want to get to fold back the splash guard and fit your hands and tools:


Again, ^^^ the amount of clips and screws removed will be determined by the user. I removed about four bolts and four clips.

Clips:


Pulling the splash guard back:


Once I take a peek back there, well see the power antenna assembly being held by ONE bolt, remove it:


Next, the silver crown nut must be removed:


This can be done one of two ways.

Break it out or turn on the 4runner so the power antenna can rise up. Then have a helper hold the antenna firmly, turn off the 4runner and prevent the antenna from coiling back in. This removes the antenna from the power antenna assembly. Since my power antenna had started failing, I went with the option of breaking it out.

Once the previous step has been taken care of, look in the engine bay. Passenger side to the corner:


That there is the retainer clip to the harness of the power antenna. Push it out or break it out.

This allows complete removal of the assembly.


We are not done yet. Now we need to trace back the antenna cable to the back of the radio:

Pop open the glove compartment and remove it:


This is done by squeezing the ends.


Remove three bolts that are holding the upper trim of the glove compartment (only two are shown):


If we take a peek towards the back right, well see the antenna cable. it has gray tape on it:


Now to remove the radio, the center console and radio trim need to removed. The center console needs to be pulled out firmly:


shifter trim:


Radio trim:

 
Carefully unplug power outlet, hazard light switch, clock, etc.


This allows radio to be removed:


Remove the four radio bracket bolts:


Two antenna cables are behind the radio. The smaller one is for the rear antenna, which I ignored. The thicker one is the one we are replacing:


This is very important! Tie a string at the end of the antenna cable, so when you pull it out at the fender outside, you can tie the string to the new antenna and easily guide and pull it behind the dash towards the back of the radio! Picture of new antenna plug:


Install the new antenna assembly, attach the bolt and run the antenna cable by carefully pulling the string to guide it to the back of the radio and plug in!


Put everything together and screw in the new whip antenna and boom! no more worrying about breaking the power antenna mast!
 
So I don't like the fact I cant charge my phone while the truck is off. So I decided on a mod that would enable all power outlets to be always on.

First I found the power outlet relay under the hood in the fuse box.


I pull it out and grab a small flat head screwdriver.


Next I pop off the relay cover with the flat head screwdriver.


See where the flathead screwdriver is poking at? There is a little spring/magnet there. Normally, it will be open. If I stick the screwdriver in there I can "swing" the spring/magnet to close onto a contact.
You need to lift that little spring/magnet thing and slide something non conductive there so that the circuit is always closed.


I wedged a piece of non conductive material in there to keep the relay on at all times. Don't worry, it wont catch on fire. Ive had this mod in my Tacoma and camry for a few years already.

 
I have planned a bunch of goodies for my 4runner. So I decided to jump on board and get a separate fuse box to wire all my accessories to. Therefore I bought skygear relay/fusebox on tacomaworld and a @Yotamac panel to house the fuse box.


Everyone and their momma tends to slap the auxiliary fuse boxes on the driver's side of the engine compartment for the tacomas. Well...no can do for the 2001 4runner. Too much junk.


Driver's side looks clear!


Upon laying out the @Yotamac panel, I realized some stuff HAD to move. This secondary fuse box and that wire harness/plug device thingamachiger right next to it (I don't know what it is).


I unbolted both of them:


I move the fuse box towards the front, luckily I had enough wiring to allow me to move it to an existing threaded hole that was the exact measurement as the previous location (you can see the outline of its original location on the second hole to the right).


Looks like I will have to drill a hole for the fuse box leg.


Picked up some bolts, washers and nuts:


Marked and drilled a hole to set the fuse box leg:


You can see the nut and bottom of bolt from the fender side:


I did the same for the thingamachiger, just making sure it is away from the proposed location of my auxiliary fuse box:


This windshield wiper hose needs to move. I removed it from here and plan to run it under the new auxiliary fuse box:


That brass looking bracket needs to move also. See the grommet at the corner? That's where the wiring is going to penetrate to get into the cab.


I relocated the bracket and its wiring to this location, not too far from its original spot. Yes, I know, the bracket is on its side :)


After I relocated everything I used the available threaded holes to do a hole layout on the @Yotamac plate:


Drill and set the [MENTION=82707]skygear[/MENTION] box:


Tada!


Wired my ground:


At this time, I did not wire to the battery since I do not have any switches or accessories.

So now to run the wiring into the cabin.

I taped a straightened out hanger to the end of the wiring to poke through the grommet and help me guide the wiring into the cabin


Removed the plastic bottom door trim and side kick panel on the passenger side:


Removed glove compartment (picture from one of my other mods) by pressing in on the sides:


I then remove the top trim of the glove compartment by removing three bolts, one on each side, and one in the center (not shown):


I then poke the wire through the engine compartment grommet and locate it near the bottom kick panel area:


I pull the wiring through (don't ask about the glove compartment):


The tricky part now is to fish the wiring back neatly towards the radio/switch panel area. I did this by slowly feeding the wiring back up towards the airbag housing.

On the right of the glove compartment, there is this hole:


I stuffed my hand to receive the end of the wire and pull it towards the airbag housing.


Feeding the wire behind the airbag housing/module:


I removed the radio (see my other mods on instructions to remove radio) and fed the wiring thru:


Finally!


Time to solder the switchbacks! Good thing [MENTION=82707]skygear[/MENTION] color coded all the wires for easy fool proof connections.


A few soldered connections later...


And now I feed the wiring back to the radio location:


Reinstall radio, kick panels, trim, yada yada, etc

For those that don't know what I am doing, I provided the wiring for future switched accessories.

The newly installed switchbacks are housed behind the switch blanks, ready to install new switches :D

 
so my battery died over the weekend.

I think it is time to invest in a deep cycle battery.

I don't think I can afford to buy two at the moment. Well I can, I just want to focus on other mods right now.

Ill buy the second for a dual battery setup when I get my winch installed.

Here is something that will help me and maybe others pick a deep cycle batterie:

 
Oh, I purchased a set of scepters from a good friend. I might go back to him and purchase another water can sometime. These things are more awesome than I thought.

 
So today I was able to do some maintenance work on the 4runner. I decided to replace the air filter, fuel filter and PCV valve.

air filter and PCV valve replacement are straight forward.

Went ahead and did a write up for replacing the fuel filter on a 3rd gen 4runner.

Relieve fuel pressure by opening fuel door and gas cap and leave open for about 20 minutes.

The fuel filter is located on the driver's side of the 4runner, in the area of the driver's door.

Taking a peek below, there will be a dust shield. Remove the dust shield.


Once the dust shield has been removed, this will reveal the fuel filter:


The fuel filter would have to be removed by loosening two flare nuts: one on each end.


Once these are loosened, remove two nuts holding the fuel filter and carefully pull out the fuel lines, one side at a time. At this moment you should be able to pull the fuel filter and fuel filter bracket assembly off the bottom of the 4runner.


Comparing both new and used filters:


Install is reverse of removal.

I would suggest, install the flare nuts FIRST. The flared fuel lines need to sit in the filter perfectly straight to make sure it doesn't leak. Once the flare nuts are tightened, turn on the 4runner and check for leaks.

If no leaks are present, install the nuts that hold the fuel filter bracket to the bottom of the 4runner and dust shield.
 
My battery on the 4runner went out last week. Took advantage of the opportunity and bought a deep cycle battery.
Picked up an Exide from a mom and pop battery store for $175 out the door.


Also finished a 1st stage wiring upgrade from a tacomaworld forum member and installed it over the weekend. The wiring is a little different from the 1st gen taco, but overall it is pretty straight forward.

In the next couple of weeks I should get a high output alternator.
 

Members online

Forum statistics

Threads
278,316
Messages
3,554,113
Members
248,016
Latest member
Advally Service

Trending content

Back
Top