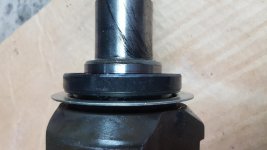
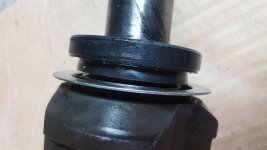
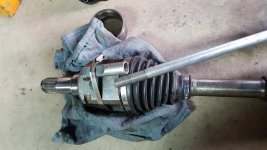
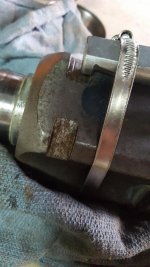
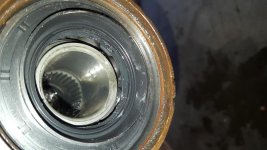
Really annoyed at the brand new Timken axle shaft seals leaking..

alia176

Senior Member
I replaced both front diff/axle shaft seals with Timkens but they're both leaking. WTF is up with that? Really annoyed right now....:redbrick: It's not like there are too many ways they go inside their locations. They came with grease inside the area where the springs reside so I know the springs didn't pop out, not that I was hammering on them to push them in.

The axles are aftermarket, at least the passenger side anyway. My guess is that they're not sealing themselves against axle shafts or maybe I pushed them in too far and no longer making a tight contact with the smooth sealing surface. I assume i'm not the only one who has/had this issue?
 
Register to hide this ad
FWIW, I used OEM Toyota seals when I did mine and haven't had any issues so far. Here's some tips that I do when replacing axle seals.

I would examine the axle shafts real close to make sure there's not a groove worn into them. Also, I apply a little bit of grease to the sealing surfaces of the shaft before I install it. When you remove the seals, be careful not to gouge the axle tube. I also pay close attention to where the seals sit before I remove them. I will often take a picture just for reference. If you tapped the seals in too far, they may be past the sealing surface.
 
FWIW, I used OEM Toyota seals when I did mine and haven't had any issues so far. Here's some tips that I do when replacing axle seals.

I would examine the axle shafts real close to make sure there's not a groove worn into them. Also, I apply a little bit of grease to the sealing surfaces of the shaft before I install it. When you remove the seals, be careful not to gouge the axle tube. I also pay close attention to where the seals sit before I remove them. I will often take a picture just for reference. If you tapped the seals in too far, they may be past the sealing surface.

Did you have Toyota shafts do you know? I agree, i must've pushed them in too far. They were greased and lubed but ill inspect the shafts to see if a new shiny spot has appeared.

Sent from my SM-G925V using Tapatalk
 
Last edited:
Did you have Toyota shafts do you know? I agree, i must've pushed them in too far. They were greased and lubed but ill inspect the shafts to see if a new shiny spot has appeared.

Sent from my SM-G925V using Tapatalk

Yes, they are Toyota shafts. There was another member on here a while back that was having the same issue and found the aftermarket shafts were just a little smaller which didn't seal and had a vibration issue. I would also check how much play there is where the shaft goes in. If could be "walking " which will cause a leak and destroy the seals. IIRC, there's an updated needle bearing or ECGS makes a bushing upgrade as well to help with this.
 
Yes, they are Toyota shafts. There was another member on here a while back that was having the same issue and found the aftermarket shafts were just a little smaller which didn't seal and had a vibration issue. I would also check how much play there is where the shaft goes in. If could be "walking " which will cause a leak and destroy the seals. IIRC, there's an updated needle bearing or ECGS makes a bushing upgrade as well to help with this.

Good info, thanks for that. Thankfully I didn't have any vibes before this project so hopefully I can rule that out but I did have the driver side axle shaft leak. Was hoping that new Timken seals would stop the leak on the driver side. Seems I now introduced one new leak on the pass side as well. D'oh.
 
Seals

I used OEM seals and had trouble with the passenger side. I think I must have got lucky on the driver side. I second the comments above with respect to taking note of the seal position before removing the old one. I also had good luck when I used a liberal application of grease on the shaft and seal. I didn't have anything big enough that was round to pound the seal in so I ended up using a 16" 1/4" drive extension with light taps from a small mallet. If you look at the passenger side there is a small lip that you can see. I ended up putting the outer part of the seal about flush with that lip. If you don't have your sway bar on you can actually get the axle in and out without taking the brake caliper off. You just loosen the axle nut and the two ball joint bolts. That will give you plenty of access as long as you don't have a sway bar.
 
Finally got around to taking apart the front axle and inspecting things. My conclusion is at the end.

Some random observations:

- making a note of the original seal location may not matter as much since the axle is getting replaced.

- The old seal still had the spring inside the seal, thought it might've popped out during install. I put grease in this area so that the spring doesn't popout during the light tapping with a hammer.

- I wonder if I should place the seal all the way in, against the flange that's inside the diff? Would this be beneficial?
Seal location smaller.jpg

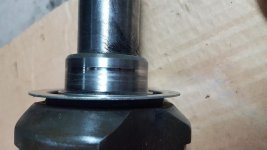
-the shiny spot on the axle tells me that moving the seal position axially really doesn't matter with respect to a good, tight seal since the axle mating surface is smooth. Moving it 2 mm one way or the other may be moot. This is a WAG based on my observation.

shiny axle seal surface.jpg

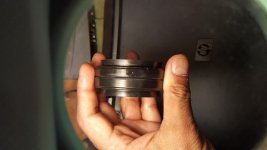
- Timken seal and Toyota OEM seal are both made by NGK and have the same part #, except the last digit. Timken: BH5320F, Toyota: BH52301. They both "feel" the same on the axle, same amount of tightness.

Both seals side by side.jpg

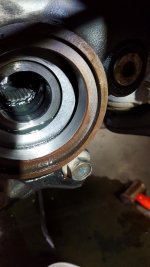
Looks like the Timken seal was placed about 2mm in.

Seal in place dripping gear oil.jpg

Here are two shots of the seal in two diff locations on the axle shaft, just for S&G.

Seal close to the CV flange.jpg
Seal further from the CV flange.jpg

CONCLUSION: I think I didn't drive the seals in squarely.
 

Attachments

  • Both seals side by side.jpg
    Both seals side by side.jpg
    127.3 KB · Views: 1,034
  • Seal close to the CV flange.jpg
    Seal close to the CV flange.jpg
    133.2 KB · Views: 914
  • Seal further from the CV flange.jpg
    Seal further from the CV flange.jpg
    136.1 KB · Views: 943
  • shiny axle seal surface.jpg
    shiny axle seal surface.jpg
    90.3 KB · Views: 994
  • Seal location smaller.jpg
    Seal location smaller.jpg
    119.2 KB · Views: 1,130
  • Seal in place dripping gear oil.jpg
    Seal in place dripping gear oil.jpg
    126.3 KB · Views: 976
Last edited:
The seals usually sit evenly flushed with the diffs outer edge. I usually get it started, then use a flat round punch and use it all around the edges to make it evenly flushed.

I have had buddies with FJs that replaced these seals also with OEM and CVs and leak also for not seating them at correct depth.
 
The seals usually sit evenly flushed with the diffs outer edge. I usually get it started, then use a flat round punch and use it all around the edges to make it evenly flushed.

I have had buddies with FJs that replaced these seals also with OEM and CVs and leak also for not seating them at correct depth.

That's a good feedback, I'll make sure it's evenly flushed with the outer edge of the diff housing opening. Also will make damn sure that the seals go on squarely.
 
Last edited:
Update

The driver side axle new OEM seal is sitting flushed with the diff seal housing, per FSM.

Unfortunately, the FSM does NOT show how to seat the seal for the passenger side axle tube. However, I did notice that the passenger side seal *should* sit at a different location than the driver side, certainly not flushed.

Once the old seal is removed, you can see where the tube/housing is very smooth/shiny vs the outer most edge (about 1/4") which is weathered by the elements. I think my previous seal was sitting on this weathered part and not creating a seal with the shaft. I wish I had taken a picture of this area when I did this work at 6am this morning but I'll take one this evening to illustrate my point better.
 
The driver side axle new OEM seal is sitting flushed with the diff seal housing, per FSM.

Unfortunately, the FSM does NOT show how to seat the seal for the passenger side axle tube. However, I did notice that the passenger side seal *should* sit at a different location than the driver side, certainly not flushed.

Once the old seal is removed, you can see where the tube/housing is very smooth/shiny vs the outer most edge (about 1/4") which is weathered by the elements. I think my previous seal was sitting on this weathered part and not creating a seal with the shaft. I wish I had taken a picture of this area when I did this work at 6am this morning but I'll take one this evening to illustrate my point better.


Recently did these seals and I can confirm the passenger side seal is indeed not flush with the housing. I also installed the driver side ever so slightly past flush.
 
All done and hopefully gear oil will stay in the diff this time! I know that folks like to use a pry bar to remove the shaft but this did not work for me. I just kept bending the pry bars, even tried to use two at the same time!

My method for pulling the axle out of the diff is to use a slide hammer with a hook at the end. This came with the slide hammer kit from Harbor Freight.


Slidehammer.jpg Slidehammer hook.jpg

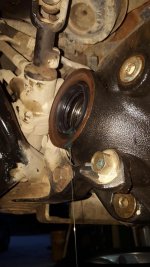
As stated previously, the passenger diff tube seal sits approx 1/4" inboard. If you look closely, there is a 3/16" or so of tube that is dirty. Then the shiny part of the tube starts and this is where the seal should be placed. At least that's the running theory anyway!

Pass seal in place.jpg

Sorry about the stupid large pics!
 

Attachments

  • Pass seal in place.jpg
    Pass seal in place.jpg
    139.1 KB · Views: 779
  • Slidehammer hook.jpg
    Slidehammer hook.jpg
    120.5 KB · Views: 767
  • Slidehammer.jpg
    Slidehammer.jpg
    139 KB · Views: 815
Well CRAP, looks like the AutoZone reman axle is still leaking but the NAPA axle is dry as a bone. It must be the reman process turning down the axle a bit too much so that a new OEM seal (or any seal for that matter) can't seal up the gear oil.
 
Good news!!!

I swapped the axles last night, took me a little less than hour. Returned to NAPA and bought another brand new axle and they gave me the internet discount so the price went from $100 to $85. Not sure what the internet deal was but I'll take it!

I'm getting pretty good with the axle swap process although this has me thinking of what tools to keep with me in case I need to do this in the field. That axle nut would be hard to crack open w/o having a 1/2" large breaker bar.

In any case, I took a short drive to the local coffee shop after dropping off the minion at the school. So far, no leaks but will check again when I get home. I got a three hour one way camping trip tonight so I'm hoping this will be the end of this ordeal.
 
last update

Drove 400+ miles over the weekend, and I can barely see a droplet forming on the passenger side. I'll see if the driveway under the rig has any spots over night but I don't think that'll be the case. New OEM seal + NAPA brand new shaft seemed to do the trick.
 

Members online

Forum statistics

Threads
278,317
Messages
3,554,129
Members
248,016
Latest member
Advally Service

Trending content

Back
Top