Rear 2.5 icon piggy install tips - 4gen

soundstudio315

New member
The install is not going good, I could not get the axle to drop enough to get the lower mount to line up. Also the heim joint tolerance is like zero so I haven't been able to get it line up either.

I think I need to remove the pan hard bard and the rear cross thing, sorry I can't think of the name.

Any tips or advice?
 
Register to hide this ad
Redswan hit the nail on the head with hs tips.

A little sand paper or steel wool can remove any corrosion on the lower mount and some anti seize will help slide it on easy.
 
Yes,

For axle drop. You need to disconnect the sway links, and do the lower link first. then using the bolt to help press it in. Do one side of the heim the shaft then the other side of the heim. then do the top by jacking it up on one side you should have no problems getting enough clearance to muscle the upper mount in there.

PM me if you need anymore help.

Sorry got a little lost in your post. Can clarify a few things.
Pretty much disconnect the sway bar from the axle
When you say use the bolt to press it in, that is to get the heim to slide on the lower shock mount right?
What do you meanside one side then the other?

Also the install kit comes with spacers but it's not mentioned in their installation guide. I assumed you side the spacers on first on the lower shock mounts then slide on the shock body heim joint.
 
Assuming you're trying to install the rears, this is what I did to get my rear shocks/springs in.

What you will need - 2 jack stands, floor jack and OEM bottle jack

Put rear frame on jack stands.
Remove both rear wheels.
Support rear diff housing with floor jack.
Extend bottle jack between axle and axle (rubber) bumpstop until you reach desired distance needed to line up shock eyelet.
Might need a screw driver to help hold/line up mounting hole to eyelet.

Notes :

Watch out not to stretch your e-brake and brake line/brackets.

Use floorjack to fine tune +/- axle angle/height.
 
Last edited:
Sorry got a little lost in your post. Can clarify a few things.
Pretty much disconnect the sway bar from the axle
When you say use the bolt to press it in, that is to get the heim to slide on the lower shock mount right?
What do you meanside one side then the other?

Also the install kit comes with spacers but it's not mentioned in their installation guide. I assumed you side the spacers on first on the lower shock mounts then slide on the shock body heim joint.

The heim shouldn't take too much force if the lower mount is clean and the heim is aligned. 1 spacer should go on each side of the heim, so slide spacer on; heim on; spacer on; then lower mount bolt.
 
The heim shouldn't take too much force if the lower mount is clean and the heim is aligned. 1 spacer should go on each side of the heim, so slide spacer on; heim on; spacer on; then lower mount bolt.

Ok thanks, i swear a few words on the install instructions couldn't cost that much more.

Thanks for the important piece of info.
 
Assuming you're trying to install the rears, this is what I did to get my rear shocks/springs in.

What you will need - 2 jack stands, floor jack and OEM bottle jack

Put rear frame on jack stands.
Remove both rear wheels.
Support rear diff housing with floor jack.
Extend bottle jack between axle and axle (rubber) bumpstop until you reach desired distance needed to line up shock eyelet.
Might need a screw driver to help hold/line up mounting hole to eyelet.

Notes :

Watch out not to stretch your e-brake and brake line/brackets.

Use floorjack to fine tune +/- axle angle/height.

That's usually all it takes to install/remove OEM's or even the 2.0's that I had on and haven't taken off 3 times, these piggy back 2.5's are longer.

So you didn't remove the sway bar in your install? Where they OEM size replacements?
 
I used a bottle jack to push the axle down the extra distance. I pulled the sway bar brackets instead of the sway links.
 
Got them on, thanks guys, test drive tomorrow. I,ll post some pics, but defiantly had to do the sway bar bracket disconnect and the bottle jacket to push the axle further down.

I use to put the top in first, but because the lower heim joint/shock mount is so tight tolerance I put that lower side on first and used the bottle jack to push the axle further down to allow the uppr shock post to clear the frame. It really puts a lot of stress on the brake lines.
 
Thanks, it does great. I really like it.

I'm glad you got it all on there. If I may suggest it. You should consider getting/building some longer sway bar links and get a set of extended brake lines. You can make use of the little extra travel that the piggy backs have to offer.

Yes, thanks. Any recommendation on where to source the extended lines/parts.

EDIT: Looks like Metaltech has some.
 
Last edited:
Quick update, so far so good, the shock body remains dry. I couldn't compress with my all my body weight so we (icon) assumed it was just assembly lube.

The one thing that still I forgot to ask, even on both 2.0 and 2.5 rear shocks the top shock rubber bushing is so big I could never get the nut the to catch a thread.

I ended up using the thinner bushing form the original OEM shocks. How did you get that monster one to fit/work?
 
I ran into the same issue with trying to catch threads on the shock top. After I secured the bottom shock mount, a little pressure with a jack on the axle pushed the shock up and compressed the lower of the top bushings enough for me to thread it up. Hope that makes sense.
 
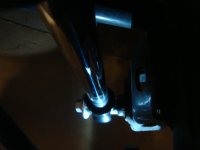
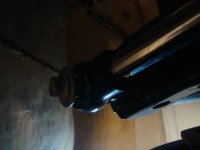
The heim shouldn't take too much force if the lower mount is clean and the heim is aligned. 1 spacer should go on each side of the heim, so slide spacer on; heim on; spacer on; then lower mount bolt.

is it like this? i'm doing my right now.

DSC02138.jpg

DSC02139.jpg
 

Attachments

  • DSC02138.jpg
    DSC02138.jpg
    148.2 KB · Views: 185
  • DSC02139.jpg
    DSC02139.jpg
    146.4 KB · Views: 193

Members online

Forum statistics

Threads
278,316
Messages
3,554,112
Members
248,016
Latest member
Advally Service

Trending content

Back
Top