Greetings.
I am finally able to spend some time in the garage putting the 4Runner's engine back together! Seems like I spend more time cleaning than turning ratchets... anyway. I've been following the FSM pretty much to the letter(yes, I've been doing more work than necessary), and when I took it all apart I removed the crossover pipe and pulled each head separately rather than pull it all as a unit as some here and elsewhere suggest.
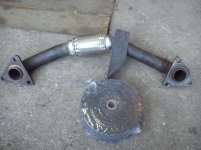
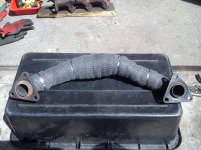
The heads are back on and torqued; I put together the exhaust after working on the intake and fuel rails(I had gone out of order because I was waiting on some studs to replace a couple of rough ones at the exhaust manifold flanges, which had to be special ordered). When I went to slide the crossover back on, it was tough to get back over the studs - it seems as if the pipe is maybe 1mm too short to center over the flanges. It did fit over, but the stud threads were rubbing the inside of the holes in the crossover pipe flanges.
The nuts pretty much cover up the worn spots, so it looks right, but it didn't "feel" right - I don't remember it being difficult to remove when I tore down everything(though it's been over a year).
I am using an engnbldr kit with standard everything, and I compared each new part to what I had removed - it all appeared to match, aside from the headgaskets(old ones were graphite). Neither block nor heads were planed or shaved by the machine shop.
Anybody have suggestions? Is this usual? Should I go back and double-check anything particular? Should I have fit the exhaust together before torquing the head bolts? Any thoughts or insights would be appreciated; thanks.
I am finally able to spend some time in the garage putting the 4Runner's engine back together! Seems like I spend more time cleaning than turning ratchets... anyway. I've been following the FSM pretty much to the letter(yes, I've been doing more work than necessary), and when I took it all apart I removed the crossover pipe and pulled each head separately rather than pull it all as a unit as some here and elsewhere suggest.
The heads are back on and torqued; I put together the exhaust after working on the intake and fuel rails(I had gone out of order because I was waiting on some studs to replace a couple of rough ones at the exhaust manifold flanges, which had to be special ordered). When I went to slide the crossover back on, it was tough to get back over the studs - it seems as if the pipe is maybe 1mm too short to center over the flanges. It did fit over, but the stud threads were rubbing the inside of the holes in the crossover pipe flanges.
The nuts pretty much cover up the worn spots, so it looks right, but it didn't "feel" right - I don't remember it being difficult to remove when I tore down everything(though it's been over a year).
I am using an engnbldr kit with standard everything, and I compared each new part to what I had removed - it all appeared to match, aside from the headgaskets(old ones were graphite). Neither block nor heads were planed or shaved by the machine shop.
Anybody have suggestions? Is this usual? Should I go back and double-check anything particular? Should I have fit the exhaust together before torquing the head bolts? Any thoughts or insights would be appreciated; thanks.