Hey! My name is Aidan, and this is going to be my first thread!
As a recent buyer of somewhat fixer-upper 1997 T4R, I hope to document some of my adventures and projects in making this 4Runner my own!
As you can tell from the title, I'm going to attempt to bring you along with me and help others as I repaint my interior trim. When searching for How-To's myself I found that there really wasn't a simple step by step on doing this yourself, just a few people with pointers and no pictures etc., so I decided I'll tackle this by myself and hopefully help some others that had the same struggles...
When I bought my T4R the previous owner took some cheap, camo duct tape and "wrapped" basically all of the trim in the interior ON TOP OF the wooden trim manufactured by Toyota. I'm not sure why, but heres the best picture I have of it:
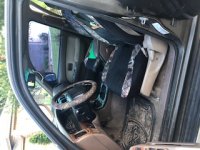
Yeah, I think he liked camo...
So obviously one of the first things I did when I arrived with my new truck was to remove that nasty camo tape, and the fake wood trim underneath to reveal the nice, flat black plastic underneath that looks oh so much better :lol:
In order to do this you're going to need:
1) Flathead Screwdriver
2) Goo Gone (Or other goo removing product)
3) Heat gun (Hair-dryer is what I used, works well also)
4) Patience
Toyota didn't make this stuff to come off easily, so youre going to need a good 1-3 hours to remove it all.
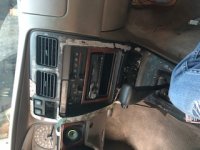
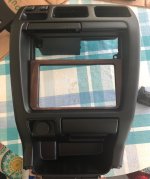
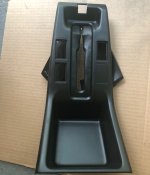
This is what it looked like after I removed all of the duct tape and fake wood trim. All of that gray substance is the glue used to hold the trim onto the plastic... As you can see I didn't do a very good job getting that off with the wood trim, but I also wasn't smart enough to use a heat gun this time around. When you apply the heat you should be able to get that glue off with the trim relatively easily, but if not, that is where the excess amounts of goo-gone and scrubbing come into play. What worked for me was an old washcloth and my fingernail to get under the sticky stuff. :sobbing:
At first I had only done the center console because thats where he had put the camo tape, and I left the rest of the wood trim that was left. Recently I decided it was time to do something about it, so I gathered my supplies and went to work:
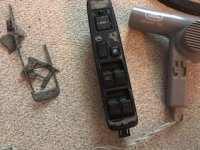
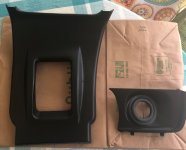
I took the door panel trim pieces off and removed the trim and glue, and here's what it came out to: (Keep in mind this was probably my most flawless piece)
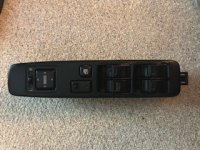
If anyone is curious about what the wood trim looked like before I got it off, here it is:
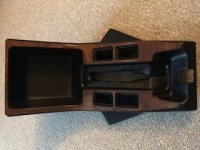
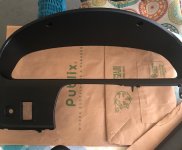
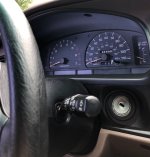
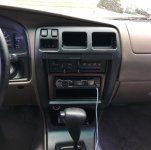
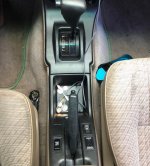
I also finished up removing the wood and goo from the panel surrounding the instrument cluster, ignition keyhole, and center console.
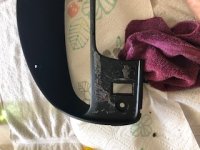
Today I decided to go ahead and do something about the scratched up, faded black plastic that was left under the wood trim. I went to Ace Hardware and picked this two items up for 8 bucks in total ($3.99 and $3.99):
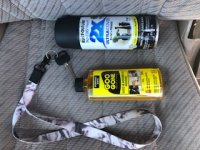
After removing the goo it was time to prep and paint.
I know this is a really controversial area when repainting this plastic stuff, but here's what I did:
Clean Panels with water
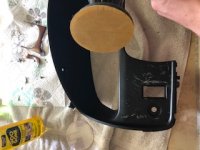
Sand down panels with 500 grit sandpaper (I used a drill)
Sand down areas that are not smooth after that with a tougher grit (I used 220) then go over it with 500.
Clean panels with water again, making sure to get all of the saw dust out.
Clean panels with rubbing alcohol
Paint
I used Rustoleum 2X Paint+Primer. :thumb:
As a recent buyer of somewhat fixer-upper 1997 T4R, I hope to document some of my adventures and projects in making this 4Runner my own!
As you can tell from the title, I'm going to attempt to bring you along with me and help others as I repaint my interior trim. When searching for How-To's myself I found that there really wasn't a simple step by step on doing this yourself, just a few people with pointers and no pictures etc., so I decided I'll tackle this by myself and hopefully help some others that had the same struggles...
When I bought my T4R the previous owner took some cheap, camo duct tape and "wrapped" basically all of the trim in the interior ON TOP OF the wooden trim manufactured by Toyota. I'm not sure why, but heres the best picture I have of it:
Yeah, I think he liked camo...
So obviously one of the first things I did when I arrived with my new truck was to remove that nasty camo tape, and the fake wood trim underneath to reveal the nice, flat black plastic underneath that looks oh so much better :lol:
In order to do this you're going to need:
1) Flathead Screwdriver
2) Goo Gone (Or other goo removing product)
3) Heat gun (Hair-dryer is what I used, works well also)
4) Patience
Toyota didn't make this stuff to come off easily, so youre going to need a good 1-3 hours to remove it all.
This is what it looked like after I removed all of the duct tape and fake wood trim. All of that gray substance is the glue used to hold the trim onto the plastic... As you can see I didn't do a very good job getting that off with the wood trim, but I also wasn't smart enough to use a heat gun this time around. When you apply the heat you should be able to get that glue off with the trim relatively easily, but if not, that is where the excess amounts of goo-gone and scrubbing come into play. What worked for me was an old washcloth and my fingernail to get under the sticky stuff. :sobbing:
At first I had only done the center console because thats where he had put the camo tape, and I left the rest of the wood trim that was left. Recently I decided it was time to do something about it, so I gathered my supplies and went to work:
I took the door panel trim pieces off and removed the trim and glue, and here's what it came out to: (Keep in mind this was probably my most flawless piece)
If anyone is curious about what the wood trim looked like before I got it off, here it is:
I also finished up removing the wood and goo from the panel surrounding the instrument cluster, ignition keyhole, and center console.
Today I decided to go ahead and do something about the scratched up, faded black plastic that was left under the wood trim. I went to Ace Hardware and picked this two items up for 8 bucks in total ($3.99 and $3.99):
After removing the goo it was time to prep and paint.
I know this is a really controversial area when repainting this plastic stuff, but here's what I did:
Clean Panels with water
Sand down panels with 500 grit sandpaper (I used a drill)
Sand down areas that are not smooth after that with a tougher grit (I used 220) then go over it with 500.
Clean panels with water again, making sure to get all of the saw dust out.
Clean panels with rubbing alcohol
Paint
I used Rustoleum 2X Paint+Primer. :thumb:








 hwell:

 :fish2: