MeefZah
New member
Part 1/2
I just completed installing a SDHQ 5th gen hidden winch mount ( [MENTION=165896]SDHQ OFFROAD[/MENTION] )and a Warn VR-8 winch. I took a lot of photos of the install since when I was researching 5th gen hidden winch mounts on here I found less than stellar info on them. Hopefully this can help someone else who is considering a hidden winch.
I opted for these products, with explanations for why:
SDHQ mount: SDHQ Off Road-14-Current Toyota 4Runner SDHQ Built Winch Mount-SDHQ
There are only a few hidden winch mounts for the 5th gen - I think Pelfreybilt (good luck finding a used one since they are out of business now), CBI, SDHQ, HWMS, and BudBuilt are the only ones. Edit: I think Demello makes one too, but I found out about that after I ordered so I didn't list them in the considerations below.
I initially ordered a CBI but later cancelled the order for several reasons - mostly because the wait time would have been about 12 weeks. CBI also doesn't have what I would call great CS - they ignored my emails and I had to call them, and even when I talked to the guy on the phone he failed to follow through with what he said he would do. Also, per their CS they don't have any install directions for their mount because its not a popular product, so they never bothered to write up a manual. CBI also doesn't have extra bracing like the HWMS and SDHQ mounts do... or at least I don't think they do, because the one photo they have of the mount online is like the shittiest photo you ever saw, and the description of their mount isn't even the right product; they are describing their front hitch mount. I told them that, too, on the phone and they were like: "meh". Basically I got the impression that they don't really want to build and sell the winch mount, they just happen to have it on their web page.
BudBuilt I don't believe fits 2014+ trucks, only 2010-13. If you have an LE this may be the only option for you.
HWMS ships bare steel, so there would be an additional cost to powdercoat it, or I would have had to prime and paint it myself. Their bare steel price was more than CBI or SDHQ, both of which are powdercoated. There is also a short lead time, about 4 weeks. They do offer shackle mounts which is an option only they offer, so that's cool.
The SDHQ version is in stock, so turnaround time was only a few days, plus it's already powdercoated, plus they don't charge sales tax (which is $40 for me on a $500 item). Their website rocks and there are enough images of the mount that I felt comfortable ordering it. I believe their mount is also the lightest, shipping weight is 50 lbs but it actually weighs a lot less than that. I went with them for those reasons.
SDHQ had great CS and I was really impressed with the ordering process. Once the box arrived - 3 days later - I opened it and continued to be impressed. The mount looked great, with excellent welds and really nice powdercoating. Everything was well packed and there is an 11 page install guide (also available online at the SDHQ link above) which is quite thorough.

For the winch I selected a Warn VR-8, steel rope: Warn VR8 Winch with Steel Rope and Cast Iron Hawse Fairlead, 8,000 lbs, 12V
I'm not going to be using this a ton; so I didn't want to spend a bunch of money on a level of quality and features I wouldn't be using. I also didn't need a 10k or 12k winch for my truck, which even when loaded for camping is quite light - sub 5k, easy. An 8k winch would do it using the weight x 1.5 formula. I also wanted steel rope, not synthetic, because the bulk of my use will be dragging small trees out of the way - plus steel is a lot cheaper. After looking at most of the lower end winches I decided on the Warn VR-8 as it had everything I needed, great reviews, a good warranty (lifetime mechanical, 7 yr electrical), the Warn name, fits the SDHQ mount, and is damn cheap - I paid $517 for it at the local truck accessories store. It feels super solid and well built (my old Smittybilt X20 felt like a piece of shit by comparison).

I weighed the winch (55 lbs) and the mount (33 pounds). You remove parts from the truck that weigh 24 pounds, so there is a net weight gain of only 64 pounds. You could shave another 19 pounds off of that if you went with synthetic rope. I measured fender clearance before and after and when the install was complete there was no additional sag (note that I have 5100s at '0' and Wheeler T1 coils, so I can't be sure OEM wouldn't have slight sag).
Installation was quite simple.
Pull off the bumper skin and radiator cover, unbolt the metal substructure, replace it with the SDHQ mount, bolt the winch on, run the wiring, cut the fairlead hole, reassemble. Took about 4 hours for everything. The trickiest two parts are removing the bumper and cutting the fairlead hole. The bumper actually isn't hard to get off, it's just unwieldy (plus like 48 pounds of mud fell out of it). This was the only time I needed a second set of hands. Pro tip: use the packing material from the SDHQ box to pad the floor before you set the bumper down, because no matter how you set it, it will promptly fall over.
A good video from CaliRaised LED that shows how to remove the bumper is here (SDHQ's instructions are also very detailed about how to remove it):
YouTube
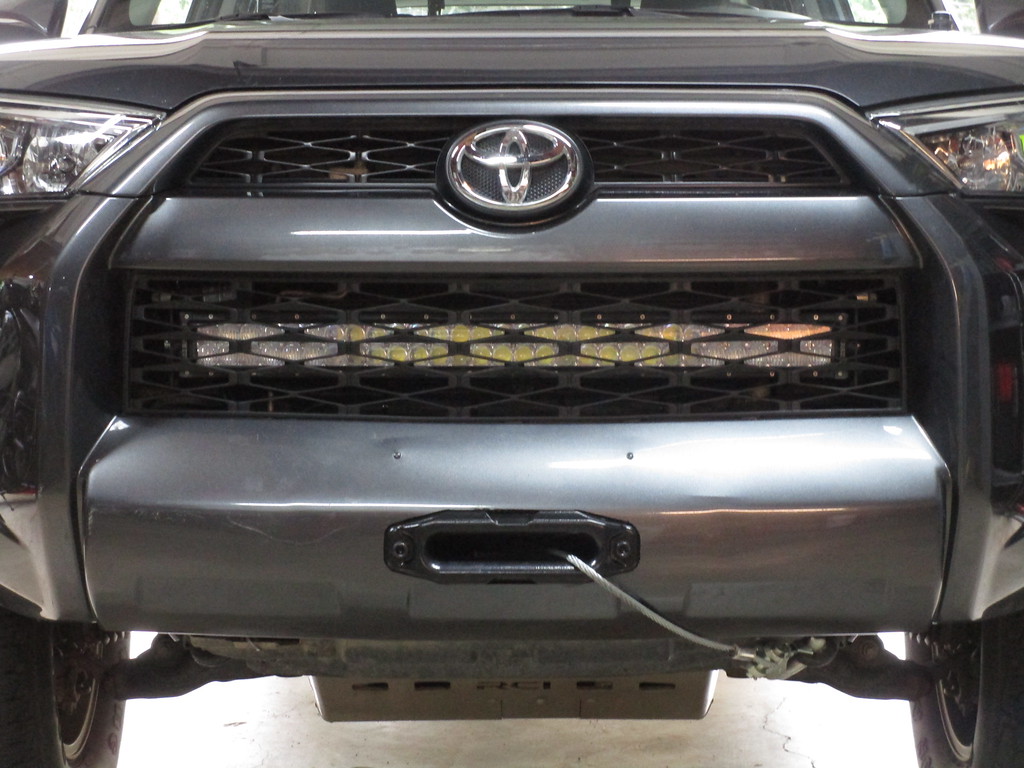
Prior to starting. I also have a CaliRaised LED bar that will need to be removed to have clearance to install the winch; it will still fit but it is in the way for the winch install. I also do not run a front plate. You may also notice the bumper around where the plate should be is a little swollen, for lack of a better word. I hit a sheep in BC last year and the plastic crumpled and then snapped back out. It wasn't worth fixing.
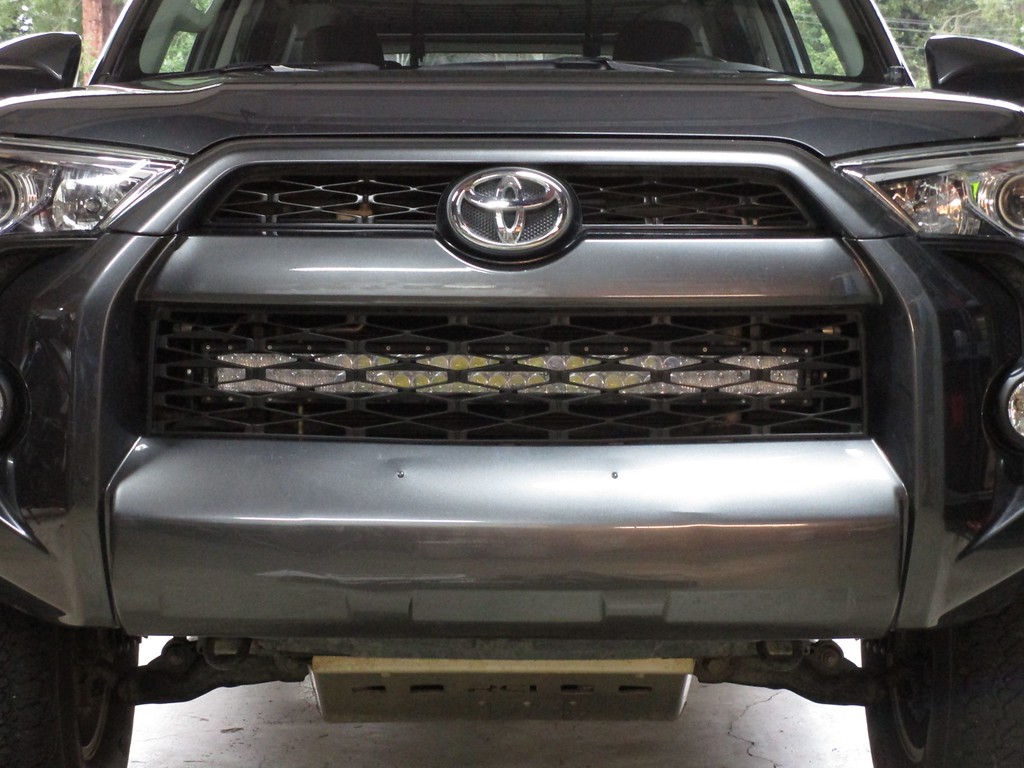
Bumper skin and top cover over radiator removed.

Next the OEM aluminum and steel sub bumper is unbolted with 4 - 14mm bolts (head size) on each side. The plastic skid plate hanging down is the bottom cover between bumper skin and radiator:

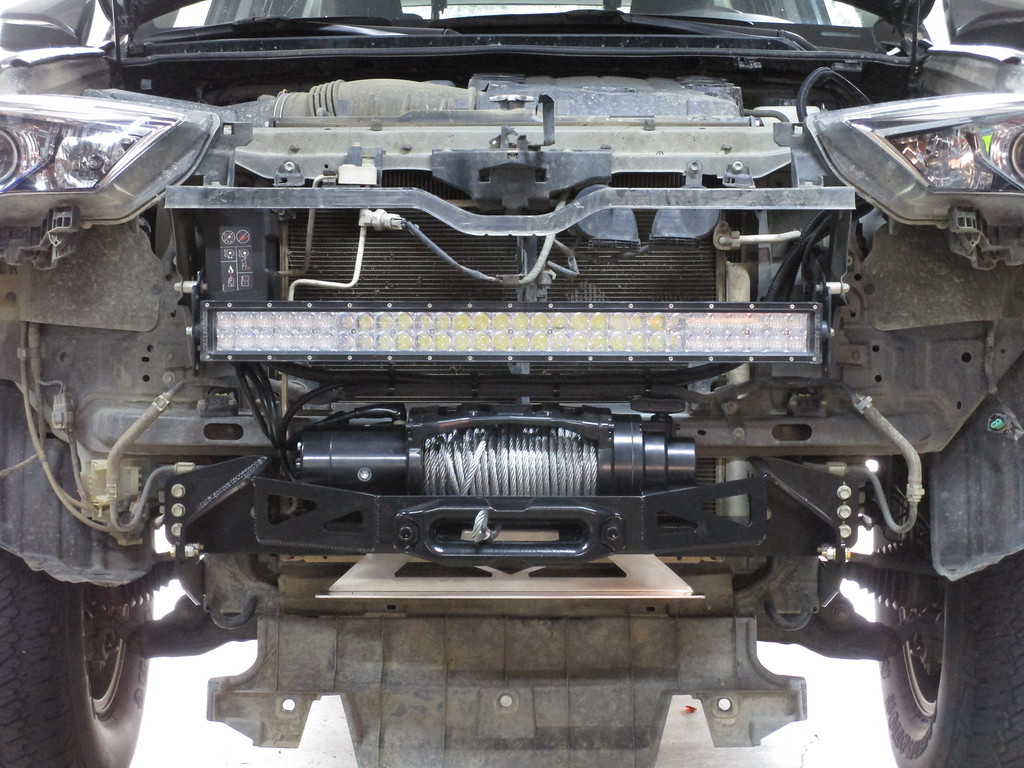
Then the winch tray is installed using the 8 - 14mm bolts you removed from the OEM sub bumper.

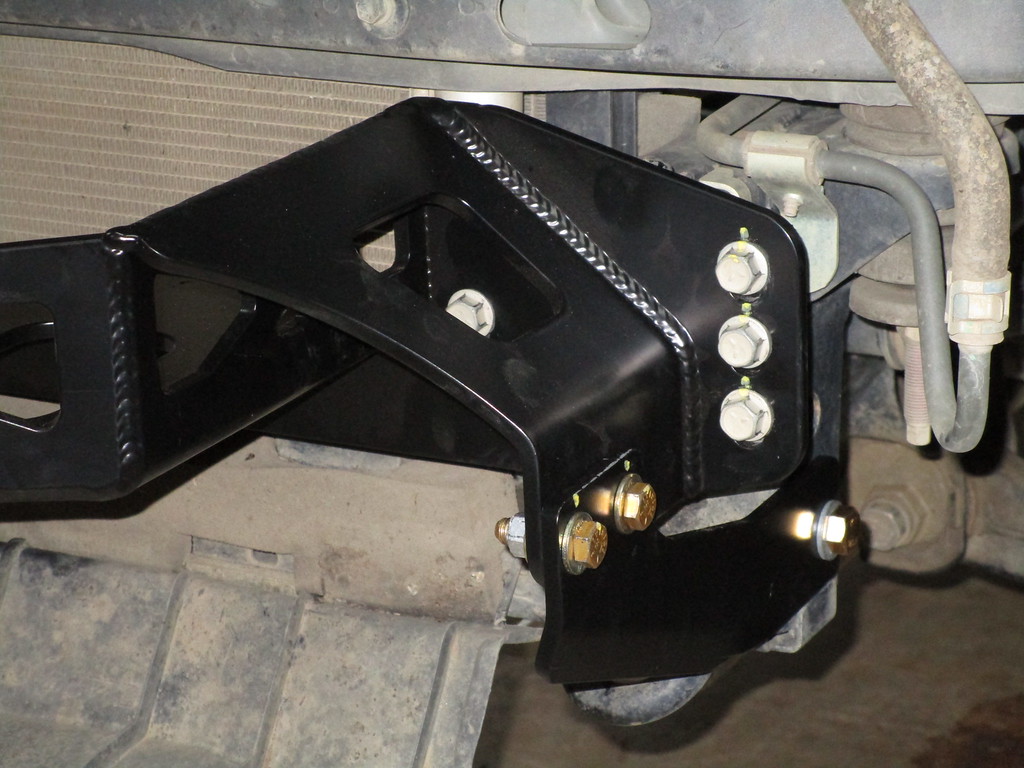
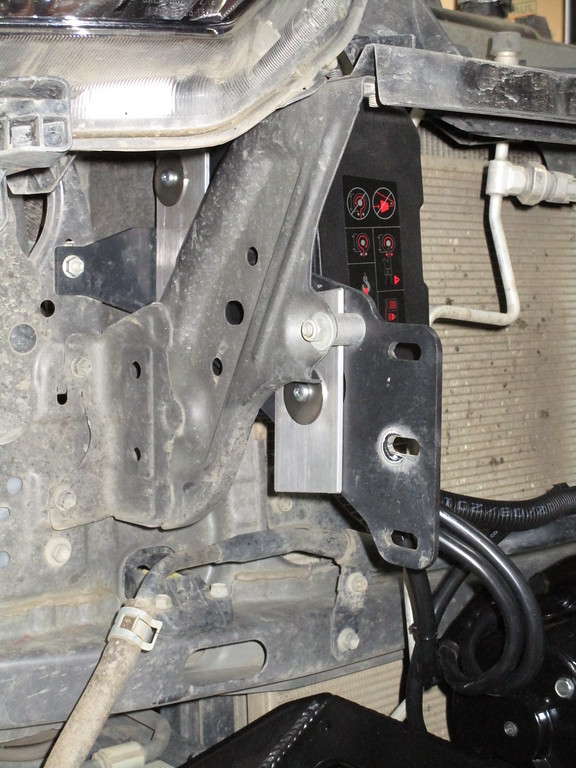
Side bracing; rearmost bolt goes into an unused and already threaded hole behind the OEM tie down loops:
I just completed installing a SDHQ 5th gen hidden winch mount ( [MENTION=165896]SDHQ OFFROAD[/MENTION] )and a Warn VR-8 winch. I took a lot of photos of the install since when I was researching 5th gen hidden winch mounts on here I found less than stellar info on them. Hopefully this can help someone else who is considering a hidden winch.
I opted for these products, with explanations for why:
SDHQ mount: SDHQ Off Road-14-Current Toyota 4Runner SDHQ Built Winch Mount-SDHQ
There are only a few hidden winch mounts for the 5th gen - I think Pelfreybilt (good luck finding a used one since they are out of business now), CBI, SDHQ, HWMS, and BudBuilt are the only ones. Edit: I think Demello makes one too, but I found out about that after I ordered so I didn't list them in the considerations below.
I initially ordered a CBI but later cancelled the order for several reasons - mostly because the wait time would have been about 12 weeks. CBI also doesn't have what I would call great CS - they ignored my emails and I had to call them, and even when I talked to the guy on the phone he failed to follow through with what he said he would do. Also, per their CS they don't have any install directions for their mount because its not a popular product, so they never bothered to write up a manual. CBI also doesn't have extra bracing like the HWMS and SDHQ mounts do... or at least I don't think they do, because the one photo they have of the mount online is like the shittiest photo you ever saw, and the description of their mount isn't even the right product; they are describing their front hitch mount. I told them that, too, on the phone and they were like: "meh". Basically I got the impression that they don't really want to build and sell the winch mount, they just happen to have it on their web page.
BudBuilt I don't believe fits 2014+ trucks, only 2010-13. If you have an LE this may be the only option for you.
HWMS ships bare steel, so there would be an additional cost to powdercoat it, or I would have had to prime and paint it myself. Their bare steel price was more than CBI or SDHQ, both of which are powdercoated. There is also a short lead time, about 4 weeks. They do offer shackle mounts which is an option only they offer, so that's cool.
The SDHQ version is in stock, so turnaround time was only a few days, plus it's already powdercoated, plus they don't charge sales tax (which is $40 for me on a $500 item). Their website rocks and there are enough images of the mount that I felt comfortable ordering it. I believe their mount is also the lightest, shipping weight is 50 lbs but it actually weighs a lot less than that. I went with them for those reasons.
SDHQ had great CS and I was really impressed with the ordering process. Once the box arrived - 3 days later - I opened it and continued to be impressed. The mount looked great, with excellent welds and really nice powdercoating. Everything was well packed and there is an 11 page install guide (also available online at the SDHQ link above) which is quite thorough.
For the winch I selected a Warn VR-8, steel rope: Warn VR8 Winch with Steel Rope and Cast Iron Hawse Fairlead, 8,000 lbs, 12V
I'm not going to be using this a ton; so I didn't want to spend a bunch of money on a level of quality and features I wouldn't be using. I also didn't need a 10k or 12k winch for my truck, which even when loaded for camping is quite light - sub 5k, easy. An 8k winch would do it using the weight x 1.5 formula. I also wanted steel rope, not synthetic, because the bulk of my use will be dragging small trees out of the way - plus steel is a lot cheaper. After looking at most of the lower end winches I decided on the Warn VR-8 as it had everything I needed, great reviews, a good warranty (lifetime mechanical, 7 yr electrical), the Warn name, fits the SDHQ mount, and is damn cheap - I paid $517 for it at the local truck accessories store. It feels super solid and well built (my old Smittybilt X20 felt like a piece of shit by comparison).
I weighed the winch (55 lbs) and the mount (33 pounds). You remove parts from the truck that weigh 24 pounds, so there is a net weight gain of only 64 pounds. You could shave another 19 pounds off of that if you went with synthetic rope. I measured fender clearance before and after and when the install was complete there was no additional sag (note that I have 5100s at '0' and Wheeler T1 coils, so I can't be sure OEM wouldn't have slight sag).
Installation was quite simple.
Pull off the bumper skin and radiator cover, unbolt the metal substructure, replace it with the SDHQ mount, bolt the winch on, run the wiring, cut the fairlead hole, reassemble. Took about 4 hours for everything. The trickiest two parts are removing the bumper and cutting the fairlead hole. The bumper actually isn't hard to get off, it's just unwieldy (plus like 48 pounds of mud fell out of it). This was the only time I needed a second set of hands. Pro tip: use the packing material from the SDHQ box to pad the floor before you set the bumper down, because no matter how you set it, it will promptly fall over.
A good video from CaliRaised LED that shows how to remove the bumper is here (SDHQ's instructions are also very detailed about how to remove it):
YouTube
Prior to starting. I also have a CaliRaised LED bar that will need to be removed to have clearance to install the winch; it will still fit but it is in the way for the winch install. I also do not run a front plate. You may also notice the bumper around where the plate should be is a little swollen, for lack of a better word. I hit a sheep in BC last year and the plastic crumpled and then snapped back out. It wasn't worth fixing.
Bumper skin and top cover over radiator removed.
Next the OEM aluminum and steel sub bumper is unbolted with 4 - 14mm bolts (head size) on each side. The plastic skid plate hanging down is the bottom cover between bumper skin and radiator:
Then the winch tray is installed using the 8 - 14mm bolts you removed from the OEM sub bumper.
Side bracing; rearmost bolt goes into an unused and already threaded hole behind the OEM tie down loops:
Last edited:






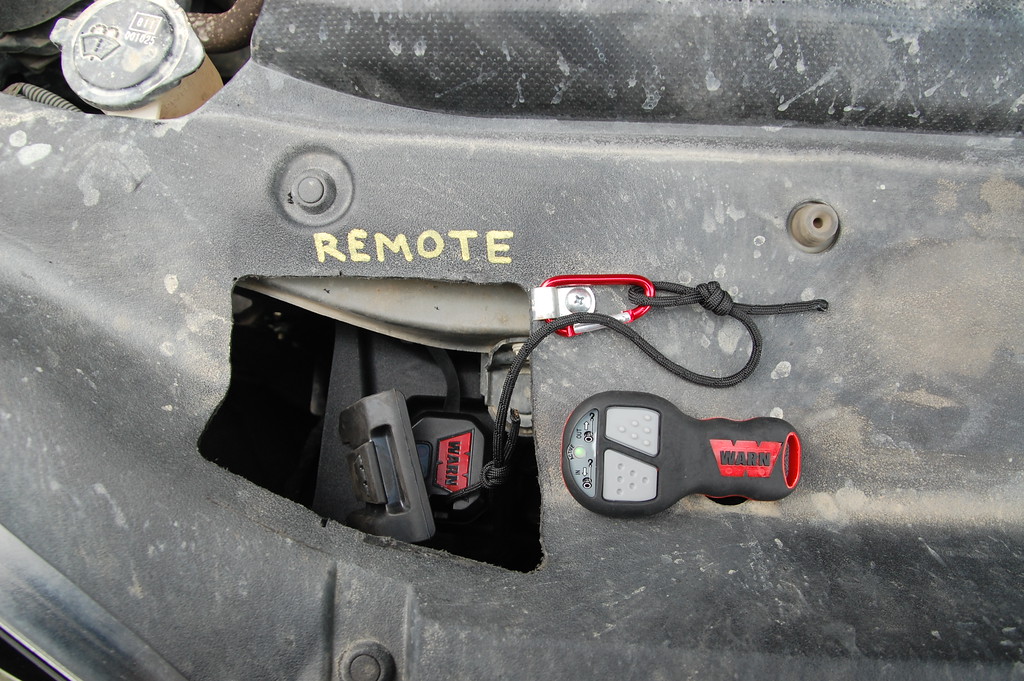


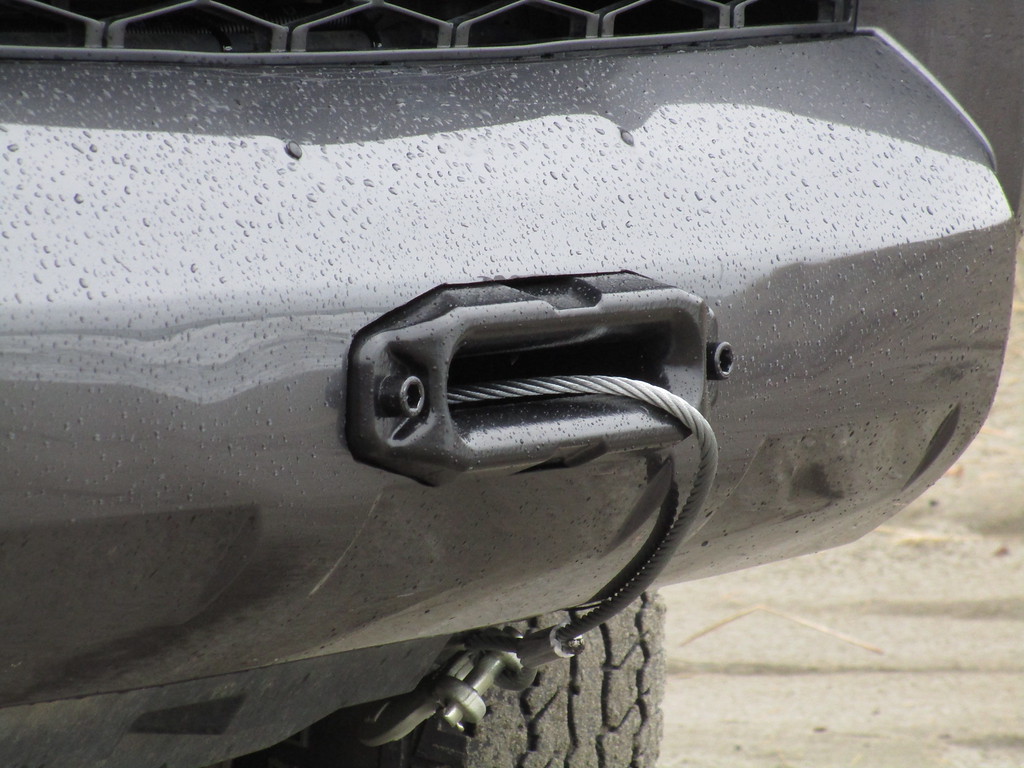


 I think I'd use it more that way than on the trail... unfortunately.