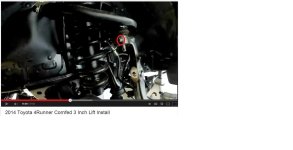
Sonoran Steel lift install

Here are my pre-lift heights, all measured from ground to bottom of fender with the tape vertically aligned on the hub:

FR = 34.625"
FL = 34.125"
RR = 37.125"
RL = 36.750"

6yldtj.jpg
 
Post lift and after alignment:

FR = 37.125"
FL = 37.125"
RR = 39.125"
RL = 38.625"

dy857d.jpg

MAN!! That looks awesome!!!!

Dang, now I am even more excited for mine to come in the mail...like this: :banana:!!!!!!

How do you like the ride? Also, did you do the install? If so any pointers?
 
Post lift and after alignment:

FR = 37.125"
FL = 37.125"
RR = 39.125"
RL = 38.625"

Looks great - I assume the ride is equally as nice.

Which spring perch did you go with on the Bilstein to get 2.5" in the front? The second (0.85") or the third (1.75")?
 
Looks great - I assume the ride is equally as nice.

Which spring perch did you go with on the Bilstein to get 2.5" in the front? The second (0.85") or the third (1.75")?

Yeah, I got those numbers using the recommended third notch. You can see the lift heights were dead on, pretty much exactly as Steve describes on his website.

I'll post up some detailed impressions after I log some miles (around 4,500 +) on an upcoming trip. I can tell you that so far I'm loving it. The very noticeable brake dive is gone, everything is firm around corners, and for light bumps while driving on the street everything is balanced well.
 
MAN!! That looks awesome!!!!

Dang, now I am even more excited for mine to come in the mail...like this: :banana:!!!!!!

How do you like the ride? Also, did you do the install? If so any pointers?

Yeah, I did the install, hmmm... let's see... pointers... All of these are pretty general, hopefully a few help.

Unbolt the sway bar endlinks first thing for both front and rear before trying to remove old parts.

I used a crowbar, torch, and a hammer to get the front stock balljoints to release from the spindle. Don't know what the preferred method is here.

The rear bilstien shocks and supplied upper mount bushings and nut don't allow you to screw the nut on without using a jack to compress the suspension. Pretty easy though once you do this.

The install is for the most part the same as an OME lift and you can find several good write-ups on that if you need more info.

 
Yeah, I did the install, hmmm... let's see... pointers... All of these are pretty general, hopefully a few help.

Unbolt the sway bar endlinks first thing for both front and rear before trying to remove old parts.

I used a crowbar, torch, and a hammer to get the front stock balljoints to release from the spindle. Don't know what the preferred method is here.

The rear bilstien shocks and supplied upper mount bushings and nut don't allow you to screw the nut on without using a jack to compress the suspension. Pretty easy though once you do this.

The install is for the most part the same as an OME lift and you can find several good write-ups on that if you need more info.

Thank you very much!! I watched a bunch of videos and didn't see anything about removing the stock balljoint. Is this only necessary if you have XREAS or KDDS?
 
Thank you very much!! I watched a bunch of videos and didn't see anything about removing the stock balljoint. Is this only necessary if you have XREAS or KDDS?

No, you don't "remove" it, but you dis-connect it. Any lift you should so the units can be installed without scratching them up.

A 3rd Gen 4Runner you don't have to dis-connect the ball joint, but a 1st gen Tundra you do as well. With the tool I listed above it is VERY easy.
 
Ok, so is that to push this (circled in Red) out to the right (in this picture)?

Shock.jpg

P.S. I SINCERELY appreciate you guys helping me with this info.
 

Attachments

  • Shock.jpg
    Shock.jpg
    54.7 KB · Views: 1,180
No you push the pin under the thing circled in red up and the 2 parts come a part.

The part you circled is part of the spindle casting.
 
No, you don't "remove" it, but you dis-connect it. Any lift you should so the units can be installed without scratching them up.

A 3rd Gen 4Runner you don't have to dis-connect the ball joint, but a 1st gen Tundra you do as well. With the tool I listed above it is VERY easy.

Yeah, that looks like it would have been handy ;)

Steve, do you use that tool for anything else?
 
Yeah, that looks like it would have been handy ;)

Steve, do you use that tool for anything else?

Dude,no tool needed to disconnect the Ball joint from the spindle, there is a flat surface on the front facing out, just hit that with a mallet/hammer and it will pop out.

Just make sure to have it supported underneath the lower arm so it doesn't just drop out.
 
Dude,no tool needed to disconnect the Ball joint from the spindle, there is a flat surface on the front facing out, just hit that with a mallet/hammer and it will pop out.

Just make sure to have it supported underneath the lower arm so it doesn't just drop out.

Yeah, I've gone this route before, including this install. That being said, I'd prefer an alternative method to using a 2lb hammer on my front suspension ;)
 
Just as an FYI for those that don't know, auto parts stores usually rent out pitman arm pullers and other specialized tools like this.. sometimes it makes more sense than shelling out for a part you'll rarely ever use.
 

Members online

No members online now.

Forum statistics

Threads
278,316
Messages
3,554,121
Members
248,016
Latest member
Advally Service

Trending content

Back
Top