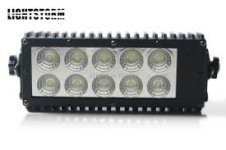
Superbrightled Light Bars?

Register to hide this ad
SuperBriteLEDS

Thanks for posting. I am in the market for some reverse lights and checked out their website when I saw your post. Unbelievably, their office is less than 5 minutes from mine, so I plan to go check out the light bars tomorrow. Let me know if you want some additional info or pictures and I will ask them.
 
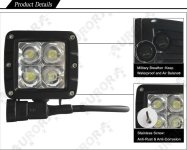
I have bee searching high and low educating myself more than I would liek to know about LEDs. The cheapest you can get into something that is of decent qaulity, good reflects, circuits, optical glass etc. Are a company called greybull, for a tiny bit more you can ge a light from a company Aurora they up the anty with german leds top bin, german waterproof connectors, opticsl glass, mil style breather, meets IP-69K and MIL810-STD. I found a 20" on ebay around $250. The have a great vid on youtube testing them out. They did everything imaginable except blow them up and they where fine. I am going with a set for the grill.

Everything I have seen points to the fact that they are almost a cabon of the Rigid. The parts are exactly the same. From ehat I understand they where specd from the same manufactures. Where the diffence comes in the optical lexan glass between the two. Not saying one is better than the other but from the test on breakdown , circuit boards etc they could not find a difference. I also understand that many companies have someone make the parts for them, they just put them together and spec out there own speciallty things such as the glass.

Look on ebay and amazon. This is where I found them. I am going to take the leap, thought that others moght want to know, it has been an exhausting week looking at these things.

Favorites USA:
Vision X
Rigid Manufacturing
Baja Designs
Bullfrog

Others using top shelf items:
Greybull
Aurora (make sure the are the IP69k, as i noticed even a copy of this. They wouldnt gove me other specs such as ip rating, i noticed it was a copy because it wasnt ip69k and there was no german waterproof connector only pigtails.)
Medium Quality:
OPT - lowest cost here, dont know the circuits using better leds and housing and the such. Only IP68. Caveat Empor on these.many good reviews, only saw one about water intrusion from a truck driver, so could be a fluke. Others including farmers using on equipment liked them for the money and had no issues.

Steve
 
Last edited:
They really are an exhausting item to research. I didn't see much about the Superbright led brand on here, and figured if it comes with a lifetime warranty why not? The Aurora lights look awesome as well. Haven't heard of them. Something else to research!
 
They really are an exhausting item to research. I didn't see much about the Superbright led brand on here, and figured if it comes with a lifetime warranty why not? The Aurora lights look awesome as well. Haven't heard of them. Something else to research!

Lots of LC owners on mud have them. I have a bunch to mount on my Fzj80. I've hooked them up and they look nice with good pattern and bright and clear glass. Build quality is really good for the price.
 
Everything I have seen points to the fact that they are almost a cabon of the Rigid. The parts are exactly the same. From ehat I understand they where specd from the same manufactures. Where the diffence comes in the optical lexan glass between the two. Not saying one is better than the other but from the test on breakdown , circuit boards etc they could not find a difference. I also understand that many companies have someone make the parts for them, they just put them together and spec out there own speciallty things such as the glass.


Steve

If you want to learn even more, here's a link to an unbiased experiment between some companies. None of which are mentioned here, but interesting none the less.
Lighting Shootout Results - TRR 2014 - FORD RAPTOR FORUM - Ford SVT Raptor Forums - Ford Raptor


On another note, the led light bar companies discussed here do NOT have the same optics as Rigid. I'd be curious to see where that information is coming from.
 
If you want to learn even more, here's a link to an unbiased experiment between some companies. None of which are mentioned here, but interesting none the less.
Lighting Shootout Results - TRR 2014 - FORD RAPTOR FORUM - Ford SVT Raptor Forums - Ford Raptor


On another note, the led light bar companies discussed here do NOT have the same optics as Rigid. I'd be curious to see where that information is coming from.

Right, the Aurora is not exactly the same optics that is the difference. Though I believe there has been lawsuits since they use the same parts and made the optics similar. Ie the lens. Using a ge lexan optically clear lens.

Here is the link of the comparison between Aurora and Rigid. Note that one is a spot beam the other is a flood so not exact. Click here


Here was the test video of the light I mentioned. It impressed me.

http://www.youtube.com/watch?v=_azdQB3N_yc
 
Last edited:
Right, the Aurora is not exactly the same optics that is the difference. Though I believe there has been lawsuits since they use the same parts and made the optics similar. Ie the lens. Using a ge lexan optically clear lens.

Here is the link of the comparison between Aurora and Rigid. Note that one is a spot beam the other is a flood so not exact. Click here


Here was the test video of the light I mentioned. It impressed me.

http://www.youtube.com/watch?v=_azdQB3N_yc


Sorry, let me clarify. I'm not talking about the lens of the whole light bar. Its the 'projector' optics.

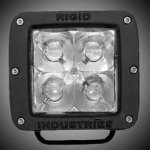
Here you can see the projector lens of a Rigid Dually. The actual LED is hidden behind the projector.
images.jpeg

And I know this isn't the exact same shape, but here you'll see there is no projector in the housing.
Unknown.jpeg

Lesser quality lights use the reflector bowl to determine the light pattern. Does this justify the cost, probably not. But the link I provided earlier shows the effectiveness of how powerful the light is at a distance.
 

Attachments

  • images.jpeg
    images.jpeg
    7.1 KB · Views: 909
  • Unknown.jpeg
    Unknown.jpeg
    6.6 KB · Views: 951
I understand completely. Yet when combine top end leds, top circuit boards, with a well built reflector and a optical lens. Then the differences between the two are negligable. I beleive this is why Rigid got upset. Since they used near the same parts (as far as the side by side of the products and internals including the circuit board) can tell. Other than that they may have copied the reflector? And although I do not think that they have done it perfectly it was close enough to warrant a patent battle.

Justifying the difference between the two is where the problems lie. Now where I able to afford a set I would probably end up with Vision X. I prefer made in america parts and there thermal managment allows them to be driven even hotter than others. Would you be willing to on a budge pay say 3x times the cost for the differnce in maybe 100 theoretically based on design and a little toghter beam at a distance? I cannot, especially when I look at they even attempted to improve upon it getting IP-69k certification and mil-810-std, by adding a military breather and who knows what else. I think that they are great for most users but the very professional or most abusive user. Ie search and rescue, military, professional users... In the end I am just sharing what I have seen. Would love to se a side by side on output beam pattern, lux readings, energy consumption, etc. But I dont have it and neither can afford to do it! It is up to others to see this data and choose for themselves. The only skin I have in this game is a user who needed a light bar and what he found inbetween the USA made top end and the Lower crap that is promising the world from China. Though even this one is Chinese. I saw other reviews looking st things like input voltages etc to judge circuit capability.


Here is a picture of the responding light to the rigid you posted with a very similar reflector design. I is not the exact light nor reflector. Look at there soght under work lights to see the other reflector designs. See here


Steve
 

Attachments

  • image.jpg
    image.jpg
    93.3 KB · Views: 895
Last edited:
[MENTION=117975]Doc_Fry[/MENTION]: the Greybull premium looks really nice, especially at the price point. No lifetime warranty but it appears to use much better components, and is mil spec listed for water intrusion. Might go with them, thanks for the suggestion!
 
[MENTION=117975]Doc_Fry[/MENTION]: the Greybull premium looks really nice, especially at the price point. No lifetime warranty but it appears to use much better components, and is mil spec listed for water intrusion. Might go with them, thanks for the suggestion!


Also if you want to do, a not so difficult distrubution block here are some parts you can get at Waytek. I will do a more thorough write-up when I can do the install on my truck. There are minimums reflected here in amounts needed. It will handle 30 AMPS per circuit. I would recommend 14 Ga for the wiring for power to handle amperage.

46343 Relay/Fuse Panel Qty 1
75730 Relays Qty 5
30069 Terminals 18-16GA Qty 50
31068 Terminals 16-14GA Qty 50
39000 Seals Qty 150 (minus 50 if you dont use quick connects to relay box)
31713 Blue Female Quick Disconnect terminals Qty 50
46351 50 Amp Circuit Breaker Qty 3
46257 20A Fuses Qty 50
46255 10A Fuses Qty 50
46259 30A Fuses Qty 50

Total $96.04 plus wire you can get from local car audio place. You will need crimpers to complete the project. Change the connectors below to 6-way they are the Delphi 280 series if you power the switches from the circuit box. Again you will only use two of these connectors, the minimums suck.

38038 Connector Part Qty 20
38039 Connector Part Qty 20
38068 5-way connector male Qty 5
38069 5-way connector female Qty 10
30036 18-16ga male pin Qty 50
30037 18-16ga female pin Qty 50
38059 step down butt connector Qty 10 (use the his to daisy chain switch power from one lead, and ground from one lead. Do in series by where switches are located to keep install clean

Total of everything: $128.85

Extras to be able to have a quick disconnect for fuse box and for switches inside the car. You will need a 18ga 5 wire cable that is sheathed for the switches from the relay box to the vehicle for the switches.


Switches I am going to use will be Aironboardusa.com. You will daisy chain all switches for positive using one lead from the cable from the relay box to power switches. Daisy chain all grounds and ground to vehicle. This can also be done either all the time or through an ignition circuit. That is up to you. I choose to do both.

Other options to go cheaper on the distrubution block/ relay center is to pull one from a late 90 cherokee classic and rewire the box, tou can also use a waterproof container like the cheap ones at walmart in the sports section to put relays in. The best all together solution out there is the SPod 4x4. Though it is $400 just for the relay box. They have an all digital unit coming out, that looks very promising, especially with the newer canbus systems as you would not be intruding into your vehicles wiring offering complete circuit protection, two ignition/ high beam circuits, auto voltage regulation, wireless controll, and they are talking about possible integration with touch screen oem system to control all switches and functions including dimming/Strobe of led capable light.

I plan in the end to have 8 circuits. This build is a step until I can see what sPod comes up with as I do not have the knowledge nor machinery to build something of this nature being mosfet driven, good luck and have fun. It is not too bad an investment for a totally waterproof DIY that is easy to unhook and remove items allowing fuse access under the hood. You can go in a few together to beat some of the minimums that you are required at Waytek,

 
Related to this topic. I'm not much of a night wheeler, but I'm thinking about throwing some leds behind my satoshi style grill for those rare occasions when I am still on the trail after dark. I might also do some rock lights.

My truck is 100% trails/rocks. I don't plan to ever do any speed related wheeling.

I was planning on getting two small 7" pods (again behind the grill). Probably some cheap ones for now. I'm assuming a flood orientation would be best for my use, but was looking for opinions... I could do a flood and a spot combo...
 
Way back in time I bought some red LED tail lights for my Subaru Forester (yeah I know, man card was taken away). They worked for about 2 months. I had to put the bulbs back. I'm not mentioning the name because I don't want to start a flame war.

OK so I am an electrical engineer, I would have my EE card taken away if I didn't take the light apart. The thing was one huge fricking cold solder joint. It was so screwed up and contorted I couldn't begin to find the weak link, there must have been several. Trash can. Looks like the thing couldn't take the hot-cold-hot-cold temperature cycling.

So ... if you are going to be drilling holes and making bars, adapters, finding bolts, splicing into cables I would go with something you know works. Something that you believe has been tested with temperature cycling. Not something that was a copy and maybe they missed something.

Oh - something else I found out at the current job (heavy duty alternators). Water, including salt water, can travel down the inside of a wire. That's why those German connectors with that orange-red silicon boot work - you don't want any way for water to get into the wire. Ring terminal outside in the engine compartment? Water can get into that and travel down the wire and corrode it. Doesn't matter if you have the perfect gnat's ass six sigma crimp on that ring terminal, the water can still get in because of how it work. And it ain't rocket science, just look at whatever wire connection you have, can you see a way for water to work its way in, you may get corrosion in it.
 
Also if you want to do, a not so difficult distrubution block here are some parts you can get at Waytek. I will do a more thorough write-up when I can do the install on my truck. There are minimums reflected here in amounts needed. It will handle 30 AMPS per circuit. I would recommend 14 Ga for the wiring for power to handle amperage.

46343 Relay/Fuse Panel Qty 1
75730 Relays Qty 5
30069 Terminals 18-16GA Qty 50
31068 Terminals 16-14GA Qty 50
39000 Seals Qty 150 (minus 50 if you dont use quick connects to relay box)
31713 Blue Female Quick Disconnect terminals Qty 50
46351 50 Amp Circuit Breaker Qty 3
46257 20A Fuses Qty 50
46255 10A Fuses Qty 50
46259 30A Fuses Qty 50

Total $96.04 plus wire you can get from local car audio place. You will need crimpers to complete the project. Change the connectors below to 6-way they are the Delphi 280 series if you power the switches from the circuit box. Again you will only use two of these connectors, the minimums suck.

38038 Connector Part Qty 20
38039 Connector Part Qty 20
38068 5-way connector male Qty 5
38069 5-way connector female Qty 10
30036 18-16ga male pin Qty 50
30037 18-16ga female pin Qty 50
38059 step down butt connector Qty 10 (use the his to daisy chain switch power from one lead, and ground from one lead. Do in series by where switches are located to keep install clean

Total of everything: $128.85

Extras to be able to have a quick disconnect for fuse box and for switches inside the car. You will need a 18ga 5 wire cable that is sheathed for the switches from the relay box to the vehicle for the switches.

There are a few guys making similar relay boxes to save you some time. Not sure if Erik from Wired Wagon is still doing it but here is a link to another on Tacoma World.

Waterproof Fuse and Relay Boxes - RFRM (10 relay) & RTMR (5 Relay) no Blue Sea/ SPOD - Tacoma World Forums
 
Also if you want to do, a not so difficult distrubution block here are some parts you can get at Waytek. I will do a more thorough write-up when I can do the install on my truck. There are minimums reflected here in amounts needed. It will handle 30 AMPS per circuit. I would recommend 14 Ga for the wiring for power to handle amperage.

46343 Relay/Fuse Panel Qty 1
75730 Relays Qty 5
30069 Terminals 18-16GA Qty 50
31068 Terminals 16-14GA Qty 50
39000 Seals Qty 150 (minus 50 if you dont use quick connects to relay box)
31713 Blue Female Quick Disconnect terminals Qty 50
46351 50 Amp Circuit Breaker Qty 3
46257 20A Fuses Qty 50
46255 10A Fuses Qty 50
46259 30A Fuses Qty 50

Total $96.04 plus wire you can get from local car audio place. You will need crimpers to complete the project. Change the connectors below to 6-way they are the Delphi 280 series if you power the switches from the circuit box. Again you will only use two of these connectors, the minimums suck.

38038 Connector Part Qty 20
38039 Connector Part Qty 20
38068 5-way connector male Qty 5
38069 5-way connector female Qty 10
30036 18-16ga male pin Qty 50
30037 18-16ga female pin Qty 50
38059 step down butt connector Qty 10 (use the his to daisy chain switch power from one lead, and ground from one lead. Do in series by where switches are located to keep install clean

Total of everything: $128.85

Extras to be able to have a quick disconnect for fuse box and for switches inside the car. You will need a 18ga 5 wire cable that is sheathed for the switches from the relay box to the vehicle for the switches.


Switches I am going to use will be Aironboardusa.com. You will daisy chain all switches for positive using one lead from the cable from the relay box to power switches. Daisy chain all grounds and ground to vehicle. This can also be done either all the time or through an ignition circuit. That is up to you. I choose to do both.

Other options to go cheaper on the distrubution block/ relay center is to pull one from a late 90 cherokee classic and rewire the box, tou can also use a waterproof container like the cheap ones at walmart in the sports section to put relays in. The best all together solution out there is the SPod 4x4. Though it is $400 just for the relay box. They have an all digital unit coming out, that looks very promising, especially with the newer canbus systems as you would not be intruding into your vehicles wiring offering complete circuit protection, two ignition/ high beam circuits, auto voltage regulation, wireless controll, and they are talking about possible integration with touch screen oem system to control all switches and functions including dimming/Strobe of led capable light.

I plan in the end to have 8 circuits. This build is a step until I can see what sPod comes up with as I do not have the knowledge nor machinery to build something of this nature being mosfet driven, good luck and have fun. It is not too bad an investment for a totally waterproof DIY that is easy to unhook and remove items allowing fuse access under the hood. You can go in a few together to beat some of the minimums that you are required at Waytek,

Great list! This is a cool project. Fun to build too!

Here are a couple alternate parts for consideration:

-75661 ISO 280 MICRO RELAY 24V SPDT 17A | Less amperage but SPDT if you need the flexibility.
-46085 MOUNTING BRACKET | Not the best looking bracket. Plus, there's a 2 minimum, but at just over $4 it's a time saver.
-46803 20 A MINI CIRCUIT BREAKER | These are cool to have in place of a fuse. About the same height as the relays and manual resetting. Good for those of us who can never seem to find their spare fuses when we need them.
-46870 MARINE CIRCUIT BREAKER 50A SURFACE MOUNT | Highly recommend a manual resetting circuit break instead of an auto resetting one. I've seen electrical fires resulting in them cycling between open and closed. Plus the manual element gives you a nice service option when you want to disable the entire panel. There are cheaper out there but I like this one for ease of use and aesthetics.
 

Members online

Forum statistics

Threads
278,309
Messages
3,554,068
Members
248,016
Latest member
Advally Service

Trending content

Back
Top