Superman3043's Build Thread

In this picture here, nothing has been modified yet. The e-locker gasket has been put in place to mark all the needed modifications so the notches that you see at 12 o'clock and 5:30 were already there. All the things marked in white are what need to be added so the big notch at 3:00 and 4 new studs at approximately 1:00, 2:00, 4:00 & 4:30. You also have to remove 3 existing studs (approx at 2:30, 3:00 & 3:30). Other than that, there is one high spot on the mating face of the axle housing around the 1:00 position that needs to be knocked down flush so that the e-locker 3rd member can seat properly and you're done as far as the mechanical modifications needed.

This portion isn't too bad if done properly. My words of advice would be to remove the entire axle housing to work on it if you can. Drilling your studs in perfectly perpendicular is very important, so make a drill bushing/jig.

My particular case was exceptionally difficult for a few different reasons. Mainly because we actually rebuilt the 3rd member that was going in which was something I had zero experience with and a huge job regardless of who you are. But that should cover the mechanical portion of the retrofit. Now the electrical portion was a whole other ball game lol. Hope that helps.

Did you weld the old holes up or did the cover up fine with the rtv and 3rd member?
 
Just spent the last week reading up on this thread. Awesome work you're putting in. A couple of buddies and I are beginning planning stages for a big west trip this summer and I'm looking to get my '05 up to snuff in time. I will surely be calling on your expertise in the near future [MENTION=68704]superman3043[/MENTION]
 
Just spent the last week reading up on this thread. Awesome work you're putting in. A couple of buddies and I are beginning planning stages for a big west trip this summer and I'm looking to get my '05 up to snuff in time. I will surely be calling on your expertise in the near future [MENTION=68704]superman3043[/MENTION]

Sounds good. I'm here to help.
 
190K Update, Thanksgiving URE Run

ATF Flush

Did a lot of prep leading up to this past weekends run. Most importantly finished flushing my transmission. Did my first drain a fill about a month ago and wanted to have it finished before the run. Did some research into "WS equivalents" while I was at it, since we all know this shit is expensive. Here is what I found:

ATF Cost/Gal
Redline D6 $50
Amsoil Signature Series Fuel Efficient Synthetic ATF $49
Toyota WS $38
Aisin WS $26
Amalie Synthetic $25
Valvoline Max Life $10

Items of note

- First off I found out that WS is manufactured by ExxonMobil

- The Aisin WS is a very intriguing option as it is WS fluid labeled under the manufacturer of our transmission, for a way cheaper price. It can be found at Low Range Offroad for that price.

- So I want to talk about Valvoline Max Life; Obviously it's the cheapest by far and can be picked up from the parts store around the corner so that's a couple of pluses. I've actually got experience with it as I used it to flush my power steering system, so I still had like 2 quarts left from that job since I bought a gallon jug. In playing with Max Life and WS, I've noticed that they're very damn similar. Same smell, same color, and both extremely viscous. Actually from the old "feel test", if I had to pick one, I'd say that the Valvoline may be even MORE viscous than WS. It does say it's a WS equivalent on the container among many other fluids. In my research I came across an old MSDS from 09 of Valvoline Max Life and it was asterisked that it did NOT meet the viscosity requirement of WS and then looked at a revised one from last year and the asterisk was gone. My theory is that they reformulated it and resubmitted to meet the requirements of WS. I wouldn't think a company could market their fluid as an "equivalent" if it didn't meet or exceed testing requirements and standards.

I've heard the arguments; "Why risk ruining your transmission or voiding your warranty just to save a few bucks? Just use WS" and "These transmissions were designed to run WS only" and "How can a fluid be used in place of T-IV AND WS?" and to these my retort would be that the 750 non-sealed transmission in the 03 V8 4runner specs T-IV fluid not WS and it's the same transmission. If I can save money buying a fluid that's just as good instead of letting a Toyota dealer bend me over like they always do to everybody, why wouldn't I? And fluids need to meet OR EXCEED requirements to be used in supplement of one another.

With all this being said, I formulated my plan of attack. My transmission has been out of warranty for a very long time, so if I eff this up, I'll have to chalk it up to an expensive lesson learned. But if I can help others and myself along the way, then great. I've already done my first drain and fill with WS and the goal was to get a few more drain and fills done. I ordered another gallon of WS and I bought a gallon of Max Life to add to the couple of quarts I had left at home. Drained my pan and filled it with 3 quarts of Max Life. Cranked the truck and shifted the tranny through all positions a couple of times to cycle the fluid. Drained the pan and re-filled with my remaining 3 quarts of Max Life. Cranked the truck and cycled through all gears. Drained the pan and refilled it with 4 quarts of WS. Entered temp check mode and popped the overflow. The fluid that came out was a beautiful red.

So far the shifts are silky smooth and everything is running excellent.

Uwharrie Turkey Day Run

Here's another link to the entire run thread:

http://www.toyota-4runner.org/off-r...wharrie-national-forest-run-11-29-14-a-5.html

All post run reports, posts and pics are there. But here are a few of my fav's:

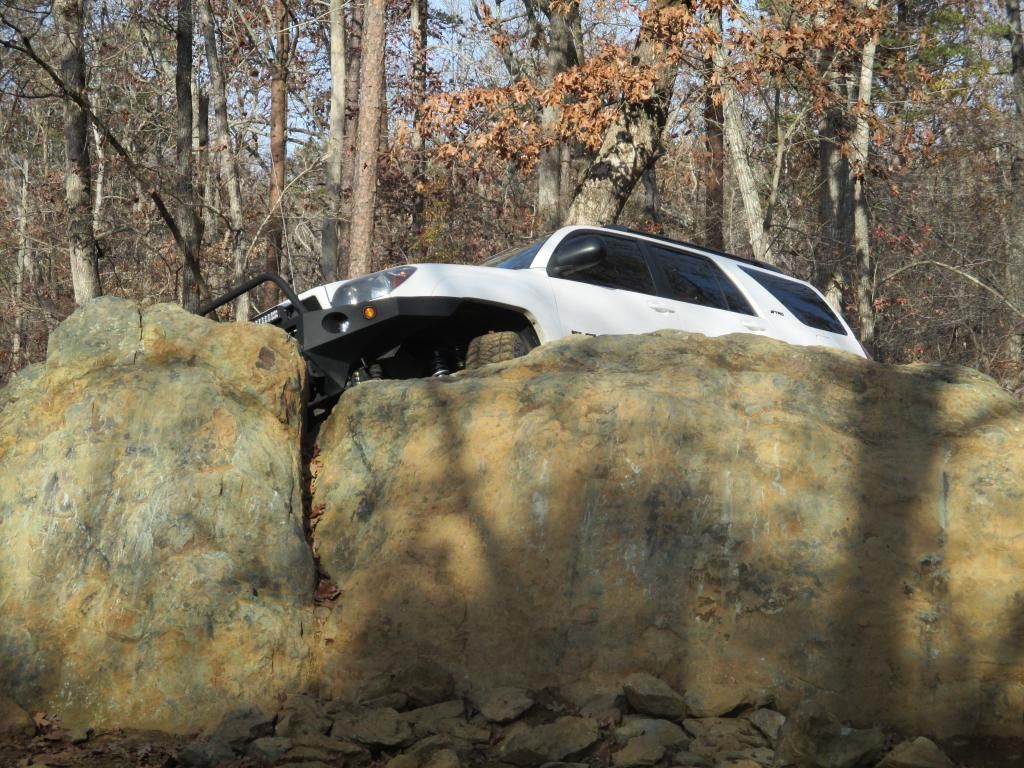
Perched up on poser rock with the new set up

Uzuth4t.jpg


A comparison shot of the old set up from the run last June

g2b8NLy.jpg


IMG_0071_zps483fa506.jpg~original


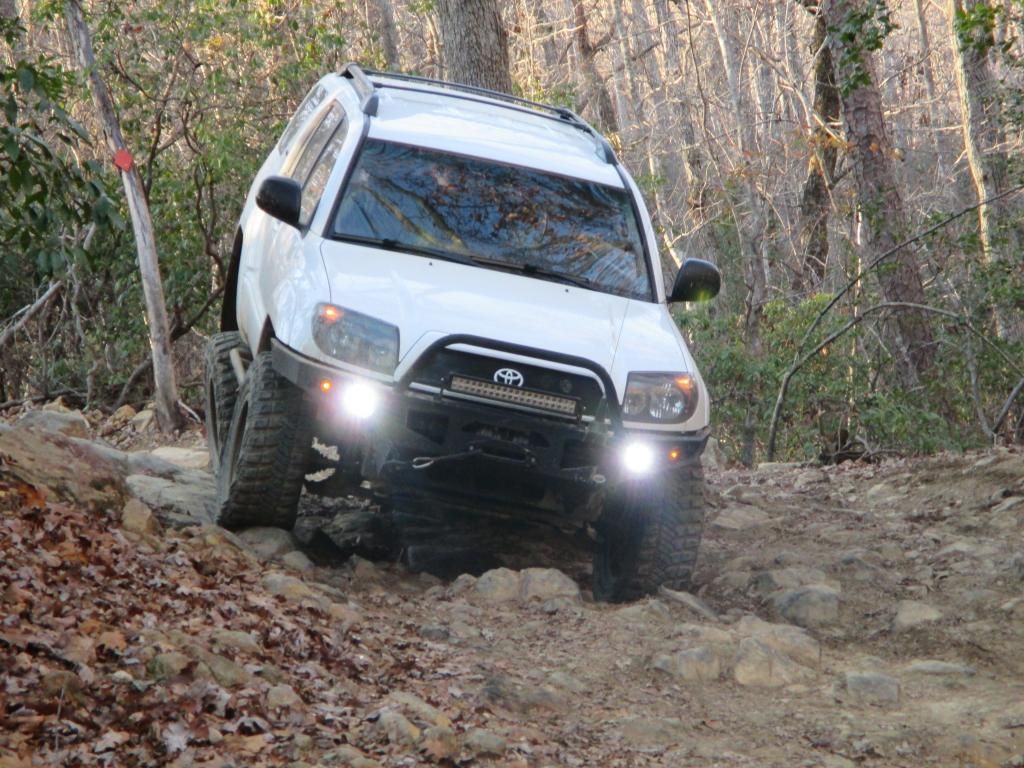
Probably one of my favorites so far coming down the Dutch John switchback. Thank you [MENTION=86836]DirtDobber[/MENTION]

IMG_0132_zpscc52946b.jpg~original


Just another day on the trail spent saving a Jeep NBD (thanks [MENTION=100415]t4rghost[/MENTION])

photo5_zps7bf763c9.jpg~original


The MT/R's spit this little muddy tight hill climb out with ease (thanks [MENTION=79132]Nyc-Runner[/MENTION])

138238d1417451202-toyota-4runner-uwharrie-national-forest-run-11-29-14-dsc_0136.jpg~original


138258d1417452680-toyota-4runner-uwharrie-national-forest-run-11-29-14-img_3475.jpg~original


138255d1417452414-toyota-4runner-uwharrie-national-forest-run-11-29-14-dsc_0029.jpg~original


To say that the shake down run of all the recent work was a success would be a gross understatement. The Metaltech long travel rear is incredible and kept the rear planted all day. While I'm not happy with the caster of the new UCA's the uniball itself is outstandingly smooth through the range of suspension cycling. I love my new wheels and received a ton of compliments on them. And I can't say enough about the MT/R's. Aired down to 15 psi and they were beyond impressive. They clear mud out unlike anything I've ever seen, are beyond tenacious, and tough as they come. Pretty sure I didn't spin a tire the entire day.

My takeaways though, are that some additional trimming of the front inner fender is required. I was chewing plastic all day and almost had a matching front fender with [MENTION=90013]HHIRunner[/MENTION]. Also the drive shaft flange will come in contact with the fuel tank skid a full droop, so some notching will be required there. May also crank down on the Coilovers and get the nose up a little bit more to relieve the scrubbing but I'm afraid of what that will further do to the caster. Heavier coils are on the wish list for the future, but for now I'm fairly content with the sway bar and current coils. Seems to work well even off road... for IFS anyway.
 
Last edited:
That's great info and write up on the tranny flush! That was something i wanted to do before the trip also but ran short on time so this is perfect now i can do mine :thumb:

You gotta love that MT long travel set up!It Performed great and really makes these truck that much more capable with the feet always planted.That was the first time i had the sway bar disconnected, well on the one side but man what a difference! I have to say i might just ditch it entirely and never look back. Even driving it home after on road it still felt great and the sway really wasn't bad at all. I also had the same issue with the shaft coming into contact with the gas tank skid but like you said nothing a little notching won't take care of.

I'm glad you were happy with the new wheel/tire set up.They look like beasts i'm glad they performed just as good at they look!

Thanks again man great run...
 
PD - That's near the Baird House, awesome little spot. My wife and I stayed up there in Valle Crucis for our anniversary. Had an awesome time fishing in the Watauga.

Yeah, I know I'm over a year late to be reading this, but have enjoyed catching up on your thread.


Took the wife for lunch and wine at 1861 Farmhouse in Valle Crucis:


Woke up with a muddy truck from the trail Sunday, so spent some time cleaning her up:


Still trying to troubleshoot my locker and finish wiring my new back-up camera. That's all for now.[/QUOTE]
 
Last edited:
PD - That's near the Baird House, awesome little spot. My wife and I stayed up there in Valle Crucis for our anniversary. Had an awesome time fishing in the Watauga.

Yeah, I know I'm over a year late to be reading this, but have enjoyed catching up on your thread.

Yup, love that area! We're getting a cabin in Banner Elk/Beech Mtn. in Feb. Hopefully will have some snow for the little one to play in. Thanks!
 
Update

Haven't posted in a while. Truck is now sitting at a shade under 192K miles. Still awesome. Figured I'd provide a little update of what I've been up to during and since the holidays.

Got a Christmas tree again this year:

MsH7oD8.jpg


Mid December I had Austin come over and we did our best to check for and clearance interference's since the Uwharrie Turkey Day run. You can see his new Lexus peaking out of the garage:

6CLfakI.jpg


UeBZerq.jpg


VIhCjWT.jpg


Originally thought it was the flange hitting the tank at full droop with the Metaltech kit just from hearing others accounts, but it appears to have been just the weight. We dropped the tank skid and Austin notched it for me. Possibly could have clearance it just by rolling the lip in toward the tank some. If you look closely at the upper right of this picture, you can see witness marks going around the shaft from where it's actually rubbing those rectangular things protruding from the side of the tank. Don't really know of a fix for that. Hell for all I know that could be what they're their for. Also cut the body mounts up further while we were at it:

kBBIVrl.jpg


For Christmas, I bought the truck some lower rear links and a new panhard bar from [MENTION=98153]MStudt[/MENTION] from his group buy. The parts came unpainted for those that'd like to know. I was unsure about that until they arrived because I didn't ask. Parts seem to be beefy and well built. My lowers came with all of the features I asked for. An adjustable Summit Machine Flex Joint on the frame side, parking brake bracket, and an offset poly bushing on the axle side. The panhard came with a fixed flex joint and an adjustable rod end with mis-alignment spacers and some sort of boot that I've never seen before holding them all together. Weld quality was good considering that he doesn't weld for a living (I assume):

9pedcgJ.jpg


Lower link painted and next to stock one for comparison:

WDh5D2f.jpg


Lower link installed:

LUsvmoX.jpg


Install was simple. If I'm being critical, the flex joint mount width and bolt thru I.D. wasn't quite as tight as I'd prefer. Made installation easier though and not really an issue once snugged down. Also, the e brake mounting bracket didn't have the slots that allow the anti rotation tabs on the mating piece to drop in. Not a huge deal.

And then came the panhard... Not sure what I recieved, but it definitely wasn't for a 4th gen. Mount width was wrong (too small) and I.D.s don't accept the hardware (too small). Not sure if there was a mix up in parts and somebody else got mine or what.

pHWW4KT.jpg


The unfortunate thing about it all is that Mike is pretty much indisposed until the fall. He's been awesome to work with, it's just the timing was unfortunate. So I'm still waiting on him to make it right.

A short while after installing my lower links I started to notice a knocking noise coming from under the truck. It happened going over some bumpy surfaces at first. Then got a little louder and started happening when taking off and braking hard. I thought it was coming from my front end at first. After diagnosing it, I realized it was coming from the rear. The big jam nuts for the Flex Joints had come loose. After tightening them down, I haven't had any issues. I plan to check the I.D. of the Flex Joints to see if they'll accept a 9/16" bolt and if so, I'll run some.

Got these made for free from a link I found here on T4R... Still have no clue what I'm going to do with them:

Nh6fDEu.jpg


That's it for now. No real clue what's on the docket for the truck this year. As far as mods go, I'm looking to get the panhard taken care of and possibly some 700# King or Eibach coils for the front. Possibly some skids down the road. As for maintenance, I'll probably be doing another timing belt/water pump and a new battery before the year is over. Other than that, my daughter is growing at an unbelievable rate and my wife and I are house shopping looking to build our first house together. Exciting and busy times! Hope y'all have a great 2015!
 
Last edited:
Truck looks good, sucks about the panhard, hopefully he makes it right soon!

Thanks man. Yeah, we'll get it squared away. I don't know about soon, but we'll get it.

What setup are you running for your rear suspension?

Metaltech Stage 2 "Long Travel". Custom lower links. All of my specs can be found in the "My Garage" link under my avatar. I try to keep that up to date as possible because I know information is scattered and diluted in my build thread. Hope that helps. Let me know if you got any more questions.
 
Mid December I had Austin come over and we did our best to check for and clearance interference's since the Uwharrie Turkey Day run. You can see his new Lexus peaking out of the garage:


PD don't be picking on my new friend from club lexus. Lexus guys have to stick together, cause you Toyota guys are..................................
much more awesome.
 
PD don't be picking on my new friend from club lexus. Lexus guys have to stick together, cause you Toyota guys are..................................
much more awesome.

Not picking on you guys at all... Some people got it and others.... are just poor like me. So we gotta live vicariously through you ballers lol.
 
Not picking on you guys at all... Some people got it and others.... are just poor like me. So we gotta live vicariously through you ballers lol.

lol I wish I was a baller, but I got an amazing deal on mine and it is cheaper then paying for my 14's 4runner at the time so I made a switch. I wanted to keep a 4runner but she don't like it. I love the Lexus but I do miss the 4runner, so maybe one day when my daughter grows up we can work on it together.
 
lol I wish I was a baller, but I got an amazing deal on mine and it is cheaper then paying for my 14's 4runner at the time so I made a switch. I wanted to keep a 4runner but she don't like it. I love the Lexus but I do miss the 4runner, so maybe one day when my daughter grows up we can work on it together.

That's awesome. My daughter LOVES her 4Runner. She always wants to ride in it instead of her moms Venza haha.
 
195K update: Inner Tie Rods, Wheel Studs

Got a little wrench therapy in over the weekend with my boy Austin, and I must say, it was one of those rare sessions where everything went right, all the tools and parts were there, cuss words were at a minimum, things went like they were supposed to and everything ran ahead of schedule. A rarity indeed. There's always something to be said about having a helping set of hands for any project, but when you have people working together that both actually know what they're doing, it makes for light work indeed.

So a little background on my inner tie rod replacement. A couple weeks ago I went in to have my alignment done for the 3rd time since I changed out my front end suspension. Since apparently your average alignment tech and definitely your average desk clerk have no idea that caster is actually an adjustable parameter, I had to actually explain to them how I wanted them to set up the alignment in order to max out my caster. It wasn't without some back and forth, but they did as I asked and low and behold, were actually able to get my caster in spec. But when they called me, the problem was that while they were actually able to get everything in spec, due to a seized jam nut on the tie rod, they had to move the steering wheel off-center in order to get everything in the suspension straight. He was glad to order and install a new inner tie rod for me to the tune of $200 and an additional 2 hour wait time... Nah... I don't think so. Told him I didn't have 2 hours and that I would just buy and install the parts myself. He made sure to tell me that if I or another shop installed the part that it would void my 3 year alignment warranty with Sears that is set to run out in August anyway. Which is a bunch of malarkey since I've been putting parts on there and tweaking my suspension since I bought the alignment package. That was the point. But regardless, for less than that price I could buy and install the parts AND buy another 3 year (or even lifetime) alignment warranty from anywhere. Came home and ordered inner tie rods for both sides for like $19 a piece.

So there were two things we wanted to get accomplished Saturday. It was to remove my spacers and re-stud my hubs and install the inner TRE's.

I commissioned Austin's shop and helping hands since we had a common interest and he had experience in this area as he's changed out the entire steering rack on his truck. In exchange for his help, I would give him the spacers as he is currently running small shim style spacers in order to gain sufficient clearance between his wheels and brake rotors as well as treat him to a meal. Win-win.

My reason for wanting to remove the spacers was because I didn't need them any more and I wanted to gain back the extra clearance from the firewall and body mounts. I only put them on to gain clearance between my old wheels and tires and my old UCA's at full droop. I already had a set of long studs that I bought as a contingency when I installed my Mud Graps in case they did not clear the UCA's. I mentioned them early in my build, but for anybody who has seen how short the front studs are on these trucks and would like longer ones, you can order wheels studs from a Toyota Matrix.

Studs where straight forward. Smacked them out with a small sledge. We jacked the rear up, locked the center diff and both turned the rear tires the same direction to re-clock the front hubs to where we could insert the new, longer studs which was right around 3 o'clock where the caliper would sit. Then just drew the splines in with an impact gun and some spacers.

Freshly long studded hub:

JOuK92o.jpg


The tie rods where straight forward as well. Since my wheel was off-center, my plan to get it close enough until alignment was to measure the amount of thread showing on the tie rods on both sides using some calipers. Add those two values together, and divide that in half and that would be my new value for thread amount on my new tie rods. Worked out in my head and it seems to have worked out pretty well in execution for now (alignment check scheduled for this week). Just break the outer loose from the knuckle, remove the outer, and slide the boot off after un-clipping the outer clamp and breaking the inner. Then use a pipe wrench to remove the inner.

Old and new:

RPu0dHJ.jpg


We were able to un-seize the jam nut that the alignment tech couldn't. So that either means they were lazy or didn't have the right tools. The newer joints were tighter obviously, but I couldn't really find anything wrong with the old stuff, so they will make serviceable trail spares. Put everything back together in reverse order. There is a locking washer that needs to be folded over the flat on the ball joint end.

Lot's of text and not a lot of pictures, but as usual, I mainly make these posts for my own benefit and documentation so that I can look back on them. Really never think about taking pictures while I'm working because it sucks trying to do it with greasy hands, plus this wasn't really an exciting update, but simple maintenance.

Probably some other small stuff coming this year, but mainly focusing on building our house for now. Hard to think about other stuff until then. Just pray that she holds together for me.

 
Last edited:
200K mile update

Been a while since my last update, because I've been putting off a long laundry list of maintenance items for the truck this entire year.

Finally got parts on order and began chipping away at this long list over the weekend.

This is what I did yesterday:

- Timing belt
- Water pump
- Idler pulleys
- Tensioners & pulleys
- Accessories drive belt
- Thermostat
- and of course coolant drain and fill accordingly

BhBswGu.jpg


Stack of new parts

iHSraHm.jpg


Cover open to expose timing belt. This belt was done at just under 90K and still looked great with over 110K miles on it.

yylWwLs.jpg


Crusty pink crud showing that the water pump was starting to go. My last one was as well. So that’s 2 for 2 on failed water pumps.

hoJwamq.jpg


New belt on

asXXZY4.jpg


Pile of old parts

Overall the job took me 8 hours to complete doing it my first time with the help of my dad who has done a few of these before. I’d rate the job as fairly difficult due to the amount of disassembly required which requires you to be pretty tedious regarding managing your steps, the parts, and the hardware. Also the fact that if done wrong you can destroy your engine.

What I’ve been up to that’s been keeping me from maintaining my 4Runner

Back around March, my wife and I broke ground on our first new home together. I was very involved with the entire build from designing the house, to prewiring the low voltage stuff, to building the shower, to laying the hardwood floors. All of which I've never done before. Basically during the entire build, the truck served as a construction vehicle hauling tools and materials to and from the job site. Now that we’ve moved in, I’m finally able to pay a little bit of attention to other stuff, even though the work on the house seems to have no real end in sight. Ah the joys of home ownership. Anyway, it turned out to be something that I’m truly proud of as I put so much of myself into it. Here a couple of pics to share. These were actually still in the construction phase, as I took a ton of photos during the build and have literally taken zero since we moved in lol.

LtzzXNt.jpg


Exterior

FfUMfEu.jpg


The custom, walk in, double shower that I built.

I really need to take some better finished pictures, but want to get settled before I do. Anyway, you get the idea.

What else I've been up to...

About a month or so ago, I acquired this ProCharged 1999 Ford Mustang Cobra convertible. It is a beast of a car and was about a 700 rwhp car, but needed more work than I could give it.

alQLDHm.jpg


UiUsE5z.jpg


So I traded it for this 1992 Nitrous fed box body notch back:

2EWX66F.jpg


7xA0xZS.jpg


7PyawjA.jpg


It's pretty much a race car, which wasn't really what I was looking for. The car turns the 8th in about 6.3X's with a 60ft in the 1.3X's and traps about 110 mph. When I took ownership of it, it was trailered in on drag slicks. Car also has a full cage. Not exactly daily driver material, but... oh well. It's a toy. I'm currently trying to do the opposite of what was done on the 4Runner and turn a purpose built vehicle, into a grocery getter. She's getting the "Superman" treatment as we speak. Something about these old fox bodies that just makes me feel 16 again. I've just always had a soft spot for them.

So anyway, that's what I've been up to. Next on the docket, I've got a new yellow top and a new wheel bearing sitting in boxes in the back of the truck and I've got a rear brake set inbound. Thanks for stopping by!
 
Last edited:

Members online

No members online now.

Forum statistics

Threads
278,309
Messages
3,554,071
Members
248,016
Latest member
Advally Service

Trending content

Back
Top