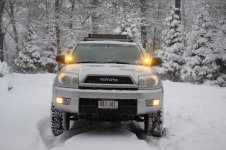
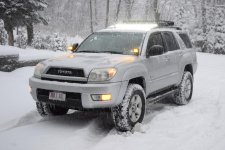
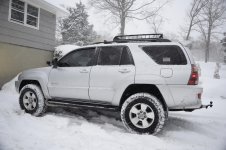
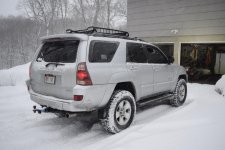
T101 build

Decide my next mod - What to do with the headlights???

  • Leave them as is

    Votes: 3 42.9%
  • Bake/Paint gloss black

    Votes: 0 0.0%
  • Bake/Paint matte black

    Votes: 3 42.9%
  • Bake/Paint color matched to body

    Votes: 1 14.3%

  • Total voters
    7
  • Poll closed .

T101

New member
DOES ANYONE KNOW HOW TO REMOVE THIS POLL ^^^^^^^^ ????????????

Alright, well first and foremost thank you to those before me for posting some excellent write ups on here. 11/2013 I picked up this beauty, 05 sr5 V8 with 46k miles, bone stock. My wife has had an 04 limited V8 for years and I always loved it, so when I grew out of my car (a 350z, balls fast but not in the least bit practical), I started shopping around and found my current T4R about 20 miles away.

I don't have any pictures completely stock but...

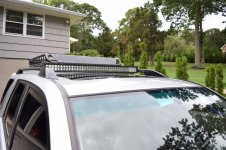
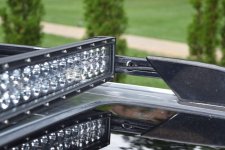
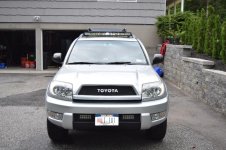
First up was a 40" on top. With the mounts on the end of the bar, it was actually about an inch too wide to fit in between the stock roof rack, so I ground the mounts off completely, painted the metal, then mounted the bar by sliding a 1.5" bar of aluminum through the slats in the back of the bar, then ran a bolt through the roof rack bar, and through that piece of aluminum on each end. I'll post up close ups soon, and go a little more in depth, but basically the light bar can't be removed (stolen) without completely removing the entire roof rack.
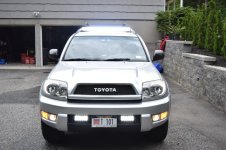
DSC_0088.jpg
(Also did the fog light mod, thanks to whoever wrote that up, instructions were great)


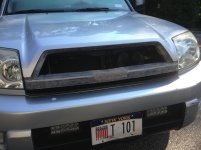
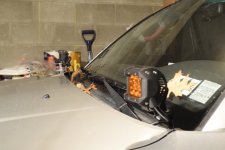
Next was two 6" bars in the lower grill. Again, I can post up more pictures of this job specifically soon. Besides the 6" bars, I also cut out the factory lower grill, custom made the mesh insert, and painted the part under the lower grill flat black with a few coats of clear coat, to end up with a semi-gloss with decent strength against chips from debris. This picture shows how I mounted them.
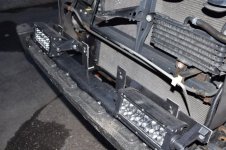
DSC_0054.jpg

And a closer pic, showing the lights and my Satoshi grill.
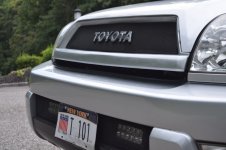
DSC_0057.jpg
I can confirm that the grill is a pain in the ass, but mostly because of the time it takes to build. I'd estimate around 20 hours spread over a few weeks. Lots of fiberglass and sanding. The grill is the same as in the lower grill, and the TOYOTA emblem was $14 on Ebay.


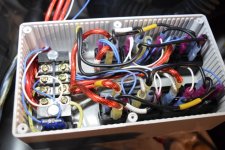
All the electronics were done right, fuses, relays, wire loom, shrink tubing. I've seen some sloppppy wiring before... my truck is the opposite. My project box housing the relays and fuses for the front bars.
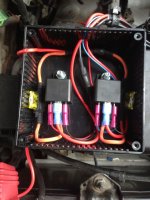
IMG_1791.jpg

Switches for the front lights
DSC_0084.jpg

Switch for the rear/backup lights, and the fuse tap so all my auxiliary lights will only work with the ignition turned on.
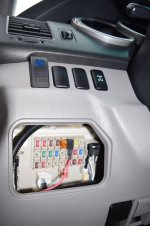
DSC_0083.jpg


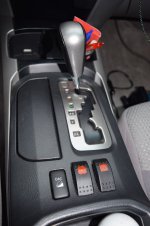
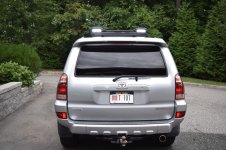
My reverse/Jackass lights. Have them wired to go on automatically when in reverse, and also a manual on/off switch for when I need a little light in the driveway, or when some jackass is tailgaiting or behind me with their brights on. Tapped into the reverse light wires, then have a diode in place so the trucks reverse lights won't come on when I hit the manual switch.

Also installed the spoiler. Piece of cake, just take your time..... measure 5 times, drill once. Took about 2.5 hours going really slow. silicone'd all the drill holes, and disconnected the factory 3rd brake light because I think keeping them both, a lot of light would reflect off the spoiler and back into the rear window.
DSC_0085.jpg
^^this pic shows just the aux lights when using the switch, when in reverse, the reverse lights in the taillights light up as well.

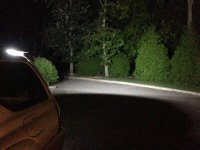
And a picture of the backups at night. Really help seeing through the tint on an unlit road.
IMG_2068.jpg


I will load up some more pictures soon going a little more in depth of the projects I've done so far, and get some night shots showing the effectiveness of the lights.

Pretty soon I'd like to hard wire an 800w power inverter I have laying around somewhere in the truck, either the center glove box thing, or in one of the storage areas in the trunk.

After that will be tires and a lift. Thinking OME and 5100's, but I won't get a lift until I buy new (bigger) tires, and I won't buy tires while mine have so much tread left because I can't justify replacing close-to-brand-new tires. Don't anticipate doing any real wheeling, just want a slightly more capable truck for the NY winters, and for frequent hiking trips up north where lots of dirt road driving is required. After the tires and lift probably a set of sliders.


Thanks again to everyone for the cool ideas and inspiration, love seeing what everyone has done to their rigs.
 

Attachments

  • DSC_0088.jpg
    DSC_0088.jpg
    136.7 KB · Views: 1,129
  • DSC_0057.jpg
    DSC_0057.jpg
    127.7 KB · Views: 1,116
  • DSC_0054.jpg
    DSC_0054.jpg
    139.2 KB · Views: 1,069
  • IMG_1791.jpg
    IMG_1791.jpg
    127.2 KB · Views: 1,097
  • DSC_0084.jpg
    DSC_0084.jpg
    118.3 KB · Views: 1,118
  • DSC_0083.jpg
    DSC_0083.jpg
    132.7 KB · Views: 1,134
  • DSC_0085.jpg
    DSC_0085.jpg
    139.2 KB · Views: 1,022
  • IMG_2068.jpg
    IMG_2068.jpg
    131.1 KB · Views: 1,095
Last edited:
Register to hide this ad
Lightbar

A little more on the roof light bar
DSC_0074.jpg


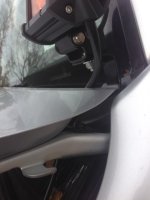
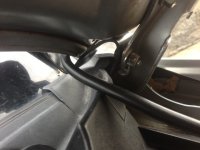
The light bar just fits in between the roof rack bars, while maintaining use of the sunroof. Drilled through the roof to run wires *almost* completely hidden and out of the elements. Silicone'd the hole to prevent any leaking into the trucks headliner, then ran wiring through headliner, down A-pillar, through firewall, to the engine bay.

DSC_0076.jpg

Best shot I could take of the aluminum bar running through the slats on the rear of the light bar. Aluminum is held within the slats by the caps at the ends of the light bar, and was cut exactly to length of the inner groove of the roof rack.
DSC_0093.jpg


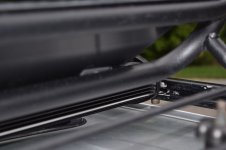
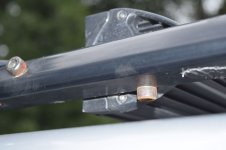
Bolts hold the entire thing in place, going through the bottom of the roof rack, through the aluminum bar, then secured with a nylon lock nut. That other bolt is just filling a hole from my first attempt to mount the light bar. I'll touch up that rust soon.

DSC_0095.jpg

The roof does obviously cut some of the light, with around the first 25 feet of ground in front of the truck not getting illuminated, but either the headlights or aftermarket fogs fill the space in nicely.

DSC_0079.jpg
 

Attachments

  • DSC_0074.jpg
    DSC_0074.jpg
    138.8 KB · Views: 931
  • DSC_0076.jpg
    DSC_0076.jpg
    123.4 KB · Views: 998
  • DSC_0093.jpg
    DSC_0093.jpg
    79 KB · Views: 1,001
  • DSC_0095.jpg
    DSC_0095.jpg
    76.2 KB · Views: 986
  • DSC_0079.jpg
    DSC_0079.jpg
    136.4 KB · Views: 934
Last edited:
Satoshi Grill

Sorry I don't have many pictures from building the grill, but just to show you that I did in fact build it...

Started with a new grill, about $80 off ebay, because i knew it would take a few weeks and didn't want to cruise around my original grill missing from the front of my truck.

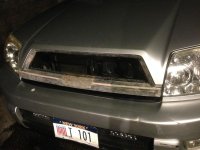
First test fitting
IMG_2030.jpg
IMG_2031.jpg

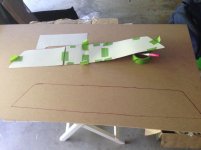
My template for molding the actual metal grill
IMG_2028.jpg

And during the painting process
IMG_2072.jpg

I used one of those factory paint match spray cans and clear coat. Color came out pretty good, but I might build another one using my original grill then bring it to a paint shop to get the color perfect.
 

Attachments

  • IMG_2030.jpg
    IMG_2030.jpg
    128.1 KB · Views: 999
  • IMG_2031.jpg
    IMG_2031.jpg
    128.9 KB · Views: 993
  • IMG_2028.jpg
    IMG_2028.jpg
    121.1 KB · Views: 977
  • IMG_2072.jpg
    IMG_2072.jpg
    132.4 KB · Views: 972
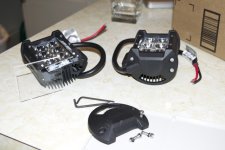
Next was my DRL/Ditch Mod made possible [MENTION=93434]gshadow325[/MENTION] for having the patience to answer my wiring questions. My plan was to install amber ditch lights which could also be used as turn signals, and wanted two things...
1: Manual on/off switch to control lights always on or always off
2: Lights flash with blinkers, regardless of switch being on or off


purchased these lights for $30 http://www.amazon.com/gp/product/B00...?ie=UTF8&psc=1.

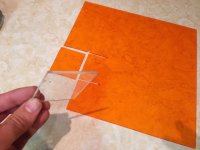
and this sheet of orange plexiglass for $10. http://www.amazon.com/gp/product/B00...?ie=UTF8&psc=1


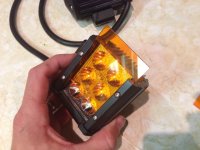
Started by removing the cap on one side of the lights by unscrewing the bolts
138030d1417368925-ditch-light-drl-turning-signal-mod-_dsc0238.jpg

then removed the clear lens that came with the lights, and cut the orange plexiglass to the same size.
138031d1417368954-ditch-light-drl-turning-signal-mod-img_2259.jpg

Put the new orange lens in, and tightened everything back up.
138032d1417368982-ditch-light-drl-turning-signal-mod-img_2261.jpg

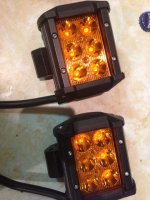
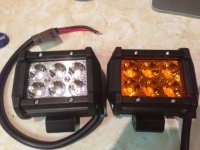
A side by side:
138033d1417369007-ditch-light-drl-turning-signal-mod-img_2264.jpg

And both after the swap:
138034d1417369026-ditch-light-drl-turning-signal-mod-img_2265.jpg
 

Attachments

  • 138030d1417368925-ditch-light-drl-turning-signal-mod-_dsc0238.jpg
    138030d1417368925-ditch-light-drl-turning-signal-mod-_dsc0238.jpg
    66 KB · Views: 880
  • 138031d1417368954-ditch-light-drl-turning-signal-mod-img_2259.jpg
    138031d1417368954-ditch-light-drl-turning-signal-mod-img_2259.jpg
    71.2 KB · Views: 868
  • 138032d1417368982-ditch-light-drl-turning-signal-mod-img_2261.jpg
    138032d1417368982-ditch-light-drl-turning-signal-mod-img_2261.jpg
    84.1 KB · Views: 882
  • 138033d1417369007-ditch-light-drl-turning-signal-mod-img_2264.jpg
    138033d1417369007-ditch-light-drl-turning-signal-mod-img_2264.jpg
    84.7 KB · Views: 895
  • 138034d1417369026-ditch-light-drl-turning-signal-mod-img_2265.jpg
    138034d1417369026-ditch-light-drl-turning-signal-mod-img_2265.jpg
    95.7 KB · Views: 878
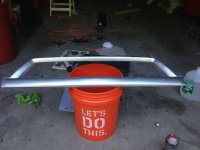
DIY'd the lights brackets by making a few bends in a 1" strip of steel from Home Depot, self etching primer, and black automotive paint.

138045d1417369396-ditch-light-drl-turning-signal-mod-_dsc0010.jpg

138046d1417369403-ditch-light-drl-turning-signal-mod-_dsc0013.jpg

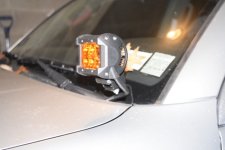
How I mounted them to the hood
138295d1417460619-ditch-light-drl-turning-signal-mod-img_2311.jpg

138296d1417460628-ditch-light-drl-turning-signal-mod-img_2313.jpg
 

Attachments

  • 138045d1417369396-ditch-light-drl-turning-signal-mod-_dsc0010.jpg
    138045d1417369396-ditch-light-drl-turning-signal-mod-_dsc0010.jpg
    50.5 KB · Views: 859
  • 138046d1417369403-ditch-light-drl-turning-signal-mod-_dsc0013.jpg
    138046d1417369403-ditch-light-drl-turning-signal-mod-_dsc0013.jpg
    61.7 KB · Views: 891
  • 138295d1417460619-ditch-light-drl-turning-signal-mod-img_2311.jpg
    138295d1417460619-ditch-light-drl-turning-signal-mod-img_2311.jpg
    57.3 KB · Views: 863
  • 138296d1417460628-ditch-light-drl-turning-signal-mod-img_2313.jpg
    138296d1417460628-ditch-light-drl-turning-signal-mod-img_2313.jpg
    68.5 KB · Views: 882
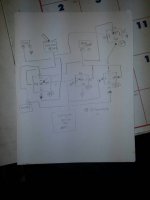
Wiring was pretty involved, and entirely thanks to [MENTION=93434]gshadow325[/MENTION]

The wiring diagram he took the time to make for me
138048d1417369549-ditch-light-drl-turning-signal-mod-010f512e902f9d53fe8fb9f4ca679ed9.jpg

What it looked like all wired up in this project box Hammond 1591ESGY Grey ABS Plastic Project Box -- Inches (7.5" x 4.3" x 2.2") mm (190mm x 109mm x 58mm) - Electronics Bags And Cases - Amazon.com

138049d1417369561-ditch-light-drl-turning-signal-mod-_dsc0005.jpg

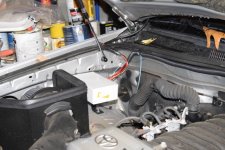
And where I mounted it in the engine bay
138050d1417369570-ditch-light-drl-turning-signal-mod-_dsc0009.jpg

A full breakdown of the wiring is is in the link in my signature

And video of the lights here https://www.youtube.com/watch?v=mbX_ZwpFuh8&list=UUmwGPuZ47r5VHizmajSXtJA
 

Attachments

  • 138048d1417369549-ditch-light-drl-turning-signal-mod-010f512e902f9d53fe8fb9f4ca679ed9.jpg
    138048d1417369549-ditch-light-drl-turning-signal-mod-010f512e902f9d53fe8fb9f4ca679ed9.jpg
    41.9 KB · Views: 864
  • 138049d1417369561-ditch-light-drl-turning-signal-mod-_dsc0005.jpg
    138049d1417369561-ditch-light-drl-turning-signal-mod-_dsc0005.jpg
    98.8 KB · Views: 869
  • 138050d1417369570-ditch-light-drl-turning-signal-mod-_dsc0009.jpg
    138050d1417369570-ditch-light-drl-turning-signal-mod-_dsc0009.jpg
    94.5 KB · Views: 865
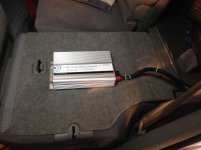
Wired in an 800w power inverter to the back panel of the rear driver side seat. Back panel pops right off then put 4 bolts through to mount inverter.
IMG_2481-1.jpg

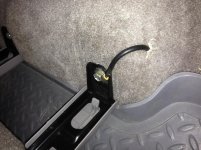
Ground wire connected to a bolt on the back seat, ran wire under carpet to keep it clean and avoiding getting snagged by a passenger entering/exiting
IMG_2482.jpg
 

Attachments

  • IMG_2481-1.jpg
    IMG_2481-1.jpg
    133.7 KB · Views: 915
  • IMG_2482.jpg
    IMG_2482.jpg
    133.6 KB · Views: 881
Ok, finally something that actually matters, the suspension.
Slowly acquired everything through E-bay, this forum and some FJ forums.
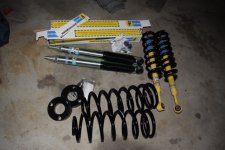
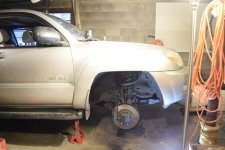
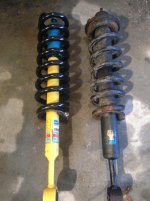
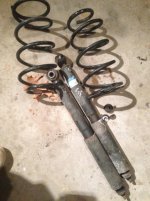
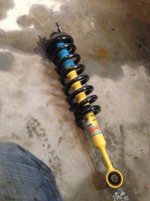
Front FJ Coils, front TACOMA TRD Bilstein struts, 2" daystar spacer, rear NIB ToyTec 2" coils, and NIB rear 5100's.
138064d1417372812-ditch-light-drl-turning-signal-mod-_dsc0017.jpg

And so the install began
_DSC0002.jpg

Soaked all the nuts and bolts in PB blaster for 2 days
IMG_2425.jpg

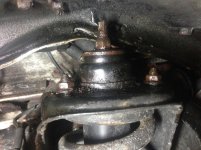
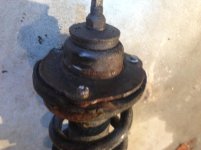
Which ended up being useless anyway, my northeast 4runner was so rusted I ended up just cutting everything and using new hardware. Got 1 of 3 nuts off on each top hat, stripped the other ones, wasted a good 6 hours when i should have just cut them in the first place
IMG_2428.jpg
 

Attachments

  • 138064d1417372812-ditch-light-drl-turning-signal-mod-_dsc0017.jpg
    138064d1417372812-ditch-light-drl-turning-signal-mod-_dsc0017.jpg
    82 KB · Views: 852
  • _DSC0002.jpg
    _DSC0002.jpg
    45.5 KB · Views: 861
  • IMG_2425.jpg
    IMG_2425.jpg
    58.2 KB · Views: 858
  • IMG_2428.jpg
    IMG_2428.jpg
    40.1 KB · Views: 850
Out with the old
IMG_2429.jpg
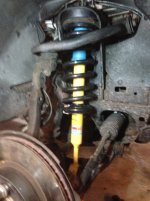
In with the new
IMG_2435.jpg
IMG_2426.jpg
Fronts assembled
IMG_2427.jpg


Front was a complete PITA, but pretty straightforward. Even if a shop could do it cheap I still would've preferred to do it myself. I always feel satisfied doing my own repairs and getting to know my vehicle. Rear was easy, maybe 2 hours by myself. Overall it was 2 full days, some really scraped up hands and I'm pretty sure I broke a finger, but hey, it's done....

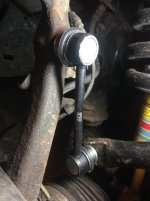
During install I stripped the nut of one of the sway bar end links so I just replaced the set for about $25
IMG_2442.jpg

Mostly followed these instructions and bits and pieces of other install writeups from the various forums OME Suspension Install on 4Runner - Toyota 120 Platforms Forum
 

Attachments

  • IMG_2429.jpg
    IMG_2429.jpg
    56.7 KB · Views: 884
  • IMG_2435.jpg
    IMG_2435.jpg
    56.3 KB · Views: 864
  • IMG_2426.jpg
    IMG_2426.jpg
    52.6 KB · Views: 871
  • IMG_2427.jpg
    IMG_2427.jpg
    56.2 KB · Views: 846
  • IMG_2442.jpg
    IMG_2442.jpg
    45.7 KB · Views: 838
Last edited:
I have since removed the fog lights I had in the lower grill, may eventually put a 30" there, but found that they weren't very effective.


As it sits now. After suspension I got the lifetime alignment at Firestone. New set of Cooper Discoverer ST MAXX 255/80/17 for about $800 shipped from ebay (still need a spare) and 1.25" hubcentric spacers.
_DSC0020.jpg
_DSC0024.jpg
_DSC0026.jpg
_DSC0027.jpg

These tires are animals in the snow and I couldn't be happier. Long Island got hammered this winter and my truck performed like a champ.

And after the lift and tires, this is all the clearance I have with my garage door....
IMG_2441.jpg
 

Attachments

  • IMG_2441.jpg
    IMG_2441.jpg
    44.9 KB · Views: 844
  • _DSC0020.jpg
    _DSC0020.jpg
    135.4 KB · Views: 837
  • _DSC0024.jpg
    _DSC0024.jpg
    133.1 KB · Views: 945
  • _DSC0026.jpg
    _DSC0026.jpg
    134.7 KB · Views: 900
  • _DSC0027.jpg
    _DSC0027.jpg
    131.1 KB · Views: 913
Last edited:
i forsee a set of lights going in the useless reflector housings
[MENTION=50591]gaterose[/MENTION] came up with the idea and there are several versions out there!

i have them wired up as reverse lights and also they can be triggered on too by a external switch.
 
Very well executed and thought out build. Love the homemade amber ditch brackets and lights that also function as turn signals. Great looking rig sir!
 

Attachments

  • IMG_2601-1 2.jpg
    IMG_2601-1 2.jpg
    126.5 KB · Views: 855
  • IMG_2602.jpg
    IMG_2602.jpg
    133.5 KB · Views: 818
  • IMG_2603-1.jpg
    IMG_2603-1.jpg
    121.5 KB · Views: 810
  • IMG_2605.jpg
    IMG_2605.jpg
    132.5 KB · Views: 807
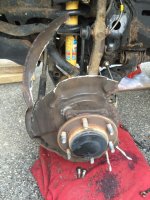
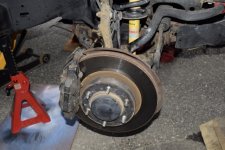
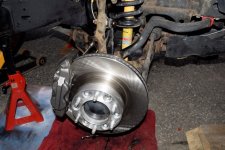
Upgraded to the 5th Gen front calipers etc. and front stainless brake lines. About 4 hours work, noticeable improvement in stopping power and brake feel.
Was having intermittently seized calipers...... Some days during my commute the front passenger driver side would lock up bad, where the truck was pulling hard to the left and after just 2 miles the wheel would be VERY hot to the touch and stench of burnt brakes. That wheel would be covered in brake dust a couple days after a wash.
Some days it would seem to fix itself and could drive all day without any symptoms of seized calipers.
For a less than $300 upgrade (After core return) this feels like money well spent.


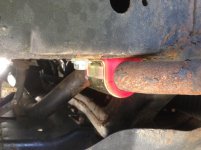
trimmed dust shield
IMG_2852.jpg
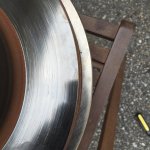
old vs new rotors
IMG_2853.jpg
old
_DSC0014.jpg
new
_DSC0015.jpg
 

Attachments

  • _DSC0014.jpg
    _DSC0014.jpg
    88.8 KB · Views: 710
  • _DSC0015.jpg
    _DSC0015.jpg
    96.8 KB · Views: 691
  • IMG_2852.jpg
    IMG_2852.jpg
    125.4 KB · Views: 662
  • IMG_2853.jpg
    IMG_2853.jpg
    106.8 KB · Views: 673
I dig the way you run the lights and wiring. Any chance you're from the port Jeff area? If so, I'm a physian at Mather Hospital.
 
I dig the way you run the lights and wiring. Any chance you're from the port Jeff area? If so, I'm a physian at Mather Hospital.

Thank you, I've tried to keep things neat as possible. In retrospect I wish I knew ahead of time ALL of the lights and electronics I was putting in so I could have done all the wiring in one shot to keep the install clean, but I'm still happy how it turned out.
And YES... I work in PJ/PJ Station, I'm the SCPD 607 car, in Mather ER fairly frequently unfortunately.
 
Nice job t101! I like the 5th gen caliper upgrade. I only got turned on to it after my order shipped ;( so no dice for me.
 
Thank you, I've tried to keep things neat as possible. In retrospect I wish I knew ahead of time ALL of the lights and electronics I was putting in so I could have done all the wiring in one shot to keep the install clean, but I'm still happy how it turned out.
And YES... I work in PJ/PJ Station, I'm the SCPD 607 car, in Mather ER fairly frequently unfortunately.

Awesome, maybe I'll run into you one day, hopefully not in the ER when you bring in the craziness. I'm the only 2wd in the area probably. 07 Shadow Mica with a TX plate. Haha. The truck held its own the past winter being only 2wd, but with good tires. I definitely saw your truck at the PJ firehouse. I played ball from time to time at the court behind Ruvo.
 
Been pretty busy with my truck and with life in general. Over the past few weeks managed to find some time to do some long delayed work to my truck.

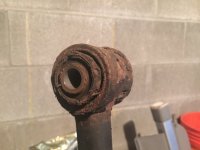
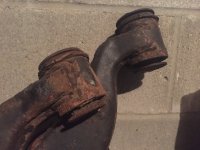
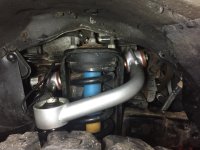
Refreshed the front suspension with new upper & lower control arms, sway bar end links, and camber alignment bolts.

Uppers were relatively straight forward, 1st side took about 4 hours as it was a learning experience and my first time doing this install. 2nd side was less than 90 minutes. Now I'm sure I could do each side in about an hour.

Had the same issue with the ebay uppers as most other people in that the bushings were too big / sleeves were too short. Ground down the poly bushings to be the same width as the sleeves, and now with a little over 1,000 miles on the uppers I've had zero issues. Had to add a small washer to one of the UCA's because there was about a 1mm gap between the inner UCA bushing/sleeve and the strut tower where the pivot bolt connects every thing, after the washer it fit like a glove.

Lowers were also straight forward but definitely more time consuming, about 7 hours total. Got very lucky in that ONLY 1 of 4 alignment bolts/sleeves were seized and had to be cut out, and even that one only added about 20 minutes to the removal time.

After TWO alignments (because Firestone 1/2 assed the first one and had a 0.9 difference in Left (4.0) - Right (3.1) caster) everything is in spec and handling great. A shake in the steering wheel around 70 MPH is gone and on a flat road my truck drives straight as an arrow. Still sensitive to road crown as should be expected with 33" tires.

Greased the heck out of everything during install to do my best to prevent any seizing in the future.

New Uppers, EBAY UCA's
IMG_2965.jpg

Old UCA
IMG_3013.jpg

New LCA
Lower Control Arm Arms Ball Joint Bushings Pair Fits 4Runner FJ Cruiser GX470 | eBay
and SPC cam bolts
SPC Performance Caster/Camber Bolt Kit; Reqr's 1 per Wheel LEXUS GX470
IMG_3005.jpg

Old LCA's
IMG_3012.jpg

Original alignment bolts
IMG_3015.jpg

New sway bar end links
2 Front Left Right Sway Bar Links 03 11 Toyota FJ Cruiser 4Runner Lexus GX470 | eBay
IMG_3004.jpg

old links
IMG_3014.jpg
 

Attachments

  • IMG_2965.jpg
    IMG_2965.jpg
    89.3 KB · Views: 200
  • IMG_3013.jpg
    IMG_3013.jpg
    61 KB · Views: 207
  • IMG_3005.jpg
    IMG_3005.jpg
    77.6 KB · Views: 201
  • IMG_3012.jpg
    IMG_3012.jpg
    86.1 KB · Views: 203
  • IMG_3015.jpg
    IMG_3015.jpg
    95.6 KB · Views: 211
  • IMG_3004.jpg
    IMG_3004.jpg
    96.7 KB · Views: 198
  • IMG_3014.jpg
    IMG_3014.jpg
    62.3 KB · Views: 193

Members online

No members online now.

Forum statistics

Threads
278,306
Messages
3,554,045
Members
248,016
Latest member
Advally Service

Trending content

Back
Top