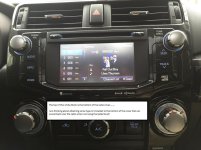
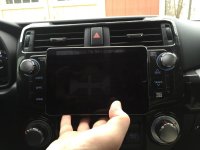
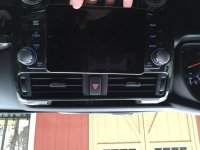
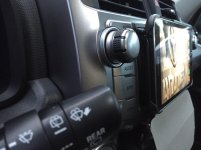
Tablet mount over head unit

Interesting grc9600, though that would get a ticket here from the local police for all sorts of violations :frusty:


I like that idea decker1. That's actually the reason why I have a Samsung Tab4 7.0, it's only slightly bigger than the screen on mine. The only issue I see is any "influence" on it's vertical position :dancin:

pjo

You mean if you the drive would shift the tablet around to be askew? If it's hanging from the cd tray it would technically straight since the cd tray is straight, provided the L brackets are the same size. I could see it swinging like a picture frame around towards the center console. Perhaps extra mounts would be necessary. Like mounted on the air vents as well
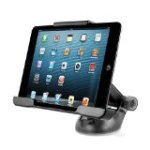
 
I use an Iottie mini ipad mount for a samsung tab 8.4. works perfectly and sticks to any surface.
Check out amazon if interested.
I don't use it like the pic shown. I turn the arm so it's low profile.
 

Attachments

  • 51fAkkPICeL._AA160_.jpg
    51fAkkPICeL._AA160_.jpg
    5.8 KB · Views: 1,684
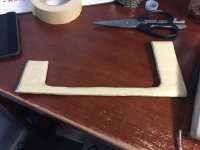
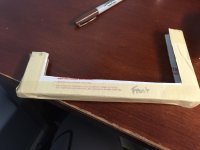
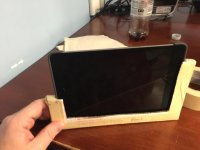
I am thinking I like the idea of a temp ipad/tablet spot. here is what I have so far:
IMG_1701.jpg
IMG_1700.jpg
 

Attachments

  • IMG_1701.jpg
    IMG_1701.jpg
    128.1 KB · Views: 1,877
  • IMG_1700.jpg
    IMG_1700.jpg
    123.7 KB · Views: 2,135
  • IMG_1699.jpg
    IMG_1699.jpg
    124.7 KB · Views: 1,739
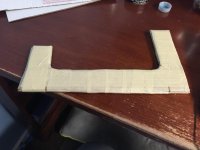
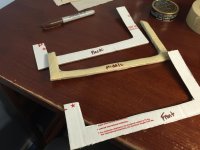
Not trying to take over this thread, but I am open to ideas....For the 1st time I decided to make a template of what I would like to do, I think that this idea needs some improvement....Like I think I need to drop he entire middle section and just use spacer washers, this will allow me to use thinner front and back rails

This was done without measuring anything...When I make the actual mount, I will measure. **Sorry that the pics are not in the order they are supposed to be, I am inserting the correct pic but the wrong one posts, ugh! I have tried to edit it several times and it will not correct

1st: took 3 layers of cardboard and cut out a section to insert the ipad with case
IMG_1710.jpg

next test fit the opening:
IMG_1711.jpg

Starting to thin out the inner layer
IMG_1712.jpg

Created a front and back with a thicker width for the front and back
IMG_1715.jpg
put together
IMG_1716.jpg
the goal is to make a permanent mount that will attach to the factory bezel but not look like sh*t when the ipad mini is not in place...I plan on running a 3.5 m to m cable through the vent or something to the glove box to plu into the aux.


****why in the heck wont mu pictures post in the order I want!!!!
 

Attachments

  • IMG_1710.jpg
    IMG_1710.jpg
    126.2 KB · Views: 1,649
  • IMG_1711.jpg
    IMG_1711.jpg
    120.6 KB · Views: 1,671
  • IMG_1712.jpg
    IMG_1712.jpg
    126.5 KB · Views: 1,660
  • IMG_1714.jpg
    IMG_1714.jpg
    124.9 KB · Views: 1,634
  • IMG_1715.jpg
    IMG_1715.jpg
    122.8 KB · Views: 1,648
  • IMG_1716.jpg
    IMG_1716.jpg
    117.3 KB · Views: 1,770
Last edited:
I am working on something now using a metal U channel..Will post when I an done. May even make my own thread for the 1st time.
 
OK. Final update unless I can come up with something better (that covers the holes I already drilled)

1. I purchased 1/2" aluminum U Channel. Mitre cut the sides and bottom at a 45 degree angle and reenforced the bottom with a 1/2" strip...All of it is gorilla glued together (Can't weld and don't have the tools to learn)
IMG_1720.jpg

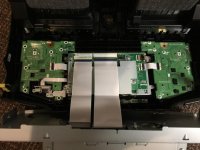
2. took the radio apart (not for the faint of heart). Here is a pic of the stock units backside with the brians removed.
IMG_1723.jpg

3. Painted it with Rusto Black Hammered paint and attached (I know its not level, i'm pissed that I did not notice unit it was reinstalled)
IMG_1727.jpg

Here it is with the ipad mini in place...
IMG_1724.jpg
IMG_1725.jpg

It does not rattle, bounce or shift. I have used it via bluetooth and aux. When I decide to go back and level it out (F****ing thing must have shifted when screwing it into place) I am thinking about adding an Aux on the face of the unit. BTW it sounds better using Aux than BT and if watching video BT Audio seems to lag a bit.

Anyone have a way to improve this? Let me know, I don't get butthurt with comments.
 

Attachments

  • IMG_1720.jpg
    IMG_1720.jpg
    125 KB · Views: 1,842
  • IMG_1723.jpg
    IMG_1723.jpg
    129.1 KB · Views: 1,834
  • IMG_1727.jpg
    IMG_1727.jpg
    134.2 KB · Views: 2,079
  • IMG_1724.jpg
    IMG_1724.jpg
    133.7 KB · Views: 2,058
  • IMG_1725.jpg
    IMG_1725.jpg
    130.6 KB · Views: 2,089
I think it looks great! I'm not clear why you had to take the stock radio apart. Does the iPad replace it?
 
The reason I had to take the stock radio apart is that I needed to drill holes in it to attach the mount. Again, for any that attempt this this is a mod that you cannot go back on. It screwed onto the radio fascia.... It is not something you can go back from without replacing parts
 
Looks good [MENTION=132095]MayorBloom[/MENTION]!

I am still waiting on some parts... but I like the functionality of yours. Is it bolted between the screen and the buttons?

pjo
 
Looks good [MENTION=132095]MayorBloom[/MENTION]!

I am still waiting on some parts... but I like the functionality of yours. Is it bolted between the screen and the buttons?

pjo

No it is just screwed into the radio face. 3 Screws across the bottom, what you cannot see is that I used a 1/2" L to put between the bracket and the radio, creating the slightest gap. I am actually thinking of removing it, leveling it and filling the gap between the L bracket and fascia with black epoxy.
 
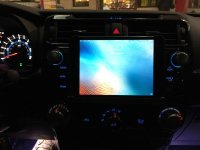
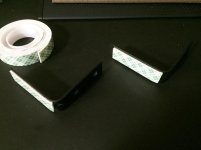
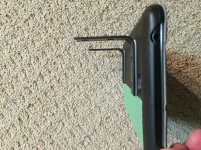
OK so after finally getting all my parts in here is what I came up with. First of all the parts list :

2 x Corner Braces ($1 @ Home Depot)
1 x Roll Permanent Double-Sided Tape ($5 @ Home Depot)
1 x Case for Samsung Tab4 ($7 @ Amazon)
** I also Plasti-Dipped the corner braces for a rubberized protection - to keep from scratching anything.

Corner Braces prepped with tape
IMG_0043.jpg

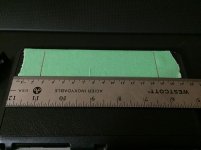
Proper measurement to make sure they fit and are level
IMG_0044.jpg

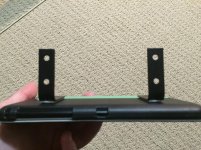
Braces Attached
IMG_0045.jpg
IMG_0046.jpg

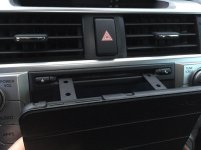
Braces inserted in CD slot
IMG_0047.jpg

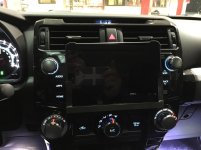
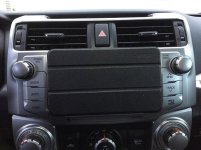
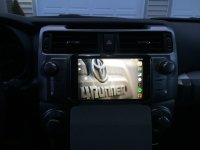
The finished mounted look.
IMG_0048.jpg
IMG_0049.JPG
IMG_0050.jpg

After driving around for half a day, seems to be holding very well as there has been no wobble, shake or change in mounting position due to slippage :cool:

pjo
 

Attachments

  • IMG_0043.jpg
    IMG_0043.jpg
    41.6 KB · Views: 1,667
  • IMG_0044.jpg
    IMG_0044.jpg
    56 KB · Views: 1,673
  • IMG_0045.jpg
    IMG_0045.jpg
    129.7 KB · Views: 1,697
  • IMG_0046.jpg
    IMG_0046.jpg
    124.6 KB · Views: 1,660
  • IMG_0047.jpg
    IMG_0047.jpg
    47.8 KB · Views: 1,687
  • IMG_0048.jpg
    IMG_0048.jpg
    68.2 KB · Views: 2,227
  • IMG_0049.JPG
    IMG_0049.JPG
    97.8 KB · Views: 1,733
  • IMG_0050.jpg
    IMG_0050.jpg
    53.5 KB · Views: 1,679
OK so after finally getting all my parts in here is what I came up with. First of all the parts list :

2 x Corner Braces ($1 @ Home Depot)
1 x Roll Permanent Double-Sided Tape ($5 @ Home Depot)
1 x Case for Samsung Tab4 ($7 @ Amazon)
** I also Plasti-Dipped the corner braces for a rubberized protection - to keep from scratching anything.


After driving around for half a day, seems to be holding very well as there has been no wobble, shake or change in mounting position due to slippage :cool:

pjo

This looks really good and might opt to do it in my 4th gen. How's it been so far pjo?
 

Members online

Forum statistics

Threads
278,307
Messages
3,554,056
Members
248,016
Latest member
Advally Service

Trending content

Back
Top