TE Parts Needed to Convert SR5/Limited Exterior

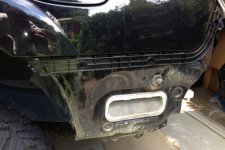
To those who has done the swap. What have you guys done with the backup sensor? I received my parts today and just realized ther are no holes for the backup sensor. Another blizzard pearl runner on TE parts coming soon :zoom::zoom:
 
To those who has done the swap. What have you guys done with the backup sensor? I received my parts today and just realized ther are no holes for the backup sensor. Another blizzard pearl runner on TE parts coming soon :zoom::zoom:

Awesome! I have a BP as well and love the look of them converted to trails. It's just too expensive for me now though.
 
Hi I bought a 2012 SR5 4 runner yesterday and regret buying w/ running boards. Any suggestions? Do you think the dealer will swap out? Can I remove the running boards painlessly and will it look like the running boards were never there? Thank you. Not too handy and would appreciate any advice.
 
Hi I bought a 2012 SR5 4 runner yesterday and regret buying w/ running boards. Any suggestions? Do you think the dealer will swap out? Can I remove the running boards painlessly and will it look like the running boards were never there? Thank you. Not too handy and would appreciate any advice.

running boards can be taken out in less than 20 minutes. I sold mine on craigslist for $250.

I guess the dremel is coming out of its box..lol

I just like the look of the TE so much more, it looks more aggressive. just a whole different attitude to the runner.
 
I just ordered a bunch of parts from toyotapartssales.com and they told me that these two parts are discontinued. Any idea whats up with that?

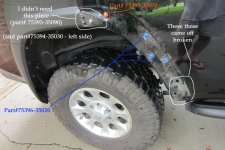
• S.) L. Front Bumper Support 52116-35130 $37.75 – 27.24
• T.) R. Front Bumper Support 52115-35140 $37.75 – 27.24


Also I still can't find the part number for the clips that hold the fender liners in for the life of me. Any help with that would be awesome. Thanks!
 
I just ordered a bunch of parts from toyotapartssales.com and they told me that these two parts are discontinued. Any idea whats up with that?

• S.) L. Front Bumper Support 52116-35130 $37.75 – 27.24
• T.) R. Front Bumper Support 52115-35140 $37.75 – 27.24


Also I still can't find the part number for the clips that hold the fender liners in for the life of me. Any help with that would be awesome. Thanks!
Ask them what it's been updated to?When you find out ,let me know and I'll update the post for the next person.

You can go to Toyota parts sales website ToyotaPartSales.com and look them up but they don't list part numbers and you'll have to call them to get them or do like I did and sit down with the parts person at the dealership writing them down.
These were a couple of the parts that set me back several weeks as nobody knew they were different then SR5/Limiteds and they definitely are!

To find them it's under 2012 4Runner / Body Hardware / Front Bumper.... and they are #7 and called "side retainer" and there is a left and right one.

As far as the fender liner clips I just reused mine so don't have the part numbers for them.
 
Ask them what it's been updated to?When you find out ,let me know and I'll update the post for the next person.

You can go to Toyota parts sales website ToyotaPartSales.com and look them up but they don't list part numbers and you'll have to call them to get them or do like I did and sit down with the parts person at the dealership writing them down.
These were a couple of the parts that set me back several weeks as nobody knew they were different then SR5/Limiteds and they definitely are!

To find them it's under 2012 4Runner / Body Hardware / Front Bumper.... and they are #7 and called "side retainer" and there is a left and right one.

As far as the fender liner clips I just reused mine so don't have the part numbers for them.


Thanks.
 
I just ordered a bunch of parts from toyotapartssales.com and they told me that these two parts are discontinued. Any idea whats up with that?

• S.) L. Front Bumper Support 52116-35130 $37.75 – 27.24
• T.) R. Front Bumper Support 52115-35140 $37.75 – 27.24


Also I still can't find the part number for the clips that hold the fender liners in for the life of me. Any help with that would be awesome. Thanks!

Check my build thread for the fender flare replacement. It has a link to where I bought my spare clips. Don't have the link handy here (doing this while in a meeting).

Okki
 
Check my build thread for the fender flare replacement. It has a link to where I bought my spare clips. Don't have the link handy here (doing this while in a meeting).

Okki

Thanks for the tip Okki (and for taking the time to reply when in a meeting!) I went ahead and got the clips you linked to, these are WAY cheaper than getting the clips from toyotapartssales.com individually.
 
Ask them what it's been updated to?When you find out ,let me know and I'll update the post for the next person.

Same part number, you just have to choose the 2011 or 2012 version when you add it to the cart, the 2010 is apparently discontinued. Strange since it should be the exact same part between the years. Oh well, I have these two parts at home now.

As far as the fender liner clips I just reused mine so don't have the part numbers for them.

Can anyone confirm that that fender retainers are number 10 here?
parts.png


Thanks!
 
Finally got around to getting my front and rear bumper ordered. In case anyone is interested, the front bumper cover part# has been updated to: 52119-35910
Everything else is still the same.
 
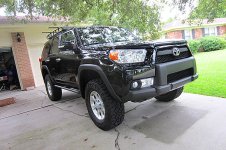
TE Conversion complete!

Finally, I have completed this mod! HUGE thanks to Harper and others on here who have made this possible! Here are some pics, and then I will upload some tips/mistakes/pics...and hopefully the next person who does this might find them helpful.

IMG_1748.jpg
 

Attachments

  • IMG_1748.jpg
    IMG_1748.jpg
    141.5 KB · Views: 4,030
Last edited:
Notes on removing the front bumper cover:
--It really is easy once you learn how to do it.
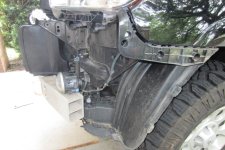
--Try to unhook the fogs and the DRLs first from underneath if you can. Then, when it comes off, you won’t mess up the wires, etc.
--You don’t have to remove the top part of the grill, but you might as well because you have to put it onto the TE bumper.
--Don’t forget to unscrew the fender liner screws and the ones underneath.
--Pull from the bottom left or bottom right first…near the fender liner.
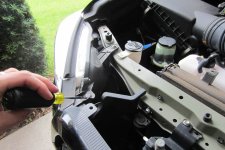
--Just under the headlights, there is a bracket that the top of the bumper cover “snaps” into. You need to pop this off on each side first. Be careful!


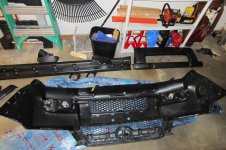
Prepping the bumper covers before putting onto the vehicle:
--Paint them if need be (just make sure to factor in some time and money for this…I got a body shop to do mine)
--MAKE SURE to do the rest of this on a rug or other soft surface!!!
--Rear – Install the middle bottom cover piece
--Rear – Install the flares
--Front – Pop in the DRLs and Fog light covers
--Front – Put in the lower grill. To get the old one off, pry gently at each lock tab with a small flathead.
--Front – Attach the upper grill piece from the old bumper. To get the old one off, you DO NOT need to unscrew all the little Phillips head screws! I did that…oops. Instead, just use a little finesse with a small flathead on the corners and the rest will be easy.
--Front – Put on the middle cover piece
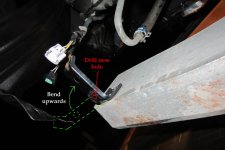
--Front – Bend the old bumper cover brackets upwards until parallel with the ground
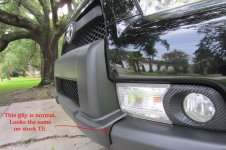
--Front – There will be a reveal around the outer cover and the main cover near the DRL. This is indeed normal. I actually went to the dealer and compared my work to a stock TE and it’s the same.
IMG_1733.JPG

IMG_1734.JPG

IMG_1735.JPG

IMG_1736.JPG

IMG_1737.JPG

IMG_1741.jpg

photo (1).JPG

photo.JPG
 

Attachments

  • IMG_1733.JPG
    IMG_1733.JPG
    122.6 KB · Views: 3,891
  • IMG_1734.JPG
    IMG_1734.JPG
    127.6 KB · Views: 3,891
  • IMG_1735.JPG
    IMG_1735.JPG
    95.8 KB · Views: 3,893
  • IMG_1736.JPG
    IMG_1736.JPG
    91 KB · Views: 3,900
  • IMG_1737.JPG
    IMG_1737.JPG
    83.3 KB · Views: 3,892
  • IMG_1741.jpg
    IMG_1741.jpg
    127.9 KB · Views: 3,894
  • photo (1).JPG
    photo (1).JPG
    98 KB · Views: 3,861
  • photo.JPG
    photo.JPG
    112.5 KB · Views: 3,875
Last edited:
Fender flares

Fender Flares:
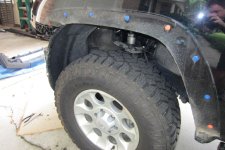
--To remove, you have to pull them off the vehicle and you will probably break the backs of them in places. Start on one end and work your way up gently. You might use a panel remover, but be careful to not slip and scratch the paint next to the flare! Some of the retainers will not break and many WILL break.
--The orange and blue retainers are NOT the same. Take pictures or take some notes on which ones are in what holes on the body after you remove the old flares. The orange retainers are slightly wider and they go deeper into the sheet-metal holes. If you don't get them right, and in the right places matched up with the fender flare piece, you could break the square hole on the fender flare (I did…doh!). So, be very gentle when putting it back onto the vehicle. Also, if you mess up and then need to remove the flare, you are very likely to break the flare. So don't plan on taking it back off unless you have a spare flare.
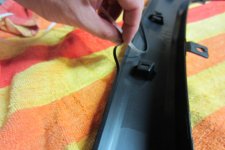
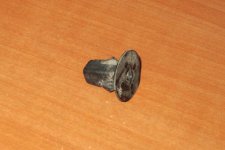
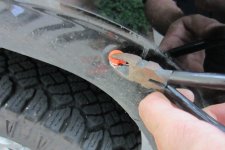
--The orange retainers are harder to get off the body than the blue ones. For the blue ones, twist 90 degrees and it comes right out. For the orange ones, try that, but if it doesn't work, then you will have to force it out and break it. About half of these will break when you pull off your old fender flares.

IMG_1725.JPG

IMG_1738.JPG

Using wire cutters to try to twist the retainers off.
IMG_1739.JPG


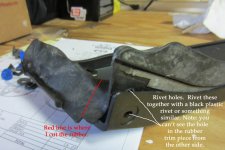
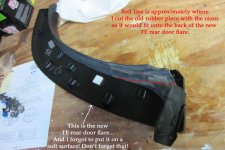
--I don’t believe Harper7's list includes the thick rubber guard for the rear door flares, and I couldn't even find the part online, but you can most definitely re-use the old ones. You just have to use a razor to cut off part of the bottom of each one. Use your own judgment. Also, you have to pull pretty hard to get them unstuck from the back of the fender flare, but I did it. Lastly, you will need some black plastic rivets to put this piece back onto the flares, another thing not in the list, but you can use generic rivets for this.


IMG_1726.JPG

IMG_1727.JPG

--Make sure to order the fender flare weather stripping and put it on before installing. USE a carpeted or towel covered countertop! These TE flares are easily scratched!
IMG_1732.JPG
 

Attachments

  • IMG_1725.JPG
    IMG_1725.JPG
    127.7 KB · Views: 7,211
  • IMG_1738.JPG
    IMG_1738.JPG
    111.2 KB · Views: 4,044
  • IMG_1739.JPG
    IMG_1739.JPG
    84.7 KB · Views: 3,944
  • IMG_1726.JPG
    IMG_1726.JPG
    116 KB · Views: 4,238
  • IMG_1727.JPG
    IMG_1727.JPG
    102.8 KB · Views: 3,994
  • IMG_1732.JPG
    IMG_1732.JPG
    89.1 KB · Views: 3,982
Last edited:
Front fender liners and bumper cover supports

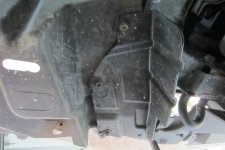
Front fender liners (probably the biggest pain in the neck!):
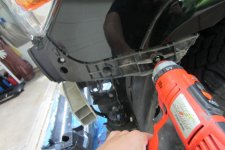
--There are these screw grommets that hold the liners in. I ended up physically cutting the plastic liners off AROUND the grommets using sheet metal snips, and then used a screwdriver and a pair of wire cutters to gently massage them out, but I still messed up at least ten of them. They cost like $2.50 per grommet for new ones locally, so you decide if you want to take the time to salvage them, or if you just want to rip them out. Just be careful if you rip them out, because you could bend the sheet metal holes into which they fit. Maybe there is some sort of special grommet remover tool for these things??? If so, then Lord I wish I had one!
--Once you get them out, it’s easy to install the new ones!
--You will need to do this BEFORE you put on the front cover ideally.
--Then, once the front cover is on, you can tie the front of each front fender liner into the new holes you drilled into the old front bumper cover brackets.
--Also, you don’t need a screw to be screwed into every of these grommets. So, make note of which ones had screws BEFORE you remove the old ones. You should have enough old screws.

Here is one I salvaged...
IMG_1740.JPG

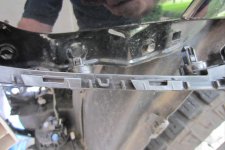
Front bumper cover brackets need to be bent upwards until parallel with the ground. I used my hands to do this. Then, once you have the front bumper cover on the vehicle and you have the top fastened properly, you will need to line up the new bumper cover with the old bracket, at which point you will need to drill a hole for a screw to hold it on there. This screw will also need to hold on your fender liner, and if you want to do the fender liner mod to fit bigger tires, then you need a new hole in the fender liner too. Easy.
IMG_1743.JPG

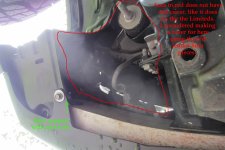
When you are finished, you may notice a place on either side of the underside of the front bumper that was covered on the LTD, but now is not. I thought I was missing a TE-specific piece, but when I compared to a TE on the dealer lot, I realized that this area is just not covered up on the TE.

IMG_1747.JPG
 

Attachments

  • IMG_1740.JPG
    IMG_1740.JPG
    91.3 KB · Views: 3,912
  • IMG_1743.JPG
    IMG_1743.JPG
    88.9 KB · Views: 3,977
  • IMG_1747.JPG
    IMG_1747.JPG
    106.2 KB · Views: 3,870
Last edited:
Other notes:
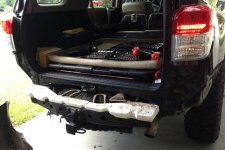
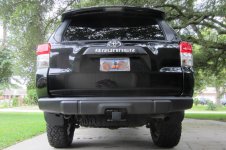
Once the rear bumper is on, you may find that there is nowhere for the middle bottom two mounts, but I just left them without fabricating a bracket/hole for them. At first I thought that it would be a problem hitting my spare, but then realized my spare was pushed back more than normal due to the last time Toyota dealer rotated the tires. This first pic is before I readjusted it and now that I have, there is plenty of room.
IMG_1731.JPG

The trailer hitch light plug relocation that I had done before now no longer works with the new bumper. The TE bumper has a tighter fit around the hitch receiver than the Limited. So, I made a simple L-bracket and used the top left hitch bolt to secure it. I also had to bend upwards the original hitch light mount to hide it more from view due to the higher approach angle. I did this with my hand while lying on the ground under it.
IMG_1753.jpg

There is a place on the front bumper that looks like the seam is too large, but it's not because I went and looked a stock TE at the dealer and its the same...
IMG_1749.jpg

Rocker panels -- Easy as pie, but I had to loosen the bolts on my Schrockworks Sliders to get them on there. Also, you will need two of those black "push-in" fasteners and two of the aforementioned screw grommets and corresponding screws to properly affix the front mud flaps. You do this from underneath the flap.

Things that DO NOT come with their associated parts:
--weather stripping for the fender flares
--Rocker panel screws (4) (but the old ones work fine if you have them)
--Rivets (4) to hold rubber piece to rear fender flare
--Retainers for the fender flares (you need lots of these, see my pics to figure out how many)
--Screw grommets for the fender liners (and mudflaps!)
--Push-in fasteners (2) for the mud flaps
--Bolts/washers (2) for your new holes in the front bumper cover brackets
--Fasteners for holding on the front and rear bumper cover trim pieces, but you can take some from your old rocker panels and also from your old bumpers.

Again, HUGE thanks to everybody who did this before I did! I now have repaired AND improved my bumpers that were damaged in Moab last spring! If there is anything in here that is wrong or needs improvement, send me a PM and I can edit it as needed.
 

Attachments

  • IMG_1731.JPG
    IMG_1731.JPG
    82.2 KB · Views: 3,982
  • IMG_1753.jpg
    IMG_1753.jpg
    124.6 KB · Views: 3,858
  • IMG_1749.jpg
    IMG_1749.jpg
    123.4 KB · Views: 3,832
Last edited:
Cheeky bastards!

Why didn't you guys buy a Trail Edition then slap on two "Limited" emblems? Seems cheaper to me!
 

Members online

Forum statistics

Threads
278,316
Messages
3,554,121
Members
248,016
Latest member
Advally Service

Trending content

Back
Top