TE Roof Rail Swap

paulndot

New member
First of all, I’d like to say thanks to cmitch for selling me & shipping his TE rack. A true gentleman who’s serving our country. You rock brotha. Also - to the folks that already did the trial and error on this swap. I got info from a few places. Not a big deal really, just 4 bolts and some spray paint, but considering that a mistake means I could find a puddle inside the 4Runner and probably have to replace the headliner, better safe than soggy. Besides, if Mr. Murphy ‘s gonna make an appearance – it’ll be at MY party…trust me. I posted parts of the process individually in case someone has a question about just one step or another.
 
Last edited:
Register to hide this ad
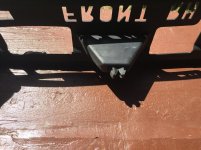
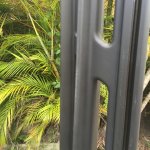
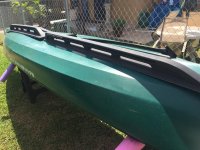
CMITCH’s rails were in great condition when they arrived. Here they are, looking like ice-skate rails on my canoe (drying after a wash). All I needed to do was wash off a bit of New Mexico sand and they were pretty clean. The long, one-piece plastic/rubber gasket comes off very easily, it’s basically just pressed into place.
 

Attachments

  • IMG_3140.jpg
    IMG_3140.jpg
    137.5 KB · Views: 960
  • IMG_3150.jpg
    IMG_3150.jpg
    133.4 KB · Views: 976
  • IMG_3151.jpg
    IMG_3151.jpg
    135.5 KB · Views: 963
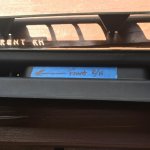
I made sure to mark the underside of each rail. Basic, yeah I know, but Murphy showed up to this party later on. As I post more often, you’ll see the things that I do to myself. Really, it’s a way of avoiding self-inflicted injury.
 

Attachments

  • IMG_3153.jpg
    IMG_3153.jpg
    128.4 KB · Views: 936
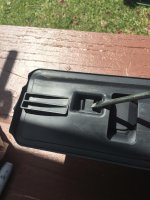
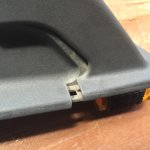
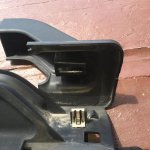
I decided to take the end caps off to make sure paint got in every crack it needs to get into. There’s nothing worse than a nice new coat, and old grayed paint showing in the cracks. They’re pretty easy to remove when the rails are off the truck. I learned something about that that I’ll share later. Be careful with these brass-colored clips. They’re pretty flimsy.
 

Attachments

  • IMG_3157.jpg
    IMG_3157.jpg
    132.4 KB · Views: 950
  • IMG_3158.jpg
    IMG_3158.jpg
    132.6 KB · Views: 942
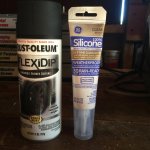
I dipped the rails, but chose not to use Plasti-dip, after reading this post from KingTaco:

I just did this to my 2016TE last week. I used the Rustoleum version of PlastiDip, and can't believe how well it turned out. I've heard the Rustoleum version goes on a bit more fine than the PlastiDip. I used many thin coats, but you don't have to wait long between coats. I think it looks totally factory, and makes a big difference on the overall look of the truck. I can't speak much to durability yet, but even if you were to beat them up, you can always touch up the dip. It was incredilbly easy to do, so even if you don't like it and want to remove it, you haven't lost much time or money. There is a good YouTube video on how to remove the boots and rails here:
https://m.youtube.com/watch?v=HVeuXVOmKbw

Good luck!
 

Attachments

  • IMG_3177.jpg
    IMG_3177.jpg
    119.7 KB · Views: 948
One of the things I noticed when using Plasti, is that it does come on a bit thick. As described here, the Rustoleum stuff sprays a much thinner coat. After the second coat, I could still see a few spots of faded paint. In all, I sprayed the rails with 4 coats each.
 

Attachments

  • IMG_3162.jpg
    IMG_3162.jpg
    133.3 KB · Views: 919
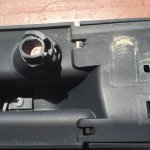
The old rails had some sort of gasket-forming goop on the feet. I wanted to re-seal them with clear silicone. I peeled what I could off, and brushed the “feet” with a small brass-bristle brush (an old .223 bore brush actually). This GE Silicone was recommended by another member on here, but I can’t seem to find the post. If you know who you are, thanks, if anyone knows who he is – thank him. If it remains a mystery, then screw it I’m taking full credit. I figure if it keeps rain out of windows, it should work fine on the car. We’ll know in a few car washes. Here are some before & after pics.
 

Attachments

  • IMG_3155.jpg
    IMG_3155.jpg
    111.8 KB · Views: 947
  • IMG_3160.jpg
    IMG_3160.jpg
    129.7 KB · Views: 955
Last edited:
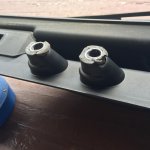
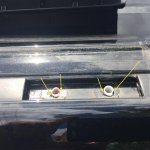
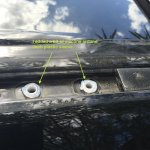
The area around these plastic sleeves is what needs to be sealed. There’s space between the sleeve and the sheetmetal, so any water through there will end up in your headliner. NO ES BUENO. I basically formed a silicone gasket around the sleeve, so the feet would get it into any gaps when the rails get torqued down.
 

Attachments

  • IMG_3167.jpg
    IMG_3167.jpg
    134.5 KB · Views: 923
  • IMG_3170.jpg
    IMG_3170.jpg
    131.3 KB · Views: 927
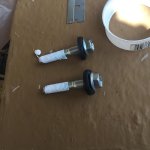
Being the paranoid anal-retentive that I am, silicone wasn’t enough for me, so I also used Teflon thread tape on the bolts. You might notice how nice, new & shiny these bolts are. They were the ones under the plastic caps on the old (new) OEM rails. Why am I mentioning this? Because it wasn’t until AFTER I completed the install that I noticed said new, shiny bolts on my all-black rails atop a black truck. Yeah, CMITCH included all the right hardware, but… Hey Murphy! Welcome to the party!! I’ll either swap ‘em out later or just spray them when I eventually have to touch-up the rack.
 

Attachments

  • IMG_3168.jpg
    IMG_3168.jpg
    113.4 KB · Views: 915
Pretty straight forward after this. Place the rails on the roof, make sure the plastic sleeves are in the feet, tighten all four bolts, and enjoy the new look.

IMPORTANT NOTE: If you torque down the rack before putting the end cap on, it’s a B***H to get back on. Not sure why this occurred, as the end-caps are removable from the factory, but I tried several times to get them back on – to no avail. It wasn’t until I backed-off the rear bolts a few turns that they clicked back into place. Weird.

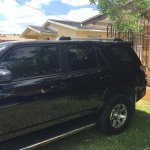
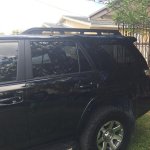
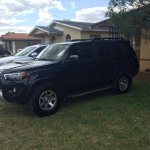
Anyway - here are the before & after shots. I really like the look of the older TE rails. They're just as functional, but in my opinion, they look like they belong on the 4Runner. CMITCH also sent the extra mini tie-down attachments that slide onto the outside of the rails. MANY THANKS SIR!
 

Attachments

  • BEFORE.jpg
    BEFORE.jpg
    133.4 KB · Views: 925
  • AFTER.jpg
    AFTER.jpg
    126.8 KB · Views: 914
  • AFTER2.jpg
    AFTER2.jpg
    135.7 KB · Views: 905
I did the same thing to my silver TE, the black 10-13 rails looks so much better. If you don't have the slide-out tray in the back of yours installing one isn't difficult at all.
 
I was considering the slide out tray, but wasn't that sure about how useful it really is. I have some tool boxes that I keep close to the back seats so cargo is easier to reach (you know, a whole extra 16 inches away). Have you seen any for sale here?
 
I did the same thing to my silver TE, the black 10-13 rails looks so much better. If you don't have the slide-out tray in the back of yours installing one isn't difficult at all.

I may have missed this, but why does the slide out tray make it difficult to install? I ask because I'm also searching for a 2010-2013 T.E. Rack and have the slide out tray.
 
Out of curiosity, if the rack needed to be re-painted, what made you decide against using actual paint?

I sort of understand the appeal of plasti / flexi / whatever dip for certain uses, but this one I don't get. If you plan on using the rack at all, I imagine that flexidip is bound to get banged up pretty quickly.

Also, just an FYI - there are some additional pieces that were used when these racks were installed at the port / dealerships. Not sure if there are really needed, but I went ahead and ordered them when I did my swap because they were cheap.

I posted the instructions with the part listing in this thread last night...probably right around the time you finished up your swap.
http://www.toyota-4runner.org/5th-gen-t4rs/212980-2010-2013-trail-rack-swap-need-help.html
 
I don't use my roof rack and didn't like the silver (like in your before pic) (my truck is pure black now) so my rails are at the powder coaters getting bead blasted and a low gloss satin black powder finish.
 

Forum statistics

Threads
278,312
Messages
3,554,089
Members
248,016
Latest member
Advally Service

Trending content

Back
Top