Teotwaki's 2018 TRD Off Road Premium Build Thread

Amen to that!!

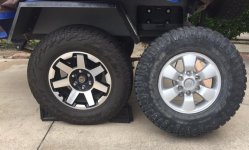
I've been watching Craigslist and have not found the rims for less than $100 each. When I had my 4th Gen I found 16" rims for $50 each and the new Duratrac tires for $100 each. The tires on the trailer will last a long time so no need to throw them away yet. But Pat likes to treat me like Antman treats him, LOL. :thumb:
 
I've been watching Craigslist and have not found the rims for less than $100 each. When I had my 4th Gen I found 16" rims for $50 each and the new Duratrac tires for $100 each. The tires on the trailer will last a long time so no need to throw them away yet. But Pat likes to treat me like Antman treats him, LOL. :thumb:

Digging the build. If you're still looking for matching wheels for the trailer, I have three with stock tires in good condition!
 
Thanks for the compliments! I need to post some updates ASAP

Where do you live? I will only need rims because stock tires clog too easily with mud and the trailer slides in mud instead of rolling, lol. Currently I have 16” Duratracs on the trailer and they work great.
 
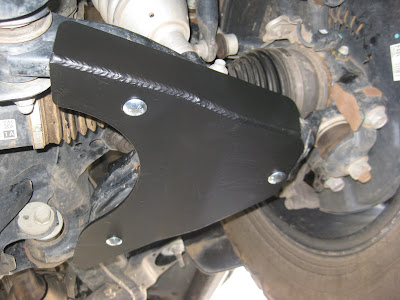
On the 2005 I had some Total Chaos skids for the lower front A-Arms. I repainted them and installed them on the 2018 4Runner

IMG_6839-1.JPG


IMG_6836-1.JPG
 
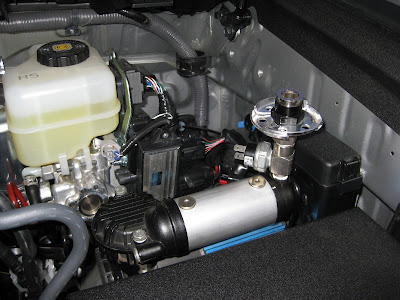
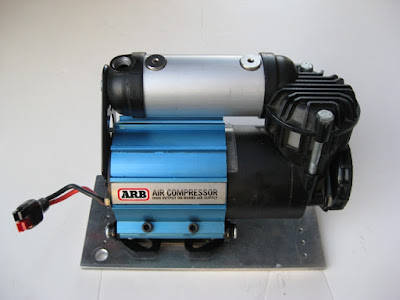
This ARB CKMA12 compressor spent many reliable years in my 4th Gen so it was a definite candidate for the 5th Gen.

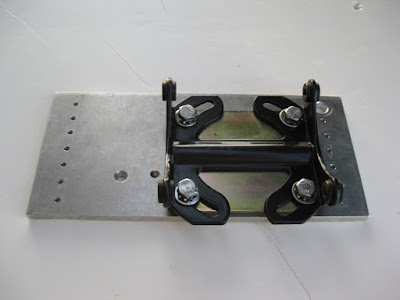
I grabbed a piece of scrap aluminum to fashion a mounting plate. This allowed me to take advantage of the existing holes in the fenderwell.
IMG_5707-1.JPG


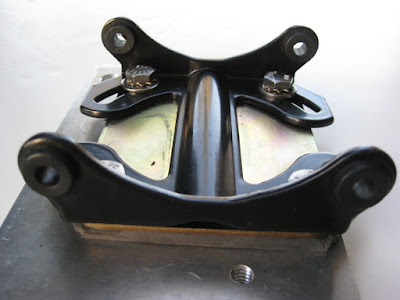
Between the ARB bracket and my plate I have some dense foam to absorb vibration.
IMG_5704-1.JPG


IMG_5703-1.JPG


Installed and running great!
IMG_5714-1.JPG
 
Will these skids protect the lower arms from boulders?

The Toyota A-arms seem pretty robust to me but I like the extra protection. These are probably fine with low speed impacts to rocks and boulders but the force has to go somewhere so you don't want to hit so hard that the impact damages the pivot points, shock mount or anything else attached to the lower A-arm.
 
I finally was able to install my 2 meter long African Outback (A/O) roof rack.
It used to be on my 2005 4th Gen and has been stored in the garage for over a year.
I finally had a chance to buy new mounting rails to match the roof of the 5th gen. I
worked with Paul at Equipt Expedition Outfitters and purchased a set of rails and
brackets made by Eezi-Awn for their K-9 racks.

IMG_6990-1.JPG


IMG_6988-1.JPG


The original A/O rail system is very good but Toyota changed the profile of the roof
on the 5th Gens and the A/O rails could not lay flat. The Eezi-Awn rails were not
cheap but were pre-drilled and the mounting brackets are readily compatible with
the T-slots in bottom of the A/O's cross braces. The only thing I do not like on the
new brackets is the set screws cannot be tightened or loosened when the mounting
screws are in. It was super tedious to remove each mounting screw, adjust the set
screws and re-install the mounting screw. Currently the set screws are button head
hex type and I plan to change them out to a conventional hex head bolt so as to
be able to adjust them from the side with a wrench.

Next projects are to purchase new skid plates and possibly a front view camera setup.
 
Last edited:
Looking good! I was considering get LCA skids but opted for the rear diff skid first since I hit that more often lol.

Thanks! I still have a set of (used) LCA skids from my 4th Gen. Not too beat up so I may clean them off, paint and install them on the 5th Gen.

I still have the diff skid off of my 4th Gen but found it wasn't really needed for my wheeling. I don't think it is compatible with my e-locker so I plan to sell it.
 
Skid Plates ordered!

After creating the thread about all available skid plates for 5th Gens Consolidated 5th Gen Skid Plate Info Thread...

... I started considering what brand and model I would purchase. I looked at pertinent design features, full coverage (engine/trans/T-case), aluminum vs. steel, powdercoating cost, weight, lead time until delivery, fitment, vendor reputation, up-to-date photos on their site and total shipped cost.

Steel won out despite the total weight increase. I had an engine and trans skid in 3/16" steel on my '05 4Runner and it served me well. I recently sold it to another forum member.

Design features for a 5th Gen skid that are important to me:

- Two center bolts on the engine skid with the mounting having some sort of support bracket between the skid and the frame.

- Reinforcement in the center area of the transmission skid to lessen the chance of bending inward because of the length of the skid

- Fitment of the T-case crossmember to the frame rail. I need the crossmember to clear my bolt-on sliders' U-bolts.

- Protection for the heads of the mounting bolts

I looked at these vendors:

Shrockworks
Victory
CBI
RCI
Budbuilt
LFD
Battleborn/M.O.R.E.

Some vendors offer free shipping but the shipping price is already built into your purchase price. Some vendors offer discounts to forum members. CBI was the most expensive at over $1300 and others were hovering around $1000.

After a lot of deliberation I chose RCI skids as they met my most important concerns and their T-case skid includes a strong crossmember that should resist bigger hits that might collapse other skid designs. RCI also offers a 10% discount if your order meets or exceeds $800.

I ordered yesterday and the skids are supposed to be delivered this Saturday. :thumb:
 
Last edited:
RCI Metalworks skidplate set received Friday and installed!

I also used RCI's filler plate for the bumper to radiator gap as the plastic OEM filler is oddly molded and won't fit anymore.
IMG_7094-1.JPG


IMG_7077-1.JPG


I really like all of the extra protection for the transfer case (which had a useless little tinfoil skid plate bolted to the bottom).
IMG_7110-1.JPG


The exhaust crossover clears the skidplate so no rubbing or vibrating issues.
IMG_7103-1.JPG


I also like the protection afforded for bolt heads on the lower mounting points.

IMG_7106-1.JPG


The longest skid for the transmission has some lengthwise stiffeners.
IMG_7065-1.JPG
 
Last edited:
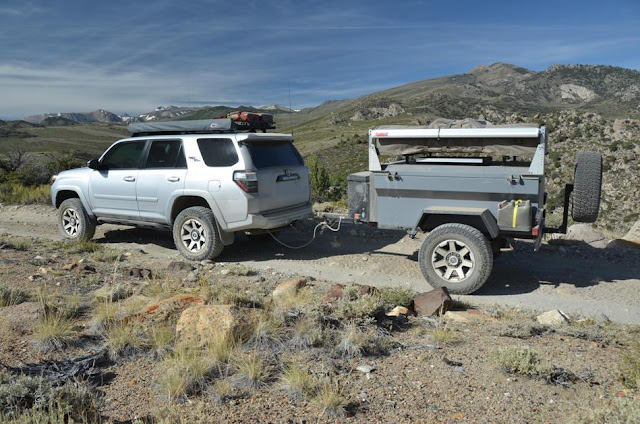
The 4Runner has been overshadowing the expedition trailer so I just finished giving the trailer some l-o-v-e!

Trailer Suspension Refresh

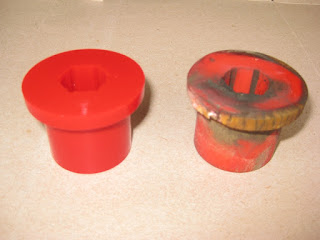
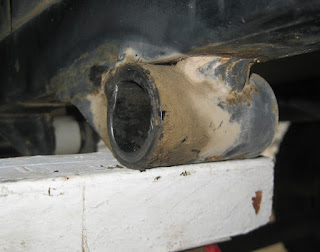
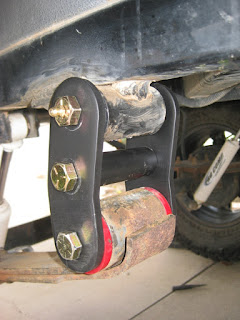
The trailer has served me well for almost ten years and it deserves a little love now and then. The red polyurethane bushings on the leaf springs looked faded and cracked, the shackle plates had never been satisfactory and the shackle hanger mounted on the frame was a bit of a mystery as to origins.

IMG_7671-1.JPG


Another issue was how the lowest spring in the pack could rotate slightly and damage the outer tube of the nearby shock absorber. I felt the worn bushings and swaying movement of the hangers might have been the root cause of the spring movement.

The leaf springs are ProComp Jeep YJ springs #51323 and the red poly bushings are 69261. So it was easy to order new bushings which are 1.5" in diameter.

New versus old bushing:
IMG_7665-1.JPG


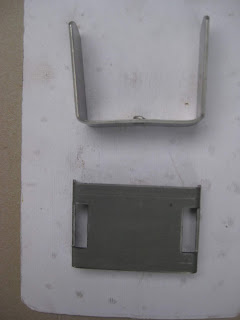
I also ordered some steel U-clamps to help with the spring leaf movement.
IMG_7672-1.JPG


The bushing for the shackle mount on the frame may well be based on one for a Jeep CJ or early YJ as the bushing diameter is 1". The worn bushings are polyurethane but I have not yet been able to find a source. For now I have installed some stock Jeep CJ rubber bushings.

Here is the frame mount
IMG_7692-1.JPG


Note the two bolt holes that likely match those on a Jeep's frame
IMG_7691-1.JPG


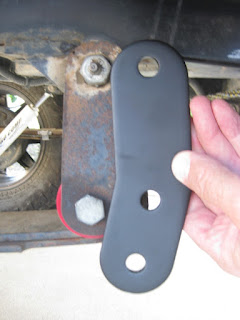
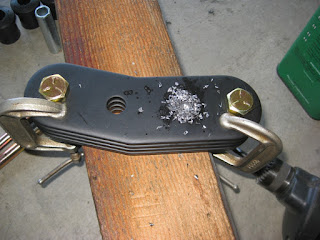
I ordered a shackle kit that was meant to add some lift and shortened the plates to match the bolt spacing of the trailer's original plates. A stock Jeep rear shackle was 3" and mine was just shy of 4" for bolt spacing.
IMG_7685-1.JPG


IMG_7686-1.JPG


IMG_7688-1.JPG


Final results are a great improvement
IMG_7693-1.JPG


The spring clamps were easy to install and if they prove to be overly restrictive I can easily remove them .
IMG_7678-1.JPG


All of my Vehicle and trailer mods can be found here:
Sun To The North: My Expedition Vehicle & Trailer
 
I did not receive my ICS Fab mount until Wednesday afternoon. I spent most of Thursday struggling with one fitment issue. The forward "struts" are bent at right angles to the main deck. The right strut matched my 2018's bezel just fine as it is angular. However the left strut was a problem because the bezel's side is rounded, not squared off. Simply bolting the strut down would warp the bezel which would not mate back into the dash properly. I managed to add some "curve" to the strut and obtain a fairly perfect fit.

The deck now has my satellite messenger on a RAM mount, my Engel fridge's temperature display and my radar detector. For the latter I just lashed it down with zip ties until I can come up with a cradle.

Dash1-1-1.jpeg


Dash1-3-1.jpeg


For USB power I utilized some existing items I had on hand to provide 4 outlets.

Dash1-2-1.jpeg
 

Members online

Forum statistics

Threads
278,316
Messages
3,554,111
Members
248,016
Latest member
Advally Service

Trending content

Back
Top