The Idiot Thread

Friggin Idiot

Senior Member
I wasn't going to do a build thread, because I wasn't going to be building up my 4Runner. This forum has cured me of such small minded ideas, and I've ended up spending more than I ever intended on upgrades for one reason or another. Some of these mods have been done on a whim, others have been patiently planned out. I try not to include regular service unless there are unexpected issues.

Completed Mods & Write-ups:

Accessories/Interior/Electronics:
Ram Mount X-Grip II
Factory Remote Start Issues and CompuStar T11 Pro
Panorama X2 Dashcam
Kenwood DNX995S & iDataLink Maestro-RR
Victory4x4 Center Console Molle Panel

Exterior:
BudBuilt Bumpout Full Tread Sliders
Southern Style Offroad Slimline Bumper
RagoFabrication 5th Gen 4Runner Modular Factory Rail Support System
Rad Rubber Engine Splash Guards

Lighting/Electrical:
Interior LED's: Scroll down, takes up most of this first page.
ArcLight LED Map & Dome Lights
Reverse Lights
Baja Designs Squadron-R Sport Fog Lights & 20" OnX6 Lightbar
Dash switches for Baja Designs OnX6 20" Driving combo
Side Marker LED
DDM Tuning Saber Pro 40w LED (High beam) & Switchback LED Turn Signals
Resistors for LED Turn Signals
Waterproof Christmas Lights using OEM power inverter
DRL Toggle Mod
GTR Ultra2 LED (Low Beams)
Aux Fuse Block & Horn Upgrade (PIAA Superior Bass & HornBlasters Musket)
Fog Light Mod & Ditch Light Install
Intermittent Back-up Cam Fix
DC Power Engineering 270A Alternator - I killed the 270A Alternator

Suspension & Tires:
Air Lift 1000 Install Part 1 - Part 2
ICON Coilovers & Shocks - Part 2
Toyo Open Country AT3 Installed

Engine & Performance:
OEM Air box mod - Easier Mod
42 Draft Designs Catch Can
URD/Whipple Supercharger & Spec-U LT Headers - Dyno Run Pics
URD Off-road Y-pipe, Stainless 3" Mk3 Cat-back, MAF Calibrator - Install - Follow-up - Exhaust Fix Round 1 Round 2 Round 3 & Side Exit Mod Round 4
Secondary Air Pump Filter Mod
Rear Diff Breather Mod

Tips & Tricks:
AC Evaporator Coil Cleaning


Pending Mods
None at this time

Mods in Planning & Deliberation:
Rear Bumper - OEM valance is loose after the Holston Mountain Trail stump encounter

Mods Removed / Uninstalled:
Cooper Discoverer AT/3 Tires: Install
BFG KO2 Tire Reviews: 5500 mi - 21k mi
aFe Momentum GT CAI - Install - Uninstall
McNally Gen2 Oil Catch Can - Install - Issues
Rancho 2" QuickLIFT Struts/Shock
XenonDepot H11 Xtreme HID Conversion (Low Beams)
GOAT TruckArmor
GM Diode Voltage Booster


Adventures/Trails
DreadPirateRoberts2891 YouTube - On & Off Road Dashcam
28Nov2016 - Laurel Fork Area TN
28Apr2017 - Bat Nest Rd OH
25Jun2017 - OH 4Runner Meet & Wheel
03May2018 - Holston Mountain TN
18Nov2018 - Steel bumper destroys minivan
Thanksgiving 2018 - Video needs spliced & uploaded
03Aug2019 - Southington Off-Road Park
29Sep2020 - Hit 100,000 miles
02Apr2023 - Grand Lake OK - Eureka Springs AR


My first 4Runner story:
Thanksgiving 2013 - After trying to stuff 5 rifle cases and a dog in the back of my Subaru Legacy for the drive home from TN, I decided I needed something bigger. My '92 Ford Bronco wasn't trustworthy enough for cross country road trips.

January 2014 - So I started doing research. I looked at several options, test drove several, and narrowed my list down to a Subaru Outback, Toyota 4Runner, and a dealer demo Cadillac CTS AWD Wagon (about to ship to auction). I decided that the CTS Wagon would have ground clearance issues going up my parents driveway in TN. The new Outback 3.0 was almost as much as the 4Runner, but with less space. My mom & sister already have the '08-'09 series Outback 3.0, and price aside, I was leaning more towards the more manly 4Runner anyway. In the end the Outback lost to the 4Runner for all the built in "safety systems" such as EyeSight and adaptive cruise control. I didn't want to pay for all those features I knew I'd not use, or end up fighting, and would regret getting when they broke. Call me old school, but I like to drive the vehicle I'm behind the wheel of, not rely on some computer to judge things for me. So the rugged and somewhat clunky 4Runner appealed to me..... along with the dreams of going off road into the woods for some camping fun.

February 2014 - So a 4Runner it had to be, but still so many choices. Black and white are a pain to keep clean, same with the dark blue and metallic grey. Green wasn't an option, and my leadfoot makes red a radar gun target. So silver, which matches my boat too! Sunroof and heated seats were a requirement, with nav being a nice to have, so Premium or Limited. So I test drove an SR5 Prem and a Limited because nobody had a Trail available (TRD Pro wasn't even a thing yet). The Limited wasn't an option as soon as I drove one, remembering the aversion to fancy electronic gadgets. I wasn't sold on the SR5 either, because I liked the Limited handling a little better, though not the rougher ride of the low profile tires. After a little more research in this forum I decided that the Trail with KDSS would probably be what I wanted. Except I lived in Oklahoma, part of the Gulf States Toyota district which never gets 4Runners with KDSS. I asked a couple different dealerships about ordering one, they halfway laughed at me. Although they said if I was willing to pay sticker price they'd put in an order for one, which may or may not be fulfilled because of the options. Not getting a warm fuzzy about that, I went back to the forum and read more and more about KDSS. When I found out it was pretty much standard on the Lexus, I decided it was now a requirement as well. New or used was the only option left, and if I was paying that much money I might as well get a new truck.
Cars.com to the rescue, a search for Silver, Trail Premium, KDSS returned exactly 3 results... in the entire contiguous USA. Ouch, do I really need KDSS? More contemplation, especially now to get it I'd have to fly to a dealer to pick up the vehicle and drive it back adding to the cost. It was still what I wanted and therefore worth it. I ended up dealing with Toyota of Bozeman MT, the closest and least expensive price. I paid a deposit over the phone, and then was told the truck would arrive at the dealership within 2 weeks. Wait, it's not at the dealership on the lot yet?! It was actually on the ship, which made port on that Monday. The dealer got it a week later, and installed remote start, a couple small options, and got transit tags for it. I arranged financing, and bought the truck over the phone and internet. With several of the mountain passes still closed for winter, I couldn't get enough time off of work to fly north and drive it back. So I arranged to have it picked up and shipped down to me by a trucking company. I just figured this in the price of the truck, and it was still below sticker and several months ahead of the "maybe" from the local dealers. It was delivered to my office on a happy day in mid-March. Since then the modifications and mileage keep rolling, along with meet-ups to make friends and hit the trails with.

Delivery to Dealer, 1Mar14
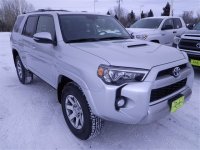
0.jpg

Most Recent, 26Apr2022 - Road trip home
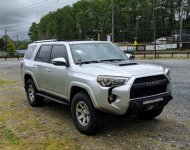
IMG_20220426_132623.jpg
 

Attachments

  • 0.jpg
    0.jpg
    70.9 KB · Views: 14,203
  • IMG_20220426_132623.jpg
    IMG_20220426_132623.jpg
    115.3 KB · Views: 1,677
Last edited:
Register to hide this ad
Small LED lights
They can throw more light, and there's some good threads out there, but I had a slightly different experience. Remember to check for polarity! Put the bulb in and see if it comes on, if not remove, rotate, retry.

Map Lights
Reference: [MENTION=83083]rigtec[/MENTION] Map Light Conversion
Fatigue certainly factored into this mod as trying to get out those stupid little map lights after you've already been awake for 19 hours is not the best idea. Those little things really are stuck up in there. The tape idea probably saved me from breaking those bulbs and pulling out what was left piece by piece. I didn't really want to clean up tiny pieces of glass from the center console anyway. I used the Philips 194's, they fit fine and are certainly an improvement over stock.
EDIT: A couple weeks later I installed JDM ASTAR LED's available from Amazon and they are much brighter. I ended up returning all the the Philips LEDs.
EDIT: I've now installed the ArcLight LED panels for the red "storm" lighting mode, and love it.

Puddle Lights
Reference: [MENTION=66390]ROBSCOOL[/MENTION] Mirror Puddle Light How To
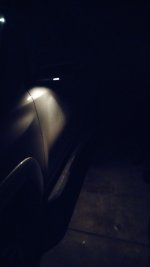
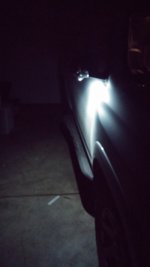
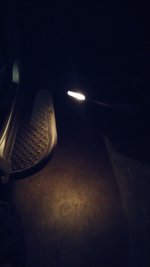
After swearing up a storm with the map lights, I decided to test out one of the Philips 194's in the mirror puddle light. Since I have to replace my passenger side mirror assembly after a high speed encounter with a branch, I figured just how much could I destroy/screw up? I managed not to break anything, and Oh boy is that a huge difference!
Here's a before and after, driver stock, passenger not quite reinstalled LED.
0125162229.jpg
0125162229a.jpg
Since I'm replacing the mirror whenever the TYC part (5320551) shows up from RockAuto later this week, I reverted back to stock bulb and reassembled.

Door Courtesy Lights
Now shooting from the hip, I moved on to the door courtesy lights, again Philips 194's. Once I got the first one out, the rest went easily.
Start with your trim tool or other prying tool at the outside edge of the light furthest from the door hinge. It should pop out pretty easily.
EDIT: The lights are all the same, use the outside edge on the passenger side, the inside edge on the drivers side.
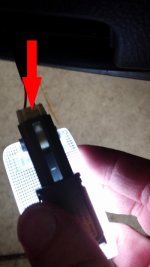
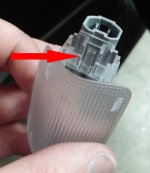
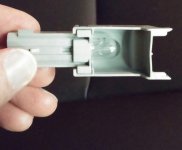
Push down on tab depicted in the first pic below to remove power plug from encasement.
Gently pull up on tab in second pic, and slide gray piece and clear lens in opposite directions.
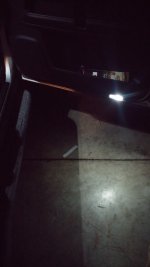
The shroud around the bulb will easily come off and you can replace the bulb. Test, then reassemble. Before and after included.
0125162242.jpg
0125162314a-1.jpg
0125162315-1.jpg
0125162311.jpg
0125162312b.jpg

Dome & Tailgate Lights
Again just tacking a whack at it and trying to figure things out I moved on. The dome light comes apart pretty easily, two tabs each front and back pop the clear lens from the gray housing. Pretty easy to swap this bulb and put it back.
Do not purchase the Philips bulbs for these however. These things are actually dimmer than the factory bulb that's been in there! I'm waiting on these JDM ASTAR's to arrive so I can test them out instead of the Philips. I sent the Philips back and put the factory bulb back in the meantime.
Sadly I didn't realize this until I had already completed the dome light and one of the tailgate lights. I was getting ready to snap a comparison picture for the forum when I realized, these LED's just weren't bright.
But I did learn those tailgate lights are a real pain to get out. There's a big metal tab on the edge closest to the outside of the vehicle (driver's side on drivers, passenger's on passenger). It actually requires a lot of force to pry one of these things out, but use slow steady pressure instead of trying to pop or jerk it out.
 

Attachments

  • 0125162229.jpg
    0125162229.jpg
    74.4 KB · Views: 17,924
  • 0125162229a.jpg
    0125162229a.jpg
    85.7 KB · Views: 17,868
  • 0125162242.jpg
    0125162242.jpg
    85.1 KB · Views: 17,678
  • 0125162314a-1.jpg
    0125162314a-1.jpg
    53.9 KB · Views: 17,601
  • 0125162315-1.jpg
    0125162315-1.jpg
    34.1 KB · Views: 17,543
  • 0125162311.jpg
    0125162311.jpg
    82.5 KB · Views: 17,679
  • 0125162312b.jpg
    0125162312b.jpg
    96.3 KB · Views: 17,643
Last edited:
More LED Lights
The other LEDs all showed up today and I set about replacing the original bulbs, as well as a comparison between the Philips 194's and the JDM ASTAR 194's. The difference is clear, with the JDM's as the brighter bulb. They are a little more fragile, but being as they are housed pretty well in all the applications, I'm not really afraid of breaking them. The Philips 194's were much easier to remove from the map lights than those smooth glass bulbs.

The JDM ASTAR DE3175 dome & tailgate bulbs that I ordered were a big improvement over the Philips DE3175 that were a waste of effort. The JDM's are much brighter than the factory bulbs, and significantly brighter than the Philips.
I also figured out the trick for pulling out those tailgate light housings. Instead of using a curved tool to try and pop the lights from the recess, use something flat and thin, a small regular screwdriver should do the job. Insert the tool under the driver's side of the light housing and push up and in. Doing this will compress the metal tab holding housing in place and you can easily pull the housing out.

Sorry no pictures in broad daylight, so no side by side comparisons either. I've ordered another set of the JDM 194's to do the puddle lights when I start to tear into the mirror, so I'll try to get comparisons on them at that time.

On a design/scientific note, the JDM 194's really throw a lot more light out of the map lights than the Philips 194's because of how the LED's are mounted and the reflector inside the map light. I wish there was a reflected in the door courtesy lights as well, and briefly played with the idea of lining them with foil but decided against this. The foil might retain extra heat, or come loose and fall on the exposed circuit board causing a short. Really it was the latter that concerned me hence choosing not to do it. If I glued the foil in place it would probably be fine, but I didn't have that kind of tinkering time today.
 
Last edited:
So maybe these were almost too bright getting into the truck after work tonight. Camera flash was off for this.
27de24b7c15572f5beac2b405fb7266f.jpg
 
Last edited:
Passenger Side Mirror
A couple weeks back I clipped a carport support in the wrong manner with the passenger side mirror breaking something in the pivot point. It wobbles up and down and won't stay locked in place. Sometimes I drive down the road looking at myself, sometimes it stays where it is supposed to until a few bumps later.

Today I received the replacement assembly. Sadly things were not as expected. Thankfully I realized this before getting the door panel off.
I had not ordered the official Toyota mirror assembly 87910-35C00 ($300 from dealer) instead picking up a TCY 5320551 assembly from RockAuto for $80 shipped. Upon opening the paint-to-match-body cap had a couple tabs broken. This wasn't a problem because I was planning on re-using the cap from my existing mirror. Except for the fact that the two parts are not compatible, the tabs line up in different places and there's no way to make the Toyota cap stay on the TCY assembly. Since it was broken anyway, I got on and got a refund from RockAuto. Toyota Online Parts has the official assembly at $200 +s/h, and has been ordered.
I suppose this is probably for the better, since the LEDs for the puddle lights won't show up until tomorrow. I just hate to waste a 60 degree day in January not getting anything done on the truck due to lack of parts.
 
Sorry I've not been posting here, I've been busy moving into a new apartment for the past couple weeks. I really am not going to like not having a garage with all of my tools to work on the 4Runner, but I would rather knock 40 minutes off my daily commute instead.

Passenger Mirror
The official Toyota mirror showed up from ToyotaOnlineParts. I had the dealer I had been using put it on for me while in for my 40k service back 5Feb. I was going to do it, but with the move and trying to get that whole door panel off just to reach the power connector seemed troublesome since the dealer only charged me about $75 to do the job. Let them do the swearing!

Driver's Front Fender Trim
I hit a muffler on a road trip last year and didn't realize that I had a loose trim piece behind the front driver's mudflap until BudBuilt went to install my Sliders back in November. I wasn't so worried about fixing it, but being as I was putting in an online order for the passenger mirror, I ordered the parts to do this as well. $25 for dealer install at the 40k service and it was fixed aside from one fastener which was the wrong size. I got the right size from the local dealer the next day and now everything fits tightly, no more rattle.

Puddle Lights
I was going to wait until I did the replacement on the passenger mirror before swapping over to those JDM ASTAR 194's that I linked above. But since the dealer did it, I took about 30 minutes the other day to put the LED's in both sides. Big difference and you can actually tell there's a light under the mirror now!


Remote Start
I got a factory unit installed when I purchased the truck and used it very little while living in Oklahoma. Well it stopped working sometime in January and I just kept forgetting to get the dealer to assess the problem. So it went in the laundry list of 40k service items.

5Feb16
The dealer had the truck for 6 freaking hours and still didn't fix it! The tech is 90% certain that it's the ECM which isn't made by Toyota but Fujitsu (or something like that). They had been waiting for a call back from that company for more than 2 hours to verify that was indeed the problem. I'm sick of the short range and factory safety crap that means the engine has to shut off when I want to unlock the truck and get into it anyway. Still waiting on verification that the part is the cause. Even if it is the problem my choice is to pay $290 for the part which has no availability until late March (WTF?!), or I could buy another whole remote start kit which has the part in it for $400. Of course the kit is available online cheaper than the dealer, but why put that money into a system that isn't meeting my expectations or satisfaction. This would have actually been covered under my warranty if it were just a few months ago, before I went flying past 36kmi.

16Feb16
The not so local dealer still hasn't heard back from Fujitsu (makes the Toyota remote start unit) on where it failed and what to replace. Even if they did, the likely failed part is backordered until mid-late March and costs ~70% of a new remote start install kit. I now have to park outside all the time both at work and home; it's winter in Ohio with lots of grey overcast, snow, and freaking cold temperatures. Remote start is no longer optional equipment!

So I pulled the trigger and replaced the whole thing. It took 90 minutes at the local dealer for them to rip out the crappy factory unit. Then drove the next exit down and had an aftermarket shop with a good reputation and lifetime warranty install a Compustar Pro T11. It's not one of those fancy cell phone based ones so it should work hiking, at my parents house, or anywhere else finding a cell signal is like trying to find a monsoon in the Sahara Desert.

So far it seems to work great! It started the truck from the back of the Staples. I also tested the pause/errand feature where I can trigger the remote start while the truck is running, remove the key, lock the doors and be gone for my default run time (15mins) with the truck still running. I spent 9 minutes in the post office, came back out the truck was still running with the key and fob in my hand. Unlocked, jumped in, took control back from the remote start and drove off. Damn that's a cool feature!
I also had the shop splice into the rear defroster, mirror heater, and wiper blade/windshield heater circuits and include them on an auto temp sensor, they will all kick on with the remote start anytime the interior temp of the truck is <42F. Sure it cost a little extra, but none of those things will stay on when you turn off the truck and restart it. I also like that the remote is USB rechargeable, no expensive batteries to buy.

I'm sure the system is awesome (it wasn't cheap), but for now I'm just happy to have a remote start working again. There was a day last week where the high temperature was a massive 19! That's hard to take when I've been accustomed to Oklahoma winters.
 
Last edited:
I finally remembered to get a shot of the puddle lights. The outdoor lighting was brighter than the shots inside the garage above, but here's what it looks like installed. The above LED shot was the Philips 194 and it was just in the socket dangling free because I wasn't going to do the conversion before replacing the mirror. I ended up sending ALL of the Philips bulbs back and replaced them with The JDM ASTARs. The below picture is the JDM ASTAR mounted and completely reassembled.
1e797f237557ab198d4649c05858624a.jpg
 
Yesterday I went up to Columbus Car audio and had them tweak a couple settings on my CompuStar T11 as well as install the dash cam I've had sitting in a box for months.
Dashcam is the Panorama X2. It does full 1080p at 30fps for both front and rear!
2da4b3a4065cacf90840548cc5dd37ce.jpg

971d052a2b6bc93eda5d2792a9618597.jpg

f04f28fc5eb8636b2a66bba2471e5f04.jpg

24f087c45e82243c1771891d0315a55e.jpg

a74b005dfa5d6e5c129d37db13c55a2a.jpg


So far I'm happy with the video, although the shock sensor is a bit touchy, it goes into accident mode anytime I nail a pothole. This time of year in Ohio that's about every 1/2mi!
Today I also tested the car wash bay at the apartment, now salt free and shiny again in time for thunderstorms to roll through tomorrow.
09e6cf0605ce71c40ca270df0bf1b82e.jpg
 
A couple months back a chip on the windshield turned into a crack, and slowly began spreading vertically about the 1/2 way mark under the passenger wiper blade.
Last week I called around a few places to get quotes
Toyota Dealer OEM glass $1100 + install, aftermarket $600 + install
I tried a few other shops who all wanted $600+ for the windshield and install because of the heating element under the wiper blades.
Safelite via insurance company $775 installed at my location, insurance pays anything more than deductible
Safelite direct from website $280 + fees -$20 coupon code SOLD!

They came out this morning before the thunderstorms, and replaced the things quickly and efficiently even with me asking questions. He couldn't explain the direct price difference, as it's usually significantly higher. Although he said the insurance company could be quoting OEM glass instead of the direct price aftermarket glass. Being that the 4Runner seems prone to chips because of the angle, I figure this will not be the last windshield I have to put in the truck, hence no need to worry about OEM glass.
He also explained a little about the construction of modern glass and how the protective coatings, sealants, or ClearPlex type protectors don't usually do much to actually save the glass against the type of impacts associated with 4Runner, FJ, Jeep, & Hummer glass. Best benefit from them is additional UV protection which isn't worth the $500+ you'd pay for a treatment.

I've heard some people complain about Safelite before, but when it comes to replacements I've never had any problems with them. This was the 3rd windshield I've done through them, 1st on the 4Runner.
Back to cleaning guns and watching scifi space movies (Moon, The Martian, Pandorum, and Event Horizon) :sniper:
 
Been a while but aside from regular service no really fun mods until today.

9/25/16 50,470mi
Reference Airlift Questions
Tackled the Air Lift 1000 kit (part #60809) I picked up on Labor Day sale for $80. Air Lift's site doesn't have one when you select a 14+ 4Runner, but a couple people here said that the instructions are a little different is all. Verified true today.
EDIT: Air Lift dealers now have the correct part number for the 5th gen as #60804

Jack up the truck in front of the hinge point for the rear axle trailing link, set jack stand. Repeat on other side. It's important to lift the frame of the truck and not the suspension. And here's where I diverged from Air Lift instructions.

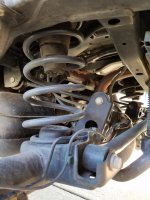
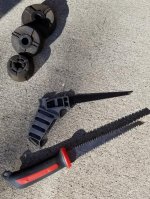
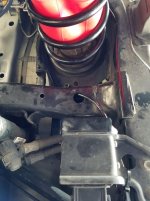
There's a conical bumper in each spring. The Air Lift directions say to remove all but the last and biggest section at the very top, but they only depict 4 sections and not 5. After research in the forum, everyone who's done this on the newer trucks has only removed the bottom 3 sections leaving the top 2. Easiest thing I found to make the cut was a manual handle for a reciprocating saw blade. I tried a drywall saw but it was just a little too cumbersome for the cramped space. I ended up having to cut apart the 3 sections I removed to get them out of the springs, they were trash anyway, and cutting them up was easier than dropping the axle to remove the springs!

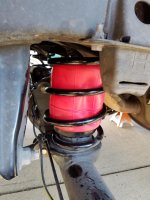
Factory setup at full drop with wheels removed.
a.jpg

What's left of the passenger side
Manual Saw using reciprocating blades, think I got it at Lowe's power tool section. Also standard drywall saw which was too long and bulky to be useful.
b.jpg

Having read other users experiences I came prepared with a bottle of Dawn. Not so much for cleaning, but it makes a good lube. There's a couple different methods I've read how to actually install the bags.

Choice A (along with Air Lift instructions) was to kneel on the bag to get as much air out as possible, then replace the cap that comes with the bag. This gives the bag a definitive shape which is easier to work with than the cylinder.
Choice B was just to remove the cap and just let the in and out as needed, meaning the shape was very fluid and could be compressed where I needed. I did this and it seemed much easier than Choice A.

Option 1 (Air Lift Instructions) install bag with feed hose down. There's a hole for this in the spacer (required on bottom anyway) and even a hole in the spring mount on the axle to support it.
Option 2 supported by forum users to install with feed hose up. I quickly saw this would mean compressing the hose against the remains of the rubber stopper. Elected option 1.

EDIT: I later discovered that unless you secure the spacers beneath the air bags to the axle or to the bag they will shift any time weight is removed from the axle (like while on a lift for service. I strongly suggest adding heavy duty outdoor rated double sided tape to secure the spacer to the axle. It was absolutely more difficult to go back and do this after 5k miles. I would suggest doing this after installing the bags, but prior to running the air lines.
c.jpg

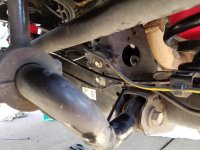
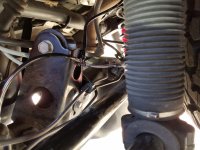
Both the forums and the Air Lift instructions are clear, ensure that there's enough slack in the line to allow for suspension articulation. Instead of requiring 2 feed lines to have the required slack, I elected to zip-tie the T joint to the rear axle and only have the feed line from the valve to the T with the need for slack. Most of that is already met by doing the install with full drop on the suspension anyway, but I still left plenty of slack anyway. Although I did run the line up into the frame from above the T fitting over to the driver's side to help keep it out of the way (and use less zip-ties).
d.jpg
e.jpg
f.jpg
g.jpg

Continued on page 2
 

Attachments

  • a.jpg
    a.jpg
    131.2 KB · Views: 15,847
  • b.jpg
    b.jpg
    128.9 KB · Views: 15,815
  • c.jpg
    c.jpg
    126.3 KB · Views: 16,205
  • d.jpg
    d.jpg
    123 KB · Views: 15,767
  • e.jpg
    e.jpg
    129.4 KB · Views: 15,742
  • f.jpg
    f.jpg
    129.9 KB · Views: 15,714
  • g.jpg
    g.jpg
    132.4 KB · Views: 15,599
Last edited:
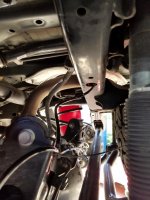
Air Lift Contd

To run back to near the tailgate I kept the line above the frame, zip-tied in a couple different places. I had to pull a couple screws, and push aside the underside strake to get the line where I wanted, but it worked nicely. I made sure to tap check where I wanted the line and drilled from the top down (simply because it's 100x easier given that location). The valve clears and isn't even visible with the liftgate fully closed.

h.jpg
i.jpg
j.jpg

Before putting the wheels back on and everything back together, I did follow Air Lift instructions and liberally spray a water/soap combo looking for leaks under pressure, thankfully finding none.
Once everything was reinstalled and cleaned up, I did a quick test run out to get lunch at 25psi. It felt a little too bouncy over uneven asphalt. I dropped it to 15psi and it felt much smoother, and nicer than stock even. Of course there was an electric dryer in the back of the truck for the whole install and running around. I'll post if I change to anything else with a mostly empty truck for my daily commuting and occasional towing needs. So far $80 and 4 hours well spent.
I did think ahead and order a better pressure gauge.

EDIT: As a daily driver, just me and my lunch, I tend to leave the air bags inflated to 10psi. It probably only needs 5psi on a regular basis, but I don't like having to drag out the compressor to air up while also adding the trailer. At 10psi that the rear doesn't drop when the trailer is on it, but not so bouncy during daily driving that I can't stand it. I do take it up if required, a trip to Tennessee required 15psi to ride evenly, but I was carrying half a dozen guns and 1200rds of ammo in addition to the other more traditional supplies.


More LED's
Finally got around to replacing the reverse lights with LED's. I don't know how I missed these or lived without them so long! What a huge difference using JDM ASTAR 921/912.
619f0c6af66fdad332e970811f140d40.jpg
 

Attachments

  • h.jpg
    h.jpg
    125.8 KB · Views: 6,040
  • i.jpg
    i.jpg
    125.3 KB · Views: 5,943
  • j.jpg
    j.jpg
    141.3 KB · Views: 5,932
Last edited:
[Surgeon General's Warning: Modding your Toyota 4Runner can be dangerously addictive, and should not be attempted by people with compulsive disorders or other mental problems. (see: Sp8ball) Modding your 4Runner is a sickness, and should not be handled lightly. Clinical help may be required, or at least a call to A&E's "Intervention" television show. Wives should be involved in the process to moderate the spending and complexity of the project if these conditions exist. People with high cholesterol or a history of heart problems should not mod a Toyota 4Runner. Call your physician for any mod lasting longer than 4 hours.]

LMAO! So true. My life is lacking a better half, so there's not supervisory control on mods or spending. Unfortunately that means there's been a recent shopping spree, and my bank account is starting to feel the pain.

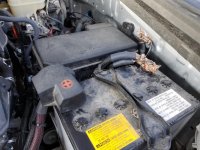
I had joined in on the DC Power Engineering Group Buy. Yesterday I had a local shop do the alternator swap and big three upgrade using 0 AWG. It was more than I was willing to take on. I'm pretty happy with the job they did, looks nicer than I would have worked out. I'll put in a bigger gel type battery later on, likely Die Hard.

20161019_151105.jpg
20161019_151112.jpg
20161019_151119.jpg


I also am in on the Southern Style Offroad Slimline Hybrid Bumper Group Buy, which I had just missed out on last time. Of course, what bumper is complete without accessories? I decided to put off the winch purchase for now and get some good lights going, as I anticipate a need for lights sooner than winches. So there will be a Baja Designs OnX6 20" Driving/Combo almost flush mounted in the bumper.
In doing light bar research I had stumbled across the Baja Design Fog Light Kit for the 4Runner. With the front bumper already off for the bumper install, that should be a breeze. So the kit was tossed into the cart, along with a set of Baja Design Squadron-R Sport in Wide/Cornering Amber. This post explains why I selected these fog lights. ETA on bumper and lights is mid December, hoping I can convince family to help me do those installs while they're visiting for the holiday.

The light bar will be off-road and deserted back road use only, but the fog lights are street legal. But I've never been satisfied with the light output from the factory headlights, so I took advantage of the October sale at XenonDepot and picked up the Xtreme HID kit with Philips 4300K bulbs. They showed up Monday, and I should be able to knock out the install in an afternoon next time I get near my tools in storage.

As if that wasn't enough, I decided that I no longer like the nose low look of the 4Runner rake. So there's a Pro-Comp 2.25" Leveling Kit on the way, and an appointment at a local suspension shop to install it.

Upgrade addiction temporarily satiated. The winch will find itself later when I'm ready for it. I promise pics and descriptions as the upgrades come. Until then someone keep me off this forum so I can stop spending money!
:banplease:
 

Attachments

  • 20161019_151105.jpg
    20161019_151105.jpg
    134.8 KB · Views: 5,897
  • 20161019_151112.jpg
    20161019_151112.jpg
    129.5 KB · Views: 5,845
  • 20161019_151119.jpg
    20161019_151119.jpg
    137.4 KB · Views: 5,659
Last edited:

29Oct16 51,553mi
Given their recent degraded wet weather performance and consistent rough ride on E load, I gave up on the KO2's. Today the local Discount tire installed a set of 5 Cooper Discoverer AT/3's in 275/70R17 C load. They look a bit more soccer mom than the KO2's, but after my KO2 learning experience, I decided looks aren't everything. Of course the way [MENTION=66316]1engineer[/MENTION] raves about them and his THIRD set, I was all but convinced I might crash in the snow without them! /sarcasm
Look for ride report updates as the mods continue.

This also caused a learning experience. I failed to consider what would happen with the air bags and spacers on the rear axle, and they shifted around some while the axle was at droop for the wheel removal. I convinced the guys in the shop to use a floor jack and lift it so I could rearrange things a little after I had deflated the bags. The bags didn't budge in the springs, but the spacers were easy enough to put back centered. I'm thinking I'm going to have to put some super velcro or double sided tape on them to hold them in place so I don't have to worry about it every time.

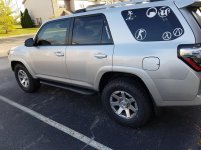
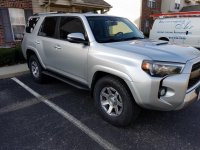
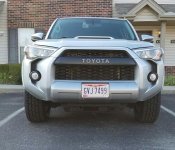
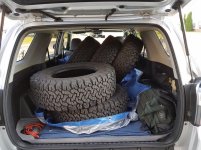
I also need to remember to deflate the bags prior to the shop getting it on the lift. If I leave the bags inflated then when the coils of the springs expand more of the bag fits between the coils and there's a chance they could be pinched or torn. If I deflate them I think any shift during drop and re-compression should work itself out as it drives once re-inflated. Upon re-inflation of the Air Lift to 15psi there was quite a bit of rear end lift, which lead me to think that is what was causing the seeming excessive 3" rake. I'm guessing I probably didn't need a lift (who really NEEDS a lift?), but should have just let some air out of the bags. So after the short drive home trying to gauge the different feel of the newer softer tires, I dropped the pressure to 10psi. I'll leave it there for a while to see how I like the ride. Since I already paid for the lift, I might as well install it (no returns on special order parts) and it's a small local shop. So I may be using the bags to level out the rear with the front. But more on the lift after install. Pics below taken with pressure at 15psi.

left.jpg
right.jpg
front.jpg
cargo.jpg
 

Attachments

  • left.jpg
    left.jpg
    124.4 KB · Views: 5,696
  • front.jpg
    front.jpg
    136.8 KB · Views: 5,639
  • right.jpg
    right.jpg
    135.5 KB · Views: 5,635
  • cargo.jpg
    cargo.jpg
    123.6 KB · Views: 5,604
Last edited:

Members online

Forum statistics

Threads
278,305
Messages
3,554,042
Members
248,016
Latest member
Advally Service

Trending content

Back
Top