

NWSKIUrbanRunner
New member
UrbanRunner Front Seat Repair How-To
So I too own a 2008 4Runner Urban Runner and of course the dang front seat cracked and wore out. I ended up ordering the seat cover part# 7107235281B0 from OEM Parts running around $338.00. With shipping it came to about $380.00.
So this is what it looked like when I started, cracked, ugly and basically an eyesore
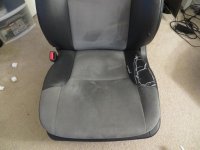
After bringing it inside the house first steps were to place the seat on its side and remove the following screws located under and in the back of the seat which will remove the plastic housing. There are two of them on the bottom near the front of the seat. There are two more black screws at the back as well. You should be able to find them pretty easy
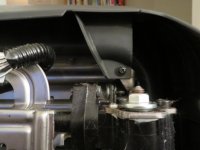
After that you will need a flat screw driver to pry the buttons off the seat to reach the two silver screws and remove those as well.
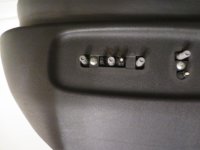
Next you will want to remove the black buttons holding down the seat. Don't worry these aren't super important so if you can't get them back in later, don't worry about it. Additionally the white tab you see holding the cover near the seat beat thing, just pop that out and set it aside.
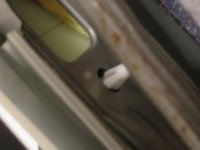
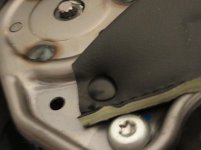
After that begin to pry the plastic hold clips off the frame of the seat and work your way around you will see the seat come off the edges of the foam pad.
View attachment 134290
Next is the royal ***** part.
The white fabric part you can just cut with a utility knife but DO NOT CUT THE FOAM. Seeing you won't be using the old cover at all (unless you want to take it out back and shoot it with a 12 gauge for pissing you off )
)
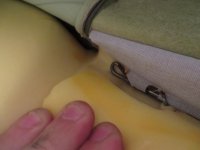
After you are all done getting the old cover off it will look something like this.
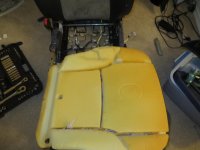
Next you will want to pull the hooks out of the loops you see here on the seat. A good pair of needlenose pliers will help push them through. I know its a royal pain in the butt. Once you get them out, you will want to sand down any rust that may be on them (mine had some) and cut off one of the hooks with a Dremel to make it easier when you reassemble.
After you have completed that you will need to begin the process of putting the new seat cover on. You will want to first start with the back part with the hooks threading them through the fabric that goes down into the foam and the small rings. Having a second person will help to manipulate the foam while doing this. After you have gotten one rear section done, you will want to do the middle section, the other rear section and finally the front section
The rest is a snap (literally) push the seat cover back down and pull the foam from the back of the seat so that he foam cover is up snug against the bottom part of the frame. Snap the plastic snaps on the seat around the seat of the frame and reassemble the rest of the seat (screws, buttons, etc)
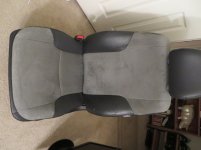
In the end you should have something looking like this
Hope this helps for others who have the same issue that I had.
Let me know if you have any questions.
So I too own a 2008 4Runner Urban Runner and of course the dang front seat cracked and wore out. I ended up ordering the seat cover part# 7107235281B0 from OEM Parts running around $338.00. With shipping it came to about $380.00.
So this is what it looked like when I started, cracked, ugly and basically an eyesore
After bringing it inside the house first steps were to place the seat on its side and remove the following screws located under and in the back of the seat which will remove the plastic housing. There are two of them on the bottom near the front of the seat. There are two more black screws at the back as well. You should be able to find them pretty easy
After that you will need a flat screw driver to pry the buttons off the seat to reach the two silver screws and remove those as well.
Next you will want to remove the black buttons holding down the seat. Don't worry these aren't super important so if you can't get them back in later, don't worry about it. Additionally the white tab you see holding the cover near the seat beat thing, just pop that out and set it aside.
After that begin to pry the plastic hold clips off the frame of the seat and work your way around you will see the seat come off the edges of the foam pad.
View attachment 134290
Next is the royal ***** part.
The white fabric part you can just cut with a utility knife but DO NOT CUT THE FOAM. Seeing you won't be using the old cover at all (unless you want to take it out back and shoot it with a 12 gauge for pissing you off
)After you are all done getting the old cover off it will look something like this.
Next you will want to pull the hooks out of the loops you see here on the seat. A good pair of needlenose pliers will help push them through. I know its a royal pain in the butt. Once you get them out, you will want to sand down any rust that may be on them (mine had some) and cut off one of the hooks with a Dremel to make it easier when you reassemble.
After you have completed that you will need to begin the process of putting the new seat cover on. You will want to first start with the back part with the hooks threading them through the fabric that goes down into the foam and the small rings. Having a second person will help to manipulate the foam while doing this. After you have gotten one rear section done, you will want to do the middle section, the other rear section and finally the front section
The rest is a snap (literally) push the seat cover back down and pull the foam from the back of the seat so that he foam cover is up snug against the bottom part of the frame. Snap the plastic snaps on the seat around the seat of the frame and reassemble the rest of the seat (screws, buttons, etc)
In the end you should have something looking like this
Hope this helps for others who have the same issue that I had.
Let me know if you have any questions.
Attachments








Last edited:


