Valve Cover Gasket

TN22Corps

New member
So, I've got a leaky valve cover. Anyone know of a detailed write-up with pics? I've searched to no avail.

I have found that I should check the tightness of the bolts before replacing the gaskets.

I'll use the info I found from M@d M@x:

My order consists of :
1-PCV Valve, Part #12204-62010 Might as well replace it while I'm doing this
1-PCV Grommet, Part # 90480-18001 Just in case the old one is in bad shape
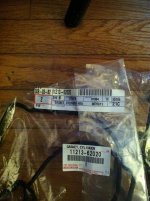
2-Valve Cover Gaskets (both the L & R side are the same part), Part #11213-62020
6-Spark Plug Tube Gaskets, Part # 11193-16010 No need to replace as of yet but it is recommended
2-Intake Plenum Gaskets (both the upper & lower are the same part), Part # 17176-62040
16-Washer Seals (for the valve cover bolts) Part # 90210-05007 While I'm at it, might as well change them

Best route to take would be to just label everything carefully, take pictures, etc., unbolt upper/lower plenums, then remove VC?

If the gaskets are shot, use acetone and razor blade to remove old gaskets?

Any adhesive/sealant when applying new gaskets?

LocTite.. anti-seize?

Thank you.
 
Register to hide this ad
Here is one from the folks over at YT: I have not been around the campfire long enough here to know of a good post on VC changing on this board.

5vzfe leaky valve covers fixed (56k beware) - Page 2 - YotaTech Forums

Replace the cam plug seals as well. One on each side in the back. Let me know if you need the part#.

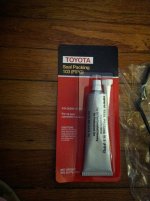
I swear by the toyota FIPG but others have used the grey RTV with good results for the half moons.

Make it a day, make sure to have the right tools, and enjoy.
 
Its not a hard job at all, just gotta pull the throttle body, and upper and lower intake manifolds off to get to the driver side valve cover. Just did them on my 96 the other day along with tbelt and all the seals etc. and it took about 4 hours. Just pay attention to how it comes apart and youll have no problem.
 
I did the job a couple months ago and it took me probably 8 hours total, but it was a little slower because I was teaching some kids about working on cars. Nothing is hard about it, it just takes time. Make sure you have a torque wrench (inch/lb and ft/lb wrench) to do the job right. I would also suggest changing the spark plugs while you are down there.


I did not have to order all the parts listed above in your first post. I only got the actual valve cover gaskets and two intake plenum gaskets (It turned out I didn't really need to replace those.

As far as a write up I used the Toyota Service Manual and that was the best instructions. Tells you the order to do things if you aren't savy and also has the torque numbers for each bolt and nut.
 
I changed mine but could have easily gotten away with just tightening the valve cover bolts. Mine were really loose
 
As far as a write up I used the Toyota Service Manual and that was the best instructions. Tells you the order to do things if you aren't savy and also has the torque numbers for each bolt and nut.

I have the FSM from TTORA and couldn't locate the section on the valve cover gaskets. Where would one find it?


Replace the cam plug seals as well. One on each side in the back. Let me know if you need the part#.

I swear by the toyota FIPG but others have used the grey RTV with good results for the half moons.

What's the p/n for the cam plug seals?

The Toyo FIPG can be bought at the dealership or online parts sales where I get the gaskets?


I don't have access to a powerwasher, would it be best to take it to a DIY carwash, spray degreaser on the affected area and spray off?
 

Attachments

  • photo-1.JPG
    photo-1.JPG
    119.8 KB · Views: 16,313
  • photo.JPG
    photo.JPG
    126.6 KB · Views: 15,345
This is an easy job, just take your time and label all the hoses. You will need to remove the plenums no matter what to tighten all the valve cover bolts. A torque wrench is mandatory as well and be gentle with the bolts, they require 4lb. I used red locktight as well.

As for cleaning up the leaked oil, I used some foaming engine cleaner which worked well. Just use common sense when ringing it off.
 
Camshaft housing plug(2): 11188-62010
FIPG: 00295-00102 or it may be 00103 now.

My semi circular plugs (half moon) were the main culprits for my leaks and not the gaskets themselves per se. Tightening the bolts would have done nothing for me. Since I had to remove the valve covers to strip off the factory FIPG and pack some new on for those semi-circular plugs, I though I might as well replace all gaskets.

Acetone is your friend but be liberal with it.

Take note of the location of the old FIPG and replace with the new (black) FIPG.

NO loctite of any kind is necessary for this job. None.

Follow the FSM and YT link and you should be OK.
 
Last edited:
I tighten my valve cover bolts when I bought my truck, hasn't leaked a drop since.

Same here. When I went to get mine the valve cover was leaking all over the place. Talked the PO down on proce because of it. Got home and tighened all the bolts (all of them were barely finger tight), cleaned up with some degreaser and hasn't leaked yet.
 
I love the fact that the YotaTech article has the words "56k beware" - meaning those of you on a 56k modem are probably SOL.
 
Got my gaskets and FIPG, which is 00103 now, by the way, LittleCaesar. Thank you for the numbers.
-Also, is it necessary to do the camshaft housing plugs too? I forgot to get the spark plug tub seals and cam plugs, doh!

The plug tube seals in the YT link didn't look worn at all..

56k still exists? :smashputer:


I can't find anything in the FSM, I'll pore over it again. Are y'all going by these headings or is there a section specifically for VC gaskets?

R.M. 2002::Engine Mechanical (5VZ-FE): Cylinder Head: Components
R.M. 2002::Engine Mechanical (5VZ-FE): Cylinder Head: Removal
R.M. 2002::Engine Mechanical (5VZ-FE): Cylinder Head: Disassembly
R.M. 2002::Engine Mechanical (5VZ-FE): Cylinder Head: Inspection
R.M. 2002::Engine Mechanical (5VZ-FE): Cylinder Head: Replacement
R.M. 2002::Engine Mechanical (5VZ-FE): Cylinder Head: Reassembly
R.M. 2002::Engine Mechanical (5VZ-FE): Cylinder Head: Installation
 

Attachments

  • 259278_10150279944874859_632759858_8977040_7833111_o.jpg
    259278_10150279944874859_632759858_8977040_7833111_o.jpg
    137.2 KB · Views: 15,221
  • 266331_10150279948604859_632759858_8977064_3834511_o.jpg
    266331_10150279948604859_632759858_8977064_3834511_o.jpg
    137.4 KB · Views: 17,090
The procedure for removal begins on EM-30 and ends on EM-61 but the chapter is for removing the cylinder head. Don't remove the exhaust pipe nor disconnect the fuel return hose or remove the cams. You have to be able to pick out the procedures that apply to just removing the valve covers and then putting everything back together. I'd start with removing the air intake, and then you should be able to see how everything comes apart from there.

I'd tell ya not to skip the cam seal (housing) plugs but if you do not want to spend the $$$ on the spark plug tube seals, I would not sweat it too much since I cannot recall anyone ever seeing oil in their spark plug tubes. Mine old ones were hard, but still sealed fine.

Take your time and some pictures of your upper cylinder head. If you have more ?s, just holler.
 
when i did my vc gaskets i replaced the spark plug seals, when i pulled them off they pretty much crumbled. i had about 150k on my engine at that point. i did not replace the cam seals and havnt had a problem, but looking back i should have replaced everything when i had it apart.
 
Well, I started in on the job today and got the passenger side off. I went to Advanced Auto to buy some acetone and they don't carry it, and all the local hardware stores were closed at this point. So, I came to a stopping point and will pick up tomorrow.

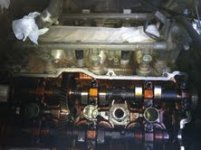
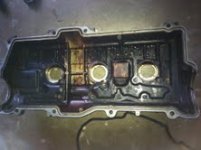
Inside the cover was not a pretty sight.

mail2.jpg


I had a pain of a time getting the spark plug tube seals out, until I realized it was essential to bend back the retaining tabs. :bash:


mail.jpg


Some things I noticed:

-The VC bolts were pretty loose, though not hand tight.
-A couple of the washer seals were cracked.
-Spark plug tube seals were cracked and crumbled on removal.
-There are 2 gaskets between the upper and lower intake plenum and 1 between the lower and the manifold :shrug:

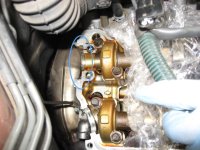
This last picture is from a reference write-up: is this where the cam seal is located?


IMG_0292.jpg
 

Attachments

  • IMG_0292.jpg
    IMG_0292.jpg
    109.1 KB · Views: 3,569
  • mail.jpg
    mail.jpg
    7.7 KB · Views: 3,173
  • mail2.jpg
    mail2.jpg
    9.1 KB · Views: 3,234
How tight should the valve cover bolts be? I noticed my passenger side was leaking a little and the bolts were loose, so I tightened them down a bit, but not excessive. Should they be torqued down?

Edit: Just saw to torque to 71 in/lbs, but it is a tight spot and I don't have a torque wrench.
 
Last edited:
That is where the cam plug should go. Just put a tiny amount on the cover as the tutorial from the link says to. Then tighten down to 12ft/lbs.

Change the oil a little more frequently. Pennzoil in the yellow bottle is a good cleaner.

Valve cover bolts are 53in/lbs, NOT 71in/lbs. The latter # is for the cam seal cover plate in the back and I don't know how one gets a torque wrench in there.
 
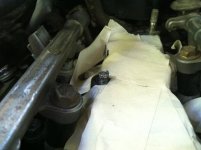
****! Broke a bolt in the manifold.

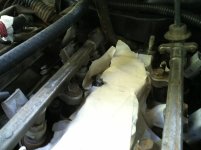
So, the 4Runner's been down for over a week now. Got the gaskets, plus seals, FIPG replaced, work got in the way, began reassembly and broke a bolt in the manifold reattaching the intake.

So far:

- I've tried PB over night, over a few nights, vice grips... nada.
- Tried a bolt extraction device (drill bit to hollow it, then a reverse-oriented drill to pull the bolt out), but the latter piece never dug in.

What's next?

PLEASE HELP :nono:

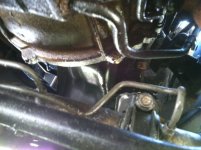
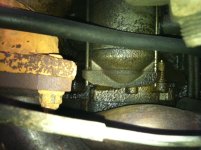
272551_10150296405594859_632759858_9088859_70782_o.jpg

265978_10150296404624859_632759858_9088845_6303979_o.jpg
 

Attachments

  • 272551_10150296405594859_632759858_9088859_70782_o.jpg
    272551_10150296405594859_632759858_9088859_70782_o.jpg
    136 KB · Views: 3,333
  • 265978_10150296404624859_632759858_9088845_6303979_o.jpg
    265978_10150296404624859_632759858_9088845_6303979_o.jpg
    141.9 KB · Views: 3,234
I would try some long vise grips and with some lubricant, actually try and tighten the bolt just a little, then try to loosen. If no go, an extractor kit and using a guide shaft cut to size made of PVC or copper so the bit does not wobble much on the bolt is how I have had to remove two or three bolts like yours. I'd not use heat given the location.

Amazon.com: Alden 4017P Drill-out Broken Bolt Extractor 4 Piece Kit: Home Improvement

How tight were you torquing the bolts there?
 

Members online

Forum statistics

Threads
278,309
Messages
3,554,075
Members
248,016
Latest member
Advally Service

Trending content

Back
Top