Vegas: 2012 Trail build thread

Attachments

  • IMAG0632.jpg
    IMAG0632.jpg
    142.5 KB · Views: 2,077
  • IMAG0633.jpg
    IMAG0633.jpg
    141.1 KB · Views: 2,105
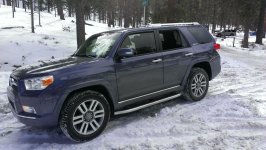
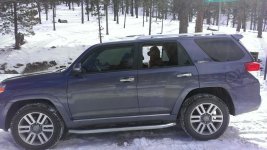
Not to highjack your great thread, but I did the same.


Truck looks great, I really like the running boards.

We went to Mt. Charleston it was hard to find a nice spot away from people to let my Saint Bernard romp in the snow. We end up going to the top of this hiking path where it was pretty steep, only saw one other SUV up there. Gotta go back soon before its back to 120 degrees here.:flame:
 
Truck looks great, I really like the running boards.

We went to Mt. Charleston it was hard to find a nice spot away from people to let my Saint Bernard romp in the snow. We end up going to the top of this hiking path where it was pretty steep, only saw one other SUV up there. Gotta go back soon before its back to 120 degrees here.:flame:

Actually I wait for it to get 120 degrees then go up there with my two pooches....Your truck is looking better and better man, keep up the good work.
 
Bummer how plans change so quick. I was suppose to be in Tahoe with the girl and then I got shingles and have been bed ridden for 4 days.

Good luck with the fix and keep those mods going.

DUDE ... I can relate. I got shingles - totally stress related, and get this... to defective water pipes in my house and having to have it all re-plumbed. All I can say is it sucks, and per doctor, in a few more years will get the vaccination. Hope it wasn't too bad, mine was at least on my waist and leg - had it been my face or upper body would imagine it would be 10X worse.

Hope you're fully recovered.
 
DUDE ... I can relate. I got shingles - totally stress related, and get this... to defective water pipes in my house and having to have it all re-plumbed. All I can say is it sucks, and per doctor, in a few more years will get the vaccination. Hope it wasn't too bad, mine was at least on my waist and leg - had it been my face or upper body would imagine it would be 10X worse.

Hope you're fully recovered.

Head and face and it is in remission. End hijack.
 
u6a6u3av.jpg

Still waiting on the bass blockers... Really getting in the way of Mod- Mania


Looks like my workshop a few months ago! All the wiring fun is just around the corner...I'm a little jealous. I miss it.

Haha love where the build is going man, great work so far!
 
So finally got my necessary/unnecessary Bass blockers the other night (the debate of bass blocker is like debating if unicorns are real) I figured I could quickly throw in the dash kappas before heading out of town... Big thanks to the great threads giving such huge detail... And Gojaybee also did a great writeup showing where to cut the brackets... So with some faith in the forum, I didn't test fit anything I just used the the kappa threads from where to cut the bracket and what color power and neg...

So here's some pics... Only took six hours... First time soldering... What did I learn? The soldering tip is hot. Also my first time using heat shrink... Heat shrink is a lot of fun, I kind of went a little crazy with it. Used some pieces of "boom mat baffle" to make a cup type enclosure to protect the speaker from touching surrounding metal to protect the issues others spoke about in previous threads... Made the fit a little tighter. Happy with the results. On to the next speakers...
ahy2ata9.jpg

y2u4y5yq.jpg

za3age6y.jpg

ny4upama.jpg


I had found an adapter on amazon for the front speakers but looks like it doesn't fit so I'll have to make my own adapters... Game on.

4yzyry8e.jpg

y6ave7a6.jpg
 
So got the front doors done today... Took a billion hours... But it's because I had to build some speaker adapters to mount the kappas...thanks Gojaybee for the great write up and all the usual culprits Antman/sp8ball to show me how remove the door panel and all the rest of the members that talked about which brand deadening they use and how to apply it etc.
I am happy with how it turned out although I should have known after reading all the threads warning about sharp metal in the doors, I cut up my hands pretty good..not sure if I'll ever be able to hand model... Tomorrow hopefully I'll get the back doors done and maybe the hatch. Then CB install and switches, painless wiring... Lots to do before heading to London this weekend.


nera9ygy.jpg

5a7evaru.jpg

u6a2abat.jpg

egyre8e5.jpg

etesu5yv.jpg
dezy8yja.jpg
 
Disappointing Update... My hands have more cuts and I even broke a nail... Finished sound deadening the rear doors and adding the kappa's.... Ran into a delay with putting on the rear door panels...

And the biggest bummer was while driving tonight and playing with the sound controls I noticed a vibration sound from the passenger door panel (i am trying out this taptalk app so not sure how to insert an angry icon of me smashing head into the wall) nothing is worse than when you take something that works perfectly and mess with it trying to improve on it and you fail...

So I am thinking it is the speaker is sticking too far out and is vibrating against door panel... The increased height is most likely from using the boom Matt baffle around the speaker. Or it could be the crossover came lose and is some how vibrating... Or most likely it is my speaker adapters I made... The problem is that even though I cut them and glued them to the old speakers there wasn't very much lip on the plastic rim to drill good size screws through to ensure it would hold the weight of the new speaker.... But we will call the learning experience, I found a few threads that show how to make a new adapter out of thick board and make it water resistant.
Here's the thread:
http://www.toyota-4runner.org/5th-gen-t4rs/100453-2011-audio-install-2.html

Could also try making adapter out of sheet metal and sealing it... I wonder if pro-installers would just drill new hole into the metal door frame and add a spacer so that it doesn't hit the window?

Rear door done.

rada9ehe.jpg


Problem with rear adapter they are too narrow to bolt the kappa down on without making some kind of clamp fastener... So ended up using the old speaker to mount the speaker in.

uqazyvuv.jpg

Hard to see in the bad photo
epe2e5e7.jpg
 
Trying to estimate how long I need to run wire for future lights...making a wiring harness... Way over kill I am sure...
etupavyp.jpg


From relay to through cab to roof... So twice the length of the truck sounds right?
dymu9epu.jpg
 
I think it was Harper who posted this tip... Probably one of the coolest ideas I have ever seen. The hard part was finding a bic pen
neqe6aje.jpg


Also hellmatic had a great tip too to make a wiring harness

hupanu3u.jpg
 
It's the mod workout brah... You swing it 10 times then do a mod...

But it's 2 poods (70lbs)so it's a perfect mod partner too to hold stuff down

Holy Carp!...70 pounds?...You (I) could hurt yourself.
I always thought it was better to use smaller weight, but more reps...:eyebrows:
 
Last edited:
Mod-mania is on hold...


1st cause I need a baby nap (ran out of red bull) and 2nd cause I ran into a problem with how to tap into our mini fuses... I thought I got the right stuff to tap into it... But I guess there is even a smaller fuse size... I'm sure I could stick a paper clip in there to tap it... But I want to try to do it right... Hopefully auto zone will carry the correct taps I know I saw them on amazon after looking through Antmans post.

Wires...
9y3ysumu.jpg


I know there is a thread on how to take this panel off to run wires but after searching for a while I gave up and just started pulling...
Running bundle of wire for future roof rack lights, CB antenna cable, the subwoofer's power,ground and speakers: high inputs
uma5avup.jpg


avyjetep.jpg

ypugyzem.jpg

So here is the painless fuse box and the amp power and also a bundle of wire for future accessories that are in the engine compartment (air compressor and fog lights behind the grill)
ebunyde4.jpg


Thought this fuse tap would work... Not so much
ehe2y6a4.jpg


ypyhemu5.jpg

ehubebyz.jpg


Made an extra ground.. I didn't trust the aux box to be grounded well... Since the bolt looked painted and so did the spot I mount... No clue what I am talking about just from members on here seems like having a good ground is important.
nujejama.jpg


ere7emup.jpg


Amp and aux power
enuzataq.jpg


Tried and tried to get them into a key powered fuse...
e2eve2ug.jpg


Nap time.
 

Members online

Forum statistics

Threads
278,309
Messages
3,554,075
Members
248,016
Latest member
Advally Service

Trending content

Back
Top