apohl17
New member
This thread will be documenting my aftermarket foglight install for third gens like mine that have the wiring (1999-2002) installed but do not have a fog switch on the turn signal stalk. Bon appetit!
I'll preface by saying there a decent amount of threads on this here on the forums, but none that encompass all the info in one place. So, buckle up and grab a :beer: .
A few of the most informational threads, as I had to learn it all from some place:
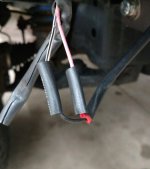
Starting with the front of the vehicle, you should notice a small,white-plugged deutsch two-pin connector taped on to your turn signal wiring, sitting unused. This is your foglight plug. Now, back when the Hella Micro DE's were still being produced, you could buy them as a kit to literally plug right in to the OEM connector. Cool, huh? Well, nowadays we don't really have that option. Most aftermarket cannons are going to be two-wired and ready for crimp or solder (preferred) connections.
So, the first step is to cut off the oem connector- but give yourself a couple inches past the plug so in theory, you could resolder it on at a later time if you find want to reuse the plug. There will be a pink and a white/black wire- pink will be your positive and white/black is negative (ground). At this point, its simple- connect your new fogs to these wires up front.
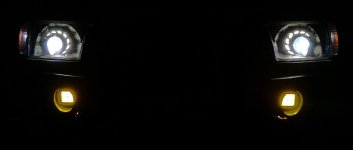
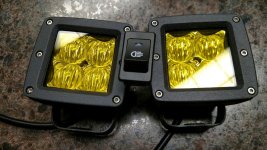
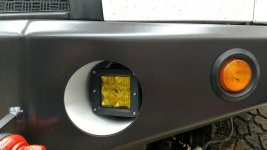
As a reminder, the OEM fogs were 55W a piece, which means these wires ran about 4A - make sure your fogs aren't pushing that boundary. With LED tech, you'll be hard pressed to find a set of fogs drawing more than 3A each (which happen to be the BD Squadron Pros @ 40W). For example, the 3" Amber Pods I bought for this (see below posts for actual install, coming to theaters shortly)are only 16W, so a little over 1A draw-which is prime. :clap2:
So, backing up a wee smidge, there are multiple ways a guy can go about doing this, all depending how "stock" you want to keep things, and how many dead presidents you are willing to shell out!
OPTION 1: Utilize the fog wiring on the factory harness
With this method, you can do it two ways-
i. Buy the following items and go through a very simple install
1. OEM Toyota 4Runner/Solara Turn Signal Stalk w/ Fog Switch PN#84140-14120 available here which is definitely good for 99-00 models, and should work with 01-02 models as well. (Note, there are also two other iterations of stalks available only usable on 1999 models, the PN #84140-20560 here and PN# 84140-06050 here)
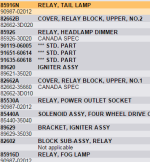
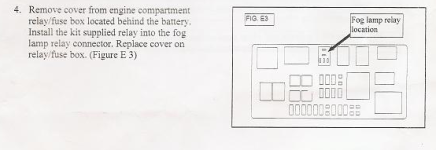
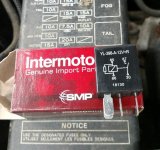
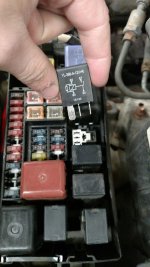
2. OEM Fog Relay PN# 90987-02012 (Note, there are multiple generic relays that are just as good as this one, SEE SECOND POST)
3. Also verify there is a 15A fuse installed in slot 14 in the main fuse box, if not, you will need one. These are cheap and there may be an extra already in your Runner.
TOTAL COST: FOGS + $100 ($80 stalk, $10 relay, $10 fuse+wiring+etc)
ii. Buy the relay listed above, any 12V switch of choice, and use
electrical knowledge to feel like a wizard
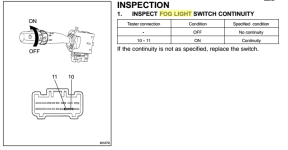
1. All it takes is knowledge of the pinout diagram (specifically, two pins) for the CF13 terminal in which the switch will be wired across! Easy!
2. SEE THIRD POST FOR DOCUMENTATION OF THIS METHOD
3. The switch can be any 22x37mm switch, lots of guys use these from OTRATTW
TOTAL COST: FOGS + $20 ($10 relay, $10 fuse+wiring+etc)
OPTION 2: Route new wiring to the firewall and bypass harness
-If you have a nice hole going through the firewall and aren't afraid to run another wire or two through, then you know the drill. Just wire up the fogs to a bypassed switch with an inline fuse, and grab accessory power under the dash to make sure you can't accidentally leave them on after taking the keys out. Some like the freedom of this, since using the factory harness incorporates a couple things:
1. The fogs can only come on when your head lights are on... AND
2. The fogs automatically switch off when your brights turn on.
NOW, there are ways to bypass this, and I'll get you peeps more info on that later (FOURTH POST) but that's not my direct focus of this thread!
Stay tuned as this thread morphs. :jump::jump::jump:
I'll preface by saying there a decent amount of threads on this here on the forums, but none that encompass all the info in one place. So, buckle up and grab a :beer: .
A few of the most informational threads, as I had to learn it all from some place:
@thaemcee2 post link
[MENTION=56510]criera[/MENTION] post link
@MTD post link
[MENTION=143133]BrianK14[/MENTION] post link
[MENTION=78542]Nashvegas34[/MENTION] post link
[MENTION=56510]criera[/MENTION] post link
@MTD post link
[MENTION=143133]BrianK14[/MENTION] post link
[MENTION=78542]Nashvegas34[/MENTION] post link
Starting with the front of the vehicle, you should notice a small,white-plugged deutsch two-pin connector taped on to your turn signal wiring, sitting unused. This is your foglight plug. Now, back when the Hella Micro DE's were still being produced, you could buy them as a kit to literally plug right in to the OEM connector. Cool, huh? Well, nowadays we don't really have that option. Most aftermarket cannons are going to be two-wired and ready for crimp or solder (preferred) connections.
So, the first step is to cut off the oem connector- but give yourself a couple inches past the plug so in theory, you could resolder it on at a later time if you find want to reuse the plug. There will be a pink and a white/black wire- pink will be your positive and white/black is negative (ground). At this point, its simple- connect your new fogs to these wires up front.
As a reminder, the OEM fogs were 55W a piece, which means these wires ran about 4A - make sure your fogs aren't pushing that boundary. With LED tech, you'll be hard pressed to find a set of fogs drawing more than 3A each (which happen to be the BD Squadron Pros @ 40W). For example, the 3" Amber Pods I bought for this (see below posts for actual install, coming to theaters shortly)are only 16W, so a little over 1A draw-which is prime. :clap2:
So, backing up a wee smidge, there are multiple ways a guy can go about doing this, all depending how "stock" you want to keep things, and how many dead presidents you are willing to shell out!
OPTION 1: Utilize the fog wiring on the factory harness
With this method, you can do it two ways-
i. Buy the following items and go through a very simple install
1. OEM Toyota 4Runner/Solara Turn Signal Stalk w/ Fog Switch PN#84140-14120 available here which is definitely good for 99-00 models, and should work with 01-02 models as well. (Note, there are also two other iterations of stalks available only usable on 1999 models, the PN #84140-20560 here and PN# 84140-06050 here)
2. OEM Fog Relay PN# 90987-02012 (Note, there are multiple generic relays that are just as good as this one, SEE SECOND POST)
3. Also verify there is a 15A fuse installed in slot 14 in the main fuse box, if not, you will need one. These are cheap and there may be an extra already in your Runner.
TOTAL COST: FOGS + $100 ($80 stalk, $10 relay, $10 fuse+wiring+etc)
ii. Buy the relay listed above, any 12V switch of choice, and use
electrical knowledge to feel like a wizard
1. All it takes is knowledge of the pinout diagram (specifically, two pins) for the CF13 terminal in which the switch will be wired across! Easy!
2. SEE THIRD POST FOR DOCUMENTATION OF THIS METHOD
3. The switch can be any 22x37mm switch, lots of guys use these from OTRATTW
TOTAL COST: FOGS + $20 ($10 relay, $10 fuse+wiring+etc)
OPTION 2: Route new wiring to the firewall and bypass harness
-If you have a nice hole going through the firewall and aren't afraid to run another wire or two through, then you know the drill. Just wire up the fogs to a bypassed switch with an inline fuse, and grab accessory power under the dash to make sure you can't accidentally leave them on after taking the keys out. Some like the freedom of this, since using the factory harness incorporates a couple things:
1. The fogs can only come on when your head lights are on... AND
2. The fogs automatically switch off when your brights turn on.
NOW, there are ways to bypass this, and I'll get you peeps more info on that later (FOURTH POST) but that's not my direct focus of this thread!
Stay tuned as this thread morphs. :jump::jump::jump:
Attachments
Last edited: