Warthog Build and Adventure Thread

This morning I installed my Icon rear lower links / trailing arms.

Oooooo shiney!

View attachment 125822

The arms came with install instructions where were ok. But missing some detailed info that would have been ice for generally novice wrenchers.

Here are some missing details:

Getting the old arms off. If your old arms are trashed they come off pretty easy, but mine were new and required some finesse.

Jacked the car up by the diff, then set it back down on jack stands on the frame just in front of the front link mounts. Then lowered the diff jack till the wheels were hanging on their own. They should be only barely touching the ground or floating.

Remove the parking brake cable guide from the link.

Next is to loosen the front bolt. Don't loosen the nut, it is self locking and will be harder to break loose. After breaking the bolt loose then take the nut off. Now try to turn the bolt with your fingers. If you can then you can pull it out and take the rear bolt off. If the bolt is still tight, slowly jack the diff back up, like one pump at a time till the front bolt is loose enough to pull out.

Once the old trailing arm is off, you need to adjust the new trailing arm to be the exact same length (assuming you are not changing your pinon angle). The instructions tell you to do this but don't say exactly how. I figured out that by placing the bolts through the old link you could use that to set the length of the new link easily like so:

View attachment 125821

So once they are the same length you just simply bolt in the new trailing arm. But there was one small problem on my setup. There is a tiny bolt on the rear link of the arm. (For oiling?) Unfortunately it does not completely clear the link mount. Fully stuffing the wheel could shear the nut right off. I used a square jawed pipe wrench and gently bent the lip of the mount out of the way just enough for it to clear. Before on left, after on right.

View attachment 125819View attachment 125820

one more little detail was that trying to bolt the parking break cable back on didn't go as smooth as it should have. I had to bend the anti-rotation tab in towards the bolt hole in order to get both of them to line up to get the bolt into the new arm.

Finally, torque all bolts to specification. The trailing arm adjustment bolts are explained in the instructions from icon, and for my 2014, the main mounting bots were to 96lbs. And again, torque on the bold heads, not the nuts.

All in all a relatively easy upgrade, though it was more exercise than I've had in months and still wore me out :D

Some installed pictures. I tried to find some good pictures of them installed before I bought them and was generally disappointed in the quantity and quality of such pics. So including the top image, here are some nice ones for everyone from now on.

View attachment 125824

View attachment 125825

View attachment 125826

Oh, one last thing. I bought a set of Total Chaos rear link mount skids. They would have fit fine with the old links but they don't fit at all with the new one. The picture above shows why, the ball joint knuckle is HUGE and extends well below the frame of the mount which the skids covered up. So I can either plasma cut the bottom of the skid so that the knuckle passes through it, or I'll just need to make my own.

Since I think I DO want to protect the knuckle itself, I'll probably just weld up my own skids...

I just read this post and i was turning the nut on the trailing arms and they wouldn't budge. now I know you're suppose to turn the bolt. do you happen to know the torque spec for those rear trailing arms?
 
I just read this post and i was turning the nut on the trailing arms and they wouldn't budge. now I know you're suppose to turn the bolt. do you happen to know the torque spec for those rear trailing arms?

The little adjuster lock bolts? It said in the instructions i think. The main bolts were 96 lbs.
 
Awesome pictures. Thanks for coming and probably in February I will plan another trip to DV. I will sure contact you if you are interested to join me again!
 
By far one of the coolest posts. Thanks.

Thank you :D

Awesome photos Warthog! Looks like a real good tour of some of the nice spots one can drive to in DV. Never seen, or heard of, that mine before. Crazy how you can drive in there! Haven't been up Goler yet this year, but been hearing its pretty rough right now, as your pics sure seem to show!

I've been in a lot of mines but driving in one was a first for me :D

Just took a couple stacked rocks for me and my 32 in tires in a couple places. Overall not bad. :)
 
Great pictures dude. I'll sync up with you via pm for some more details on that trip. I'd like to know the trail details so I can try it some time.
 
As much as I enjoyed my slide out tray and as much as my removable tiedown system worked, I still was missing having some good permanent storage.
SO I set out to build a set of storage drawers for carrying all basic camping equipment and tools, as well as a sleeping platform and a tiedown system
that didn't require being removed to sleep in the back.

So a mental image of what I wanted and a paper full of measurements after removing my slide out tray, then buying all the wood and basic hardware
as pictured earlier I got started...

View attachment 156924
Basic shell. I am using pine planks specifically for a couple of reasons. It is somewhat lighter than plywood. And in the direction fo the grain is VERY stiff,
not requiring any further bracing across spans such as the drawer openings.


View attachment 156925
The top. I measured and placed several tie down D rings. Then routed them out so they would sit flush when not used.


View attachment 156926
Making the drawers.


View attachment 156927
After removing the tray and the felt/wool/foam bottom(It stuck up to high to leave in) The noise from the back of the runner was MUCH louder!
So I bought some sound dampening material and it quieted right back down.


View attachment 156928
Drawer slides in as well as the fabricated mounting brackets to use the existing mounting locations for the slider. Also sliders for the little pull
out work tray I added.


View attachment 156929
Mounted in the back.


View attachment 156930
And the forward mounting brackets in use.


View attachment 156931
All done except for the covering!

Continued...

I wish I have wood working skills like this ... I would love to get rid of my sliding tray and put this cabinet in ... I'll have to see who can make me this after I get my roof rack is on...
 
Sooooooo...

I don't /really/ need a new project right now but. After the last trip I was sort of pining for a more full bumper. Just, something I can use to bump into a rock or cliff face if needed without worrying too much about the front fender/lights being the first thing to contact the wall.

Given that I also kind of feel like a goof for buying expensive bumpers when I SHOULD be making them since I have all the tools to do so. I've been thinking about what it would take to extend my SSS slimline bumper to cover more of the front.

The slimline bumper is a great base already, with hidden winch mount and everything. All I'd have to do is add some more metal and bracing on the sides!

SO last night I took a recent picture and photoshopped up a couple of possible designs from the front.

First. As it is now:
View attachment 160355

The minimal approach. Low bumper but high enough for my typical rock climbing limits. Top of bumper goes just under the built in fog lights.
View attachment 160356

Med height. Top of bumper goes to just the top of the current fog lights.
View attachment 160357

Top height. Top of goes to the top of the plastic bumper cover at the wheel well.
View attachment 160358


Leaning towards the low or medium ideas... Overall I still want to keep it light as possible and look nice with the current front end. SO no over the top hoops or anything :)

whos going to make these bumpers for you ??? I really dig the last one ...
 
whos going to make these bumpers for you ??? I really dig the last one ...

Oh I'd do it myself...

I'm a little ashamed I didn't make my own from scratch actually :D

Only thing I don't have is a pipe bender which I would probably use this as an excuse to get one... :D
 
Compressor is doing fine there. My only worry is the heat from the engine compartment. No problems so far, used it a lot, but not sure if it might be shortening it's life or something :/

The mounting bracket I made is really sturdy and it bolts to preexisting reinforced mounting points on the body so it's really solid!

As for the wiring. I bought the ARB harness to SPod adapter and plugged it into the SPod. Then used one of the switches on ITS cable. (I did pry off the ARB logoed switch rocker and pot it on the SPod switch :D)

I just realized I never took any pictures of the SPod or where I mounted the switches... But anyway the hollow slot at the bottom of the center console behind the drivers cup holder was just large enough to make a metal bracket to hold all 6 SPod rocker switches...

View attachment 167769

[MENTION=3475]warthog[/MENTION] I was apart of the GB for the ARB deal.. Love where you have the switches.

Was the sPOD something you had installed (switch bank/center console) yourself or a local shop in Esco/SD/Carlsbad? and do you have pictures of the process?

Im from SM, class of 2000, what is the 4Runner group that meets up in Carlsbad? I would love to meet up when Im visiting California.

Beautiful truck, you're doing it right!
 
[MENTION=3475]warthog[/MENTION] I was apart of the GB for the ARB deal.. Love where you have the switches.

Was the sPOD something you had installed (switch bank/center console) yourself or a local shop in Esco/SD/Carlsbad? and do you have pictures of the process?

Im from SM, class of 2000, what is the 4Runner group that meets up in Carlsbad? I would love to meet up when Im visiting California.

Beautiful truck, you're doing it right!

Hey :) Thanks!

I had the sPOD already installed before I got the air compressor. sPOD sells an adapter cable so you can connect the ARB harness directly to it and it will use some switches on the sPOD wiring harness if you want.

I installed it myself after looking at pictures of other peoples installs. I just made a simple bracket for it and bolted it to the inside of the engine compartment using existing mounting points. Just like I did for the compressor.

The Carlsbad meet was just one of the meet-up places for the general San Diego 4runner group. Which is very unofficial :D someone usually posts for a San Diego meet up and then people show up or not. Someone posted one in the SoCal section just a couple days ago in fact! So best to post there about when you are planning on being in S.D. :)
 
Hey "Warthog"
Just wanted to take a second to say thank you for your CBI rear bumper write up, followed it when I put mine on. You nailed everything perfectly, including the issues, with excellent pictures, and I was grateful that you took the time to do it. Much appreciated.

Halko
 
Hey "Warthog"
Just wanted to take a second to say thank you for your CBI rear bumper write up, followed it when I put mine on. You nailed everything perfectly, including the issues, with excellent pictures, and I was grateful that you took the time to do it. Much appreciated.

Halko

Oh just saw your post! Glad it was some help :D Enjoy your awesome new bumber!! :) Got any pics up yet?
 
Quickie Deathy Valley trip

Took the warthog out to play in Death Valley last weekend.

Only three days and the one full day, the wifey was running in the badwater half marathon so not a lot of actual offroading. But weather was nice, always a great little getaway!

Some pictures...

Went in the north entrance on Big Pine Road into Eureka valley. Some snow and a little ice on the road but after a week of sun since the last storm it was fine.

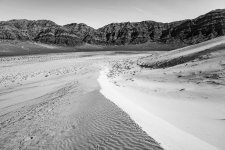
Stopped by Eureka Dunes

DunesNMtns.jpg
Part of the dunes (a very tiny part!) and the striped mountains of the Last Chance Range around the east side of the valley.

AndreaDune2.jpg
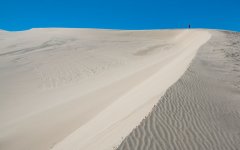
Wifey walking along the dunes. No.... no offroading allowed!

MicroDuneStructure.jpg
Micro dune structures

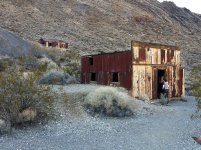
WarthogAtSulphurMine.jpg
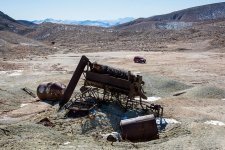
From there is was over the mtns through Hanging Rock Canyon with a stop at the Sulphur mine.

SumphurProcessor.jpg
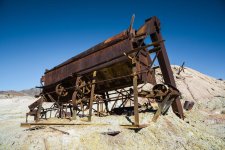
Close-up of the ore processor

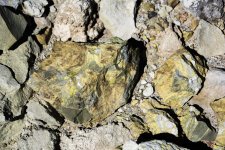
SulphurOre.jpg
Closer up of some of the ore laying around. Yes, it is a bit stinky still :D

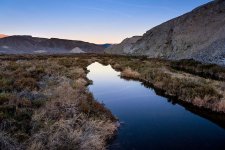
SaltCreekSunset.jpg
After checking in at Stovepipe wells, we went to nearby Salt Creek for a leisurely evening stroll along the creek.

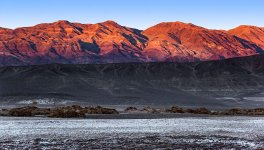
SaltCreekSunset2.jpg
Bit of the alien landscape just as the sun was setting.
 

Attachments

  • DunesNMtns.jpg
    DunesNMtns.jpg
    128.3 KB · Views: 1,350
  • AndreaDune2.jpg
    AndreaDune2.jpg
    100.7 KB · Views: 1,335
  • MicroDuneStructure.jpg
    MicroDuneStructure.jpg
    136.6 KB · Views: 1,325
  • WarthogAtSulphurMine.jpg
    WarthogAtSulphurMine.jpg
    142.5 KB · Views: 1,341
  • SumphurProcessor.jpg
    SumphurProcessor.jpg
    138.2 KB · Views: 1,340
  • SulphurOre.jpg
    SulphurOre.jpg
    148.7 KB · Views: 1,343
  • SaltCreekSunset.jpg
    SaltCreekSunset.jpg
    136.9 KB · Views: 1,346
  • SaltCreekSunset2.jpg
    SaltCreekSunset2.jpg
    139.1 KB · Views: 1,324
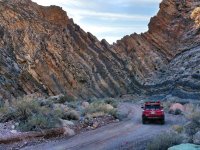
After the race the next day, we didn't have a ton of time or I'd have gone to the race track. Instead we went through Titus Canyon which I'd never been too. Basically a walk in the park as far as off-roading goes, but a major bit of scenery!

Unfortunately I left my camera in the hotel room. What kind of idiot photographer leaves his camera in the hotel room?!?!? Arg! So... cell phone pictures it was today :D

LeadvillePostoffice.jpg
Checking out the post office in Leadville.

TitusLeadville1.jpg
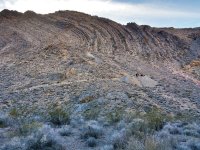
The mountains through this canyon are some of the most tortured rock stratta!

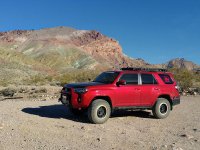
WarthogTitusCanyon.jpg
Warty with some colorful background

TitusStripes.jpg
Man what is going on with the rock here? It's crazy how much differential uplifting as shaped the already wild layers of deposits.

TitusMosaic.jpg
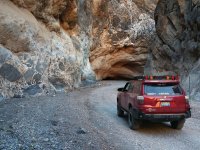
Some large scale natural "Mosaic" in the narrows near the end of the canyon.

Sadly not quite enough time to get more adventurous but Titus was new to me and a really nice mellow family type drive though amazing scenery.

More next trip!
 

Attachments

  • LeadvillePostoffice.jpg
    LeadvillePostoffice.jpg
    141.3 KB · Views: 1,319
  • TitusLeadville1.jpg
    TitusLeadville1.jpg
    146.3 KB · Views: 1,288
  • WarthogTitusCanyon.jpg
    WarthogTitusCanyon.jpg
    140.9 KB · Views: 1,344
  • TitusStripes.jpg
    TitusStripes.jpg
    147.2 KB · Views: 1,316
  • TitusMosaic.jpg
    TitusMosaic.jpg
    147.5 KB · Views: 1,357

Members online

Forum statistics

Threads
278,312
Messages
3,554,085
Members
248,016
Latest member
Advally Service

Trending content

Back
Top