Water pump issue 3VZE

takingblame

New member
Hi,
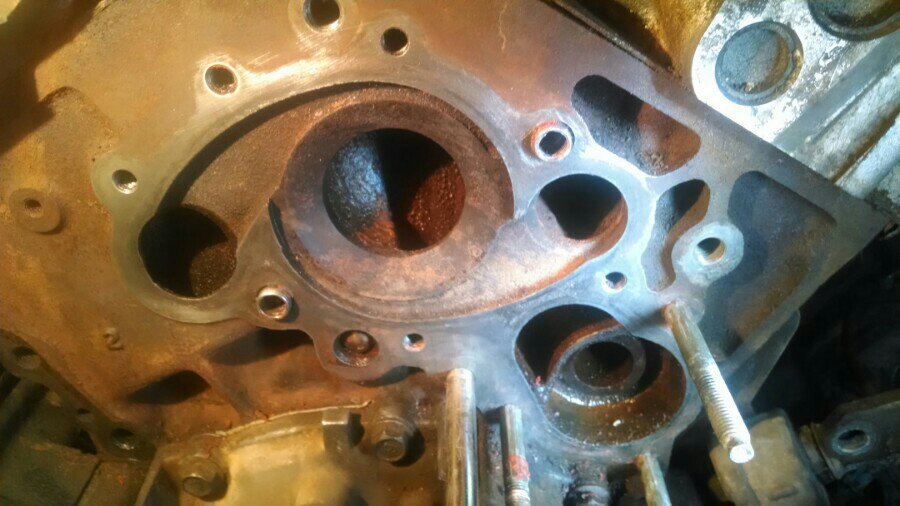
So i am having issues with the water pump that i am replacing on my 93 4 runner. I bought a NEW pump from orielly, installed it, and it started to leak. not just a slow drip, but a good leak. So i took it off, re sealed it and it started leaking again.
My question is did i get a bad water pump??
I am a pretty good mechanic, shocks, brakes, throttle body, valve cover, i.e. i know what i am doing, but this is really frustrating not knowing what is causing the leak. My plan is to return the water pump to orielly and pick up an OEM pump and sealant from the toyota dealership by my house.
Am i missing something??
also does anyone know what this little bearing thing is underneath the water pump.

Yes i know i went a little crazy with the sealant.
Any help is much appreciated.
Thanks
 

Attachments

  • IMG_7785.jpg
    IMG_7785.jpg
    134.4 KB · Views: 3,864
Register to hide this ad
Shouldn't need sealant. A new gasket should be enough. Maybe a warped pump?? The ball looks like just a plug like maybe they had to drill an oil passage from the outside of the block and put the ball in from the inside to block the hole. See that a lot on carburetors.
 
might sound dumb but, did you celan off all the old gasket material? Did you make sure the surface was dry? are you torquing the pump correctly? Sometime if you don't cross tighten / torque, you will cause a warp, causing a leak.
 
Did you torque the water pump bolts before allowing the RTV to set? I know that you're supposed to "lightly" or "finger" tighten the bolts ensure all of the gaps are filled, let the RTV set up for about an hour, and then torque the bolts to spec. Also did you make sure that the surface was dry before applying the RTV? I know this was asked previously but I never saw an answer.
I just changed my water pump last weekend (got the part from O'Reilly as well) and haven't had any issues.
 
Shouldn't need sealant. A new gasket should be enough. Maybe a warped pump?? The ball looks like just a plug like maybe they had to drill an oil passage from the outside of the block and put the ball in from the inside to block the hole. See that a lot on carburetors.

So I don't have to use silicon to seal the water pump and that just the paper gasket is fine??
 
Yup I cleaned all of the crap off the block use alcohol to wipe it down waited until it was completely dry the put sealant on. I hand tightened the bolts then torque them down to the specs of the FSM
 
Yes it is more than likely a bad pump. We get bad pumps from napa often. Get a new gasket and pump and apply with your finger a thin layer of black silicon on both sides of the gasket and let it sit for 5 min on the pump then put on the block that is cleaned with brake cleaner then wait at least 1hr before adding coolant to let the silicone cure
 
Yea a very thin skim of sealant should be suffice and like 541 said let it sit for a few minutes to bond to the gasket good. But I've done plenty of different kinds of water pumps on all kinds of motors and if both surfaces are properly cleaned just the gaskets are fine. IMO.
 
du6ygebu.jpg

OK so I have purchased a new water pump from the dealer and it came with a gasket. So that is all I will be using. Looking at this photo I am pretty sure that plug at the bottom should be covered by the water pump. But the pump I just got doesn't.
 
no that ball looking thing is not covered by OEM or aftermarket water pumps. Or atleast My old Toyota water pump didnt cover it & my new aftermarket one doesnt either.
If you think its leaking from it you could clean the living $#i+ out of it & glob it full of funnycone.
 
Hazza I have a water pump that is no longer leaking!!
But I have a new problem. The number 2 idler pully is leaking!! Could you guys point me to a post about replacing?? Thanks
 
Sorry for the slow reply. Im still finishing up my rebuilt 3VZE install. Have everything done now but bolting in the starter & my hoses. Waiting on parts now. They should be here this coming week. (guess Ill have to start installing the Stereo system, CB & Alarm.)


You can remove the upper timing cover. you will see 4 bolts around the water inlet/pully remove them. then you can pull the small pice of backing plate out. unbolt the water inlet/pully. instal the new one inreverse...


here is a link with a few pics....
http://www.yotatech.com/f2/my-turn-2-idler-pulley-replacement-70655/

Dont clamp your timing belt like he did!!!!!! No need to possibly damage the new timing belt. Do it right. Just remove the dizzy cap, line up the the timming marks & make sure its on #1.
 
Last edited:
You can remove the upper timing cover. you will see 4 bolts around the water inlet/pully remove them. then you can pull the small pice of backing plate out. unbolt the water inlet/pully. instal the new one inreverse...


here is a link with a few pics....
My turn for the #2 idler pulley replacement! - YotaTech Forums

Dont clamp your timing belt like he did!!!!!! No need to possibly damage the new timing belt. Just remove the dizzy cap, line up the the timming marks & do it right.

very cool, thank you for pointing me in the right direction. Yes i will be doing it right and taking the timing belt off before attempting this repair, should i drain the block as well??
also, he used a universal join to get in there and loosen the bolts. i wonder if it would be a hassle to move the wiring harness that sits on top of it...
 
You don't need to remove the timing belt all the way. But if you do mark it with a pen so you know the direction it goes.
Don't need to drain the block. But you could drain som out. Just catch the coolant in a clean bucket so you can put it back in.
Supose You could remove the wiring, but its way more work. Its attached to the dizzy, oil sensor, injectors, TPS, then around behind the plenum to 4 sensors back there. May have forgotten something. As my 89 is slightly different. (89 trucks & 90 runners is where they made some minor changes to the wiring along with some other stuff. I know this because my last 3vze was in an 89 4x4 pu & I still have some spare electrical & other parts. Some interchange & some don't.)
 
Last edited:
7anyda2a.jpg


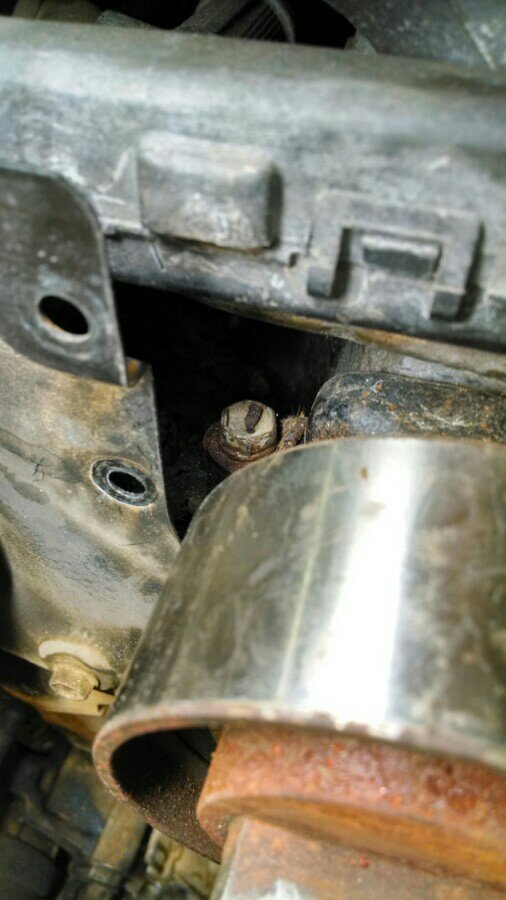
So this guy is giving me trouble. 3/8 in drive is to big. I can't get to it from the back cause there is a hard line running right on top of it. Switched to 1/4 drive cause its small enough to fit in the space.
 
Unbolt the wiring at each end. should give you more room. If more is needed, make sure the plastic is really warm & you can add some pressuer to it to flex it out of the way. (if its to cold, it will brake)
 

Members online

Forum statistics

Threads
278,307
Messages
3,554,054
Members
248,016
Latest member
Advally Service

Trending content

Back
Top