What Did You Do To Your 3rd Gen Today?

Status
Not open for further replies.
Yes toyota is think but feels solid. Never time I just will find an OEM from a wrecker or salvage yard. Same with my hood, one little hail storm destroyed a new aftermarket certified hood.

Yeah.... I wanted to do that... but again... not much by way of availability here. It's a French, Northern Ontario Town, filled with Chevy/Ford owners. Closest scrap yard is 3 hours away too... I tried to get a fender from a few members here, but all told me that shipping to Canada was too costly, or just didn't get back to me at all. :/

I also tried Toyota of Dallas.... same deal. They wouldn't ship me a fender... :(


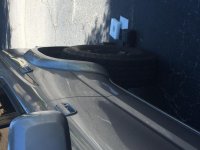
This will have to do... just hoping it works out. At the end of the day, it'll look better than this:

 
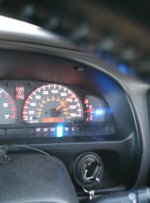
Took out my Subaru Compass and put in my two Thermostats. DON'T JUDGE THE MOUNT PLATE! IT'S TEMPORARY!!!! I want to see how and if these last. If they hold up, I'll get a digital water temp and put in between them and make a new mounting plate for them hopefully on a C&C machine so it's nice and clean looking. The one on the left is cabin temp, the right is the engine compartment temp.

20150508_155046_zpsrlzqys38.jpg~original


20150508_154701_zpsjhdnyfmk.jpg~original


Ran the engine compartment probe through here (copper wire is what I taped it to and pulled it through).

20150508_141237_zpsgvdrgla8.jpg~original


That is right behind the glove compartment, so it's a perfect distance. I zip tied the probe on that support bracket holding the wiring harness to the right.
 
Took out my Subaru Compass and put in my two Thermostats. DON'T JUDGE THE MOUNT PLATE! IT'S TEMPORARY!!!! I want to see how and if these last. If they hold up, I'll get a digital water temp and put in between them and make a new mounting plate for them hopefully on a C&C machine so it's nice and clean looking. The one on the left is cabin temp, the right is the engine compartment temp.

20150508_155046_zpsrlzqys38.jpg~original


20150508_154701_zpsjhdnyfmk.jpg~original


Ran the engine compartment probe through here (copper wire is what I taped it to and pulled it through).

20150508_141237_zpsgvdrgla8.jpg~original


That is right behind the glove compartment, so it's a perfect distance. I zip tied the probe on that support bracket holding the wiring harness to the right.

What gauges are those?
 
What gauges are those?

Off of Ebay.

Celsius Fahrenheit Digital Thermometer Temperature Meter Gauge C F 30°C 110°C | eBay

They are for Computer Towers, but for $5 and either C or F, I was willing to try them and see if they last. There's a jumper on the back. Default is for C, pull the jumper and it changes to F.

I'll have a better write up on my build thread after a while. But it's super simple!!! Just hook them up to power and the probe is about 3 foot long. Run it wherever you want.
 
Off of Ebay.

Celsius Fahrenheit Digital Thermometer Temperature Meter Gauge C F 30°C 110°C | eBay

They are for Computer Towers, but for $5 and either C or F, I was willing to try them and see if they last. There's a jumper on the back. Default is for C, pull the jumper and it changes to F.

I'll have a better write up on my build thread after a while. But it's super simple!!! Just hook them up to power and the probe is about 3 foot long. Run it wherever you want.

Do you think it could be made to fit in the clock location of a 97?
 
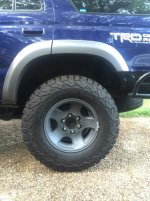
Installed Spidertrax 1.25" spacers on all 4 wheels. Fills out just enough to the edge of the flair. Looks so much better IMO! Since I lifted it, I felt like something was missing and it looked too narrow. Now it looks perfect. Sorry for the crooked photo. Couldn't figure out how to rotate.
 

Attachments

  • image.jpg
    image.jpg
    128.3 KB · Views: 490
Finished up my stealth relocation of the solenoid assembly for my M8000. Took more work than expected, but I'm pleased with the result for now.

It currently uses an in cab controller for 12Voltguy.com, but I plan to make a custom grille badge with a Warn logo and a remote receptacle so I can use my handheld remote as a backup or if I just need to be outside the vehicle while winching.

<a href="http://s902.photobucket.com/user/caseyreep/media/001_zpsalthkx3y.jpg.html" target="_blank"><img src="http://i902.photobucket.com/albums/ac222/caseyreep/001_zpsalthkx3y.jpg" border="0" alt=" photo 001_zpsalthkx3y.jpg"/></a>
 
Changed the last two Heater hoses and change my oil and forgot to but the little gasket back on it :frusty: all at 308918 miles .....….


Note to self : take off skid plates and check to make sure gaskets on it.....
 
That sucks

Mine got rear ended by some drunk blowhard in a S10 Blazer.

:censored:

Sorry to hear that, hope that means there's a new or improved bumper in your near future.

Ordered a HiLift and Amerex 5lb fire extinguisher after reading [MENTION=96877]T4Rfirefighter[/MENTION] 's thread (preciate that!)
 
Last edited:
Oil Change, Rear Diff and Tcase oil, the front diff axle seal is leaking so i just topped it up and will do the front when i get the axle seal fixed. Got my Power steering belt replaced, AC belt didnt bother, the pump? is seized and i never use AC anyways, too expensive to fix.

BTW, need to replace my rotors and brakes I have the 13WL Tundra Kit, anyone know if this will fit?

Premium Front Ceramic Brake Pads AND Disc Rotors Complete KIT Left Right Pair | eBay. it doesnt state whether its13wl or 13we.
 
Finally got the SS 7.2 on!

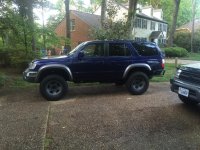
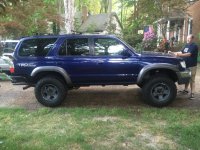
Sittin' pretty now with the SS 7.2 kit on. Rides slightly better than my mostly stock suspension from before with 218,000 on it. Pumped on the looks, and waiting to hit the trail, gotta get the extended brake lines in still and get an alignment up front.

<a href="http://s375.photobucket.com/user/jhmiller22/media/IMAG0423_zpsjotynlff.jpg.html" target="_blank"><img src="http://i375.photobucket.com/albums/oo191/jhmiller22/IMAG0423_zpsjotynlff.jpg" border="0" alt=" photo IMAG0423_zpsjotynlff.jpg"/></a>

<a href="http://s375.photobucket.com/user/jhmiller22/media/IMAG0426_zps6uwuvaux.jpg.html" target="_blank"><img src="http://i375.photobucket.com/albums/oo191/jhmiller22/IMAG0426_zps6uwuvaux.jpg" border="0" alt=" photo IMAG0426_zps6uwuvaux.jpg"/></a>

<a href="http://s375.photobucket.com/user/jhmiller22/media/IMAG0420_zps1gceegj3.jpg.html" target="_blank"><img src="http://i375.photobucket.com/albums/oo191/jhmiller22/IMAG0420_zps1gceegj3.jpg" border="0" alt=" photo IMAG0420_zps1gceegj3.jpg"/></a>

And for fun here's a pic of my dad's 4Runner, his truck made me fall in love with 4Runners! Love those wheels and the grey/black color combo.

<a href="http://s375.photobucket.com/user/jhmiller22/media/IMG_62629081780203_zpsnqoyik9n.jpeg.html" target="_blank"><img src="http://i375.photobucket.com/albums/oo191/jhmiller22/IMG_62629081780203_zpsnqoyik9n.jpeg" border="0" alt=" photo IMG_62629081780203_zpsnqoyik9n.jpeg"/></a>
 
Been away to school for 8 months so I've been far away from the garage :S

Drove her back 2 weeks ago with the entire car completely loaded. 2,000 km in 14 hours through Ontario during a snowstorm in the middle of the night, through Manitoba with crazy sidewinds and slushy roads, and finally through sunny Saskatchewan and sunny Alberta. Took me 8 red bulls, but I pulled it off.

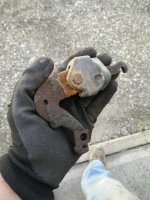
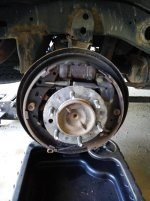
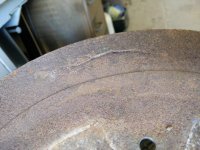
Fixed my rear brakes yesterday. Replaced all the springs, pins, shoes and cleaned up the rest. Parking brake bell crank was completely seized on both sides, the self adjuster was out of position somehow on both sides and check out the crack in the right brake drum!!

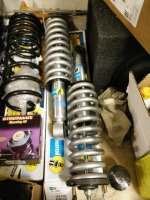
Today, I assembled my struts! Rental spring compressors warped like crazy under the load so I got scared and gave up. Called a family friend and he had some beat up but beafy compressors(lucky me). Tried again, but I didnt get them exactly opposite each other so the spring started to bow. So I said to myself "I'm gonna be safe and decompress them and try again". BAD IDEA! As soon as I loosened one side, it slipped and flew over to the other side! Hit my wrist pretty hard... :eek: I hid behind the truck for a bit after that haha. Once I managed to decompress them without killing myself, I tried again, but this time with vice-grips keeping the compressors in the right place. Easy as pie after that!
Word of advice to all the newbies out there(cause I definitely am one): Don't even bother trying to assemble struts... its a nightmare :redbrick:. Take them to a place with a machine!

Tomorrow I do some more stuff :eyebrows:
 

Attachments

  • IMG_20150421_201257_nopm_.jpg
    IMG_20150421_201257_nopm_.jpg
    122.3 KB · Views: 644
  • IMG_20150509_173723.jpg
    IMG_20150509_173723.jpg
    134.9 KB · Views: 674
  • IMG_20150508_180122.jpg
    IMG_20150508_180122.jpg
    129.1 KB · Views: 642
  • IMG_20150508_180024.jpg
    IMG_20150508_180024.jpg
    135.7 KB · Views: 628
  • IMG_20150511_001729.jpg
    IMG_20150511_001729.jpg
    132.7 KB · Views: 630
Last edited:
I finally Got around to doing the Tundra Brake Upgrade. I got all my parts at Autozone and it took about 3 hours taking it very slow and taking my time one side at a time. I found the culprit of my shaking on highway speeds, It was the passenger side caliper with 2 frozen cylinders. I was a few days away from diagonally burning through the backing plate on one pad.

As I've read and now experience the braking power is amazing, but getting used to the peddle travel will take some time. No more warped rotors for me :surfer: :bigok:
 
Status
Not open for further replies.

Members online

Forum statistics

Threads
278,316
Messages
3,554,120
Members
248,016
Latest member
Advally Service

Trending content

Back
Top