Writeup: HVAC Damper Servos Diagnostic/Repair/Replace Options

Let me know if you need any tips once you pull the motor. There are 2 places it looks like it fails most often. Both are repairable. I think the motor runs 80 bucks the last time I checked.

Sent from my moto g(6) (XT1925DL) using Tapatalk

It's actually siting in my glove box. I'll pull the cover off and take some pics later.

Appreciate it!
 
I actually overhauled the little motor. I found that the grease had worked its way in between the gear and the electrical contacts and I just cleaned it and reset the position and got it working again. Really easy to fix that guy up.

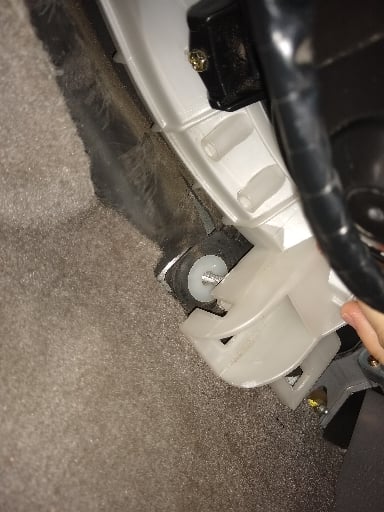
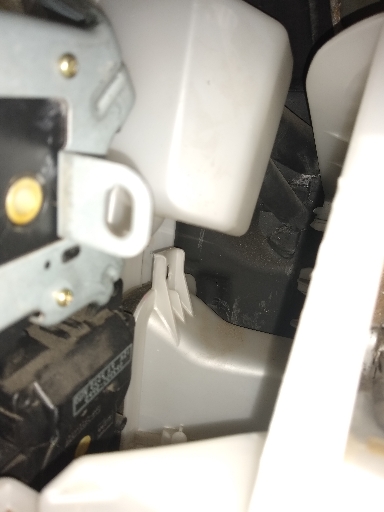
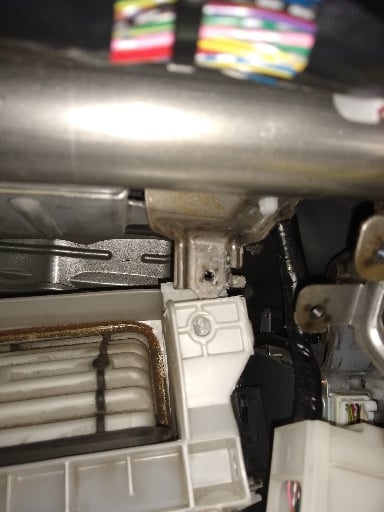
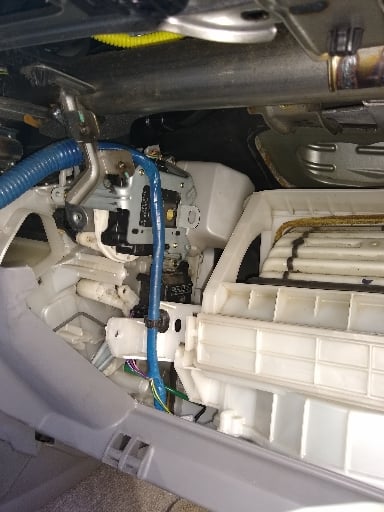
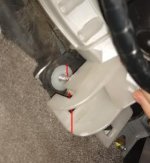
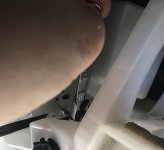
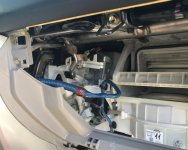
As for getting the box back in tho.... I've spent over an hour messing with it and am at my wits end. Any tips would be greatly appreciated. I've attached pictures. Wasn't nearly as hard to get out for me as it is to get back in. Any pry points or insight would be amazing. Thanks!
43a4bc4f59746bf3fe71bedfa52629e9.jpg
cf6bcc4130c6aa25cb0c8f0f91aaf6f2.jpg
601cd100e479706c54362b96c5c508a7.jpg
18cec2af796d73be886161950e5d46d9.jpg


Sent from my moto g(6) (XT1925DL) using Tapatalk

OK, from my notes:

Notes: when replacing the blower assembly, start with the lower right bolt in the back. You will have to pry the plastic bracket back up and to the left over the bolt. The blower assembly's servo will hang up on the metal bracket towards the top right side (shown in step 10), so make sure to pry that loose as well.
Then make sure the claw fitting re-engages before replacing all of the bolts and nuts.

My thoughts are, pry the bracket back over the bolt on the bottom right first (this is the one that has a stud instead of threads). If you are having trouble doing that, make sure the top right back corner of the assembly is not hanging up on the metal bracket in step 10. You will need to squeeze the servo housing in front of that metal bracket while getting it mounted back on the stud (visible in your first photo).

I don't remember for sure, but I honestly might have pried using the stud as the fulcrum, somehow. I'd have to play with it again to remember for sure. I am pretty confident though the best way to get it back together is starting in that corner.

IIRC, you won't have enough room to slide it far enough right so you have to go in at an angle and pry the assembly high enough so it "falls" onto the stud.

I attached an image of how I might have pried it back on. Sorry, I don't remember too well, it's been a while. I may have to do the third one soon :shrug:
 

Attachments

  • pry angle.jpg
    pry angle.jpg
    13.4 KB · Views: 782
Let me know if you need any tips once you pull the motor. There are 2 places it looks like it fails most often. Both are repairable. I think the motor runs 80 bucks the last time I checked.

Sent from my moto g(6) (XT1925DL) using Tapatalk

Yeah honestly both repairs are extremely easy, it's the removal and installation that is a PITA. I've had one of each. I'm more worried about the dirty contacts -- I feel like that could happen again a lot easier than having the coupling disengage again...
 
Let me know if you need any tips once you pull the motor. There are 2 places it looks like it fails most often. Both are repairable. I think the motor runs 80 bucks the last time I checked.

Sent from my moto g(6) (XT1925DL) using Tapatalk

Yeah honestly both repairs are extremely easy, it's the removal and installation that is a PITA. I've had one of each. I'm more worried about the dirty contacts -- I feel like that could happen again a lot easier than having the coupling disengage again...

Welp, I opened her back up today and took some photos (forgot how flimsy those clips are ):

XOqwVnj.jpg


HYBTvUC.jpg


What exactly needs to be fixed here? At those point I don’t even know which direction the big plastic white piece is supposed to be facing to go back in, but I might be able to fool with it a bit this weekend.
 
Welp, I opened her back up today and took some photos (forgot how flimsy those clips are ):

XOqwVnj.jpg


HYBTvUC.jpg


What exactly needs to be fixed here? At those point I don’t even know which direction the big plastic white piece is supposed to be facing to go back in, but I might be able to fool with it a bit this weekend.

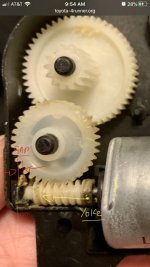
If it was hunting, you need to clean the grease off of the black contact patches on the gear, and clean up the 3 contacts on the other half. It looks like your coupling is intact.
 
Welp, I opened her back up today and took some photos (forgot how flimsy those clips are ):


XOqwVnj.jpg


HYBTvUC.jpg


What exactly needs to be fixed here? At those point I don’t even know which direction the big plastic white piece is supposed to be facing to go back in, but I might be able to fool with it a bit this weekend.
Sorry for the late response. I second the contact cleaning. It looks pretty greasy. To get the gear to sit in the right position again just separate the assy(like you have in the picture) and spin the large arm gear until it reaches it's limit. Keep the gear in this position and reassemble. You have the chance of putting it in at the wrong limit and if that's the case just pry it apart again and move the arm gear to the opposite limit. You can test the servo by plugging it back into the harness and selecting air flow direction before reinstalling to make sure you've got it right. Good luck!

Sent from my moto g(6) (XT1925DL) using Tapatalk
 
If it was hunting, you need to clean the grease off of the black contact patches on the gear, and clean up the 3 contacts on the other half. It looks like your coupling is intact.

Thanks! Alright, I have some MAF/electrical contact cleaner I can hit it with. It wasn’t hunting (I don’t think?), it would just make a grinding noise when trying to switch air mix modes.

Sorry for the late response. I second the contact cleaning. It looks pretty greasy. To get the gear to sit in the right position again just separate the assy(like you have in the picture) and spin the large arm gear until it reaches it's limit. Keep the gear in this position and reassemble. You have the chance of putting it in at the wrong limit and if that's the case just pry it apart again and move the arm gear to the opposite limit. You can test the servo by plugging it back into the harness and selecting air flow direction before reinstalling to make sure you've got it right. Good luck!

Sent from my moto g(6) (XT1925DL) using Tapatalk

Thanks and no worries! Are the max limits specific to any specific mode (upper vents/lower vents/defrost)? That could help in reinstalling although I don’t expect anyone to actually remember.
 
Thanks! Alright, I have some MAF/electrical contact cleaner I can hit it with. It wasn’t hunting (I don’t think?), it would just make a grinding noise when trying to switch air mix modes.


Thanks and no worries! Are the max limits specific to any specific mode (upper vents/lower vents/defrost)? That could help in reinstalling although I don’t expect anyone to actually remember.

I would be careful and not remove all the "grease", the gears/teeth need to have that lubrication on them to work smoothly/properly and to resist wearing too rapidly.

I would avoid spraying the electrical cleaner directly onto any of the insides, I would spray it onto a cloth and use that to clean the contact areas.
 
Last edited:
I would be careful and remove all the "grease", the gears/teeth need to have that lubrication on them to work smoothly/properly and to resist wearing too rapidly.

I would avoid spraying the electrical cleaner directly onto any of the insides, I would spray it onto a cloth and use that to clean the contact areas.

Gotcha. I’ll try to only clean the contact areas and leave the grease on the gears. Here’s to hoping!
 
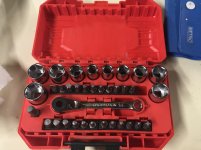
only my air direction servo was buzzing ( no selection of direction except face vent) . I was abled to get to the 3rd screw for the vent control direction servo using a mini ratchet from crafstmen i left most of the car intact, bent the servo bracket back to aid installation and removal. im not saying its a better way than a full strip out, i just thought it suited me.
upon dissassembly of servo i found the yoke on the motor shaft was not driving the worm screw because it had slipped back, so i moved it up the shaft a bit with sharp sidecutters supporting the yoke (motor hanging from yoke by side cutters) and tapped gently on the motor shaft to move the yoke about 0.060" until it engaged with the plastic worm screw. the yoke came loose once, so i slid it off the shaft, squashed it a smidge so the hole closed up marginally, and knocked it back on the shaft , it was now very tight, i also used loctite 609 as a lubricator on the shaft... its designed for drive applications and sets very strong. tested out and working fine, thanks to all the adventurists that first took the servo apart to discover its fixable.

 

Attachments

  • 951BE287-5E65-4941-ADD5-833C11E3BF44.jpg
    951BE287-5E65-4941-ADD5-833C11E3BF44.jpg
    131.6 KB · Views: 725
  • 112D5624-D333-462E-9504-4945344A4352.jpg
    112D5624-D333-462E-9504-4945344A4352.jpg
    121.1 KB · Views: 762
  • 16DFC4FF-A1F8-4AA6-A728-9EB3C89D9C0E.jpg
    16DFC4FF-A1F8-4AA6-A728-9EB3C89D9C0E.jpg
    122 KB · Views: 718
Last edited:
only my air direction servo was buzzing ( no selection of direction except face vent) . I was abled to get to the 3rd screw for the vent control direction servo using a mini ratchet from crafstmen i left most of the car intact, bent the servo bracket back to aid installation and removal. im not saying its a better way than a full strip out, i just thought it suited me.
upon dissassembly of servo i found the yoke on the motor shaft was not driving the worm screw because it had slipped back, so i moved it up the shaft a bit with sharp sidecutters supporting the yoke (motor hanging from yoke by side cutters) and tapped gently on the motor shaft to move the yoke about 0.060" until it engaged with the plastic worm screw. the yoke came loose once, so i slid it off the shaft, squashed it a smidge so the hole closed up marginally, and knocked it back on the shaft , it was now very tight, i also used loctite 609 as a lubricator on the shaft... its designed for drive applications and sets very strong. tested out and working fine, thanks to all the adventurists that first took the servo apart to discover its fixable.

Thanks for sharing. I should've made a point of this, as I also bent the bracket for this one when I repaired it, but the second one I could not reach, so I made the writeup.
 
i used your image to show what i encountered: that tiny yoke was not engaging the worm, the worm had slid to the left past engagement of the yoke, that was the yoke i moved. it remains to be seen if it holds up, i think the press fit i made and loctite 609 should hold it long enough.
 

Attachments

  • 26E9381E-C3BD-43D7-A023-4F90E41C0C2E.jpg
    26E9381E-C3BD-43D7-A023-4F90E41C0C2E.jpg
    90.7 KB · Views: 435
Last edited:
Warning, please note, this project is not for the faint-hearted.

Omg! You weren’t kidding…I recently got a 2004 GX470 and I compared to my set up looked similar except for one detail. When I got to that claw fitting I was unable to move the assembly even a fraction because of my girly strength. Anyways I ended up using clamps to move assembly to the right and up. In the end, I was unable to move downwards but it gave me enough space to remove both dampers on the left.

view


Question….can anyone recommend a thread that discusses removing the damper to the right of the blower assembly? It’s really tight in there.

Thank you in advance.

The write up was EXCELLENT!
 

Members online

No members online now.

Forum statistics

Threads
278,312
Messages
3,554,083
Members
248,016
Latest member
Advally Service

Trending content

Back
Top