ZachAttack's Build Thread - 2004 Sport Edition

ZachAttack

New member
Hello everyone.

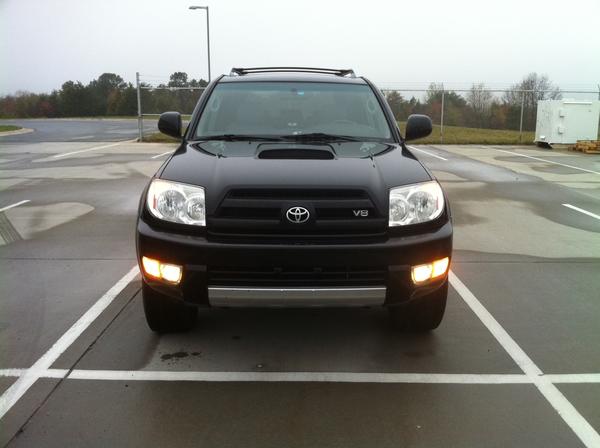
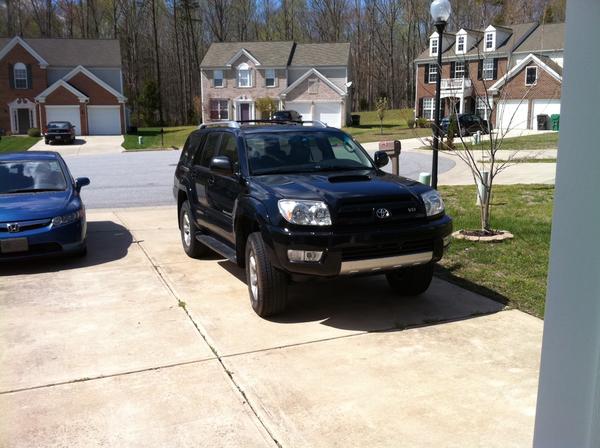
I've been lurking for a little while and finally signed up. I currently have a 2004 Sport Edition, in black. I used to have a '97 Anthrocite Limited; I loved that 4Runner and is the primary reason I bought the 2004.

I figured I'd start this thread to document what I did and have been doing to my truck.

It's good to be here.

2004 Sport Edition, V8, Black
zachattack-albums-my+4runner-picture12811-photo-4.jpg


Mods Done:
Pioneer AVIC-Z130BT
Fog Light Mod
HCF Removed
Interior LEDs
Daystar 1" Level, then removed for the 5100s.
DIY Black Headlights
Spidertrax
Urban Runner Roof Rack
Painted Calipers
El Grande Horns
Removed Running Boards
Steelcraft Nerf Bars
LED Taillights
5100s/FJ Coils
BFG AT 265/70R17
Poly LCA Bushings


Mods Planned:
HID Lo/Hi/Fog
Steelcraft Bull Bar
More lights on the Bull Bar
Front windows tint to match rears (20%?)
Cut off exhaust resonator, new tips
New battery
Racing DOT4 brake fluid

My Service DIY links:
Differential and Transfer Case Fluid Changes
Clay Bar and Polishing
DIY Automatic Transmission Fluid Flush
Replaced Front Rotors and Pads, Flushed Brakes DOT3
Replaced Spark Plugs

Service Items to do:
Driveshaft Servicing (to-do)
Product Listing from AMSOIL
 
Last edited:
Register to hide this ad
:worthless:hungry:
sorry I had to do it.

Welcome! But I'm not sure you have your facts straight on that black being the fastest color thing. I believe the if you look at the old brochures for the '04s that you'll see titanium metallic actually had the most horsepower.
 
This weekend, I finally decided to upgrade my head unit. I chose, based on much research (and help from here), the Pioneer AVIC-Z130BT.

You can find more information here: Pioneer AVIC-Z130BT Navigation receiver at Crutchfield.com

Also purchased:
PAC Toyota Factory Integration Adapter ($75)
Toyota In-dash Receiver Kit ($15)
iPod Cable (Pioneer CD-IU51V) ($50)
PAC Steering Wheel Controls Adaptor ($70)

I followed the instructions to a "t" and got everything working (I haven't finished the steering wheel controls yet).

Notes:
1) I took out the box for the dual-diversity antennae.
2) I removed my old iPad adapter I had installed.
3) Did the bypass successfully.
4) Still need to install backup camera.
5) Still need to install steering controls.
6) Still need to connect reverse and speed sense wires.

zachattack-albums-pioneer+avic-z130bt-picture3089-pioneer-avic-z130bt-installed.jpg
 
Last edited:
Fog Light Mod

I know this is nothing new for many of you, but I surfed around for awhile and finally settled on JA's site as a good guide for the fog light mod. I'm going to link and quote his site here, so you don't think these are my words.

This is from Toyota 4Runner Independent use of Fog Light Mod.

JA said:
Concept:
The factory fog lights are wired to illuminate...[snip]...only if the low beam headlights are switched on. The fog lights also shut off when the high beams are switched on.

[snip]

Part One:
Fog Mod part one is done so that the fog lights will turn on using the factory switch anytime the ignition is on and the high beams are off.

Remove the fog light relay located in the engine room relay box and bend prong #2 so that it no longer inserts into its usual location. Prong #2 is the upper right prong when the prongs are facing up at you, it is the upper left prong when the relay in inserted in the relay box (see pic for clarification). Prong #2 is where the coil side of the fog relay was getting 12V+ power from the headlamp circuit. Take a short piece of 14-18 gague wire and crimp on a fully insulated female quick disconnect terminal with a 0.187" tab. Do not use a standard 0.250" tab disconnect because it will not fit tightly enough. Connect the disconnect to the prong of the fog light relay that you just bent.

I used a .25" fast-on anyway, and it was tight enough...

...[snip]...
For SR5 and Sport Edition owners you will find ignition activated 12V+ power at the bottom left prong #1 of the IG relay socket. SR5 and Sport Edition owners do not have an IG relay as that is for the seat heaters which came on Limited Edition's only. Use an 0.250" insulated male quick disconnect 'crimp type' solderless terminal which plugs directly into this socket.

Easy enough. Checked, and now I have independent control of the fog lamps, until the high beams go on.

Part Two:
Fog Mod part two is done so that the fog lights will remain on (if the factory switch is in the on position) while the high beams are activated.

Remove the three philips screws securing the steering column lower trim cover...[snip]...Unplug the C12 combination switch harness and connect wires going to pin 16 and 17 together. I used a blue 3M Scotchlok Electrical IDC (insulation displacement connection) connector to do so.

For 2005-2009 4Runners...[snip]...

Please note that for 2003-2004 pin #17 is a solid blue wire, connect this together to the white with black stripe wire going to pin #16. Again, there is also a red with green stripe wire in the 2003-2004 harness at pin #7, this is NOT the wire you want to connect to.

Well, I tried the blue Scotchlock trick, and because the wires were such different diameters, I couldn't get it to work. I ended up stripping some of each wire away and soldering a jumper to the wires.

After plugging back in and getting everything reassembled, I have totally independent fog lights.

Went for a spin to check out my newfound capabilities:

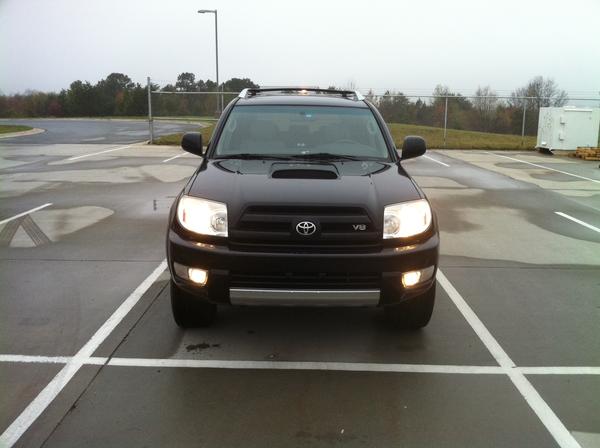
Fogs on with DRLs: I like this.
zachattack-albums-fog+light+mod-picture3090-fog-light-mod-drl.jpg


Fogs on with Parking lights: I don't think I'll use this for nighttime driving (too little light too far down). (It's hard to see in this picture, but the parking lights in the upper outboard portion of the headlights are on.)
zachattack-albums-fog+light+mod-picture3091-fog-light-mod-parking.jpg

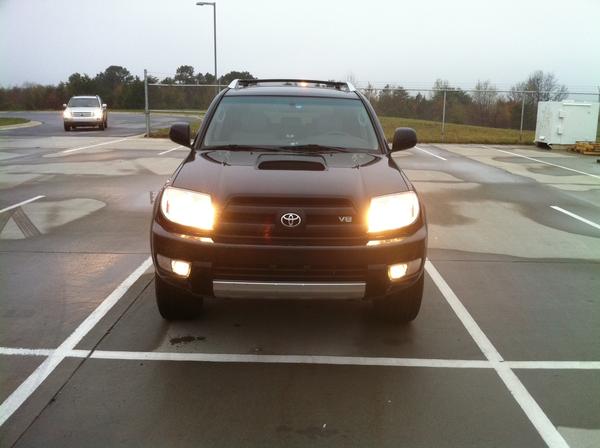
Fogs and headlights: No different than before, but here's a picture anyway.
zachattack-albums-fog+light+mod-picture3092-fog-light-mod-headlights.jpg

Fogs and Brights: WUHOO! LET THERE BE LIGHT.
zachattack-albums-fog+light+mod-picture3093-fog-light-mod-brights.jpg


(Also, I am still using the stock halogens. Can't wait to see everything lit up with future HIDs.)

Thanks to JA, whoever you are. Your site has motivated me to get to work on my 4Runner.
 
Last edited:
HCF Removal

This may be kind of controversal, but I also followed JA's site on the Hydrocarbon Filter removal. I'll quote him here...

You can find his page (with pics) here: Toyota 4Runner Hydrocarbon filter removal

JA said:
Concept:
This modification removes the hydrocarbon charcoal emissions filter located in the airbox in order to increase intake airflow.

...snip...

From the time people began modifying the automobile, one thing they always want to do is to get more air into the engine...[snip]...more air equals more power. Removing the factory hydrocarbon filter located in the airbox is just one simple (and free) way to increase airflow.

Start out by unhooking the 4 clips securing the top half of the airbox to the lower half. While still in place, disconnect the mass airflow sensor (MAF) wire harness. Then loosen the hose clamp securing the intake air tube to the airbox using a #2 phillips screwdriver.

Okay, I'm going to stop here. I was able to remove the HCF after having just unclipping the 4 clips. I hooked a screwdriver underneath one of the lips by the plastic rivets and just popped them out one by one. Didn't have to unhook anything...

Keep reading for the original instructions, though.

On the underside of the top half of the airbox, you will find the charcoal activated hydrocarbon emissions filter. It is permanently mounted to the box via six plastic rivets that were melted in place at the factory. Using a sharp chisel, remove two of these rivets from one side. You can now get your hand underneath the edge and by pulling on the filter frame, the four rivets left will snap off.

That was pretty much it. I reassembled and took it for a spin.

I'm not sure if it was just in my head, but I seemed to get more throttle response and it seemed like there was more power/faster acceleration. I'm not sure that is real, though.

Even if it's not, it makes me think it's helping, so I'll call this a win.

Again. No pics yet. Sorry.
 
This weekend, I finally decided to upgrade my head unit. I chose, based on much research (and help from here), the Pioneer AVIC-Z130BT.

You can find more information here: Pioneer AVIC-Z130BT Navigation receiver at Crutchfield.com

Also purchased:
PAC Toyota Factory Integration Adapter ($75)
Toyota In-dash Receiver Kit ($15)
iPod Cable (Pioneer CD-IU51V) ($50)
PAC Steering Wheel Controls Adaptor ($70)

I followed the instructions to a "t" and got everything working (I haven't finished the steering wheel controls yet).

Notes:
1) I took out the box for the dual-diversity antennae.
2) I removed my old iPad adapter I had installed.
3) Did the bypass successfully.
4) Still need to install backup camera.
5) Still need to install steering controls.
6) Still need to connect reverse and speed sense wires.

zachattack-albums-pioneer+avic-z130bt-picture3089-pioneer-avic-z130bt-installed.jpg

I like the dash kit, it looks like an updated version from the one they used to sell. Did you have the JBL system before installing this?
 
I like the dash kit, it looks like an updated version from the one they used to sell. Did you have the JBL system before installing this?

Yeah, my only complaint is that the top center bows down a little (which you can see in the picture). I think the surrounding assemble is pinching it a little causing the bow. After I get everything installed for the last time, I may use a little epoxy to tack it up in place, knowing I'll have to break the seal if I want to pull everything out.

Did you have the JBL system before installing this?

Yeah, which means I had to buy the PAC Toyota Factory Integration Adapter ($75).

After some studying with the wiring and such, it worked out, and the thing sounds great.
 
Interior LEDs

Well, I'm skipping the writeup for the Daystar leveling kit, mostly because I am having a little trouble. I'll explain it when I get to the writeup.

Anyway, my LEDs arrived from LEDoption today. I had been using...you guessed it...JA's site as a guide for the leds, but vleds didn't have any of the 5k color temperature LEDs I was interested in. LEDoption came through.

Based on the lights I wanted to do (door courtesy lights, map lights, and 2 domes), I bought 6 of the wedge style LEDs (LEDoption 5-SMD Top Shine T10 LED wedge light bulbs 168 194 2825 2823 W5W 912 921 at $7.99 per) and 2 of the tube-style (LEDoption 1.25" 31mm 6-SMD Festoon Dome Light LED bulbs DE3175 DE3022 3175 3022 @ $12.99 per).

Of course what I didn't realize was that each "per" was actually a set of two. I also figured out that I don't have two dome lights. I have one dome in the way back, and my ceiling DVD player actually consists of two more of the wedge style lights. (No biggie, I have extras!) Oh, and the license plate lights are the wedge style bulbs. Sweet.

So, I used 10 of my 12 wedge style LEDs and 1 of my 4 cylinder types. (Crap, now that I'm typing this, I forgot to check the glove compartment. Grrr.)

Enough talking, on to the pictures!
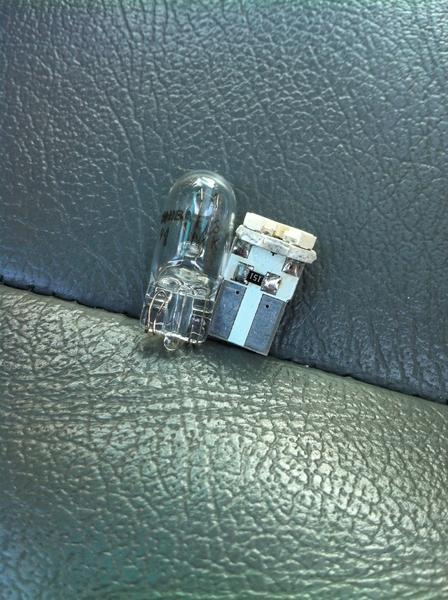
Here's the old and new bulbs next to eachother:
zachattack-albums-interior+leds-picture3103-photo-6.jpg

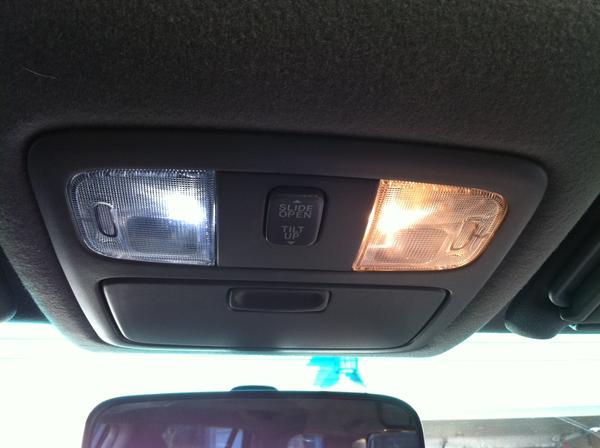
I started with the map lights:
zachattack-albums-interior+leds-picture3106-photo-11.jpg

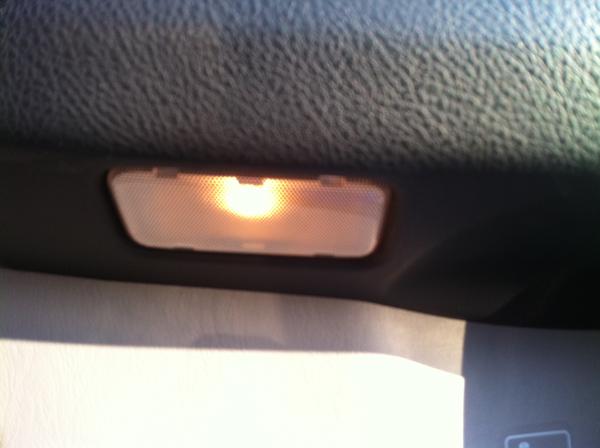
Then moved on to the door courtesy lights.
Before:
zachattack-albums-interior+leds-picture3105-photo-8.jpg

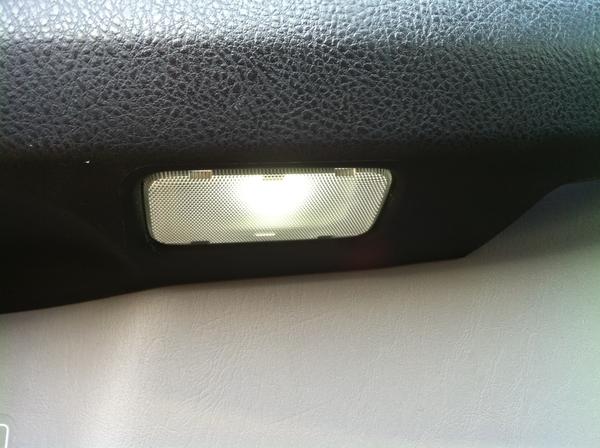
After:
zachattack-albums-interior+leds-picture3104-photo-7.jpg

From outside...comparison:
3102-20110401-001.jpg


After that, I kind of stopped taking pictures. Anyway, it looks really good, and I'm happy with the change. More light, and more importantly, more ELEGANT light.

Stay tuned for my Daystar Leveling kit installation adventure, hopefully complete tomorrow.
 
Last edited:
Well, after receiving the Daystar leveling kit this week, I got it installed this morning.

I went with the 1" kit because I'm not quite ready to lift the whole truck yet, but do want the slightly more aggressive stance afforded by the level.

(I chose the Daystar 1" lift by perusing the http://www.toyota-4runner.org/4th-gen-t4rs/51742-lift-tire-central-pics-post-em-up.html thread. Really, though, the before and after shot that convinced me is here, care of ajc.

Here's the Daystar site with some good info: Daystar™ - Driven by Design.

Anyway, for $40, I figure even if I replace them in a year with a bigger lift, the $40 is worth the education.

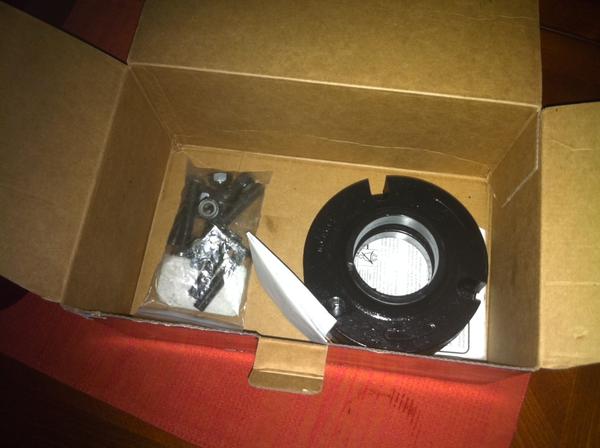
The kit arrived last night, so I grabbed a quick photo (my personal version of the Daystar photo here.)

zachattack-albums-daystar+comfortrider+1-inch+leveling+kit-picture3094-daystar-1-inch-leveling-kit.jpg


I also scanned the instructions for any of you who are interested.
http://n999za.files.wordpress.com/2011/03/daystar-1-in-leveling-kit-instructions.pdf

Alright, I went out to the garage on Thursday night, jacked the car up and removed a wheel just to get oriented, and quickly realized that without jack stands, I wasn't going to get very far. You need to jack the whole front up so you can disassemble the sway bar and get it out of the way.

Also, looks like I'm going to need a ball joint splitter (found out later that the "pittman arm separator" is what I needed from Autozone) and a spring compressor.

So, I put everything back together and ended up going to Autozone to get jack stands and the other stuff. Turns out Autozone has a "loan-a-tool" program for some of the obscure stuff. I'm sure I'll order these things some day, but it was nice to essentially get them for free. (You pay for used versions of them, then the refund what you paid when you bring them back.)

Anyway, Saturday morning, I jacked the car up and got to work.

After about 3 hours of wrestling with this or that, I finally got the (pretty much stripped) 3rd nut off the top of the tower (where you can't reach it with any tools).

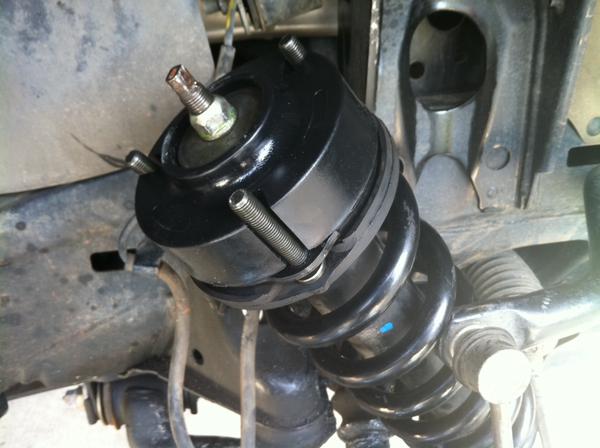
Among other things, I figured out that if you take apart both sides at once, you can swing the sway bar out of the way instead of having it prevent you from removing the strut assembly.) After getting everything unbolted, I laid (layed?) the strut assembly over (because it was still connected to the XREAS) and used the spring compressors to...well...compress the springs.

zachattack-albums-daystar+comfortrider+1-inch+leveling+kit-picture3112-photo-7.jpg


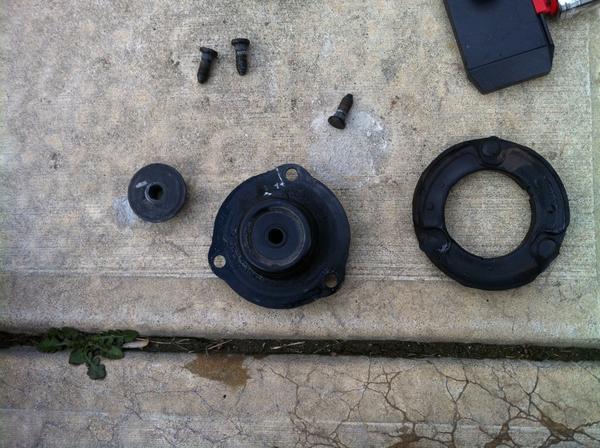
Then, I took apart the top of the strut, removed the old studs, and put in the new studs.

zachattack-albums-daystar+comfortrider+1-inch+leveling+kit-picture3113-photo-8.jpg


Here's the strut with the spacer ready to go back in.

zachattack-albums-daystar+comfortrider+1-inch+leveling+kit-picture3114-photo-9.jpg


Another few minutes of putting everything back together...
(Here's a before shot):

zachattack-albums-daystar+comfortrider+1-inch+leveling+kit-picture3117-photo-13.jpg

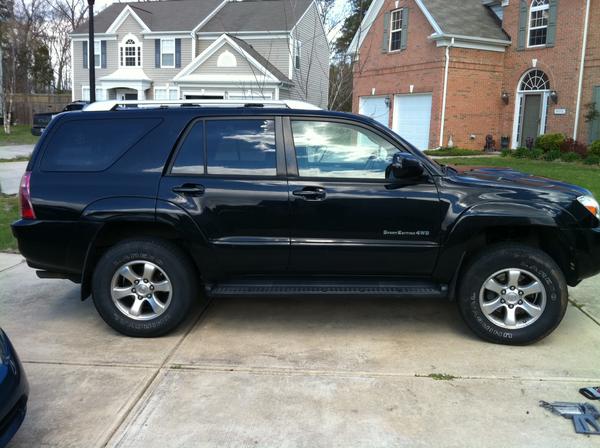
Here's the final product.
zachattack-albums-daystar+comfortrider+1-inch+leveling+kit-picture3115-photo-10.jpg


Another angle.

zachattack-albums-daystar+comfortrider+1-inch+leveling+kit-picture3116-photo-11.jpg


I love the lift (level). I looks way more aggressive, and it exactly what I want with these stock tires. Drives great, too.

Now I have to decide if I want to go back and do the Daystar 2.5/1.5 when I get bigger tires, or do a real lift kit when I get bigger tires, or just get bigger tires with this level. (Rumor is the BFG AT 265/70R17s fit with this level just fine.)

Anyway, what should have taken me 1.5 hours actually took me about 8 hours.

7 hours for the right side, and 1 for the left. I'd be able to do another 4Runner just like this in an hour, no problem, there is just too much to learn the first time you do it.

I need a beer.
 
Last edited:
Bulb Upgrades

Already updated to LED:
Description, #Bulb No., Wattage, Type
License plate, #168, 5 W, Clear Wedge base
Interior light (DVD), #?, ? W, 2x Clear Wedge
Personal/Map, #?, 5 W, Clear Wedge base
Door courtesy, #?, 3.8 W, Clear Wedge base
Luggage compartment, #?, 8 W, Double end

Future Upgrade:
Description, #Bulb No., Wattage, Type
Headlights (high beam), #9005, 60 W, HB3 halogen,
Headlights (low beams), #9006, 51 W, HB4 halogen,
Front fog, #9006, 51 W, HB4 halogen,
Parking and front side marker, #168, 5 W, Amber Wedge base,
Front turn signal lights (w/DRL), #4157NAK, 27/8 W, Amber Wedge base,
Rear turn signal, #?, 21 W, Amber Wedge base,
Stop/tail and rear side marker, #?, 21/5 W, Clear Wedge base,
Back- up, #921, 16 W, Clear Wedge base,
High mounted stoplight, #921, 16 W, Clear Wedge base,
Glove box , #?, 1.2 W, Clear Wedge base,
 
Last edited:
Zack - looks great! I was going to go for the "budget boost" at first (I hate the rake), but ended up going with the 2.5/1.5 kit (either way the 265's will be fine). I'd like to find out what you come up on the LED stop/tail lights? I have tried v-leds, etc (4 different brands) and have not got one pair to work. For the turn signals, I decided to go with Chrome Amber High Output bulbs. I didn't go LED because you need a resistor. I just really hated the "egg yolk" look - with Chrome bulbs you don't see the "amber".
 
...but ended up going with the 2.5/1.5 kit (either way the 265's will be fine).

Yeah, I just can't by new tires right now, so I decided that for $40, I could at least see how the leveling will work. I have a feeling the second I buy 265/70R17s, I'll go for the 2.5/1.5 and be very happy.

I'd like to find out what you come up on the LED stop/tail lights? I have tried v-leds, etc (4 different brands) and have not got one pair to work. For the turn signals, I decided to go with Chrome Amber High Output bulbs. I didn't go LED because you need a resistor. I just really hated the "egg yolk" look - with Chrome bulbs you don't see the "amber".

I'm not even sure I'll upgrade the turn signals and stop/tail lights for the reasons you list.

I think I will pursue some Hi/Lo/Fog HIDs next from DDMtuning.com. After that, I'll probably follow your lead with the Chrome bulbs.
 
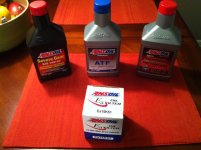
Synthetic Fluids

Guess what came in the mail yesterday?

7 qts. SAE 5W-30 Synthetic Motor Oil
7 qts. SEVERE GEAR 75W-90 Synthetic EP Lubricant
14 qts. Low Viscosity Synthetic ATF
1 ea. EA15K51-EA Absolute Efficiency Oil Filter

I thought about stacking them all up for you to see, but the kitchen table vetoed that, so you only get to see one of each.

Maybe an oil change tonight. Have to wait for some more gaskets to show up before I can do the differentials, transfer case, and ATF flush.
 

Attachments

  • photo (7) (Medium).JPG
    photo (7) (Medium).JPG
    63.2 KB · Views: 1,865
How compatible is that fluid with Toyota WS?

I'm not sure about the compatibility, but I'm not too concerned, as I'm going to do the entire 14 quart flush.

Edit: Looks like you are the Toyota Service Technician. Am I going to ruin the transmission by doing a complete flush, or am I just wasting money?
 
Last edited:
Honestly? I haven't really sat down to look at the chemical composition/differences of our Toyota WS (World Standard) Fluid. All our factory information says that you should not run anything but the WS Fluid and as far as I have seen I haven't come accross a fluid that "meets or exceeds OEM Specs" for the WS Fluid.
I've been sick for a few days and haven't been at work, I'll be in Saturday and I'll ask the parts guy and some of the older techs if there really is a difference.

Personally, when it comes to automatic transmissions, I like to put what the factory asks for, the transmissions are built with that fluid in mind and so the addatives and viscosity play a major role in operation.

A link I found that may help you with that question: http://www.etimago.com/yaris/TSB/TS-TC01...20Fluid ).pdf

Will try and update if I find some more answers.
 

Members online

Forum statistics

Threads
278,307
Messages
3,554,056
Members
248,016
Latest member
Advally Service

Trending content

Back
Top