Zonarunner SAS build thread

Hey brother your truck looks awesome! Love the boss lift. I have a similar kit on my rig. I use it hard, fast and slow. Im amazed at how tough and capable our trucks are.
But on a very SERIOUS note. Please for your own safety and those around you, please refrain from using stone blocks to lift your rig. Stone blocks give NO warning when they are about to fail. Wood blocks usually start to creak and splinter. You can hear when wood is getting ready to fail thus allowing your and your buddies time to quickly escape. Not to preach my man, but Ive witnessed twice vehicles falling on people when using stone or cement blocks. Its scary watching the fire department rescuing your dad who is trapped under a fallen car as an automatic transmission on his chest and car the car has him pinned. Just looking out for a brother!
:cheers:
 
I have the same set up on mine, just the 1.25 body lift... Would love some more close up shots of the tire clearance. I have the 285/70/17 and rub slightly here and there. I would love a bigger tire, just dont know if they will fit. I friend has 295/70/17 (I think) and they rub like a mother on the same set up.
 
I have the same set up on mine, just the 1.25 body lift... Would love some more close up shots of the tire clearance. I have the 285/70/17 and rub slightly here and there. I would love a bigger tire, just dont know if they will fit. I friend has 295/70/17 (I think) and they rub like a mother on the same set up.

Hey man you're running a toytec boss lift with the adjustable coil overs? Im looking to adjust them tomorrow, did you put them to the max? Let me know if you had any issues. I'll look into getting a body lift next year right for the spring season. Appreciate any feedback!
 
Someone correct me if I'm wrong, but from his setup I only think he's running a Roger brown body lift at 1.5 and the toytec boss lift right?

Wanna make sure because i'm considering on doing a 1" body lift install from shootmymime.


Me too, waiting on him to have one ready!
 
year update

the toytec lift has been awesome, the ride is amazing. a few friends have even said for a lifted truck it doesn't make them want to not ride with me. the lift comes already pre set for the max 3" recommended, I used the rodger brown body lift but I think I did 2" lift. the steering link extension ended up being the hardest part for me, a real pain. I'll post pictures of the inside of my finders to show where I rub. but I've done A LOT of hacking to get my tires not to rub. I'm think more might be needed. so far I have not had any issues with the LR upper control arms knock on wood. I Finished my front bumper and wanted to adjust the coils to get back the 1/2' I lost and I have to remove the coils to do that. that would most likely be my only complaint. also someone noted that the cv boots cracked on theirs after the lift... mine did too. so now I'm looking into replacing those at some point.
 
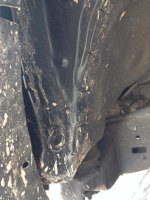
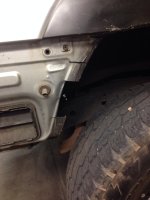
This is my front right inner fender. You can see how much of the body mount I've cut up and I'm still rubbing, I've also cut and bent and beat the inner fender where it is glued/welded/crimped to the body. It's been a learning curve as I learn new places I rubb when I remove another.
 

Attachments

  • image.jpg
    image.jpg
    135.9 KB · Views: 1,246
Last edited:
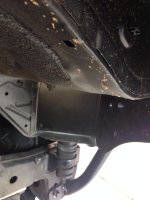
This is a cover I made to help keep water and mud from building up on the body mount
 

Attachments

  • image.jpg
    image.jpg
    124 KB · Views: 1,250
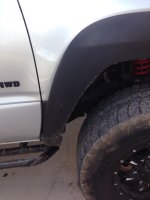
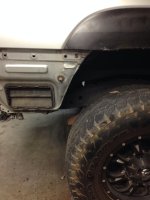
Because I wanted 35's and refused to settle and just give in, I also had to trim my fender flares because as most of us know no one is willing to make aftermarket set for us. I cut out 2 inches from the bottom and cut along it till I was happy with the curve, then glassed it back together. Left fender took me 3 times to get it correct.
 

Attachments

  • image.jpg
    image.jpg
    127.6 KB · Views: 1,235
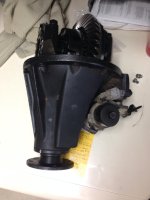
Got my e-locker, I'll post an in detailed install so hopefully people won't have to search as much as I have trying to piece together how to do it, I'll also post pictures of my wire harness I'm going to build using a factory switch to help keep a clean oem look inside my 4runner.
 

Attachments

  • image.jpg
    image.jpg
    121.9 KB · Views: 1,176
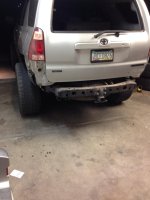
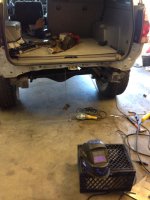
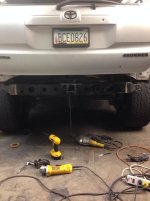
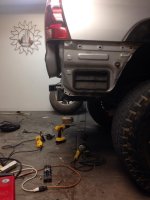
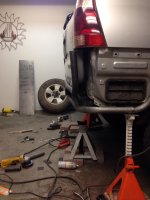
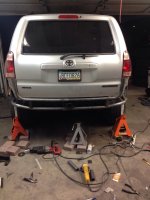
Removed my rear bumper so I can start building my own. Going to cut the frame back 5ish inches to limit the amount of over hang
 

Attachments

  • image.jpg
    image.jpg
    119.5 KB · Views: 985
More trimming! Yay! My want for 35s and still to be able to flex. I used to rub against the bumper and the tire would come up but now I've given myself plenty of room
 

Attachments

  • image.jpg
    image.jpg
    118.7 KB · Views: 982
man that looks great, you've got my wheels turning now.

Just an observation, but shouldn't you have a little more space between the hatch and the bumper? Or does it just look close?

Very cool man.
 
The gab between the rear bumper and hatch is about 1/2". For it to bend up into the hatch I would have to bend the frame too. I'll take closer pictures of the mounts if you want.
 

Members online

No members online now.

Forum statistics

Threads
278,309
Messages
3,554,071
Members
248,016
Latest member
Advally Service

Trending content

Back
Top