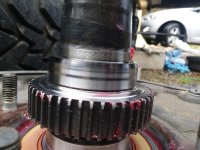
Rear Axle Seal replacement? - 3rd Gen

What a freaking difference between location in the US. In the California Bay Area, this repair including the rear brakes is $1500 if you bring them the vehicle and they do the whole job.

Is $380 parts and labor to do the whole job for you or are you bringing them the axles?

Is that per side? Just curious as I just did this job myself 3 weeks ago, a friend that is a service writer at a local dealership got me the parts at the employee pricing and I was still right around $300 just in bearings, retainers, tone rings and seals.

The quoted me to replace drivers side bearing, retainers, abs ring, and seals on the vehicle. I sourced all the parts from Amayama for $90-ish.

I will swap out the pads myself.
 
Last edited:
That is an incredible price. Like I said above, this job ran me $1500 at my local dealer in San Jose but it included the rear brakes. The labor rate at Stevens Creek Toyota is $150/hr. I think they charged me 6+ hours labor. What a freaking ripoff. I've been redeeming myself by doing this repair multiple times. I've now done this job 4 times.

Mind you this is for ONE side...YES...so not so great pricing either. Did get new brake shoes etc too.
 
Make sure that they guarantee their work. I had this done multiple times incorrectly. You can't just follow the FSM. I have a friend that has his own automotive business and he sent this to a shop that specializes in this, and this leaked 3 times.

Axle seal was done 1st time, still leaked. Found that a rear brake cylinder was seized. Rear cylinder taken care of with new pads. Still leaked, new seal replacement. Rear cylinder was causing everything to get really hot, I could smell it when getting out of vehicle after driving, I thought e-brake pad was sticking initially, i was wrong, it was the cylinder for drum brake.

Sent out again to machine shop to remove and press on new axle seals. In 2-3 days later leaking again. Sent back again, and replaced pads again, and clean up. Clean up is messy with diff, fluid all over rear drum brake.

Got it back this no new pads in case it leaked again. It leaked again, 3 times fail. I drove with it leaking for a bit, and was topping diff off to keep rear ended lubed. Never really had to add much but was nerve racking to stay on top of.

Eventually I did the job with a family member who is a well seasoned Subaru mechanic. I knew there had to be a way to do it. I knew something was not right. The job was getting done to spec by the manual, Mitchell or Toyota manual, could be same spec for both. It measured exactly how the manual said. I did not measure mechanic friend in the beginning 3 times and family memeber last time measured and it was as the manual stated.

To keep from leaking I had to come up with a way to see how the seal was lining up when everything was put together. My family member with a lot of mechanic experience and I, put our heads together to slide the seal on axle without cutting it off, I did have a new seal, but was really going for proper alignment, and was going to replace with a new seal.

Once we came up with a way to move the seal back towards the center. This was easy as there was little space to work with, I could see how most people would cut it off and just press on another seal, but the goal was to figure out why it was not lining up right, because it kept leaking.

So the trick was to put axle grease in a line along the axis of the axle, then slide the axle in, to see how far off the seal was from where it needed to line up, to create the seal. The seal was being pressed too far toward the wheel, creating a gap, that the fluid would eventually get past. Measured exactly to spec as the manual stated, and still leaking. Using the axle grease to see how far off the seal was, we could measure where the seal needed to be. Once we had that measure we just pressed the seal to end of the grease line, where the seal was supposed to be. After doing this it had not leaked since. It has been about a year. I did not replace the seal as there was no wear on it because it was not rubbing the contact point where the seal was to be made.

Braking improved a lot and on braking the vehicle pulls less to one side.

It took longer for me to clean the brakes of diff fluid than it did to press the seal.

I hope this made sense. I have read online where multiple people considered gettting rid of their vehicle because after getting the job done by a shop it still leaked. I considered buying a used whole rear setup, that was known not to leak. I watched a few videos on YouTube of different people doing the axle seal repair, to get familiar, then got my family member to help and after the third time putting it back together sliding axle in and out we could see why it was leaking because the seal was not in the right position.

Good luck.

 
With it leaking, you already need to take that side apart, but as part of the whole fix, I'd also make sure that the axle breather is not stuck shut. That's fairly common on these things, and when it's shut, pressure building up in the axle housing as it warms up will push oil past even perfectly installed and brand new seals.

On my '99, when I initially noticed jsut a tiny amount of leakage on the passenger side, I found a stuck breather and freed that up, and just took the drum off and brakekleened the heck out of the area (can't recall if I put on new shoes, I may have). And then it was dry for another ~40K miles.
 
Make sure that they guarantee their work. I had this done multiple times incorrectly. You can't just follow the FSM. I have a friend that has his own automotive business and he sent this to a shop that specializes in this, and this leaked 3 times.

Axle seal was done 1st time, still leaked. Found that a rear brake cylinder was seized. Rear cylinder taken care of with new pads. Still leaked, new seal replacement. Rear cylinder was causing everything to get really hot, I could smell it when getting out of vehicle after driving, I thought e-brake pad was sticking initially, i was wrong, it was the cylinder for drum brake.

Sent out again to machine shop to remove and press on new axle seals. In 2-3 days later leaking again. Sent back again, and replaced pads again, and clean up. Clean up is messy with diff, fluid all over rear drum brake.

Got it back this no new pads in case it leaked again. It leaked again, 3 times fail. I drove with it leaking for a bit, and was topping diff off to keep rear ended lubed. Never really had to add much but was nerve racking to stay on top of.

Eventually I did the job with a family member who is a well seasoned Subaru mechanic. I knew there had to be a way to do it. I knew something was not right. The job was getting done to spec by the manual, Mitchell or Toyota manual, could be same spec for both. It measured exactly how the manual said. I did not measure mechanic friend in the beginning 3 times and family memeber last time measured and it was as the manual stated.

To keep from leaking I had to come up with a way to see how the seal was lining up when everything was put together. My family member with a lot of mechanic experience and I, put our heads together to slide the seal on axle without cutting it off, I did have a new seal, but was really going for proper alignment, and was going to replace with a new seal.

Once we came up with a way to move the seal back towards the center. This was easy as there was little space to work with, I could see how most people would cut it off and just press on another seal, but the goal was to figure out why it was not lining up right, because it kept leaking.

So the trick was to put axle grease in a line along the axis of the axle, then slide the axle in, to see how far off the seal was from where it needed to line up, to create the seal. The seal was being pressed too far toward the wheel, creating a gap, that the fluid would eventually get past. Measured exactly to spec as the manual stated, and still leaking. Using the axle grease to see how far off the seal was, we could measure where the seal needed to be. Once we had that measure we just pressed the seal to end of the grease line, where the seal was supposed to be. After doing this it had not leaked since. It has been about a year. I did not replace the seal as there was no wear on it because it was not rubbing the contact point where the seal was to be made.

Braking improved a lot and on braking the vehicle pulls less to one side.

It took longer for me to clean the brakes of diff fluid than it did to press the seal.

I hope this made sense. I have read online where multiple people considered gettting rid of their vehicle because after getting the job done by a shop it still leaked. I considered buying a used whole rear setup, that was known not to leak. I watched a few videos on YouTube of different people doing the axle seal repair, to get familiar, then got my family member to help and after the third time putting it back together sliding axle in and out we could see why it was leaking because the seal was not in the right position.

Good luck.

In a roundabout way, you figured out what most mechanics don't realize with this repair. It's not that the seal is sitting in the wrong position in the axle housing, it's because the inner retainer is in the wrong position. The seal can be properly fully seated and get a good mating with the inner retainer if you reposition the retainer on the axle or flip it's orientation.

Toyota redesigned the axle seals sometime in the past. When the seal is pressed fully into the axle housing, the seal lip is now riding 2mm more inboard than before. If you keep the inner retainer in the same position on the axle, that seal lip will be riding very close to the non-polished bevel of the retainer. Ideally, you want the seal lip riding close to the middle of the polished portion of the retainer. The polished portion of the retainer is 10mm wide and the non-polished bevel is 2mm wide. The inner retainer from the factory sits on the axle with around 5mm of polished axle showing.

So, you have a few choices. #1) Do what you did and not press the seal in all the way into the axle housing so you have a better mating of the seal with the retainer #2) Press the inner retainer on not as far (around 3mm of polished axle showing) but this gets the retainer very close to rubbing the inside of the axle housing. #3) If you flip the inner retainer (Dr Coffee Method), bevel facing the ABS gear, you can keep the retainer in the same position on the axle, 5mm of polished axle showing, because you are gaining back the 2mm lost with the redesigned seal by not having to first push past the 2mm non-polished bevel to get the seal lip up onto the polished shoulder of the retainer.

In my opinion, the Dr Coffee method is the way to go. You can drive the seal all the way into the axle housing and you get a good mating of the retainer and seal without having to worry about the retainer rubbing on the inside of the axle housing.

The biggest mistake mechanics and DIYers make with this job is they don't confirm a good mating of the seal with the inner retainer by doing a very simple grease test. The grease test shows you exactly where the seal lip is riding before you bolt everything back up. This repair hands down has got to be the #1 repair that is done incorrectly on our rigs.
 
Last edited:
I decided to cancel the appointment and do another seal replacement leaving it out a mm or two instead of pressing it in fully. This is my last attempt before I find a cliff.

The picture shows the old original seal mark and new redesigned seal mark above it (which was leaking).
 

Attachments

  • 20171102_101012.jpg
    20171102_101012.jpg
    129.8 KB · Views: 2,543
I decided to cancel the appointment and do another seal replacement leaving it out a mm or two instead of pressing it in fully. This is my last attempt before I find a cliff.

The picture shows the old original seal mark and new redesigned seal mark above it (which was leaking).

How do you know your bearing is fine? If you have a decent amount of miles on your rig, the additional play in the bearing causes stress on the seal. Over time, the seal will fail again. The new seal design is more pliable than the old design but the definitive fix for this job is to replace the bearing too and not just the seal.

So, you now know what most mechanics don't know, even Toyota mechanics. The redesigned axle seal is the first part of the problem and not being knowledgeable enough to verify the mating of the seal and retainer with the grease test is the second part. A third and Fourth is not realizing a worn axle bearing can cause the seal to fail and a clogged breather can also cause the seal to fail.

Not driving in the seal all the way should work for now, but if I were you, I'd replace the bearing and other associated parts. What you have to know also is the gear oil has most likely washed out some of the grease inside the bearing. Now you have a compromised bearing that could eventually overheat and implode like I've seen with dude's rigs that ignored the leaking axle seal for too long. The bearing is lubricated with grease and not gear oil. If a lot of bearing grease was washed out, you're on borrowed time.
 
Guys, if you're sourcing your own parts and looking to save a few bucks you can forgo the Toyota bearings and pick up a standard sized bearing from your favorite Japanese supplier (Koyo, Nachi, NTN, etc). The bearing size is 6308, double-sealed (not shielded).

I used 6308 Koyo bearings and they have performed fine. The OEM ones that came out were Nachi's: http://www.toyota-4runner.org/2606970-post58.html

Toyota does not make its own bearings. In some rare cases a bearing supplier will make a "special" size for Toyota but usually they spec standard sizes.

Example: the idler bearings on the AC and P/S belts are just a 6301 size: http://www.toyota-4runner.org/2699942-post86.html
 
How do you know your bearing is fine? If you have a decent amount of miles on your rig, the additional play in the bearing causes stress on the seal. Over time, the seal will fail again. The new seal design is more pliable than the old design but the definitive fix for this job is to replace the bearing too and not just the seal.

So, you now know what most mechanics don't know, even Toyota mechanics. The redesigned axle seal is the first part of the problem and not being knowledgeable enough to verify the mating of the seal and retainer with the grease test is the second part. A third and Fourth is not realizing a worn axle bearing can cause the seal to fail and a clogged breather can also cause the seal to fail.

Not driving in the seal all the way should work for now, but if I were you, I'd replace the bearing and other associated parts. What you have to know also is the gear oil has most likely washed out some of the grease inside the bearing. Now you have a compromised bearing that could eventually overheat and implode like I've seen with dude's rigs that ignored the leaking axle seal for too long. The bearing is lubricated with grease and not gear oil. If a lot of bearing grease was washed out, you're on borrowed time.

The bearings are good. They have zero play and spin smoothly without any noises. It is true that the bearing grease gets washed out and I repacked the bearing during the 2nd seal installation. You can pop off the side cover of the seal and push grease into it. I popped it off again today and it was still packed with grease. I went ahead and regreased it since it was open. That is where all that grease is from in the picture.

At this time I just want the leak to stop till I can get my cherokee back together as a backup vehicle so I can get the bearings taken care of. I just cannot afford to have the 4runner down for longer than a day.
 
Last edited:
Guys, if you're sourcing your own parts and looking to save a few bucks you can forgo the Toyota bearings and pick up a standard sized bearing from your favorite Japanese supplier (Koyo, Nachi, NTN, etc). The bearing size is 6308, double-sealed (not shielded).

I used 6308 Koyo bearings and they have performed fine. The OEM ones that came out were Nachi's: http://www.toyota-4runner.org/2606970-post58.html

Toyota does not make its own bearings. In some rare cases a bearing supplier will make a "special" size for Toyota but usually they spec standard sizes.

Example: the idler bearings on the AC and P/S belts are just a 6301 size: http://www.toyota-4runner.org/2699942-post86.html

Good call! With alot of these bearings they follow industry standard naming conventions. There really isn't a need to go OEM if you can source the same bearing spec from a reputable manufacturer. If you know what you're doing with the Timken/SKF bearing calculator, you can even custom "build" a bearing part that might be better than OEM (eg. Top notch grease, seals, etc...).

The front wheel bearing however, seems to be a custom product of which there is no standard nomenclature for.
 
Last edited:
Where do you live? I'm in San Jose. People have hit me up for help for this repair many many times and at first I was turning them down but now I'm offering to do the job for $200. This includes the whole job. I'll help you pull the axles, do all the press work, do the rear brakes and put it all back together. If we don't run into any snags, it takes around 4 hours. You of course have to supply the parts. In regards to the parts, you can save money by reusing both retainers on each axle and reusing the ABS gear on each axle. I pull off the parts rather than cut them off. Read the video description below and you'll understand how we can reuse the retainers.

[MENTION=102606]infamousRNR[/MENTION] and I will work for free if it means making a new video, but when it comes to doing free work for total strangers, I couldn't see myself doing that, at least not at first. If I like wrenching with you and we become friends, then future work will be for free if I have the time to help you.

I think you'll find $200 is a steal for this job in the Bay Area.

<iframe width="560" height="315" src="https://www.youtube.com/embed/AVhSDnw2ugo" frameborder="0" allowfullscreen></iframe>


I'm about to do this job too...just found a junkyard axle with a locker, so I want to put new bearings and seals in. I just watched your video last night...literally so helpful! You guys made it look so easy!

I can just reuse all the retainers and ABS sensors, right?

Also, I wish I could get the SST cheaper, or make my own, but I can't weld. I may have to have a shop do the press work :(
 
Good call! With alot of these bearings they follow industry standard naming conventions. There really isn't a need to go OEM if you can source the same bearing spec from a reputable manufacturer. If you know what you're doing with the Timken/SKF bearing calculator, you can even custom "build" a bearing part that might be better than OEM (eg. Top notch grease, seals, etc...).

The front wheel bearing however, seems to be a custom product of which there is no standard nomenclature for.

I used these Koyo wheel bearings for my truck. They certainly seemed to be the right thing!

https://www.amazon.com/gp/product/B007453K9C/ref=oh_aui_search_detailpage?ie=UTF8&psc=1
 
I'm about to do this job too...just found a junkyard axle with a locker, so I want to put new bearings and seals in. I just watched your video last night...literally so helpful! You guys made it look so easy!

I can just reuse all the retainers and ABS sensors, right?

Also, I wish I could get the SST cheaper, or make my own, but I can't weld. I may have to have a shop do the press work :(

Adam, read the video description and I describe how you can reuse the retainers by swapping their positions on the axle. The ABS gears are just a hunk of metal and as long as they aren't cut off, you can absolutely reuse them.

If you let a shop do the work, you need to give them very specific instructions on what you want. If you're going to follow our lead and do the inner retainer flip, make sure you tell them you want 5mm of polished axle showing. No more and no less. That will put the seal lip dead center on the polished part of the retainer. If you don't want to flip the inner retainer, 3mm of polished axle showing is what you want.
 
Last edited:
Tim helped me out doing this job two weeks ago. We did both sides even though my leak was on the left (driver) side. No way I would've been able to do it without his knowledge and tools.

Poor guy had to spend 8 hours because of some screwed up bolts from the previous "fix" to the rear seal.

It's looking good so far. I noticed some small oil leaks but I think it's from the old diff oil not being fully clean off since there was a lot of it on the wheel. I took the wheel and drum off and brake pads are clean.

[update] 11.5.17 - Did the test to see if oil is on the ABS gear and no oil so it's looking good so far.
 
Last edited:
I'm missing something. How are people adjusting the position of the seal vs the retainer? By varying the depth of how far the seal is pressed in?

Also, am I correct to assume I can reuse the retainers and tone ring if I don't damage them getting them off?
 
I'm missing something. How are people adjusting the position of the seal vs the retainer? By varying the depth of how far the seal is pressed in?

Also, am I correct to assume I can reuse the retainers and tone ring if I don't damage them getting them off?

A few ways to do it. When I did mine, I fully seated the seal in the axle housing, then did the "grease test" to dial in where the retainer sat on the axle shaft so that it hit the retainer dead center. When I finished, my tone ring and retainer for the oil seal were no where near touching each other.

Before I pressed on the tone ring or inner oil seal retainer, I put the axle shaft back in the housing and inserted a Sharpie into the hole where the ABS sensor goes. I rotated the axle shaft so that the sharpie left a mark on the shaft. I pulled the shaft back out and measured from the flange to that mark then started pressing on the tone ring. I used the measurement to set the tone ring at the place where the mark was. Once I did that, I measured from the center of the ABS sensor hole to the lip of the axle shaft seal and used that measurement to press the oil seal retainer ring place. I did the grease test and fine tuned the position for the oil seal ring.

I personally think that an easy fix from Toyota ( or the aftermarket) would be to make an oil seal ring that's an inch wide ( or wider ) so that even the laziest low I.Q. shop ape could get the oil seal ring into the right place.
 
Last edited:
I'm missing something. How are people adjusting the position of the seal vs the retainer? By varying the depth of how far the seal is pressed in?

Also, am I correct to assume I can reuse the retainers and tone ring if I don't damage them getting them off?

Yes, some people opt to not press the seal all the way in until it fully seats to get a better mating with the retainer. I personally wouldn't use this technique.
I'd rather address the seal/retainer mating by getting the inner retainer in the correct position on the axle.

You can reuse both retainers on each axle and the ABS gear as long as you don't cut them off. The two retainers on each axle are exactly the same. The inner retainer that mates with the seal ends up getting a witness mark where the seal was riding. Using this retainer in the same position isn't advisable, because from what I understand, the metal gets slightly worn down in that spot. If the new seal ends up riding in the same spot, it may be more prone to leak. So, you put the outer retainer that was sitting against the bearing on the inner spot to mate with the new seal, and you put the inner one in the outer position to rest against the bearing. The retainer that was originally in the outer spot has no wear on it's polished surface. The purpose of that retainer and the retaining clip above it is to just to support the bearing so the axle can't slide out of the bearing.

The ABS Gear is just a hunk of metal for the ABS sensor to take a reading off of. As long as you don't damage it when taking it off, you can reuse it.

Pulling and pressing the parts off is the way to go. When you cut them with a disk, you run the risk of scoring your axles like we've seen on this forum and you also waste money.
 
Last edited:
If you let a shop do the work, you need to give them very specific instructions on what you want. If you're going to follow our lead and do the inner retainer flip, make sure you tell them you want 5mm of polished axle showing. No more and no less. That will put the seal lip dead center on the polished part of the retainer. If you don't want to flip the inner retainer, 3mm of polished axle showing is what you want.

Thanks for the tips so far. This is what I'm afraid of. I know I can do this, if I had an SST, and I don't really trust shops around me.

That being said, it may be worth it to build my own SST...but I'll have to figure out how to do it cheaply without welding.
 
Dead horse here: If I press the inner retainer on until it's centered with the seal, then doesn't that leave a gap between the tone ring and the retainer? What "retains" the tone ring at that point? I'm under the impression that the retainer is the sealing surface, but is also there to properly position/retain the tone ring.
 
The retainer and ABS ring have an ID that is size on size with the OD of the axle shaft. It is a tight fit and wont move once pressed on the shaft.

Just do it the way Tim documented in his video and you'll be good to go.

Good luck
 

Members online

Forum statistics

Threads
278,311
Messages
3,554,082
Members
248,016
Latest member
Advally Service

Trending content

Back
Top