What did you do to/in your 5th Gen today?!

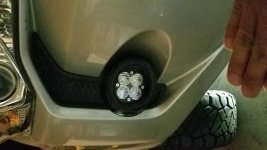
Same thing happened to me when I put wheel spacers on with my 265's. Procedure is the same for both sides. Unscrew the two screws, pull fender liner forward, drill two new holes in fender liner to line up with existing holes in bumper, screw back in, then trim the excess bumper now sticking out towards the tire. An extra set of hands helps, but can be done on it's own in 15 mins.

How much of a space are yall using? I have 265 and a set of ray 10's coming. I'm hoping to not have to cut anything.
 
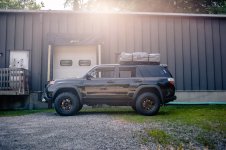
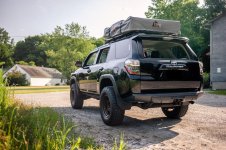
Got back behind the lens to capture these:


_DSC5495.jpg

_DSC5491-Edit.jpg
 

Attachments

  • _DSC5495.jpg
    _DSC5495.jpg
    139.3 KB · Views: 738
  • _DSC5491-Edit.jpg
    _DSC5491-Edit.jpg
    146.7 KB · Views: 749
Last edited:
Running boards help!

Hey guys, new to this. I've had my 5th gen SR5 for about 6 months. Today I had Bilstein 5100s installed 0.85 front and 275/70R17s installed on black TRD pro wheels I picked up. I also got a set of go rhino running boards I was planning to install tmrw morn. So I took this evening to pop off the stock boards before I detail whole exterior tomorrow.
Unfortunately, on the passenger side, I got 5 of the 6 bolts out while the sixth just keeps rotating! The nut inside is rotating...I think it's supposed to welded in there. No idea how to get to it. Any ideas?!
 
Hey guys, new to this. I've had my 5th gen SR5 for about 6 months. Today I had Bilstein 5100s installed 0.85 front and 275/70R17s installed on black TRD pro wheels I picked up. I also got a set of go rhino running boards I was planning to install tmrw morn. So I took this evening to pop off the stock boards before I detail whole exterior tomorrow.
Unfortunately, on the passenger side, I got 5 of the 6 bolts out while the sixth just keeps rotating! The nut inside is rotating...I think it's supposed to welded in there. No idea how to get to it. Any ideas?!

Maybe wedge some thing between the bolt and the body to give the nut tension?
 
Alright. I was confused by the passenger side because the front-most screw goes into a plastic boss instead of a clip, so it seems like you definitely have to make the hole on that side much larger plus, as far as I could push the liner forward, I wasn't able to push it forward enough to drill a brand new hole on the front-most screw, instead it would just be like I'm slotting the existing hole.

I think I might have put one screw in the front existing hole on that side after pulling the liner as forward as it could go. And drilled one new hole for the rear.
 
Christmas in July?!?

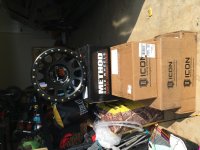
Wanted to shout out to Richard at total automotive performance for setting me up with my icon stage 2 suspension lift, Christmas is coming early ladies and gents! I’m going on Vacation Tuesday, the crap part is I won’t be able to get it all put on until the 23rd, such a long time to wait
 

Attachments

  • 18CEF907-0BEF-4FEB-BDA3-DAEC93CA5CA4.jpg
    18CEF907-0BEF-4FEB-BDA3-DAEC93CA5CA4.jpg
    132.4 KB · Views: 994
Window tint, oil and filter change! Taking it in tomorrow for a front end alignment, and a transmission flush and fill.

This is my wifes grocery getter, and it needs an upgrade! Next will be new tires, ram ball cell phone holder. Nothing major, mostly minor creature comforts for when I drive it lol.
 
Several members (and myself) recently installed these:

LUYED 2 X 300 Lumens Super Bright... https://www.amazon.com/dp/B01EJNMR40?ref=yo_pop_ma_swf

Highly recommended! See my recent post on here for pics. They're crazy bright.

What bulb did you use for the rear hatch? I know Amazon is littered with them but I've had so-so results with random Amazon bulbs.

I'll probably be keeping my interior lights incandescent just because it's easier on the eyes at night but I do like the idea of having more light in the back.


those are exactly it Joe-runner
 
Washed, vacuumed, interior detailed. Also fixed the rear driver side door, wouldn't open from the inside. Somehow the cable that runs from the handle to the latch on the door came off the latch on the door side. Had to remove the 3 bolts that hold the latch to the door, reconnect the cable, all good to go.
 
Still working on it, but adjusting the pinion angle for the new driveshaft. Thanks to [MENTION=96425]JSparky[/MENTION] for some info.

5c1f7b470f15ad827c02c0e3f23f017b.jpg


fbd7d8f19040830331b80ecff57a348c.jpg


Sent from my SM-G965U using Tapatalk
 
Last edited:
What bulb did you use for the rear hatch? I know Amazon is littered with them but I've had so-so results with random Amazon bulbs.

I'll probably be keeping my interior lights incandescent just because it's easier on the eyes at night but I do like the idea of having more light in the back.

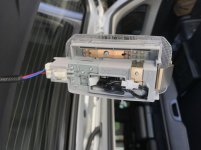
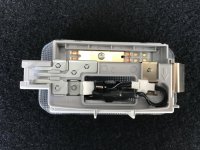
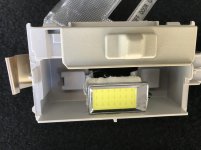
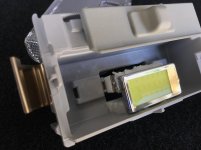
For my rear hatch lights on a 5th gen I got two of these Pilot Plasma LEDs (model CZ-3261W) from my local Pep Boys. The package included a battery and switch so you could test before buying. They are very bright.

They’re also on Amazon:
https://www.amazon.com/Pilot-Automotive-CZ-3161W-Replacement-White/dp/B011CFAMZY

They come with several common adapter connections, I used the festoon to connection into the 4Runner prongs.

Double-backed tape and heat-shrink tubing were used to insulate the light fixture prongs from the back of the metallic LED body. I used plastic spacers and liberal amounts of R6000 adhesive to mount the LED and tack the wires solidly in place.

It works great. Lots of light in the back now.
 

Attachments

  • 0C39A498-5F0F-4715-89F3-C1D178190346.jpg
    0C39A498-5F0F-4715-89F3-C1D178190346.jpg
    123.5 KB · Views: 914
  • 3283BC5C-CEEE-4428-87F5-F68A1B51AED4.jpg
    3283BC5C-CEEE-4428-87F5-F68A1B51AED4.jpg
    134.1 KB · Views: 894
  • 2B0F966A-E588-4386-8959-A50984C49FC4.jpg
    2B0F966A-E588-4386-8959-A50984C49FC4.jpg
    124.5 KB · Views: 896
  • 30B3EA2B-0634-4E9A-9E20-0F883BA64B2E.jpg
    30B3EA2B-0634-4E9A-9E20-0F883BA64B2E.jpg
    123.1 KB · Views: 914

Members online

No members online now.

Forum statistics

Threads
278,306
Messages
3,554,045
Members
248,016
Latest member
Advally Service

Trending content

Back
Top