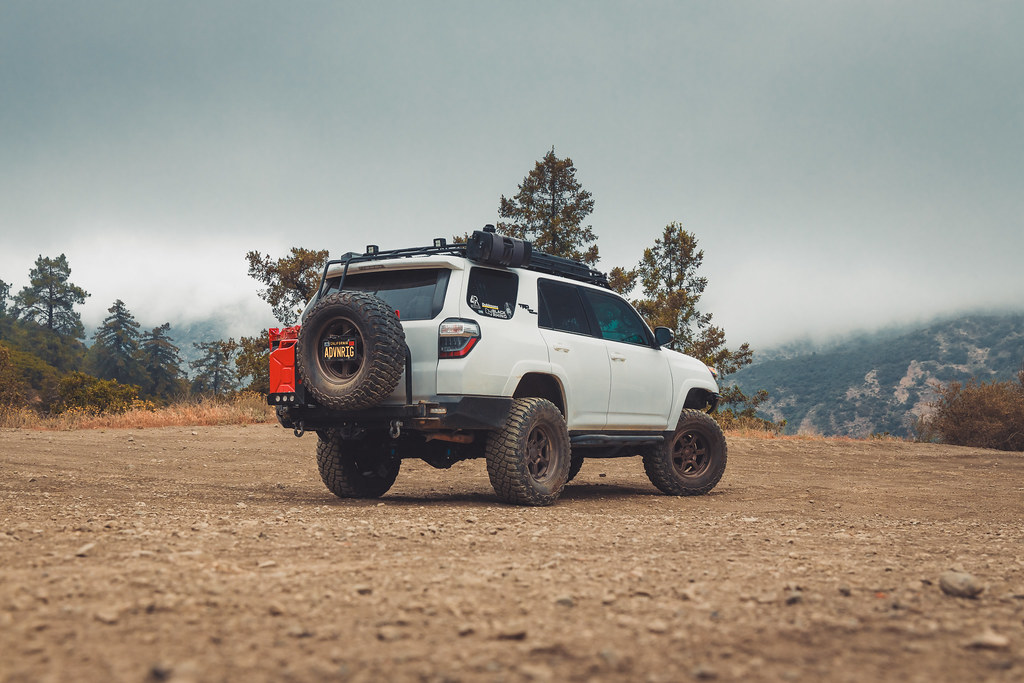
The Adventure Rig - TRD OR Build!

Tackled some small changes today. This accessory tray from Apex Overland showed up today. Wanted to clean up some of the wiring and a secure mounting spot for future additions. Shortened some of the excess wiring, and tucked it nicely under the panel. Now I want to get a battery terminal upgrade to clean up the wiring on the battery side.

51164717103_6537ed706b_b.jpg


51163787482_9be644d467_b.jpg


Yes I need a car wash, but mounted the new roof lightbar yesterday. With it being a slimmer bar, it mounted a little high and left a gap between the wind deflector and the light bar. Looked funny to me, so I dropped the bar down a bit so it sit more flush, although the brackets on the edge do kind of sit higher than the bar unfortunately. Still looks better imo than the big gap.
51163810157_f51512b365_b.jpg


Had my old bumper light bar laying around and figured I might as well add it back in. No more lights lol.
51164452116_c68f68e592_b.jpg


51164716998_f30499d110_b.jpg
 
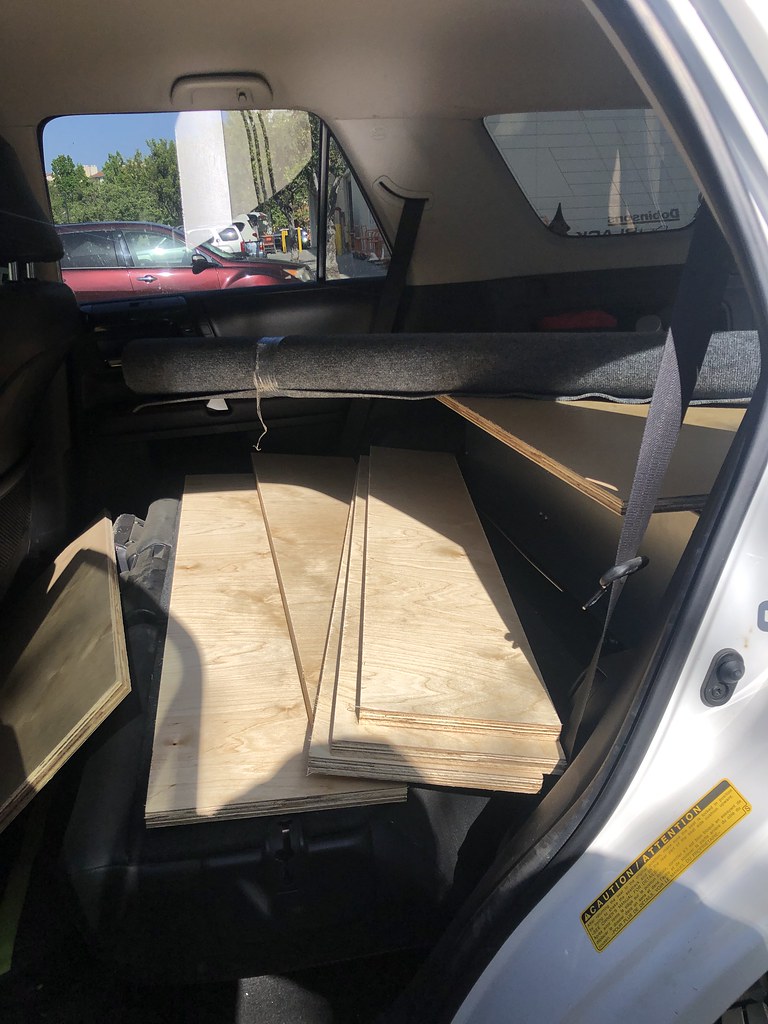
Today has been super busy. Got a late start but ran to get the materials needed to finish the extension to turn my drawer system into a sleeping platform. After a few designs and going back and fourth we settled on a rough plan and wanted to get the materials to at least be able to visualize it better. Well that turned into deciding just to build it and we knocked it out in a few hours and total cost was under $100.

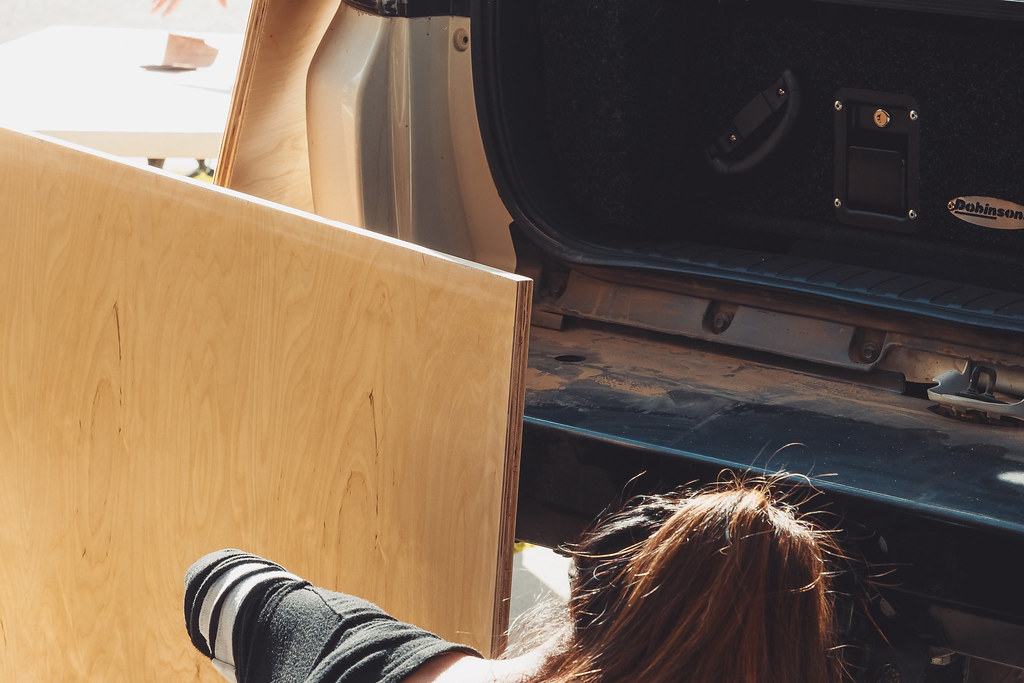
Had Home Depot make the cuts for us, which saved a ton of time and work. Picked up some carpet to wrap it in, although we wish we had gotten black, but they did not have any. We didn't think it was too far off, but you will see later that it doesn't match. We are likely to end up dying it darker, but it really doesn't matter.
51167554389_c48bed9dbd_b.jpg


We got 3/4" ply, and the surface was already smooth, we just went around and sanded the edges from the cuts and the sharper corners.
51166139107_2a3d7fc18c_b.jpg

51166806736_afe703c949_b.jpg

51166138892_59bbf5c13f_b.jpg


The girls began putting the carpet onto the platform. We sprayed down some adhesive and then stapled it to the underside as best we could.
51167582009_a1b4388cf3_b.jpg


I began drilling some holes through the back of the drawer which would allow us to mount a lip for the platform to rest on. Didn't worry if they were even, putting enough to make sure it was solid was all that mattered.
51167036728_662c352cbf_b.jpg


I had them add some carpet to a small strip of wood which would become the lip for the platform to rest on. Not perfect, but it is completely hidden when the seats are up and covered with the platform.
51167036218_d0999c1fed_b.jpg


With the lip on it gave us a starting point to measure and fit the support. With the seats squishing down with weight it made it difficult to calculate it perfectly without having it in there and experimenting.
51167899895_55c8fc03aa_b.jpg


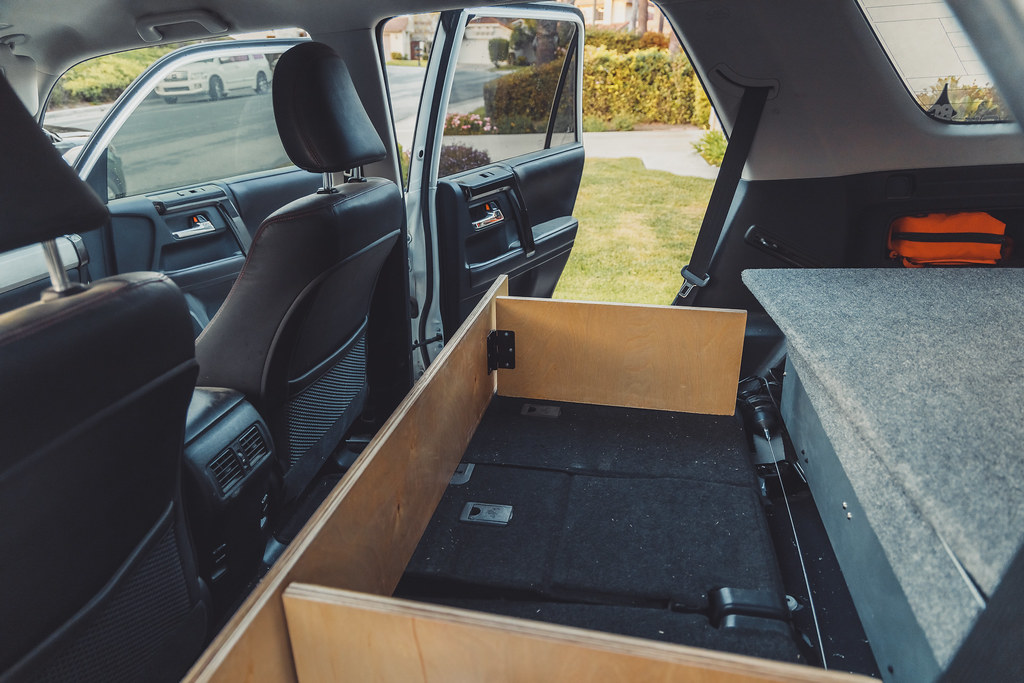
Originally we were going to go a "T" shape support like many of the other DIY systems. But with our Dobinsons drawers being taller than other drawers, we felt it would be better off adding a little extra support. Our support "beams" are 9" tall, and with two people in and out moving around we didn't want to shortcut this part or have a wobbly bed. We were also concerned about getting in and out of the car through the side doors, and it tilting or breaking off on the corners. The lip is there so it doesn't move and was not originally planned to actually support the weight.
51167036323_f630f8a2db_b.jpg


One drawback to having two hinged supports would be that it wouldn't fold flush or it would be too bulky. After putting the first support on, we mocked it up and realized it hardly took up more space and still folded down nicely.
51167009478_ea1edeab1b_b.jpg


I don't know if these were the best hinges for this application, but now that it is put together they are fine.
51167009278_d96098ce26_b.jpg


So with a gap with no support on the front most part of the platform it had a tendency to want to tip when weight was put on it. For a quick solution, we mounted a small straight bracket on the bottom side of the platform. This would slide under the corner of my dobinson drawer and prevent it from tipping forward. This is only temporary as we have decided to probably add two legs from the bottom of the platform to the floor of the rear seats. Having built the platform we can now get a better measurement of the leg height we need. We found a set of table legs that should get us close, and will be ordering those to hopefully finish this off. Ideally we are also going to figure out an anchor system to lock it down so it doesnt move too much when offroading. Although it is fold-able and removable we don't have to have it setup until we get to camp which is what we wanted.
51166111322_50ba261ee0_b.jpg

51167009483_fb58e45798_b.jpg


Here is what it looks like from the back. As you can tell the colors don't match but hey function over form.
51166806261_39825a763f_b.jpg


Side view
51167581519_3def1a57b9_b.jpg


When not in use or when you want to remove it, it actually sits so perfect on top of the dobinson drawer. Folding up the rear seats prevents it from sliding around and everything can be loaded on top of it. No issues while offroading or it shifting! Then the support boards either can go on top and be held down or on the floor.
51167009433_b3a93381a4_b.jpg


Part 2 for today in a follow up post.....

 
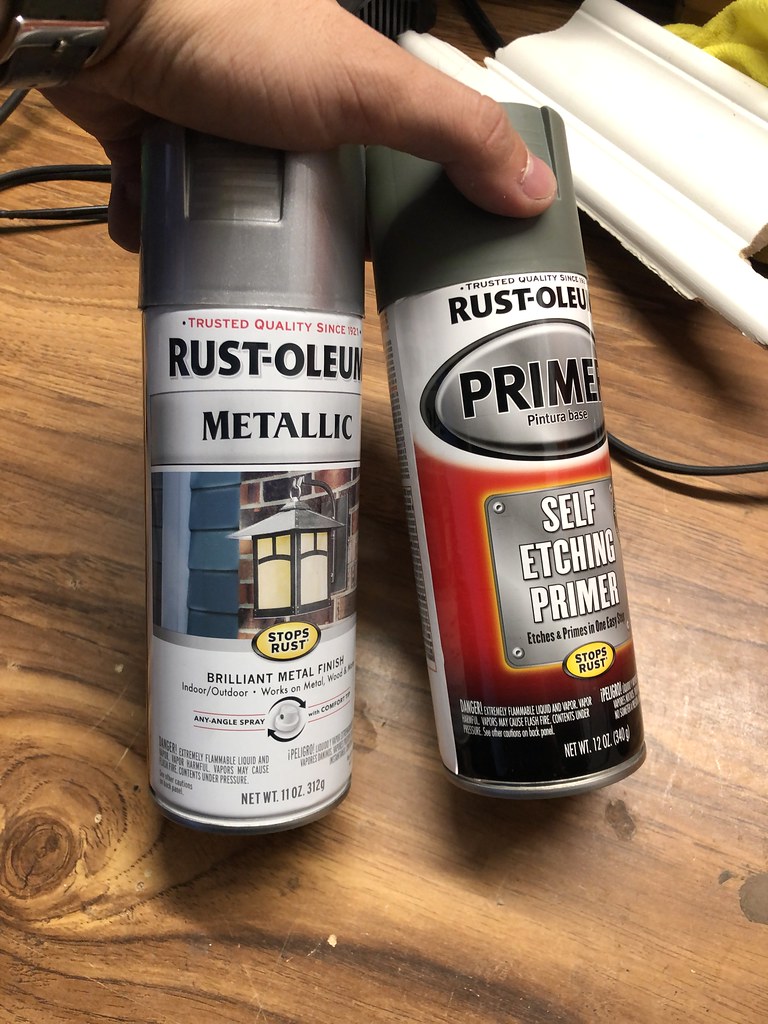
While I was at the store, I grabbed some spray paint for a few projects hopefully coming in the next week or so.
51166778506_91d213ee49_b.jpg


By the time we got back from the store, these were waiting for me! Finally a proper set of awning brackets for my Gobi rack. Luckily came across a used set to save some $$ and avoid the horrible lead times from Gobi. It was two weeks after placing the order that I eventually got a phone call to confirm my order, and who knows how long for them to ship after that. Timing on these couldn't have been better!
51167009438_33854feed2_b.jpg


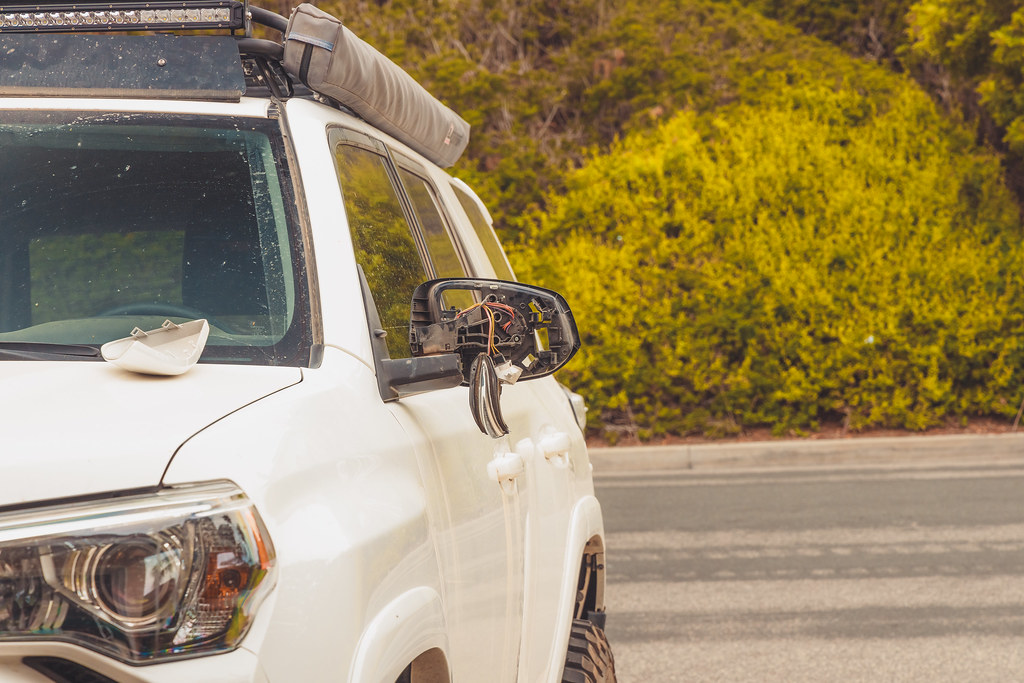
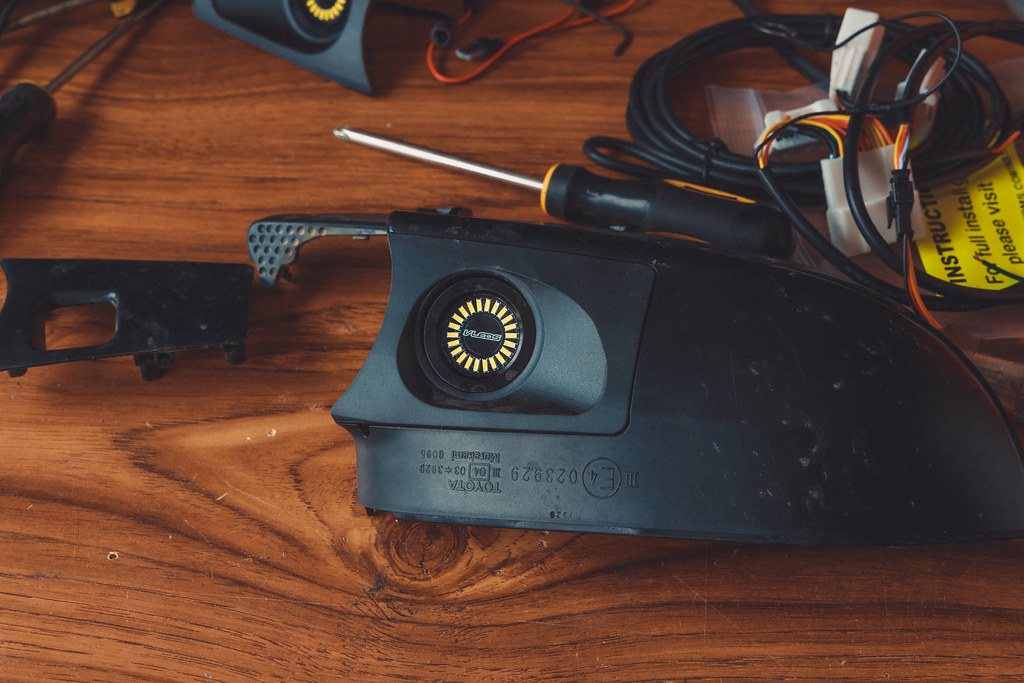
After talking to some friends about whether I should throw some rock lights on or not, I came across these bad boys. Mirror puddle lights/courtesy lights from Meso Customs! Extremely bright, and with the added harness kit they are able to be controlled manually! This would give me a clean, simple and easy alternative to other lights.
51166778551_f63d625951_b.jpg

51167009458_ee4874e455_b.jpg

51166111332_6ee4a02b5c_b.jpg
 
Another day another addition!

Started by tackling the Meso Customs puddle lights. These things look sweet!
51169401496_fa77ffb7f5_b.jpg


Took a few minutes to get the mirrors apart. Sounds terrible when you are undoing it but easy to do.
51169627148_1d2f4d1877_b.jpg


Swapped the oem lights out for the Meso lights.
51168729062_455231387e_b.jpg


Mirrors took a few minutes, then it was onto the wiring kit with the switch. Easy plug and play, hardest part was just tucking the wire under the carpet.
51170182354_5dd8c0d4f5_b.jpg


Button added in. While I was in there I swapped some of the buttons around. Took the old wiring harness buttons in and filled them in with blanks. Moved the inverter button up top because it is hard to tell when its actually on from the lower spot. Bottom row will be for the lights.
51170494520_3048304f5f_b.jpg


Wrapped it up within 20 minutes or so, and moved onto the awning brackets. These are what I am swapping out them with. While it worked, it was not solid.
51168728172_794fb408fb_b.jpg


Only have a 6.5' awning, which only needs 2, but since I got a set of 3 might as well use them. Will also be nice since we use the awning room with it, can never have too much support!
51170494315_3e29a75b9d_b.jpg


Solo mounting it was a challenge. Feel like it needs to be adjusted and slid forward but that's for another day when I have a second pair of hands.
51168728387_7300a479c5_b.jpg


While I was doing that, my kinetic recovery rope got delivered! Now to find where to put it in the car.
51170493775_acc5d8d375_b.jpg
 
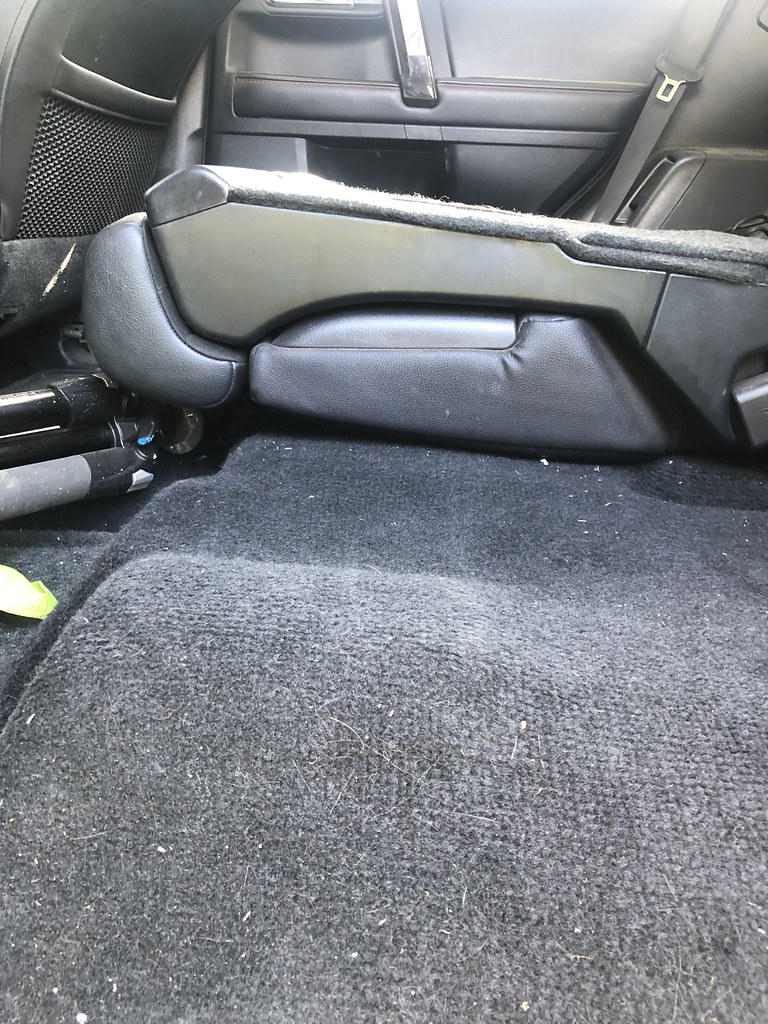
Winding down the sleeping platform build. One issue we noticed while measuring and building is that the drivers side rear seat actually sits lower when there is weight on it. This caused the support to not sit level.
51171357273_7a5d9a0cbc_b.jpg


Lifting the seat, there is a raised portion of the carpet closest to the door. There is nothing actually under it which means it compresses when you push on it.
51171914469_391e9041e8_b.jpg


I placed a small piece of leftover wood right next to that hump.
51170455732_c465379fa4_b.jpg


I then stacked a bigger piece that fits perfectly over that hump. After some trial and error, it took 3 total pieces stacked to get it to sit level.
51171123626_33324d1ef4_b.jpg


Three pieces screwed together.
51171914524_ca3711070f_b.jpg


Used the leftover carpet from the platform and wrapped it up so the wood would not damage the seats. When not in use it tucks away easily. Should hopefully be able to wrap up the final steps this week by adding the legs. Who knows, I may not even need this in the end.
51171357283_56ccbe5ab0_b.jpg


In the afternoon, this showed up!
51172225080_3f7ce6924a_b.jpg

51170455802_28b2149cdc_b.jpg


Decided to quickly spray them with a metallic silver and I am glad I did. Small change, and totally unnecessary but I dig it.
51171914574_c29c8c7870_b.jpg

51171914544_116864dec5_b.jpg


Hopefully will throw them on tomorrow!
 
Easy install, took about 5 minutes! Hardest part is getting your hand to the tire side of the bracket to thread the nut on if you have big hands. While I was there I cleaned the shock, had some dirt and dust built up on the shaft due to the dust cover slipping up. Ended up putting a ziptie on them to make sure they stay put.

Before
51174114765_7fb26746e7_b.jpg


After
51174114575_1d2ffa6b8b_b.jpg
 
Another productive day today.

Started by stopping by a friends house to get my BMC cleaned up, pinch weld seams cleaned up, and then getting my sliders welded on.
51176311555_6a14920c9a_b.jpg


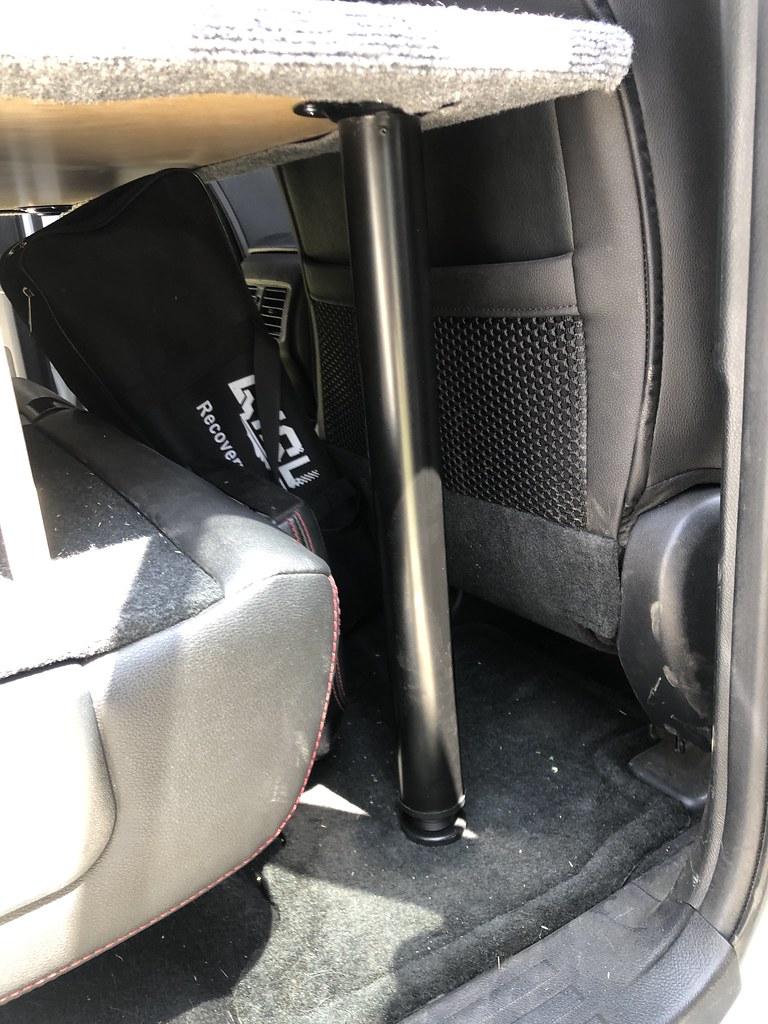
Found these legs on Amazon which should complete my sleeping platform build. With the wood support in the middle, the corners closest to the doors did not have much support. Having the rear swing out, we usually use the side doors to get in and out and this would cause the platform to tip if too much weight was on the corner. After considering a few options, these seemed to be perfect. Didn't take up too much room, and are easily screwed on and off for storage! They also have adjustable bottoms and happened to be the perfect height with room to go up or down.
51174544712_1110922290_b.jpg


The mounts screwed into the bottom of the boards.
51174544662_e917fda73d_b.jpg


Legs screwed on outside of the vehicle.
51174544702_5950f777b7_b.jpg


Here is what it looks like inside the car.
51176311605_90eb746615_b.jpg


From there I began to swap my old terminals to new SDHQ billet terminals!
51176311700_47739f1b51_b.jpg


Before. Yuck
51174544612_2c301f6a1b_b.jpg


After. Tucks away most of those ring terminals and easy 5 minute install. Oem cables fit perfectly, no need to do any modifications to the cables.
51176009129_4df98b55e6_b.jpg


Lastly, had this arrive today! Some matte black vinyl which I am planning to make a windshield banner with one day.
51176311690_339806c4fd_b.jpg
 
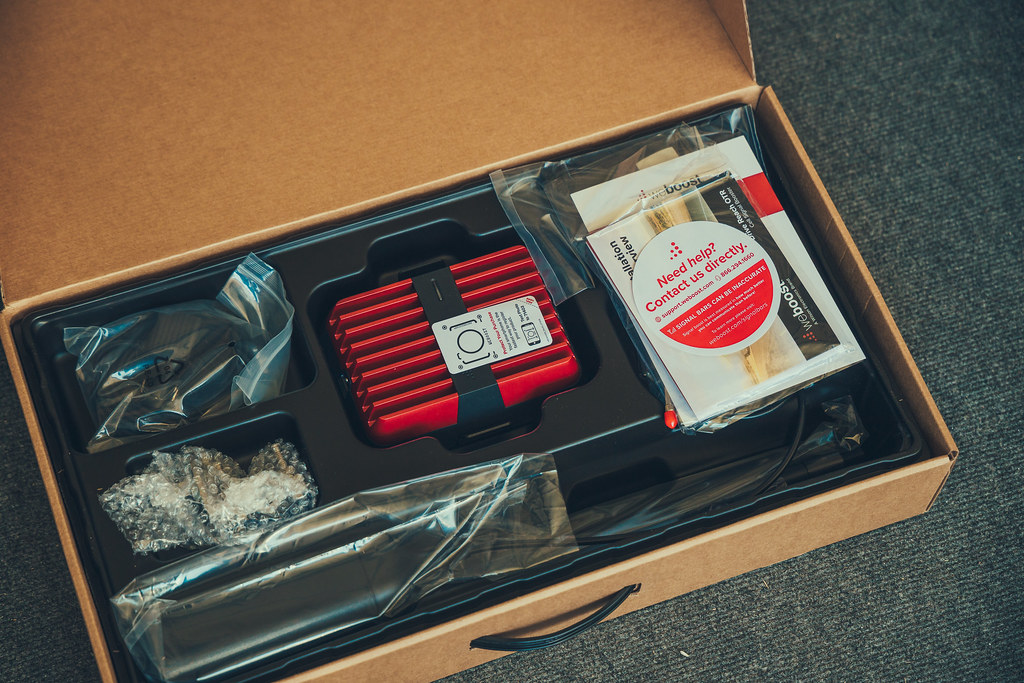
Well this was the most impulsive thing I've bought lol. Had been wanting one for a while but couldn't justify the price or if it would be worth it. After hearing one of my trustworthy friends got one and said he is super happy with it I started looking into it a bit more. I mentioned it to my girl and she said she would go halfsies because she needed to use her phone sometimes for work. So with that being said we ordered it Saturday and it was here by Monday!

I followed Brenan's review found here: Link

Super helpful although I hate how the wire gets run just into the passenger door. Unfortunately there aren't many options with the cable only being so long, and other access points being used by lights. With us leaving out of town in two days I just wanted to get it put on for this trip. Ideally I would like to run it through the rear hatch, although the wire would not be long enough to reach under my driver seat and would require me to relocate that as well. I will do some thinking and seeing what I can come up with. I also really need to get one of those RAM mounts that allows you to fold it down. For now I wanted to keep it above the roofline but not excessively high because I need some clearance for my daily driving. With the folding mount I can add the extension in to hopefully get a little bit better signal and tuck it away when we are driving around home.

51189128844_6f9d9251c9_b.jpg


51188359061_34601055ae_b.jpg


51189423175_3c6bdc7bb4_b.jpg


First impressions so far is that the quality is great, and everything is solid. We tested it just in my driveway and went from 3 bars to max bars. Seeing how I already had decent signal I couldn't see its full potential at work, but I did see positive results with what I had! We will be back on the road this weekend and should really get to put it to the test!
 
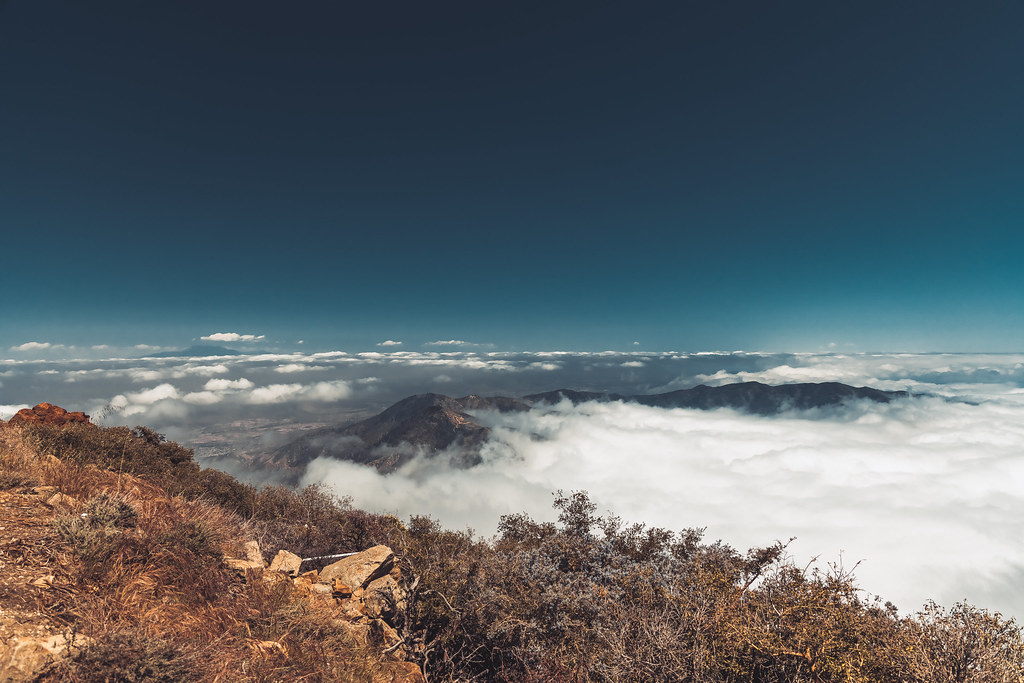
Finally got around to getting through some photos from our daytrip up to the peak! We couldn't have chosen a better day to go weather wise. Down at the base it was cloudy, and as we gained elevation we broke into the fog which made for some awesome photos.

51190417423_bce9a293ce_b.jpg

51190199716_9d8566d821_b.jpg

51191267140_79f49c9926_b.jpg


Made it to the play area, and got to stretch the legs. This time with the extra clearance after redoing the BMC and pushing back the pinch welds. I am super stoked with how it feels now, and not having to worry about tearing up my tires on my body mount I can actually have a bit more fun with it.

Nothing too crazy here, just some small ruts to play around in. Hoping to plan a trip out to a more technical area soon.
51190418593_87790bcc8a_b.jpg

51191274630_b976636e65_b.jpg


Once we hit the peak we had broken through the clouds and were greeted with one of the coolest views. Absolutely solid blanket of white as far as you could see on all sides.
51190203491_043e221598_b.jpg


Stopped at the top to make some lunch and just soaked in the view.
51191272455_08b371c953_b.jpg


By the time lunch was done, some of the clouds had opened up and we got some nicer views of the cities below.
51190203251_957aa2ed73_b.jpg


The aftermath. Ended up spending yesterday getting to clean this mess up.
51191275775_1c2b8d17d3_b.jpg
 
Just unpacked from an extended weekend trip up in the Eastern Sierra area!

Our original plan was to head straight to Mammoth lakes, but due to the chance of rain and snow we decided to wait it out and spend our first night in Alabama Hills. This place is busier and busier everytime we go. Especially arriving on a Saturday, spots were scare. Thankfully we could go places many others didn't try, and found this gem of a spot. We would be sleeping inside the rig this trip, as our RTT is still stuck in transit.
51206629265_32867680a9_b.jpg


The views did not disappoint.
51205768813_c7065a029a_b.jpg


The next day we packed up and were off to Mammoth lakes! The views were amazing the entire way.
51206628015_1b54b57abe_b.jpg


Finally made it our camp, just hunting around for spot.
51206627740_1108cb8e06_b.jpg


Brought both cars this trip, and finally got settled at camp. It was chilly, with nights dropping down to the 30's with wind chill.
51206329139_b75fd8c98b_b.jpg


On our second day at camp, we were informed that due to the incoming winds, we would no longer be able to have a fire. It was at that point we started deciding if we wanted to stick it out for the rest of the trip in the cold. We decided to try sticking through it that night, and while it was chilly, it was manageable. The next morning, we checked the weather again, and were looking at 24mph winds coming. Yikes. So we made the call to head back towards home to enjoy our last night back where it started. We made the two hour trek back to Alabama Hills to spend our last night. A total change of temperature as it was about 90 degrees over there. Even for a Tuesday, it was still pretty busy here, we were shocked. In the end it worked out, as it made our drive back home day much shorter, as well as gave us some incredible sunset views last night. Took a ton of photos, now it is just a matter of getting through them all!
51205558966_55cf868e27_b.jpg


Came home to a few more projects, hopefully can get started first thing tomorrow on those!
 
The other day I was researching alternate ways to power our fridge as a backup to our Goal Zero. I came across THIS .

So I picked up the GM fuse.
51207032032_3a051f3b50_b.jpg


Began to shave down the sides to fit.
51208814710_9529da7ddf_b.jpg


Swapped it out for the other fuse.
51207950188_b01799285d_b.jpg


Cold start, 0.7V gain from before putting it back into the ideal charging range per the battery.
51207950178_36110c2fc4_b.jpg


Onto the next project. Got a ram mount for the WeBoost so I can have some overhead clearance and still have a tall antenna.
51208509149_9017251265_b.jpg


Lastly, picked this up. I want to run this to the rear like many others do, and have an always hot 12V unlike the inverter which requires the key. I have no idea what I am doing yet, still doing research.
51208509059_19cc69b2f0_b.jpg
 
Still winding down from our last trip. Got the time to take it to a buddy to get it properly cleaned. Think this may have been my 3rd wash in the last year with the car. This car cleaned up so nice, and I have never seen it this clean. Ended up getting my windshield ceramic coated as that's a big pet peeve of mine is having a dirty window, so that should help a bit. Eventually will take it back to get the whole car done.

51211528207_884a0718b8_b.jpg

51212459123_ec4b4a46e1_b.jpg

51212239846_a38200b72e_b.jpg


While I was waiting for my car, I got a notification that I had another delivery! This was a total surprise as it arrived almost a month early! The first dual zone fridge Setpower is releasing! When we heard about it, we were super happy as we had just had some ice cream at camp on our last trip and were mentioning how nice it would to have some in the future haha. On top of that, the design is much more competitive to others on the market, and has so many nice new features and upgrades we appreciate. Hoping to break it in soon, as well as do some proper reviews about it. We have been working around the clock on redoing our blog, which we will compare all of their fridges and share other product reviews for everything we have. I will drop a link when it is live, hopefully that can help others with some future mods and purchases!
51212240071_bdd19b5bbe_b.jpg

51211528372_418f5fab48_b.jpg

51211528332_38872bdbf4_b.jpg
 
Been a minute! Now that the weather has gotten a bit better, we have been spending a lot of time doing some fishing out at the islands. Headed back out this weekend to the islands to hopefully score some more!
51262121002_c7f3bcddbb_b.jpg


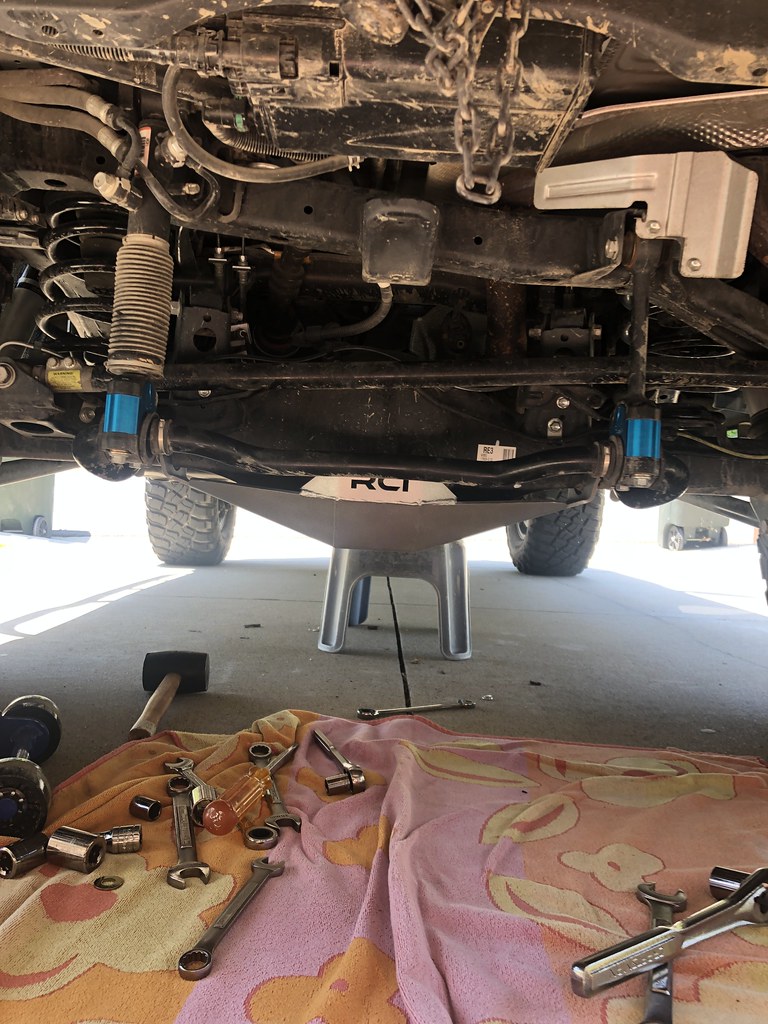
Back in April I placed an order with RCI, and yesterday one of my items arrived, my rear diff skid! I was super excited until I got outside and saw the gaping hole in the box. Was worried it would be damaged/missing and have to wait another two months for a replacement. Thankfully everything was still inside with only some minor blemishes. Not a problem, as long as everything was there. It would get scratched up anyways and I had plans to paint it.

51263592759_01691e637e_b.jpg


51262118837_b2ec467394_b.jpg


Been digging this metallic silver paint I had from my rear shock skids, and my C4 battery tray, so I figured I would make it at least look a bit nicer until it eventually gets its trail beating. While it pops so much in the sun, under the car it becomes much more subtle.
51263592649_a195318d10_b.jpg


Doing it solo was a bit tricky, as the rear sway bar mounting brackets were slightly bent and needed a bit of tinkering to get the skid plate to slide in. Eventually got it on, and happy to have a bit more peace of mind/protection.
51263890410_bc368bfff5_b.jpg


Hoping the rest of my RCI order will be here soon!
 
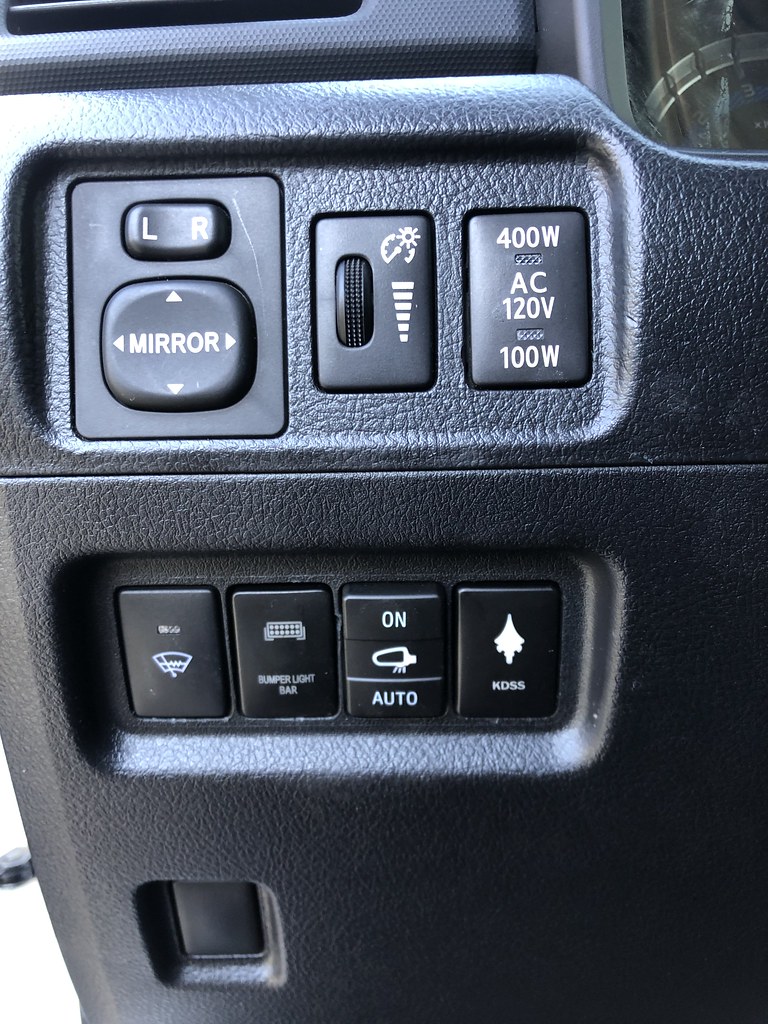
Another small update. Been on the water more than the road lately and have put the car on hold. For the last few weeks I have been anxiously waiting for Blackgate Customs to drop their KDSS control kit. I happened to check last week and saw it was available, and ordered it! Within 2 days it was here and getting installed! The actual install of the wire harness was easy. Two bolts holding the KDSS cover on and it clips right in, a few zipties and run the wire harness to the engine bay. I am not that experienced with electrical so I got a bit stumped on the wiring the harness to the relay and switch. Thankfully Blackgate was extremely helpful and responsive after I reached out for some clarification! To summarize what he explained and to possibly help anyone else in the same situation...

If using the factory switch: The two wires from the harness will be connected to the red and yellow on your relay. The black relay wire will be ground, the white relay wire goes to green on the switch. The blue relay wire will be used unless you wire it in reverse. Using the blue wire as the main/hot will default your KDSS to off. On the factory switch, the blue is for the backlight LED and wired to the headlight as shown on their instructions/website. The black wire needs to be grounded and can be done in sequence or individually. Red for the switch is power.

51295318638_99a1104dd9_b.jpg


51296144210_a21d0b108d_b.jpg


I opted for the factory style switch.
51295857654_720b141340_b.jpg


All done!
51296144170_653b30d58a_b.jpg
 
Well it's been a while, that's for sure. Have spent the last few months traveling and using the rig quite a bit! Figured an update was long overdue.

Starting from where we left off. Got my RCI a-arm skids and installed those.
51839122928_7217ea3c9e_b.jpg

51839742265_9e7d0be682_b.jpg


Ended up ditching the metal jerry cans for some Rotopax. Slightly less fuel that I can carry, but the weight savings/rattling was worth it. The previous metal ones + holders were weighing down my swingout quite a bit on top of the endless rattles. So much happier with this setup.
51839125318_3230406692_b.jpg


Switched the Trigger 4 plus controller to an 8 gang setup that didn't break the bank. The Voswitch setup got the job done and so far zero complaints! Finally have more than 4 buttons. The panel is quite large, but I don't mind it the more I use it. Yes, I fixed that cb radio button that is no longer off. :p
51838064142_3e456360b9_b.jpg


Really been wanting a constant 12V supply for the rear and finally had some time to do it. This will be helpful to plug the fridge into on trips as well as our other devices if we need it!
51838063817_8e3f443456_b.jpg

51839743760_e5d2eff9c6_b.jpg


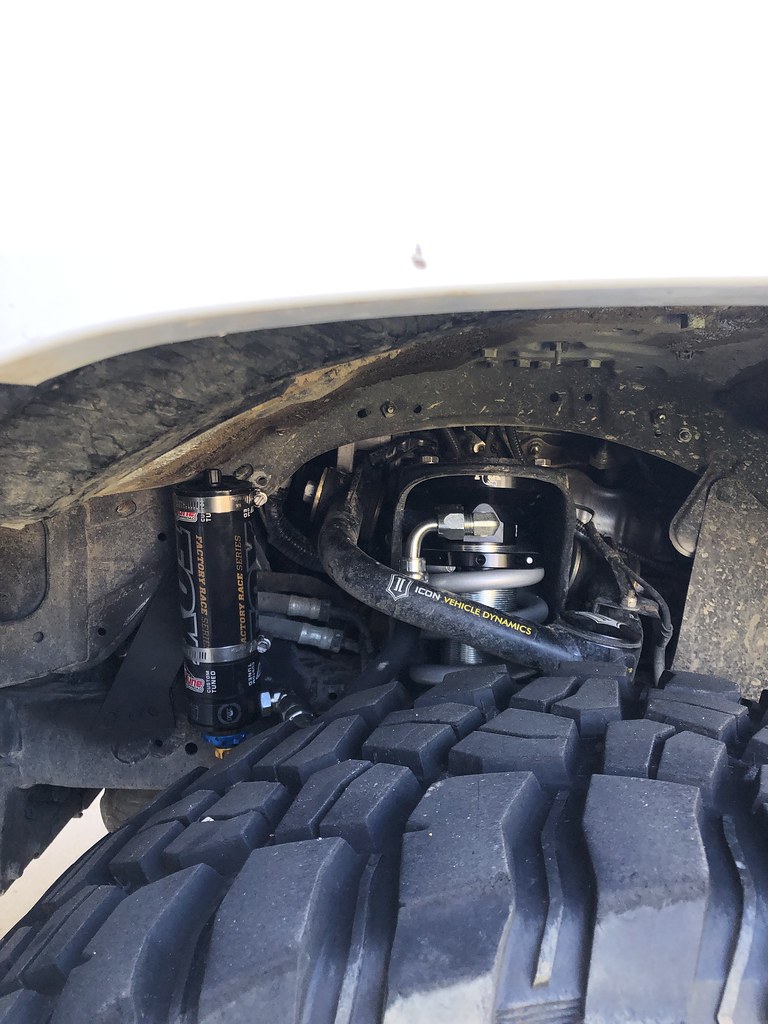
Probably the biggest and most exciting upgrade was the Fox 2.5 remote resi's w/ DSC's! Ordered these back in October and just this week got to put them on! Custom tuned by the helpful people over at Accutune and man do they ride amazing.
51838062987_9a37993b65_b.jpg

51839366144_7b507a5782_b.jpg

51839008121_2608332cda_b.jpg

51838062562_19277c71b5_b.jpg

51838062327_90dc51aea8_b.jpg
 
Last edited:
excuse me kind sir.. but how did you install that front runner table to your shrockworks rear bumper?

I've been looking for a way to install a table to the shrockworks rear bumper and i'm super stumped.

thanks
 
excuse me kind sir.. but how did you install that front runner table to your shrockworks rear bumper?

I've been looking for a way to install a table to the shrockworks rear bumper and i'm super stumped.

thanks

51840671611_6711845631_b.jpg


I found a picture that may help explain. I basically used a bracket behind the table to reinforce it since its quite flimsy. From there I mounted it using the existing holes in the shrockworks bumper and some oversized washers/plates to keep it in place. They don't make it easy to mount tables and have been changing it every so often.
 
51840671611_6711845631_b.jpg


I found a picture that may help explain. I basically used a bracket behind the table to reinforce it since its quite flimsy. From there I mounted it using the existing holes in the shrockworks bumper and some oversized washers/plates to keep it in place. They don't make it easy to mount tables and have been changing it every so often.

dood thanks for the pic man...yeah..the only negative for shrockworks is the inability to easily install a table.... otherwise love the bumper.

FYI, awesome build btw...
 
dood thanks for the pic man...yeah..the only negative for shrockworks is the inability to easily install a table.... otherwise love the bumper.
FYI, awesome build btw...

Thank you! Hopefully that pic helped haha it was just a DIY sort of thing. Personally not a fan of the shrockworks bumper, but maybe they have been improved since I got mine back in 2018. I feel like there are better options out now a days.
 

Members online

Forum statistics

Threads
278,307
Messages
3,554,049
Members
248,016
Latest member
Advally Service

Trending content

Back
Top