2000 limited SleepyDad build

this is a shot from under the prado how it connects, I suspect it just hooks on where the 4runner stock bumper hooks up? I wish I could find some more shots of how it connects in the front?
Interesting. The skid plate attaches to the frame crossmember in the back there (the Prado does have a different frame than the 4Runner, though it is very similar) - it is hard to see where the tank mounts. I would assume it is somehow to the frame so the skid plate and tank move together.

-Charlie
 
remediation and bush

I zapped some stuff into the hole I created. not sure it was worth it but I will put a couple of coats of epoxy over it and seam sealer. if anything it helps the overall Frankenstein appearance?

<a href="https://imgur.com/aa97sgj"><img src="https://i.imgur.com/aa97sgjl.jpg" title="source: imgur.com" /></a>

I was really not happy with the upper strap concept on the fuel tank... so I took inspiration from Samwise Gamgee and created some side bushings.

the idea here is to pore some poly into the void. I plasma cut and bend up som U-type brackets then used the press to install some dom tube that then holds an M8 to secure it's position. I 3D printed some end caps to create the void and plug the end to create the contact surface. needs some mold release agent for sure, no idea if this will work?

<a href="https://imgur.com/MNLKsFA"><img src="https://i.imgur.com/MNLKsFAl.jpg" title="source: imgur.com" /></a>

the busings will then capture the edge of the fuel tank and keep it in the center of the frame rails. still need to come up with a little L bracket to hang them but this will hopefully hold the fuel tank in place and stop it from jumping up or banging from side to side. still waiting on the poly mix going to give this stuff a try and see how it works.

Amazon.com: Smooth-On Vytaflex 60 Urethane Mold Making Rubber - Trial Unit

<a href="https://imgur.com/OvEQ0RX"><img src="https://i.imgur.com/OvEQ0RXl.jpg" title="source: imgur.com" /></a>
 
well this might just work?

I put some spot welds on the U-bushing things and epoxy dipped them, they will now last longer than me.

this is my first try at poly bush and I failed at the first pour, you really need a mold, so I made a mold and sprayed it with mold release stuff.

<a href="https://imgur.com/z4k5Rb6"><img src="https://i.imgur.com/z4k5Rb6l.jpg" title="source: imgur.com" /></a>

and pour them, should have done pink die. maybe next life.
<a href="https://imgur.com/FMdrkLW"><img src="https://i.imgur.com/FMdrkLWl.jpg" title="source: imgur.com" /></a>

well I'll be dipped they turned out ok and were not hard to remove from the molds.
<a href="https://imgur.com/Bx3jQjW"><img src="https://i.imgur.com/Bx3jQjWl.jpg" title="source: imgur.com" /></a>

and then we need adjustable hammer bent bracket guy
<a href="https://imgur.com/X62Dgv4"><img src="https://i.imgur.com/X62Dgv4l.jpg" title="source: imgur.com" /></a>

there you go hammer bent bracket guy!
<a href="https://imgur.com/rV5FpPJ"><img src="https://i.imgur.com/rV5FpPJl.jpg" title="source: imgur.com" /></a>

holy mother forking shirt balls this might just work?
<a href="https://imgur.com/R4aJvSK"><img src="https://i.imgur.com/R4aJvSKl.jpg" title="source: imgur.com" /></a>
 
well I'll be dipped...

As a complete side note, not related to this thread, are you sad that Derek and his family are moving to Tennessee. I'm pretty sure you're the one that I first saw VGG in a post from and now I'm hooked on that channel. Any who, build is looking good man! Always love the ingenuity you come up with! :cheers::cheers:
 
As a complete side note, not related to this thread, are you sad that Derek and his family are moving to Tennessee. I'm pretty sure you're the one that I first saw VGG in a post from and now I'm hooked on that channel. Any who, build is looking good man! Always love the ingenuity you come up with! :cheers::cheers:

Derek will go on to do bigger things I think? maybe a cable reality show?

some VGG vernacular has snuck into our house hold lingo, my son and I use the hamer = Tonya Harding

I enjoy it because he does all kinds of crazy stuff, nice to see the variety of life.
 
I put some spot welds on the U-bushing things and epoxy dipped them, they will now last longer than me.

this is my first try at poly bush and I failed at the first pour, you really need a mold, so I made a mold and sprayed it with mold

and pour them, should have done pink die. maybe next life.

well I'll be dipped they turned out ok and were not hard to remove from the molds.

Super cool engineering. It's great stuff. Those brackets look great. yes pink would'ev popped!.
 
sometimes the smallest victories are the largest in size

I found a local Midas shop 2.4 miles from my house and one of the guys was brave enough to give it a go. he did ok, it's not pretty on the inside but I was able to do a quick test drive and it does not contact the bumper but man it's tight up in there now.

yes I will have to drop the new fuel tank to remove the tailpipe but a guy has too do what a guy has too do. I would have to say this is the setup I have been dreaming about for like 20 years, so check that one off the list.

<a href="https://imgur.com/RIX6pyR"><img src="https://i.imgur.com/RIX6pyRl.jpg" title="source: imgur.com" /></a>


Last edited:
minor stupid thing about splash shields

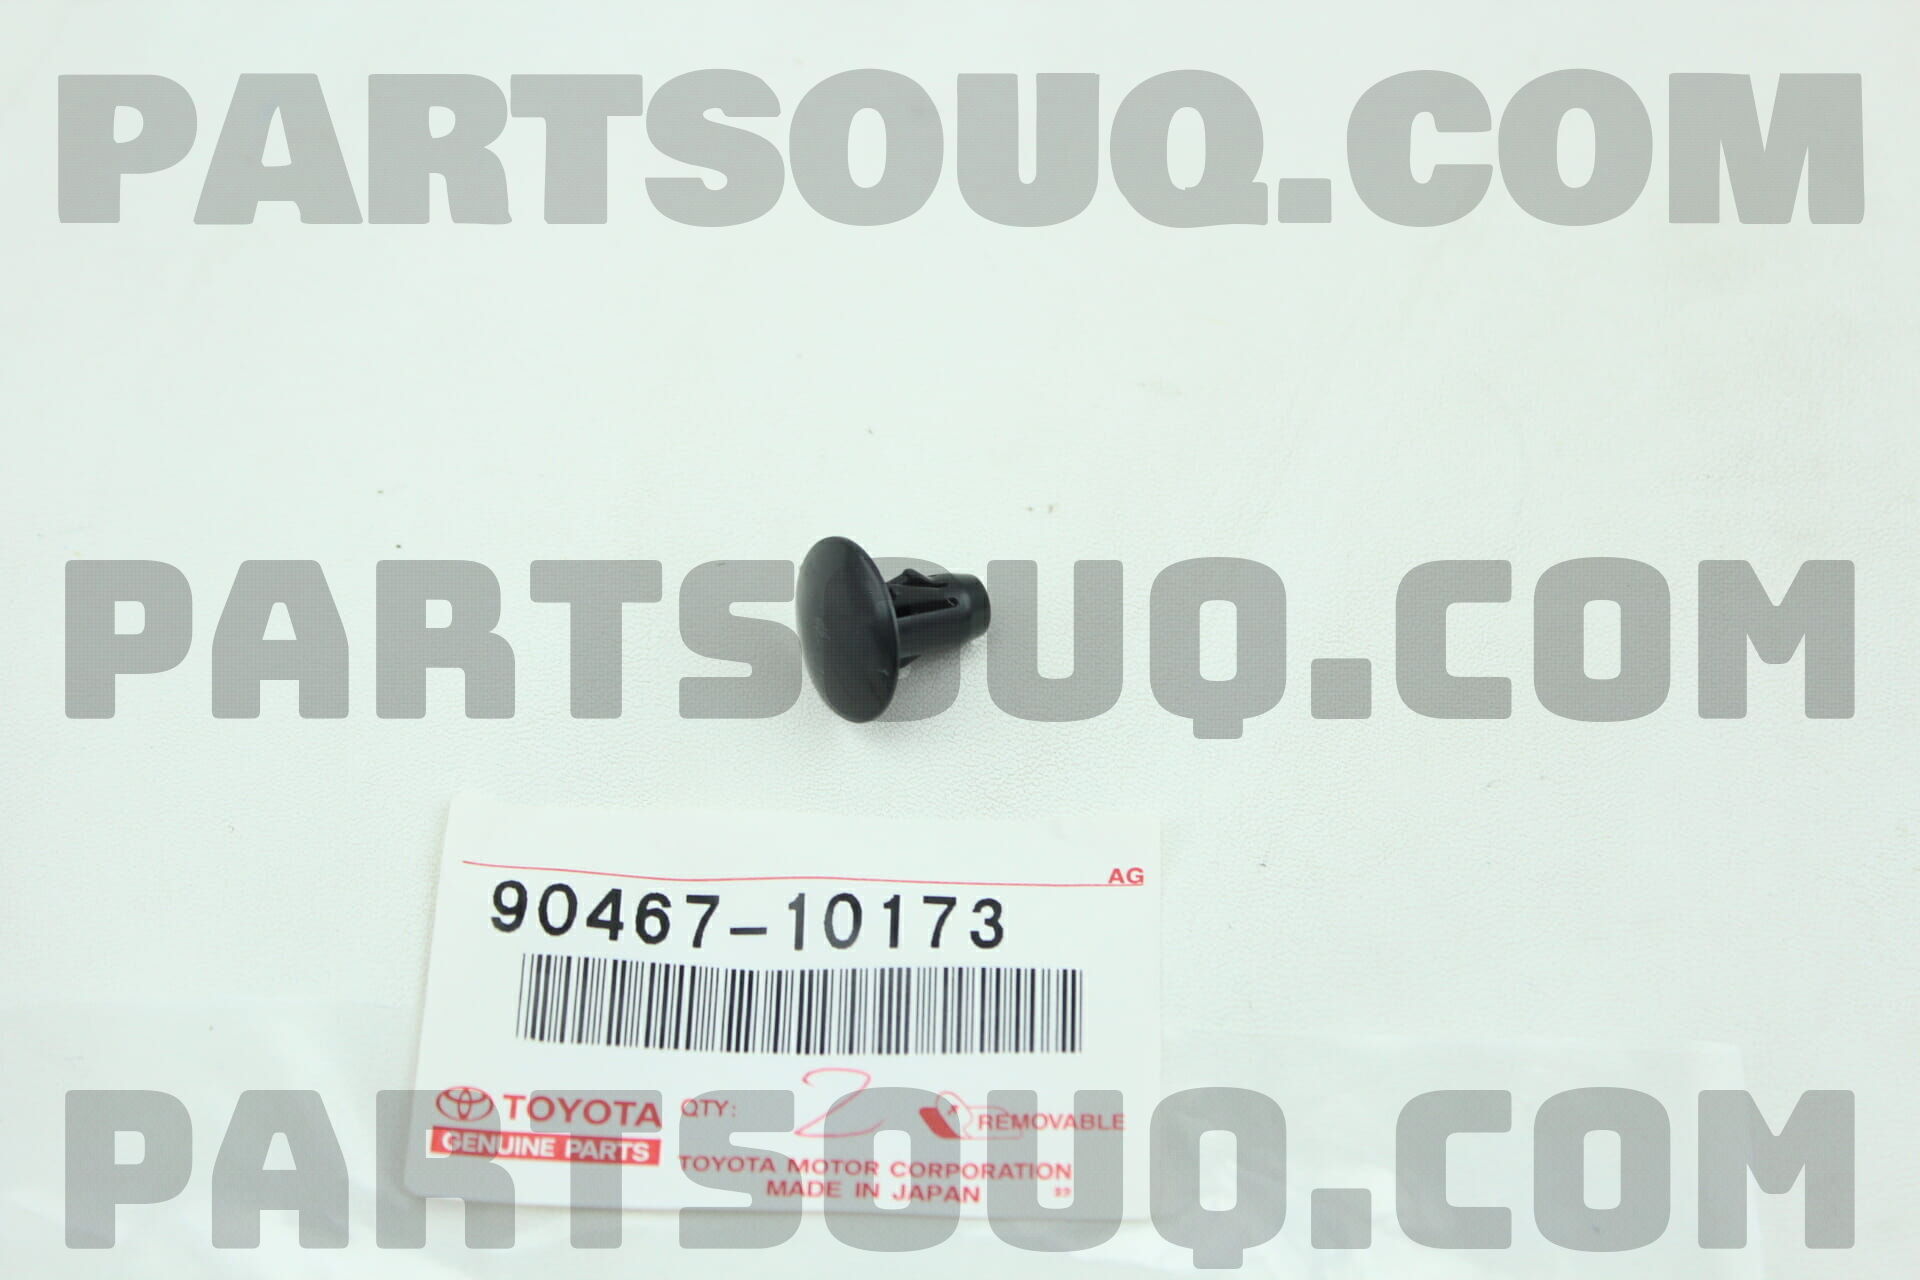
I have given up on the splash shields little black clips
9046710173.jpg


I will not be held hostage to them NOMORE!

the fender aprons are perfect for M5 nut certs so I certed them
<a href="https://imgur.com/cA9WI7O"><img src="https://i.imgur.com/cA9WI7Ol.jpg" title="source: imgur.com" /></a>

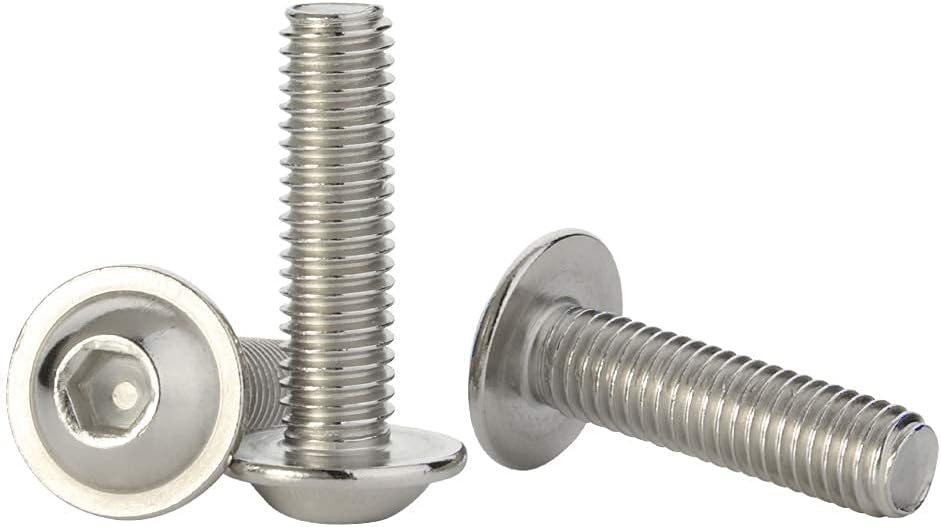
I did not have any m5 Flanged Button Head Socket Cap Screws on hand but did have some m5 machine head screws. I ordered some of these and once they come I will swap out the machine screws. who am I kidding I will get the new box of screws and they will sit on my dresser for months and the next time we have visitors my wife will freak out and hide them in the name of cleaning up. Or maybe this time it will be different but probably not.

Amazon.com: M5-0.8 x 12mm Flanged Button Head Socket Cap Screw Bolts, 304 Stainless Steel 18-8, Allen Socket Drive, Bright Finish, Fully Machine Threaded, Pack of 25 : Industrial & Scientific

but until then it works just fine and the splash shields on the drivers side has never been so beefy and secure.
<a href="https://imgur.com/Df2SwAm"><img src="https://i.imgur.com/Df2SwAml.jpg" title="source: imgur.com" /></a>

 
I have given up on the splash shields little black clips
9046710173.jpg


I will not be held hostage to them NOMORE!

the fender aprons are perfect for M5 nut certs so I certed them
<a href="https://imgur.com/cA9WI7O"><img src="https://i.imgur.com/cA9WI7Ol.jpg" title="source: imgur.com" /></a>

I did not have any m5 Flanged Button Head Socket Cap Screws on hand but did have some m5 machine head screws. I ordered some of these and once they come I will swap out the machine screws. who am I kidding I will get the new box of screws and they will sit on my dresser for months and the next time we have visitors my wife will freak out and hide them in the name of cleaning up. Or maybe this time it will be different but probably not.

Amazon.com: M5-0.8 x 12mm Flanged Button Head Socket Cap Screw Bolts, 304 Stainless Steel 18-8, Allen Socket Drive, Bright Finish, Fully Machine Threaded, Pack of 25 : Industrial & Scientific

but until then it works just fine and the splash shields on the drivers side has never been so beefy and secure.
<a href="https://imgur.com/Df2SwAm"><img src="https://i.imgur.com/Df2SwAml.jpg" title="source: imgur.com" /></a>

Oh I love that idea. Can you send me a link to your certs? I’ve never actually used those before.

I think a philips head fastener is actually ideal in this scenario. Or maybe some of those philips and 8mm headed combo bolts.
 
Oh I love that idea. Can you send me a link to your certs? I’ve never actually used those before.

I think a philips head fastener is actually ideal in this scenario. Or maybe some of those philips and 8mm headed combo bolts.

sorry I used the wrong vernacular, Rivet Nuts.

this was the kit I picked up back in 2017
Amazon.com: Astro Pneumatic Tool 1442 13" Hand Rivet Nut Setter Kit - Metric & SAE W/ 60pc Rivnuts : Automotive

so these should be the same thing that came with the kit

Amazon.com: Astro Pneumatic Tool RN5M 100-Piece M5 5mm Steel Rivet Nuts : Automotive

as I need to remove the splash shields I will be doing it for each one, I have not tried the frame and I'm guessing those holes are different. so...

agree I have the same allen heads in M6 and they match the size of the plastic toyota clips much better. I just did not have them in M5, machine screws are way to small.

51RcRjljKLS._AC_SL1000_.jpg
 
amazingly

Oh I love that idea. Can you send me a link to your certs? I’ve never actually used those before.

I think a philips head fastener is actually ideal in this scenario. Or maybe some of those philips and 8mm headed combo bolts.

Ordered the M5 on sunday and had it today, wow amazon. I was a bit surprised how much smaller the M5 are but after installing them they are fine. that plastic splash guard is totally solid now, no more floppy.

M6 would be the best but you would have to drill out the sheet metal and then make sure you do something to protect the hole and since mine are still in good shape I don't want to drill them out and destroy the toyota zink+paint protection that still exists.

<a href="https://imgur.com/2ISR0VN"><img src="https://i.imgur.com/2ISR0VNl.jpg" title="source: imgur.com" /></a>
 
Splash guard rivets with bolts. I am not quiet sure. Looks good but I have an inclination that they might seize in there and the rivet and the bolt will spin when trying to loosen the bolt, just a thought.
 
Splash guard rivets with bolts. I am not quiet sure. Looks good but I have an inclination that they might seize in there and the rivet and the bolt will spin when trying to loosen the bolt, just a thought.

it is a risk but the drivers side plastic one is so floppy, at least let me savor the victory for a time. Nothing is forever, sadly.
 
it is a risk but the drivers side plastic one is so floppy, at least let me savor the victory for a time. Nothing is forever, sadly.

Ha ha, looks good. I am sure it will be fine. Your built is super impressive. I read the old posts and look at pics in your built thread quiet often.
 
it is a risk but the drivers side plastic one is so floppy, at least let me savor the victory for a time. Nothing is forever, sadly.

That's funny. Cool idea with the rivet nuts. Maybe anti-seize to prevent them from getting stuck together?
 
Ha ha, looks good. I am sure it will be fine. Your built is super impressive. I read the old posts and look at pics in your built thread quiet often.

That's funny. Cool idea with the rivet nuts. Maybe anti-seize to prevent them from getting stuck together?

Could throw some small tack welds on the rivnuts too..

For me being in the mid-west it's just under stood you use it

rust belt assembly lube
<a href="https://imgur.com/ylIHVZ9"><img src="https://i.imgur.com/ylIHVZ9.png" title="source: imgur.com" /></a>
 
Mission accomplished

using the switch as a ground was super easy, man don't know why I did not do it this way from the start.

you only have to run 3 wires 1 red 15 amp for the compressor and solenoids, then 2 ground.

the 3d printed bezel I made worked perfect as well. I just contact cemented the switch to the outside and it sticks like glue, wait that is glue? yea yea.

link to the STL for the bezel
5552435020E0 COVER SWITCH BACE HOLE beefier v4.stl - Google Drive

<a href="https://imgur.com/JAZKJLu"><img src="https://i.imgur.com/JAZKJLul.jpg" title="source: imgur.com" /></a>

<a href="https://imgur.com/3BnZXGs"><img src="https://i.imgur.com/3BnZXGsl.jpg" title="source: imgur.com" /></a>

<a href="https://imgur.com/UoOrlKd"><img src="https://i.imgur.com/UoOrlKdl.jpg" title="source: imgur.com" /></a>
 
Last edited:
battery tray V10000000.1

I have 3d printed a couple of battery trays... I know I should make a metal one but it seems overkill to me?

with the tools now days it's not hard to scrape dimensions, I'm actually getting pretty good at it. Because I wanted to make nubs that extrude down into the holes in the battery tray area and printing stuff has rules... I decide to do a plug based approach.

<a href="https://imgur.com/5f9NtQI"><img src="https://i.imgur.com/5f9NtQIl.png" title="source: imgur.com" /></a>

<a href="https://imgur.com/HJiyapn"><img src="https://i.imgur.com/HJiyapnl.png" title="source: imgur.com" /></a>
and it's not the most beautiful print in the world but... it's ASA and it's pesky stuff to print.

<a href="https://imgur.com/nPF11ex"><img src="https://i.imgur.com/nPF11exl.jpg" title="source: imgur.com" /></a>

<a href="https://imgur.com/a9JGrFo"><img src="https://i.imgur.com/a9JGrFol.jpg" title="source: imgur.com" /></a>

used some acetone to glue the plugs into place, acetone could be used to smooth the print but... meh I have enough chemical in my body for one day.
<a href="https://imgur.com/F0Jo9aM"><img src="https://i.imgur.com/F0Jo9aMl.jpg" title="source: imgur.com" /></a>

it fits perfectly and the nubs engage into the slots nice and snuggles.
<a href="https://imgur.com/T8vnvt5"><img src="https://i.imgur.com/T8vnvt5l.jpg" title="source: imgur.com" /></a>

now I need to fire up the cnc plasma table because it has finally decided to be above freezing. next up battery hold down the way mom used to make them.
 
I have 3d printed a couple of battery trays... I know I should make a metal one but it seems overkill to me?
The factory one is plastic for a reason... RUST! Plastic (or stainless) would be the choices there. Higher sides and a drain that takes the chemicals that wash off the battery down below the frame would be the best. You did a great job there already though.

Battery trays are the only place you find rust on California cars.

-Charlie
 

Members online

Forum statistics

Threads
278,309
Messages
3,554,075
Members
248,016
Latest member
Advally Service

Trending content

Back
Top