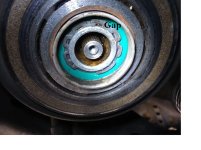
Toyota Denso AC Compressor bearing and Idler bearing replacement

nissanh

Senior Member
This is for demonstration purposes only.

For safety: Apply park brake and have the A/T shifter in park. Choke all 4 wheels in front and back.
AC compressor bearing: 30BGS10DST2 (UPDATE after 7000 MILES: AVOID CHINESE BEARINGS. I BOUGHT the replacement chinese brearing from ebay and it is shot)
ID: 30 mm
OD: 52 mm
Depth: 22 mm

Remove the front skid plate
Loosen 12 and 14 mm bolts holding the AC idler bearing.
Remove the belt
Remove the idler bearing. There is a bushing behind the bearing, be ready to note its orientation on the bolt
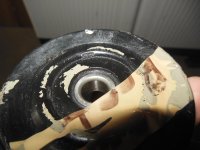
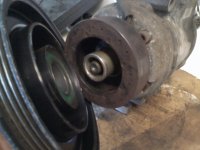
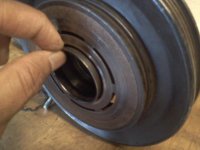
1st picture: You can press out the bearing to replace the new.
Idler bearing number 6301 Nachi/NTN

Removal of the compressor bearing
There is NO NEED to empty freon or remove the compressor off the vehicle. (I DID THIS THREAD ON A COMPRESSOR that was removed from a truck)
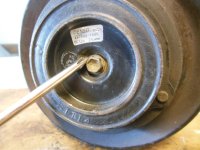
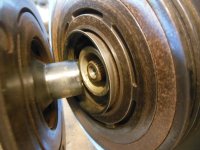
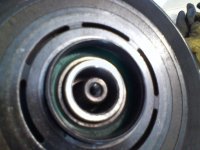
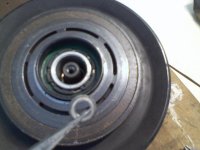
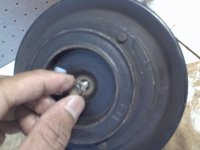
2nd picture: Remove the 10 mm bolt: impact gun is the best: It will spin just like how the crank bolt spins so be ready to hold the clutch. [HINT: BEFORE you remove the belt, have the ignition ON (engine NOT running), turn the ac on to engage the compressor clutch and then remove the 10 mm bolt)
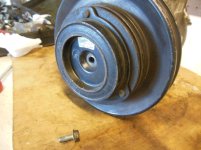
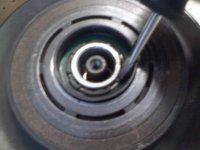
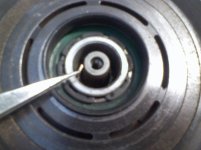
3rd picture: 10 mm Bolt off

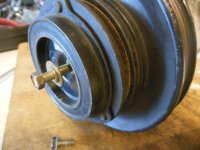
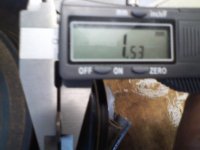
4 Picture: Using a 12 mm bolt to puller the clutch from the compressor: IMPORTANT: There is a 1.5 mm thick washer and keep an eye on where it goes.

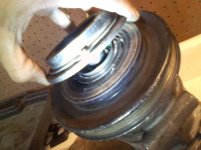
5 Picture: clutch removed
6 Picture: 1.5 mm washer shown
7 Picture: Lock click removed
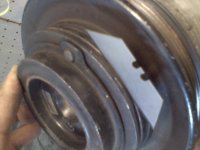
8 Picture: Pulley pulled out. It should come right out with gentle pull.
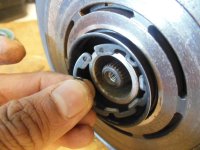
If you want to remove the clutch coil pack, remove the circlip
shown inside and then remove the wires attached to the coil pack
 

Attachments

  • DSCN3306.jpg
    DSCN3306.jpg
    127.7 KB · Views: 10,919
  • DSCN3308.jpg
    DSCN3308.jpg
    126 KB · Views: 13,323
  • DSCN3309.jpg
    DSCN3309.jpg
    129.4 KB · Views: 11,027
  • DSCN3312.jpg
    DSCN3312.jpg
    123.9 KB · Views: 11,115
  • DSCN3314.jpg
    DSCN3314.jpg
    124.2 KB · Views: 10,932
  • DSCN3315.jpg
    DSCN3315.jpg
    125.9 KB · Views: 10,923
  • DSCN3316.jpg
    DSCN3316.jpg
    123.7 KB · Views: 10,822
  • DSCN3317.jpg
    DSCN3317.jpg
    122.9 KB · Views: 11,131
Last edited:
Register to hide this ad
continued

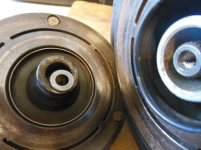
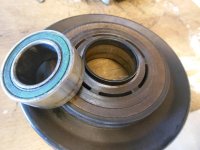
9 picture: Compressor pulley bearing pulled out: Note the dust shield collar. It will fall out with the bearing (not a tight fit). Reuse it with the new bearing
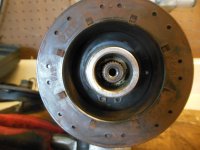
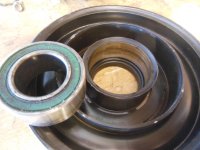
10: Picture: other side of the pulley

11 Picture: dust shield back in
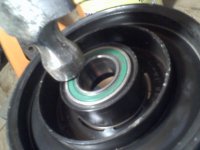
12 picture: Bearing installed
Use a wise to drive the bearing's last few mm's (prevent damaging the dust shield)
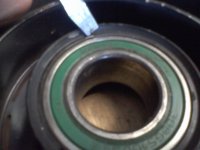
13 Picture: Bend the tabs to secure the bearing
14 Picture: Pulley ready to install
15 Picture: Pulley installed
16 Picture: C-clamp installed
 

Attachments

  • DSCN3319.jpg
    DSCN3319.jpg
    125.7 KB · Views: 11,325
  • DSCN3321.jpg
    DSCN3321.jpg
    124.2 KB · Views: 11,010
  • 160903_0006.jpg
    160903_0006.jpg
    136.4 KB · Views: 10,597
  • 160903_0008.jpg
    160903_0008.jpg
    123.8 KB · Views: 13,259
  • 160903_0010.jpg
    160903_0010.jpg
    116.3 KB · Views: 11,183
  • 160903_0011.jpg
    160903_0011.jpg
    117.7 KB · Views: 11,003
  • 160903_0013.jpg
    160903_0013.jpg
    139.5 KB · Views: 10,394
  • 160903_0015.jpg
    160903_0015.jpg
    121.3 KB · Views: 10,828
Continued

17 Picture: Thickness of the washer that goes between the clutch and the pulley
18 Picture: Washer
19 Picture: Washer on the compressor shaft
20 Picture: Clutch going in
21 Picture: Space between the clutch and pulley (if you didn't installed the washer, you will not see this space)
22 Picture: 10 mm bolt back on

Now it is time to put back the idler bearing and the drive belt:
 

Attachments

  • 160903_0016.jpg
    160903_0016.jpg
    144.2 KB · Views: 10,348
  • 160903_0017.jpg
    160903_0017.jpg
    125.1 KB · Views: 11,258
  • 160903_0018.jpg
    160903_0018.jpg
    121 KB · Views: 10,428
  • 160903_0020.jpg
    160903_0020.jpg
    132 KB · Views: 10,431
  • 160903_0022.jpg
    160903_0022.jpg
    122.5 KB · Views: 10,359
  • 160903_0023.jpg
    160903_0023.jpg
    113.3 KB · Views: 10,795
Thanks for the post! I just replaced the AC idler bearing as it was starting to go bad, never thought about the AC bearing itself. I don't think I've read about anyone having this fail, but this is good info to have.
 
Has anyone actually done this with the pump installed?

"Pulley will come off with a gentle pull" is definitely not working for me. Been at it for almost three hours now, and the inner race hasn't budged from the pump.

I honestly don't believe this can be done with the pump installed.
Edit-
I would highly recommend not trying to do this on the vehicle!
There is very little room to work, and you're just going to get extremely frustrated.
I took the pump off, and secured it between two 2x4's to get the pulley off-
0b914254e2c1743690e3f20face6652f.jpg

Then I had to get the bearing out of the pulley- also not easy. Started out by tapping the "stakes" out of the way-
edbcd60ce3df0c9b6cfd1e1ee7d0cc7d.jpg

Then getting the bearing out-
18a588a027fd14e2022ad3b79ee8e41a.jpg

Bearings-
0e6eeed60b12863275809b1c38c032b9.jpg

It's easy from there [emoji1598]
 
Last edited:
Hey guys, I'm going to try to replace this bearing soon. Trying to get my brain around how this stuff comes apart. I see the first step is to remove the small bolt. How does the longer bolt help pull the front of the pulley off?
 
[MENTION=148218]JZiggy[/MENTION], the pulley is threaded with a larger(8mm vs 6mm) bolt hole. When you thread the larger bolt in, it presses against the 1.5mm washer, and acts as a puller to pull it off. It works really slick!
 
[MENTION=148218]JZiggy[/MENTION], the pulley is threaded with a larger(8mm vs 6mm) bolt hole. When you thread the larger bolt in, it presses against the 1.5mm washer, and acts as a puller to pull it off. It works really slick!

Thanks for the fast response! Makes perfect sense now.
 
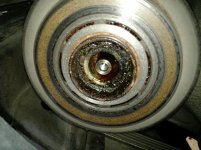
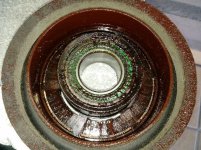
This thread motivated me to try and remove my AC pulley after giving up on removing the 10mm bolt last time. Got the bolt removed in 2 seconds today after a "light bulb" moment. Then I tried for a good hour to pry off the magnetic clutch. After giving up, I noticed something that killed all my motivation for the foreseeable future.
69615cd1548f70c24275117d252548f3.jpg


Sent from my SM-G930T using Tapatalk
 
Wow!

Look what I found:
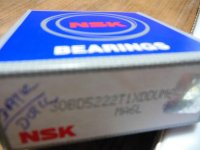
I am in Sri Lanka visiting my parents at the moment, also messing with their Diesel Hilux 4x4. A local autoparts store is selling NSK bearing (made in Japan) for this AC compressor application for just $ 8.27!
Attached is the picture: 30BD5222T1XDDUM6 is the number it has and the dimensions are
Inner X Outer X Thickness: 30 X 52 X 22 mm
 

Attachments

  • DSCN3988.jpg
    DSCN3988.jpg
    118.3 KB · Views: 9,871
I was able to do this repair without removing the compressor. My 4runner was originally from Massachusetts so I expected to wrestle with it a bit...surprisingly, I had this whole job completed in 3ish hours. Luck of the draw with these things I suppose??? Removed the fan clutch, bottom skid plates, and unbolted the fan shroud for some extra room to work. Everything removed easily without special tools (aside from a set of snap-ring pliers). Got the bearing off amazon for $16 delivered. My old one was in pretty bad shape, purrs so quietly now. A few pics of the bearing but I followed the procedures from previous posts and diagrams from the service manual.
 

Attachments

  • IMG_20171209_133933403.jpg
    IMG_20171209_133933403.jpg
    59.8 KB · Views: 9,332
  • IMG_20171209_152352953.jpg
    IMG_20171209_152352953.jpg
    105 KB · Views: 9,213
  • IMG-20171209-WA0003.jpg
    IMG-20171209-WA0003.jpg
    64.4 KB · Views: 9,463
Last edited:
Hey guys, I'm going to try to replace this bearing soon. Trying to get my brain around how this stuff comes apart. I see the first step is to remove the small bolt. How does the longer bolt help pull the front of the pulley off?

I hope we're going to film this Jordan.
 
I should note the hardest part for me was the snap ring. I spent a lot of time aligning my pliers to the correct location. I had to use my cell phone's camera to find the alignment holes. I snapped off the prong on one of my attachments with misalignment of the pliers. If you leave the compressor in the vehicle you just don't have the angle needed to see the snap ring.
 
I still haven't been able to remove mine. The snap ring pliers I bought are too long to fit between the compressor and the radiator. Unfortunately the amount of time I can devote to this project has been less than desirable. I end up working a little at a time on it. The outer pulley was such a nightmare because someone welded it to the clutch. Anyway, I think I will elect to cut an inch or so off of my plier handles so they fit better.
 
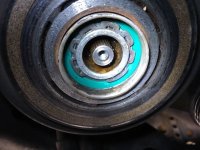
I see the snap ring didn't go into the groove completely. Please see the gap at the open-end of the snap ring in one of my pictures posted above.
"Topher7"
Try one of the two.
1) Try to flip the snap ring and see that makes it to go into the groove completely.
2) You need to drive in the bearing/pulley more into the compressor housing.
 

Attachments

  • Untitled.jpg
    Untitled.jpg
    65.9 KB · Views: 1,844
Thanks for the heads up. The posted photo was one of a few I used to ensure the snap ring was seated properly. Had to tap the front of the pulley with a mallet to seat it all the way. I didn't get a final photo of it completely seated. I was happy to have your photo to compare. Thanks!
 
I hope we're going to film this Jordan.

Tim,

I actually did this job myself a while ago, back in May I think. It was a total PITA for three reasons:

1) I didn't have the right size snap ring pliers (and the snap ring is pretty stout)
2) The bearing was pretty stuck on the rotor so it was a beast to pull off. I essentially had to wiggle it back and forth a few hundred times
3) To get enough space for all this I had to pull the radiator

Once the pulley was out sure enough the old bearing was pretty grainy and the new bearing went in easily. But after putting it all back together I got a little whine from the compressor that I only hear at idle speed. I even pulled the belt to confirm that was it. So either the new Nachi bearing had an issue or all the wiggling caused some stress to the compressor itself, unsure.
 

Members online

Forum statistics

Threads
278,316
Messages
3,554,121
Members
248,016
Latest member
Advally Service

Trending content

Back
Top