 12-04-2016, 08:40 PM
|
#1
|
 |
Banned
|
|
Join Date: Oct 2014
Location: USA 97 4Runner 2WD manual 150K miles 2.7L 3RZFE
Posts: 309
|
|
|
Banned
Join Date: Oct 2014
Location: USA 97 4Runner 2WD manual 150K miles 2.7L 3RZFE
Posts: 309
|
Advice requested from those of you who have mounted tires & balanced wheels at home
Advice requested from those of you who dismount, patch, and mount your own tires & (static) balance your own wheels at home.
If you have never dimounted, patched, mounted or balanced your own tires at home, you probably won't be able to add much practical value to this thread; however if you have actually dismounted, patched, mounted and balanced SUV tires at home, you almost certainly can add valuable pragmatic hints to this thread (such that we'll all learn from your experience).
At a rough cost of around $200 (which pays for itself after about the 10th mounted tire), I already bought or will buy the following tools from Harbor Freight:
I will need to securely mount the tire changing tool, either to a large pallet, or to the concrete of my driveway or sidewalk (or maybe on the ground in the dirt somehow, temporarily).
I'll need four new tire valve stems so a basic question is which ones you recommend (e.g., Pep Boys, Kragen/O'Reilly, Autozone).
Other than tire valves, I'm hoping the tools I bought today are adequate, because I already have:- Air compressor, hose, air chuck, and tire pressure gauge
- Shrader valve removal tool
- Lots of dish detergent & water
- Assorted pliers, wrenches, ratchets, and sockets
- White greasy marking stick for marking tires
Here's the background:
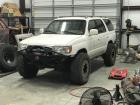
A relative of mine owns the 2WD '97 4Runner Base Model (4cyl), and all four tires are worn well past the wear bars.
She has never once driven off road (not even on the shoulder of a road!), and she just ordered, online, the Nexen N'Priz AH5 P225/75R15 tires (load range 102S, Treadwear 460, Traction A, Temperature (aka Speed) A for about $60 each.
When the tires arrive in a few days, I plan on mounting and static balancing them for her and just want to ask for tactical advice from those of you who have done the task yourself.
I'm well aware of the difference between dynamic road-force balancing and static balancing.
Therefore, my plan is simple:
a. Drive the vehicle to determine if there is any pre-existing vibration,
b. Break the beads, and remove the old tires and wheel-balance weights,
c. Mount the new tires & new valve stems & pressurize to spec,
d. Balance the wheels statically,
e. Test drive at highway speeds for noticeable vibration,
f. If there is any wheel-related vibration, then (and only then) would I simply take the wheels in for dynamic road force balancing.
Note that I am aware that tire manufacturers use different paint dot schemes for match mounting:- Usually they paint a yellow dot at the tire's light spot which is paired with the valve stem on the wheel which is the wheel's heavy spot, and/or,
- They paint a red dot at the tire's high point for radial runout and radial force variation.
- But this applies mostly to match mounting on new factory wheels, and, in any case, is completely up to the tire manufacturer.
I have a few questions about the stock Toyota 15-inch wheels because where I mount the red spot (if the tires have a red spot, which takes priority over the yellow spot) depends on whether Toyota put a dimple in the steel rim to indicate the steel wheel's low spot.
All I'm asking for is practical advice and hints and helpful suggestions for how to do the job best from those of you who have actually mounted their own tires and balanced them yourself at home with standard home equipment.
a. Did I miss anything that I'll need to do the job right?
b. Do you have any tricks or hints to make the job easier, simpler, or better?
Last edited by foo; 12-28-2016 at 12:10 AM.
|

|
|
|
12-04-2016, 09:36 PM
|
#2
|
|
Member
|
|
Join Date: Jun 2014
Location: Denver, CO
Posts: 169
Real Name: matt
|
|
|
Member
Join Date: Jun 2014
Location: Denver, CO
Posts: 169
Real Name: matt
|
Other than getting the tire machine mounted securely to the ground you seem to have a pretty good plan devised. The only advice I may offer is depending on the size of air tank and/or air hose you may run into an issue getting the new tires to seat the beads. They make some for lack of a better term ' inflatable ' straps that help squeeze the tire so that the beads are forced outward towards the rim. You can use a ratchet strap but be very careful when releasing it after the bead starts to seat. All you really need to do is get it started and then release the strap. You can break the strap or your fingers releasing it if there is to much tension on it. This may not even be necessary depending on the tire and more importantly how they are shipped. If they are cinched down bead to bead I would cut the straps and let the tire relax back to normal shape as much as possible before proceeding. What about dyna beads for final balancing ? Hope that helps, Matt
__________________
1997 t4r sr5
lots of 2 wheeled toys
|
|
|
|
|
12-04-2016, 10:49 PM
|
#3
|
 |
Senior Member
|
|
Join Date: Dec 2012
Location: Dayton, OR
Posts: 3,042
|
|
|
Senior Member
Join Date: Dec 2012
Location: Dayton, OR
Posts: 3,042
|
Factory wheels with factory sized tires seat up extremely easily, probably will just have to put air to them. The one hard part is breaking the beads, the steel wheels aren't terrible, but the factory alloys from 90s Toyotas are among the most stubborn. Especially the split 3 alloys, super deep drop center. Mounting and dismounting is relatively easy, just go with plain pop in rubber stems or screw down metal, not any fancy kind, the fancier they are the crappier they are to work with usually.
The dots are hit and miss, you can line it up and it could be awesome or terrible, I wouldn't count on em for much.
I'd rather have the more expensive shovel style bead breaker and a set of tire bars than the tire changer and a breaker bar.
I work at a tire shop, I've never done car tires by hand though, only atv and truck tires.
Sent from my Z958 using Tapatalk
__________________
'97 3RZ 5 Speed "FrankenRunner" ( Build Thread) - Dormant
The "shitmobile" 500$ 3RZ Auto 4Runner - ( Saved from the Scrapyard: Resurrecting a 500$ 3rd Gen
02 Tacoma Double Cab, mid-travel, locked, armored, supercharged and riced. (Longbed and 5 speed in the works)
Last edited by UnderFire; 12-04-2016 at 10:56 PM.
|
|
|
|
|
12-05-2016, 07:54 PM
|
#4
|
 |
Member
|
|
Join Date: Aug 2016
Location: AZ
Posts: 793
|
|
|
Member
Join Date: Aug 2016
Location: AZ
Posts: 793
|
I just use a couple of pry bars and slip them on. Breaking them might require a hi-lift jack on the deflated tire/rim edge under the bumper (if you're bumper is strong enough to use the hi-lift).
I don't balance as I have beadlocks......I throw 10 oz (measured out according to an online chart per tire size) of airsoft BBs in each tire to balance them out.
|
|
|
|
|
12-05-2016, 08:09 PM
|
#5
|
|
Member
|
|
Join Date: Jun 2016
Location: Portland
Posts: 56
|
|
|
Member
Join Date: Jun 2016
Location: Portland
Posts: 56
|
Spent 6 years working at Les Schwab in/around school
Looks like you have what you need. If you have problem seating the bead, a lot of dawn/water can help. You want it thick. like maybe 50/50. Keeping the core out helps too. Shops use a bead blaster to help, but with a wider tires it's not even necessary.
I wouldn't use stick on weights for steel rims. The closer you can get to the lip the better the balance. Also further from centerline (dual plane> single plane). Most A/S or A/T don't take much weight. M/T take a ton. Even if you do/don't line up the dots. Most the time the dot line up only makes a 1-2oz difference.
For valve stems:
Core removers should only be one size that I know of
You can remove old stems with a pair of diagonal cutters once the tires is off. Snip from back side
You can get bolt in ones.
Or you can get a puller and pull them both directions. With a puller you could skip the core, just yank the stem(but you'd better finish the job if you do it this way). I will say the air up faster(which helps with bead
|
|
|
|
|
12-06-2016, 04:08 AM
|
#6
|
|
Banned
|
|
Join Date: Oct 2014
Location: USA 97 4Runner 2WD manual 150K miles 2.7L 3RZFE
Posts: 309
|
|
|
Banned
Join Date: Oct 2014
Location: USA 97 4Runner 2WD manual 150K miles 2.7L 3RZFE
Posts: 309
|
Quote:
Originally Posted by Stiles97

Other than getting the tire machine mounted securely to the ground you seem to have a pretty good plan devised.
|
Thanks for that advice.
To secure the machine, I went to Harbor Freight today and picked up eight of these Harbor Freight item# 69896 fifteen-inch long earth augers.

One idea is to either use four of them as the "bolts" by lopping off the loop and tapping the cut post to 3/8"x16TPI, or to use 8 of them intact, two each across each of the four arms of the tire-changing machine with a pipe or wedge between the two loops.
That earth-auger idea has the advantage of being completely portable; but it's kind of hokey, I admit.
The better idea, of course, is to mount the tire changer the way it was designed to be mounted, so to that end, I picked up some more tools at Harbor Freight: - Four 3/8" (16TPI) by 3.5-inch long bolts
- Four 3/8" Red Head Drop-In Anchors (SKU 92097-50125)
- Eight 3/8" steel washers Everbilt (SKU 87480-02501)
- One 3/8" Red Head Drop-In Anchor Setting Tool (SKU 92097-07499)

Quote:
Originally Posted by Stiles97
The only advice I may offer is depending on the size of air tank and/or air hose you may run into an issue getting the new tires to seat the beads. They make some for lack of a better term ' inflatable ' straps that help squeeze the tire so that the beads are forced outward towards the rim. You can use a ratchet strap but be very careful when releasing it after the bead starts to seat. All you really need to do is get it started and then release the strap. You can break the strap or your fingers releasing it if there is to much tension on it. This may not even be necessary depending on the tire and more importantly how they are shipped. If they are cinched down bead to bead I would cut the straps and let the tire relax back to normal shape as much as possible before proceeding.
|
Thanks for that advice about the bead-sealing strap.
If it comes to that, I have seen ways to seat the bead by putting flammable liquid inside the tire and lighting it, and I have seen people who have used a compression strap, but most people just seem to "knee" the tire into place, so how I seat the bead will have to await what happens when I try!
Quote:
Originally Posted by Stiles97
What about dyna beads for final balancing?
|
I'm going to give the old-style static balancer a chance!

I don't like the idea of putting beads inside to compensate for my lack of ability to put the proper weights outside, so, I will first try to statically balance as best I can, and then worry about any secondary balancing later (since I can always take it to a shop to road force balance if the vehicle vibrates with the new tires).
Thanks Matt for your advice. I'll try to keep you informed of progress.
Right now, we're still waiting on two things: - Mounting the tire changer
- Receiving the tires
|
|
|
|
|
12-06-2016, 04:32 AM
|
#7
|
|
Banned
|
|
Join Date: Oct 2014
Location: USA 97 4Runner 2WD manual 150K miles 2.7L 3RZFE
Posts: 309
|
|
|
Banned
Join Date: Oct 2014
Location: USA 97 4Runner 2WD manual 150K miles 2.7L 3RZFE
Posts: 309
|
Quote:
Originally Posted by UnderFire
Factory wheels with factory sized tires seat up extremely easily, probably will just have to put air to them.
|
That's what I'm hoping will be the case!
These are the stock 15-inch steel wheels, so, I'm not worried about damaging them.
Quote:
Originally Posted by UnderFire
The one hard part is breaking the beads, the steel wheels aren't terrible, but the factory alloys from 90s Toyotas are among the most stubborn. Especially the split 3 alloys, super deep drop center.
|
The Harbor Freight tire-changing tool comes with a puny bead breaker.
I thought of buying their much larger bead breaker, but, instead, I bought today a breaker bar and a few extra tire irons just in case they are needed.

Quote:
Originally Posted by UnderFire
Mounting and dismounting is relatively easy, just go with plain pop in rubber stems or screw down metal, not any fancy kind, the fancier they are the crappier they are to work with usually.
|
This is good advice because I was about to get the "fancy" multi-diameter screw-in type, but I figured they were too short.

Since I opted, as you suggested, for the all-rubber valve stems, my main choices were what diameter and what length.
For example, they had two different diameters: - 0.453 inch rim holes
- 0.625 inch rim holes

And, multiple lengths: - 1 inch long
- 1-1/2 inches long
- 2-inch long
- 2-1/2 inches long

Quote:
Originally Posted by UnderFire
The dots are hit and miss, you can line it up and it could be awesome or terrible, I wouldn't count on em for much.
|
I was afraid of that.
As you noted, the match-mounting dots might not even be there, and, even if they are, the wheel could have changed in balance since it was born at the factory. Plus, the tires were changed so many times in the past that any dots might have been worn off by the brutal machines they use in the shops.
So I will just have to wait until I remove the tires from the wheels to see if the wheels actually have any match-mounting marks.
Quote:
Originally Posted by UnderFire
I'd rather have the more expensive shovel style bead breaker and a set of tire bars than the tire changer and a breaker bar.
|
That's an interesting observation, because, in general, most all-in-one tools don't do any job well, so I get your point that the standalone bead breaker might be more useful.
The HF tire changer I have is sort of a "leatherman" in that it has attachments for breaking the bead and a separately sold attachment for motorcycle tires, so it does three things: - Breaks the bead (but the attachment looks wimpy)
- Holds and mounts/unmounts a passenger tire
- Holds and mounts/unmounts a motorcycle tire
I'm not sure what the "shovel-style" bead breaker tool you're talking about looks like, but I did pick up one of these black 30-inch long bead breakers today from Harbor Freight; is that what you're talking about?
I had considered buying the $50 standalone Pittsburgh item# 92961bead breaker from Harbor Freight, but I figured I'd try to break the bead with the tool that came with the tire changer first. Worst case, I can run over the bead with another vehicle to break it! 
But I do get your point that I'm probably better off had I invested in a single-purpose bead breaker and a few very long tire irons!
Last edited by foo; 12-06-2016 at 12:42 PM.
|
|
|
|
|
12-06-2016, 04:48 AM
|
#8
|
|
Senior Member
|
|
Join Date: Dec 2012
Location: Dayton, OR
Posts: 3,042
|
|
|
Senior Member
Join Date: Dec 2012
Location: Dayton, OR
Posts: 3,042
|
Quote:
Originally Posted by foo
That's what I'm hoping will be the case!
These are the stock 15-inch steel wheels, so, I'm not worried about damaging them.
The Harbor Freight tire-changing tool comes with a puny bead breaker.
I thought of buying their much larger bead breaker, but, instead, I bought today a breaker bar and a few extra tire irons just in case they are needed.
This is good advice because I was about to get the "fancy" multi-diameter screw-in type, but I figured they were too short.
Since I opted, as you suggested, for the all-rubber valve stems, my main choices were what diameter and what length.
For example, they had two different diameters: - 0.453 inch rim holes
- 0.625 inch rim holes
And, multiple lengths: - 1-1/2 inches long
- 2-inch long
- 2-1/2 inches long
I was afraid of that.
As you noted, the match-mounting dots might not even be there, and, even if they are, the wheel could have changed in balance since it was born at the factory. Plus, the tires were changed so many times in the past that any dots might have been worn off by the brutal machines they use in the shops.
So I will just have to wait until I remove the tires from the wheels to see if the wheels actually have any match-mounting marks.
That's an interesting observation, because, in general, most all-in-one tools don't do any job well, so I get your point that the standalone bead breaker might be more useful.
The HF tire changer I have is sort of a "leatherman" in that it has attachments for breaking the bead and a separately sold attachment for motorcycle tires, so it does three things: - Breaks the bead (but the attachment looks wimpy)
- Holds and mounts/unmounts a passenger tire
- Holds and mounts/unmounts a motorcycle tire
I'm not sure what the "shovel-style" bead breaker tool you're talking about looks like, but I did pick up one of these black 4-foot long bead breakers today from Harbor Freight; is that what you're talking about?
I had considered buying the $50 standalone Pittsburgh item# 92961bead breaker from Harbor Freight, but I figured I'd try to break the bead with the tool that came with the tire changer first. Worst case, I can run over the bead with another vehicle to break it!
But I do get your point that I'm probably better off had I invested in a single-purpose bead breaker and a few very long tire irons! |
That's the breaker I was talking about, the extra 30$ in expense would be well worth it in my opinion. Passenger wheels have by far the most well seated beads, the bars and hammers are mostly used for truck tires and 16.5s with no safety bead. That extra push from the shovel is what you need to get past that back bead.
You'll want the shorter rubber stems in the smaller diamater. The large diameter ones are only used on some farm stuff and old full size trucks. And the longer ones are for adding length to stick out past plastic hubcaps.
Once you've got it broken down and pair of tire irons and a film or soapy water should get the tires off and on easily, seating should be no issue with stock sized tires or the factory 15s, should pop on with just air and a little wiggling, if not wrap a ratchet strap around the tire and it should go, shouldn't have to blast em at all unless they really squish the tires together to ship em.
Harbor freight is usually really good about returns so if you find you bought something and didn't need it or it didn't work exchanging it shouldnt be an issue.
Sent from my Z958 using Tapatalk
__________________
'97 3RZ 5 Speed "FrankenRunner" ( Build Thread) - Dormant
The "shitmobile" 500$ 3RZ Auto 4Runner - ( Saved from the Scrapyard: Resurrecting a 500$ 3rd Gen
02 Tacoma Double Cab, mid-travel, locked, armored, supercharged and riced. (Longbed and 5 speed in the works)
|
|
|
|
|
12-06-2016, 04:49 AM
|
#9
|
|
Banned
|
|
Join Date: Oct 2014
Location: USA 97 4Runner 2WD manual 150K miles 2.7L 3RZFE
Posts: 309
|
|
|
Banned
Join Date: Oct 2014
Location: USA 97 4Runner 2WD manual 150K miles 2.7L 3RZFE
Posts: 309
|
Quote:
Originally Posted by TinBucket
Spent 6 years working at Les Schwab in/around school
Looks like you have what you need. If you have problem seating the bead, a lot of dawn/water can help. You want it thick. like maybe 50/50. Keeping the core out helps too. Shops use a bead blaster to help, but with a wider tires it's not even necessary.
|
Thanks for that advice.
Right now I'm concentrating on how best to mount the tire changer tool.
To that end, I bought this Harbor Freight, item# 62383 Chicago Electric 1/2" Variable Speed Reversible Hammer Drill and Harbor Freight item# 62791 and six-piece eight-inch long set of SDS masonry bits (which includes the 1/2" diameter bit that I'll need to sink a 3/8" female thread into the concrete).

I'm assuming these anchor bolts will hold the thing down if I decide to drill into my concrete garage.

Quote:
Originally Posted by TinBucket
I wouldn't use stick on weights for steel rims. The closer you can get to the lip the better the balance. Also further from centerline (dual plane> single plane). Most A/S or A/T don't take much weight. M/T take a ton.
|
That's interesting that you wouldn't use the stick-on weights.
Too bad I just read that, because I already bought them.
But what you said makes sense.
So I think I'll go back, either to HF or to an automotive store to see if I can find a set of crimp-on weights.
Quote:
Originally Posted by TinBucket
Even if you do/don't line up the dots. Most the time the dot line up only makes a 1-2oz difference.
|
I understand, which is why we almost never see the tire mounting shops line up the dots. They're lazy in that they know the road-force balancer will even out whatever. They often don't even remove the old weights. To them it doesn't matter how much they have to put on.
But the goal is as little weight as possible, and, for that, we should match mount (if we can).
Quote:
Originally Posted by TinBucket
For valve stems:
Core removers should only be one size that I know of
|
The core remover isn't what I was worried about.
The diameter of the hole in the wheel is what I'm worried about.
I don't know what that diameter is, so I bought two different diameters, both of which were two-inches long:

The question becomes simply one of what is the best diameter and length to use, which is probably only going to be figured out from actual experience.
Quote:
Originally Posted by TinBucket
You can remove old stems with a pair of diagonal cutters once the tires is off. Snip from back side
|
This is good to know as I have never removed valve stems before.
Quote:
Originally Posted by TinBucket
You can get bolt in ones.
|
I saw these bolt-in ones but I figured they were too short:
Quote:
Originally Posted by TinBucket
Or you can get a puller and pull them both directions. With a puller you could skip the core, just yank the stem(but you'd better finish the job if you do it this way). I will say the air up faster(which helps with bead
|
I'm not sure what you mean by I could skip the core because my plan is to remove the core until the bead is seated, and then screw the core in without losing the seating on the bead.
I hadn't realized there is a special "puller" for installing the rubber valve cores.
Can I get away with just a regular pair of pliers?
Or should I pick up a special core-puller tool from either HF or an automotive store?
Last edited by foo; 12-06-2016 at 01:06 PM.
Reason: Photo of the wrong tool was removed (see later portion of the thread)
|
|
|
|
|
12-06-2016, 05:00 AM
|
#10
|
|
Senior Member
|
|
Join Date: Dec 2012
Location: Dayton, OR
Posts: 3,042
|
|
|
Senior Member
Join Date: Dec 2012
Location: Dayton, OR
Posts: 3,042
|
No need for the puller, a pair of pliers and a small bit of lube on the stem and it'll pop in with no effort.
__________________
'97 3RZ 5 Speed "FrankenRunner" ( Build Thread) - Dormant
The "shitmobile" 500$ 3RZ Auto 4Runner - ( Saved from the Scrapyard: Resurrecting a 500$ 3rd Gen
02 Tacoma Double Cab, mid-travel, locked, armored, supercharged and riced. (Longbed and 5 speed in the works)
|
|
|
|
|
12-06-2016, 05:05 AM
|
#11
|
|
Banned
|
|
Join Date: Oct 2014
Location: USA 97 4Runner 2WD manual 150K miles 2.7L 3RZFE
Posts: 309
|
|
|
Banned
Join Date: Oct 2014
Location: USA 97 4Runner 2WD manual 150K miles 2.7L 3RZFE
Posts: 309
|
Quote:
Originally Posted by UnderFire
That's the breaker I was talking about, the extra 30$ in expense would be well worth it in my opinion.
|
I very much appreciate your advice on bead breaking because I expect that to be a difficult task given how puny the bead breaker attachment is on the HF tire mounting tool.
However, neither bead breaker at HF was $30 so I'm not sure which one you're talking about above.
The fancy bead breaker at HF was the $50 Pittsburgh item# 92961, which seemed to be a heavier-duty version of the attachment that is currently on the HF tire changer.
The bead breaker bar that I bought was the 30-inch long $19 Harbor Freight item# 67403, called a Tire Bead Breaker with Swan Neck. I think that's what you're calling a "shovel" (which HF seems to call a "swan neck").
|
|
|
|
|
12-06-2016, 05:09 AM
|
#12
|
|
Banned
|
|
Join Date: Oct 2014
Location: USA 97 4Runner 2WD manual 150K miles 2.7L 3RZFE
Posts: 309
|
|
|
Banned
Join Date: Oct 2014
Location: USA 97 4Runner 2WD manual 150K miles 2.7L 3RZFE
Posts: 309
|
Quote:
Originally Posted by UnderFire
No need for the puller, a pair of pliers and a small bit of lube on the stem and it'll pop in with no effort.
|
Thanks for that advice, as I hadn't even thought of how to "pull" the valve stem through until you had mentioned that.
I never mind buying tools that are going to get used a lot, but it seems wasteful to buy tools that are only going to get used rarely, and especially if another tool that I already have can do the job.
I probably need to go back to O'Reillys and get the shorter valve stem though, because I got four each of the two different diameters, but all eight are 2-inches long.
I guess there isn't anything bad about longer stems, other than they may catch on curbs.
|
|
|
|
|
12-06-2016, 08:38 AM
|
#13
|
|
Member
|
|
Join Date: Jun 2014
Location: Denver, CO
Posts: 169
Real Name: matt
|
|
|
Member
Join Date: Jun 2014
Location: Denver, CO
Posts: 169
Real Name: matt
|
The "valve" tools shown in the red plastic case sure look like valve seal tools for removing and installing intake and exhaust valve seals. Not sure how they relate to this job...
__________________
1997 t4r sr5
lots of 2 wheeled toys
|
|
|
|
|
12-06-2016, 01:00 PM
|
#14
|
|
Banned
|
|
Join Date: Oct 2014
Location: USA 97 4Runner 2WD manual 150K miles 2.7L 3RZFE
Posts: 309
|
|
|
Banned
Join Date: Oct 2014
Location: USA 97 4Runner 2WD manual 150K miles 2.7L 3RZFE
Posts: 309
|
Quote:
Originally Posted by Stiles97
The "valve" tools shown in the red plastic case sure look like valve seal tools for removing and installing intake and exhaust valve seals. Not sure how they relate to this job...
|
Oooooops. My bad. I googled for a "tire valve stem pliers" but I didn't know enough about them to recognize what you did.
Since I try to make all thread reference threads so that others can follow in our footsteps with fewer unknown issues than we had, I'll remove that picture and update the thread with what valve stem removal tools work, from googling on the net.
While this redneck valve-stem removal process (using a threaded nut and needlenose pliers) method exists, this " How to change a tire at home" article says that we should use the cross-bar-style threaded valve-stem removal tool to screw onto the new valve stem to pull it through. My valve-stem removal tool is the screwdriver type, so I'll pick up that cross-bar-style tool at the parts store.
In a pinch, I think I can use needle-nose pliers or even my clamp-on air chuck, to get a grip on the valve stem threads, but I can see now that the cross-type threaded valve removal tool is a good option since it grabs onto the brass threads without pinching the soft brass.
BTW, in googling, I found that there are two types of valve stems: - Low pressure (below 65psi)
- High pressure (above 65psi)
But for our purposes, the low pressure ones will do fine.
Apparently there are mandatory identifying markings on the inside of the valve stem, which, for the ones I bought, were: - TR425E (060)(A) on the 2-inch long 0.625" rim-hole diameter O'Reilly's PN 15-4252 (XtraSeal 31inc.com) valve stems
- TR 418 (060)(A) & TR418 (048)(A) on the 1.6 ounce 2-inch long 0.453" rim-hole diameter O'Reilly's PN 15-418 (XtraSeal 31inc.com) valve stems
Both are apparently 1.6 ounces (from googling the specs) and designed for a maximum rim thickness of 0.156" and googling for what diameter nut and pitch threads to use for the redneck puller method, I find the Wikipedia on Schrader valves says these are the standard "TR" sizes: - TR-4, straight metal stem (8 mm dia.)
- TR-6, straight metal stem (8 mm dia.)
- TR-13, straight rubber stem (11.5 mm dia.)
- TR-15, straight rubber stem (16 mm dia.)
- TR-87, short 90° metal stem (10 mm dia.)
- TR-87C, tall 90° metal stem (10 mm dia.)
- TR 413, 0.453 in (11.5 mm) rim hole diam. 1.25 in (32 mm) long
- TR 415, 0.625 in (15.9 mm) rim hole diam. 1.25 in (32 mm) long
- TR 418, 0.453 in (11.5 mm) rim hole diam. 2 in (51 mm) long
- TR 425, 0.625 in (15.9 mm) rim hole diam. 2 in (51 mm) long
That Wikipedia article says a standard Schrader valve has the following threads: - External threads:
- Metric: 7.7 mm OD, thread root diameter is 6.9 mm × 0.794 mm pitch
- Imperial: 0.305 in OD, thread root diameter 0.271 in × 32 tpi (threads per inch; thread density)
- Internal threads (to accept the threaded valve core):
- Metric: 5.30 mm OD × 0.706 mm pitch
- Imperial: 0.209 in OD × 36 tpi
Given that the range between 0.271" and 0.305" is an odd size for a standard nut, I wonder if one can be found for my toolkit?
One tidbit in that home-made tire-changing article is that the rim is often not symmetric such that the deepest part of the wheel is often NOT in the center, so that deepest valley of the rim must be mounted UP when removing (or reseating) the upper bead lip from the top of the wheel so that the underside bead lip of the tire can be IN that depression.
Another tidbit in that article was that there are three types of wheel weights: - Hammer-on wheel weights for steel wheels (thinner clamp)
- Hammer-on wheel weights for alloy wheels (thicker clamp)
- Stick on wheel weights (glue on the backside)
One "issue" I have with hammer-on weights is that I see them by the side of the road all the time, but I don't recall ever seeing the stick-on weights. It's not proof, but what it kind of implies is that the hammer-on weights are unreliable.
The other issue the article stated when static balancing the hammer-on weights is that they should be split in half with each half placed on opposite sides of the rim (inside and outside), which, according to that article, is to ensure better dynamic balance (whereas stick-on weights are generally placed near the center, which already reduces dynamic balance issues).
Anyway, the tires have not yet arrived so today my plan is to: - Securely mount the tire-changnig tool
- Pick up a screw-on cross-type Schrader valve tool
- Maybe get shorter 0.453" diameter valve stems
In looking for a washer and nut for the redneck method of pulling the new valve stem through the rim hole, the odd size of the Schrader valve threads is described a bit over here where it says:
Quote:
|
The external thread size of a Schrader valve is 0.305 inches outer diameter by 32 threads per inch (TPI), and it has a thread root diameter of 0.302 inches outer diameter. The valve also has an internal thread of 0.209 inches outer diameter by 36 TPI. If no taps and dies of 0.305 inches are available, then 0.302 inch taps and dies are suitable replacements.
|
This forum shows that I'm not the first one to ask this question of how to figure out the best nut size (without ruining the soft brass threads) where they said:
Quote:
Thread designation is .305-32 or 7.7-32 with a mix of inches and millimeters!
Yesterday I called a local nut/bolt supplier to see if they can get a 5/16-32 UNEF screw. That might be close enough to fit.
The thread for the valve core for valves used in passenger cars is .206-36 which is a special valve thread.
|
The same quest was found in this forum:
Quote:
It is .305-32, which is not anyone's standard AFAIK.
19/64 = 0.2969" 7.5406mm
5/16 = 0.3125" 7.9375mm
so .305 32 is not a standard tap.
|
EDIT: I'm going to give up on the stupid idea of fitting a washer and a nut on the brass stem so that it can be pulled out with pliers since there will be no common nut that will fit so all I'll do is screw up the threads for no good reason. At least I know this now, but I didn't know this until I looked at it (and I hate when there are HOWTO articles that don't say what SIZE to use!). If anyone really wants to do this idea, a washer and a metal valve cap would probably work as a redneck method.
Last edited by foo; 12-07-2016 at 01:07 AM.
|
|
|
|
|
12-06-2016, 10:07 PM
|
#15
|
|
Banned
|
|
Join Date: Oct 2014
Location: USA 97 4Runner 2WD manual 150K miles 2.7L 3RZFE
Posts: 309
|
|
|
Banned
Join Date: Oct 2014
Location: USA 97 4Runner 2WD manual 150K miles 2.7L 3RZFE
Posts: 309
|
The research is always harder than the actual work!
For one thing, now that I know that the tutorial I read that had drawings was complete BS, I won't bother trying to find a nut to fit the Schrader valve stem so that a needlenose pliers can be used to pull the new valve stem through the wheel rim hole. (If I really wanted a nut to do the needlenose-pliers trick I can always buy a valve stem steel cap - but I don't see any reason to bother with that idea anymore.)
For another, I wasted my time and money purchasing that new impact drill since it was very easy to drill into the concrete. Each bolt hole took about a minute where I don't think the impact drill contributed anything that a regular drill wouldn't have done. Lesson learned. (Now I have an extra impact drill - I wonder if there is anything else it's good for when working on cars?)
Another lesson learned is that you want the hole at least 1-5/8ths deep but no deeper because if it's too shallow, you have to bang the fitting in too much, and if it's too deep, you need a longer bolt. Of the four holes, only two were perfect, one was too deep, and the other too shallow. They were my first ever, drilling into concrete, so, I guess that's how we learn. (In the photo below, the concrete is still wet because I used water for lubrication and cooling although I don't know if that's necessary or not but it seemed like a good idea at the time.)

Another mistake was that the 3-1/2 inch 3/8ths inch bolts (by 16 TPI) were far too long. Anyone doing this job really needs 2-3/4 inch long bolts (because 2-1/2 is too short and 3 inches is too long); but quarter sizes are hard to find (I went to two hardware stores today looking for them and they're even hard to find on the net, although they exist) so I just used 3-inch bolts which works ok with a thick washer.
Another mistake was not getting stainless steel bolts, or at least stronger bolts, because one of them snapped below ground level when I was tightening it up (do probably to the friction caused by the damage I accidentally did to the threads of the female anchor when pounding it in, as it was my first anchor ever).
Another omission was to not get stainless steel Allen-head caps to cap off the set anchors to keep water and debris out when the tool is removed.
Another omission was to not put the gray sacrificial never-seize on the bolts so that the metals in the never seize sacrifice themselves, instead of the metal on the bolt and anchor seizing together.
I was never thinking originally of permanently mounting this so I bought 3/8" stainless steel allen-head flush plugs; but after I mounted the thing in a far-off corner of the yard, I realized I'll probably just leave it there, so, in hindsight, I probably should have bought stainless steel bolts since once these soft steel bolts start to rust, they'll be difficult to remove without snapping them in half.
Anyway, even with the mistakes, the thing is securely mounted, so all I need now is to wait for the tires to arrive and to get a shorter 0.463" diameter pop-in valve.
Last edited by foo; 12-16-2016 at 11:12 AM.
|
|
|
|
 Posting Rules
|
You may not post new threads
You may not post replies
You may not post attachments
You may not edit your posts
HTML code is On
|
|
|
|


 Linear Mode


