Removal of the rear cargo area plastic interior pieces

alia176

Senior Member
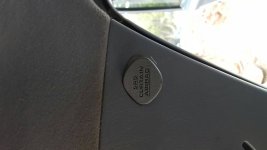
Has anyone removed the rear cargo area plastic interior pieces? I'm particularly interested in figuring it how to to remove the upper piece that has the air bag symbol on it. I was able to remove the lower piece but wanted to be sure of what I was doing before I break important tabs and such. Plus, the air bag deal makes me extra cautious. If there's a link with pics, let me know.

Thanks.
 
Register to hide this ad
Has anyone removed the rear cargo area plastic interior pieces? I'm particularly interested in figuring it how to to remove the upper piece that has the air bag symbol on it. I was able to remove the lower piece but wanted to be sure of what I was doing before I break important tabs and such. Plus, the air bag deal makes me extra cautious. If there's a link with pics, let me know.

Thanks.

Not 100% sure on removing them but don't worry about the airbag labels. The airbags are curtains and deploy from the crack between the headliner and the side pillars, they're not just clustered behind that one little "airbag" logo.
 
Not 100% sure on removing them but don't worry about the airbag labels. The airbags are curtains and deploy from the crack between the headliner and the side pillars, they're not just clustered behind that one little "airbag" logo.
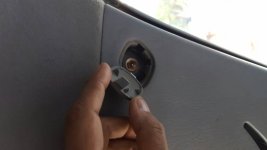
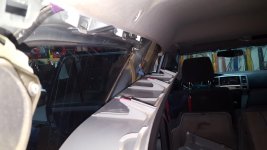
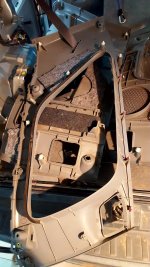
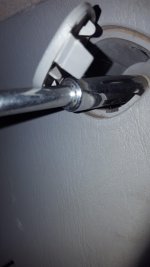
Thanks, I figured it out. That logo has a 10mm bolt behind it and then the top panel can be removed.

20170305_164324.jpg20170305_164327.jpg20170305_170553.jpg

Sent from my SM-G920V using Tapatalk
 

Attachments

  • 20170305_164324.jpg
    20170305_164324.jpg
    39.9 KB · Views: 5,741
  • 20170305_164327.jpg
    20170305_164327.jpg
    27.7 KB · Views: 5,683
  • 20170305_170553.jpg
    20170305_170553.jpg
    81.3 KB · Views: 7,954
Is all you have to do is remove that bolt and pull?


Sent from my iPhone using Tapatalk

That's basically how it works on the A-Pillar, except there are two bolts (one on each end of the grab handle) so I assume its the same on the back
 
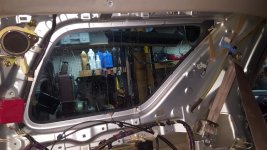
Some more pics so that everyone can see where all the snap pieces and bolts are for the top trim panel. I must admit, I didn't see any SRS air bag deal behind the log or anywhere in the vicinity :ohwell:

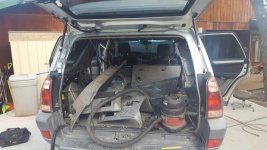
My main reason for doing all this work was to drop the headliner enough so that I can wire in couple of wires to the cargo dome light. I found two dead mice babies and poop up there. So while all the trim pieces were off, lots of cleaning and vacuuming ensued as you can imagine.

The top part of the panel simply slides into the rectangular holes located in the body. The bottom part is where the snaps and bolts are.

20170307_055201.jpg

20170307_055233.jpg

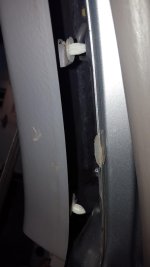
You see how one of the white snaps is missing? Look toward the front of the vehicle and you'll see it. It's still attached to the body so be sure to check for the presence of all the plastic snaps before reassembling the interior panels. They're easy to remove from the body and reattach to the trim piece before the reinstall.

20170307_055109.jpg

Be sure to reattach the white snaps back onto the trim panel. This is where the driver rear passenger seat belt resides.

20170307_055324.jpg

The bolt behind the SRS air bag logo piece.

20170307_055500.jpg
 

Attachments

  • 20170307_055201.jpg
    20170307_055201.jpg
    141 KB · Views: 6,603
  • 20170307_055233.jpg
    20170307_055233.jpg
    123.6 KB · Views: 6,129
  • 20170307_055109.jpg
    20170307_055109.jpg
    143.5 KB · Views: 5,850
  • 20170307_055324.jpg
    20170307_055324.jpg
    136.5 KB · Views: 5,609
  • 20170307_055500.jpg
    20170307_055500.jpg
    131.5 KB · Views: 5,550
Last edited:
Just out of curiosity, why are you removing the interior?

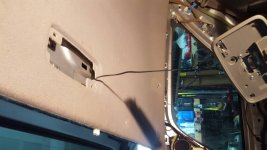
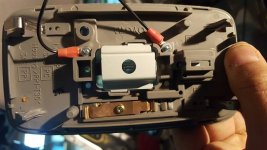
I'm installing additional led light strip on the tailgate for camping purposes and needed to access the dome light.

Edit: not sure why pics are posting sideways from my phone!

20170307_052833.jpg

20170307_052858.jpg

Sent from my SM-G920V using Tapatalk
 

Attachments

  • 20170307_052833.jpg
    20170307_052833.jpg
    53.4 KB · Views: 5,486
  • 20170307_052858.jpg
    20170307_052858.jpg
    66.2 KB · Views: 5,501
Last edited:
Keep us posted, I'd like to see how the light turns out...

Will do. If it's anything like my underhood light, it's gonna be GREAT!!! I love the bright warm white underhood LED strip, it really lights up the engine bay very nicely while not being harsh on the eyes.
 
Sorry to necromance this thread, but what is that red box? Is that the door control receiver? I noticed it says ABS on it- does it have anything to do with the Anti-lock brake system or does that stand for something else? I can't imagine an ABS module would be paired into the Door controller receiver.
 
I’m still looking through both this forum and YouTube but I haven’t been able to find it yet.
Does anyone have pictures or a link to the removal of all of the rear panels? Is there more to the bottom panels?

I’m working on putting sound deadening material throughout the interior. So far I have the back hatch and all 4 doors done, cargo area is next.

I may stop there, I might do the roof if I get ambitious. I already know I’m not ambitious enough to do the floor...
 
Last edited:
I’m still looking through both this forum and YouTube but I haven’t been able to find it yet.
Does anyone have pictures or a link to the removal of all of the rear panels? Is there more to the bottom panels?

I’m working on putting sound deadening material throughout the interior. So far I have the back hatch and all 4 doors done, cargo area is next.

I may stop there, I might do the roof if I get ambitious. I already know I’m not ambitious enough to do the floor...
Not sure if this is what you're looking for, but it covers the lower panels in the cargo area:

How to Remove the Navigation ECU from a 2003 Toyota 4Runner

Crutchfield also has instructions for installing a subwoofer; you might be able to find them online.
 

Members online

No members online now.

Forum statistics

Threads
278,316
Messages
3,554,114
Members
248,016
Latest member
Advally Service

Trending content

Back
Top