I found "The One", 2001 Sport Ed. TRD SC'd

Looking forward to the fuel pump writeup. I'm sure you'll get it done before I get mine done, so it'll be nice to read how the process went. My pump is fine (it's actually an upgraded Walbro pump...the PO had a supercharger installed). However, my fuel gauge doesn't work at all, and my tank has a dent in it. So I'm planning on dropping the tank, trying to push the dent out, and then also replacing whatever fuel level sender equipment is in there.
 
Great job on the license plate trim, turned out very nice!


I too am looking forward to your fuel pump write-up. Just hope you beat me to it, I hate having to wing it, haha.
 
Isn't it beautiful. I love boost. It's only a 2 PSI increase, but they say every PSI equals 10 horsepower, so I can't wait to step on it.

860576b1.jpg~original


That's it for now. Fuel Pump and URD AIC/FTC install coming soon. There's not a lot of info out there on installing a fuel pump on a 3rd gen, so that may be my next write-up. After all that comes the tuning process.

Stay "tuned"....

Love your 4Runner, and your write ups! How easy did your pulley nut come off?

The fuel pump is pretty easy to install, the directions that come with the 7th injector kit cover the install really well. I do have one tip for you, the directions say to only lower the tank enough to get the pump out. I found it was a lot easier to remove the tank all the way (just make sure it's as close to empty as possible), it's only two more hoses to remove and it gives you a whole lot more room to work on it. You can also clean it up a lot better before you pull the pump and don't risk dropping dirt inside the tank.

I will be interested to see how loud your fuel pump is when it gets hot. When I first start mine it's like stock, but after I have driven it for a couple hours it is extremely loud (no matter the fuel level). I called Gadget and he said this was normal, but I would still like to compare it to another one. I took a couple second video, maybe after you get yours installed (and your out on the trail, or something) you could do the same and we could compare.
 
Nice work man! Always a quality job man! :cheers:

Gracias, hermano!

Looking forward to the fuel pump writeup. I'm sure you'll get it done before I get mine done, so it'll be nice to read how the process went.

Great job on the license plate trim, turned out very nice! I too am looking forward to your fuel pump write-up. Just hope you beat me to it, I hate having to wing it, haha.

I'm hoping I beat you too it too. Not for the sake of beating you to it, but because I just need to get it done already. Letting performance parts sit in your garage for almost a year should be a crime.

I'm thinking Thursday the 18th, or Monday the 22nd the fuel pump will be going in. Then I just have to write it up. Hopefully I'll get it done before you guys start so you have some insight on it.

In the meantime, I found some good links you guys might want to check out:

The best pics I have found online:

removing the fuel pump - YotaTech Forums

And another decent thread to check out:

190 LPH Fuel Pump Install Questions? - YotaTech Forums

Love your 4Runner, and your write ups! How easy did your pulley nut come off?

The fuel pump is pretty easy to install, the directions that come with the 7th injector kit cover the install really well. I do have one tip for you, the directions say to only lower the tank enough to get the pump out. I found it was a lot easier to remove the tank all the way.

I will be interested to see how loud your fuel pump is when it gets hot. When I first start mine it's like stock, but after I have driven it for a couple hours it is extremely loud (no matter the fuel level). I called Gadget and he said this was normal, but I would still like to compare it to another one. I took a couple second video, maybe after you get yours installed (and your out on the trail, or something) you could do the same and we could compare.

The pulley nut was a little tough. I used a Strap Wrench to get it off. I used a basic model w/a rubber strap and doubled the strap over twice on the pulley for a better grip. I set a metal bar across the engine bay from front to back, then spun the pulley until the handle of the strap wrench hit the bar (kinda like bracing a breaker bar on the frame to spin off a crank pulley via a starter bump)...Then I took a breaker bar and an 18mm socket, and torqued on it and it came right off.

After I started it, I was getting A LOT of belt squeal from the new pulley. I let it idle for about 10 minutes with a couple extended trips to 3000 rpm's, stepping down to 2000, then 1000, then back to idle. After that the belt cut-in to the pulley and the squeal went away. I also repainted the silver line you see on the pulley nut across the input shaft so I can keep a close eye on whether or not the pulley nut is holding it's torque.

Thanks for the tips on the fuel pump. I can use all the help I can get. I'm curious as to the noise that it will put out as well. Some say they're noisy as hell, some say noise levels are close to stock. I'll definitely get some documentation so you can compare yours to mine.

Finally... I thought I'd post that I went on a little shopping binge today. I can't tune the URD AIC/FTC with my psychic powers, so I had to go out and buy a laptop. It's a Gateway NV Series, and I paid $530 out the door @ Best Buy. I also set up a wireless router so I can use the new laptop in the garage :keyboard:

fb534362.jpg~original


35638e2c.jpg~original


The specs on the Laptop:

Weight: 5.7 lbs
Processor: Intel® Core™ i5
Processor Speed: 2.3GHz (with Turbo Boost up to 2.9GHz)
Battery Type: 6-cell lithium-ion (4-6 hour life)
Display Type: High-definition widescreen LED-backlit LCD with Ultrabright technology (1366 x 768)
Screen Size (Measured Diagonally): 15.6"
System Memory (RAM): 4GB
Computer Hard Drive Size: 500GB
Optical Drive: Double-layer DVD±RW/CD-RW
Networking: Built-in 10/100/1000 Gigabit Ethernet LAN (RJ-45 connector)
Wireless Networking: Wireless-B+G+N
USB 2.0 Ports: 3
Operating System: Windows 7 Home Premium

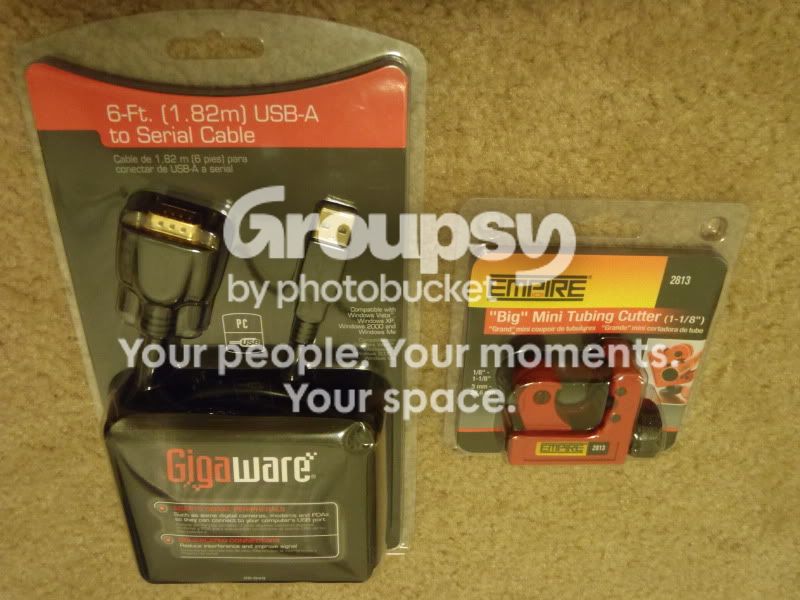
I also picked up a Serial to USB cable to hook up & test the URD FTC/AIC & a small pipe cutter to hack down the hard line when installing the fuel pump.

3e50b749.jpg~original
 
Last edited:
URD AIC & FTC Installed!

I got a little time, mixed with a little motivation, so I decided to yank the TRD 7th Injector electronics and install the URD electronics.

It's an intimidating install, mainly due to the fact that you have to cut up your factory ECU wiring and tap/splice several wires to install the URD kit. After having owned both setups, I would say that the biggest benefit of the TRD 7th Injector is the comfort factor. It is all plug and play, and while it is adds a TON of wiring behind the glove box, it is easy to install/reverse. The URD kit, not so much.

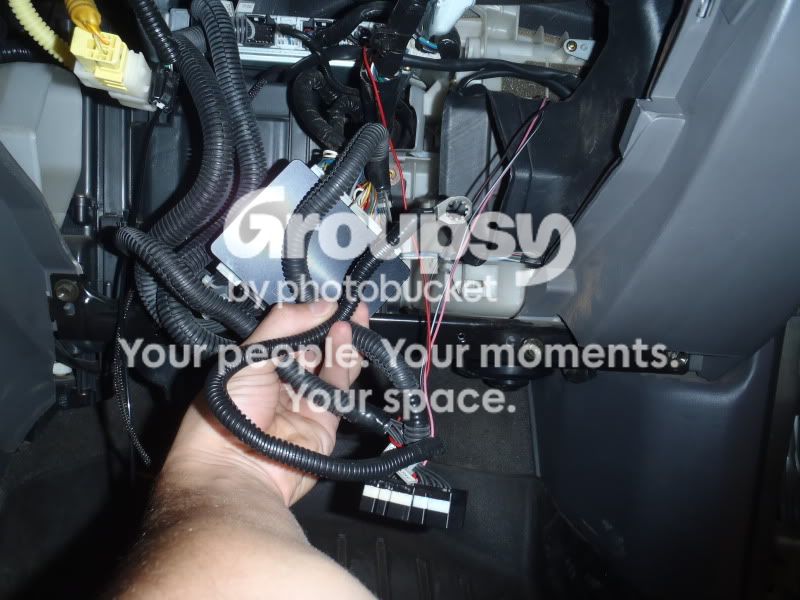
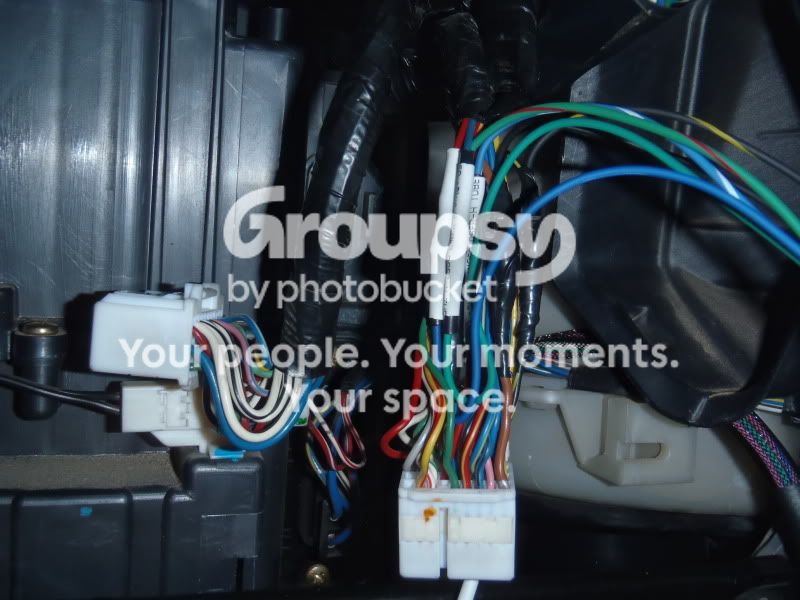
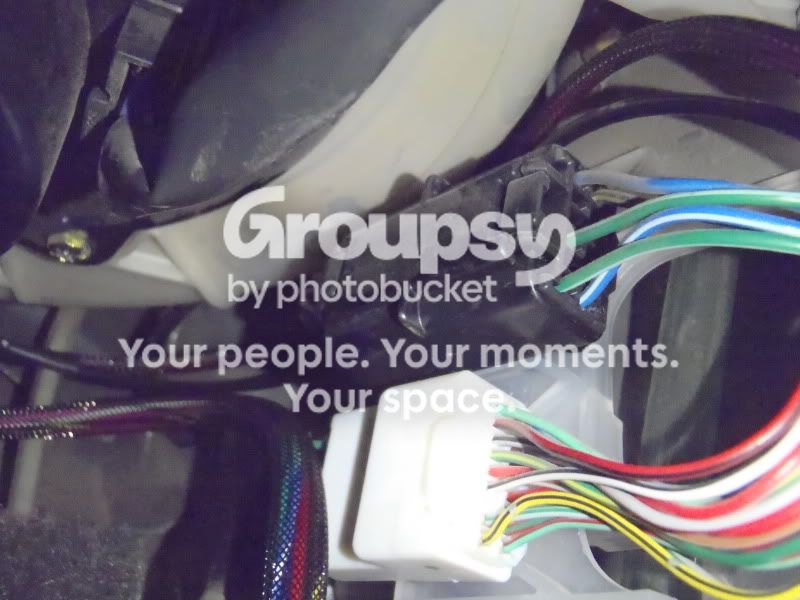
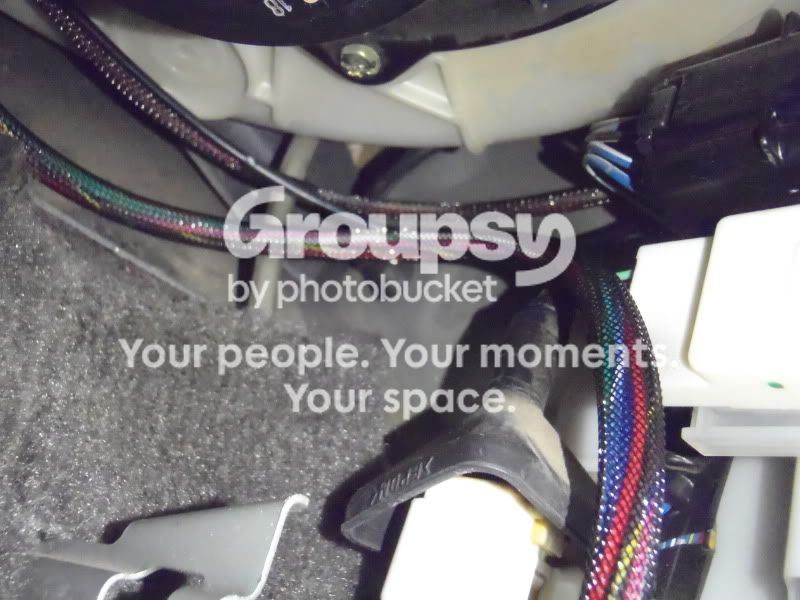
To start, a picture of the TRD 7th wiring. In this picture I have already removed the 2nd box, and visible are the plugs on the lower RH side of the pic...

65409617.jpg~original


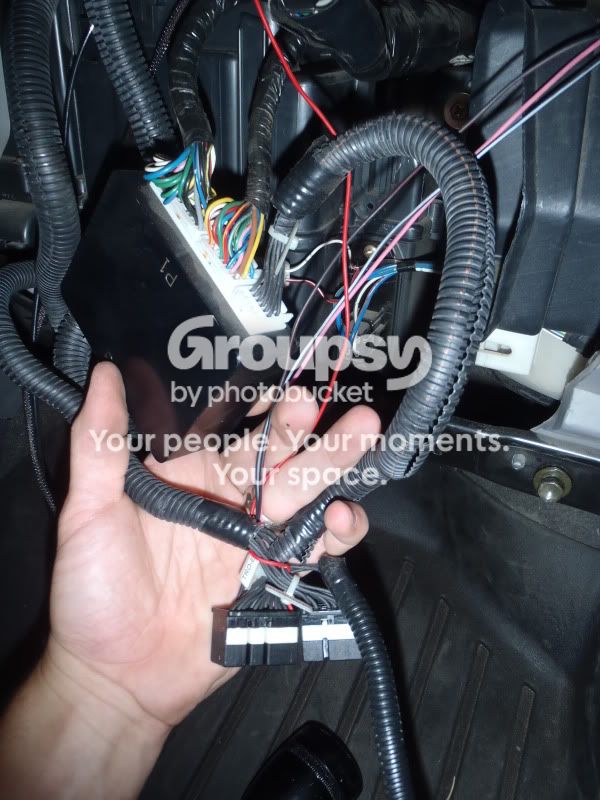
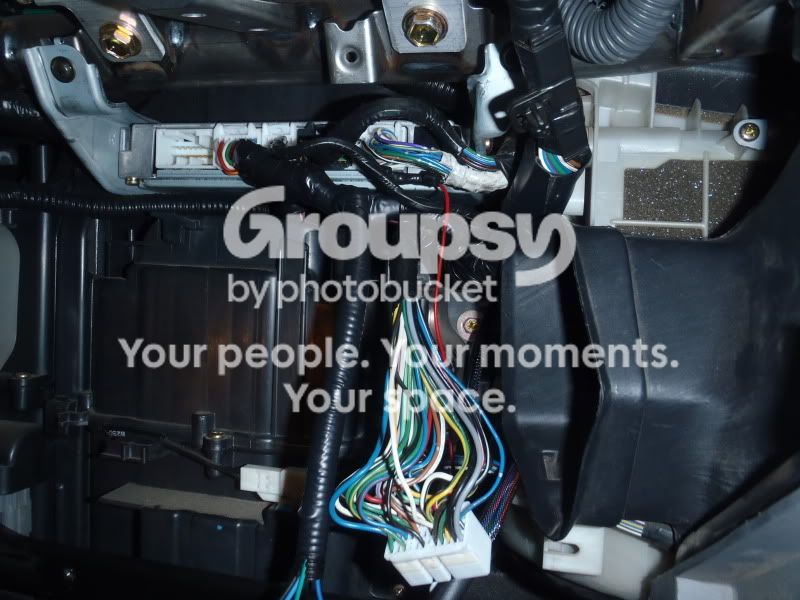
I took one more shot to show the interface between the factory ECU and the TRD 7th ECU, along with the wiring that feeds the TRD 7th Injector itself...

533d05c6.jpg~original


After a bit of unplugging and cutting the injector wiring, you start installing the URD kit. It includes instructions that are specific to each model year, because the ECU wiring changes from year to year.

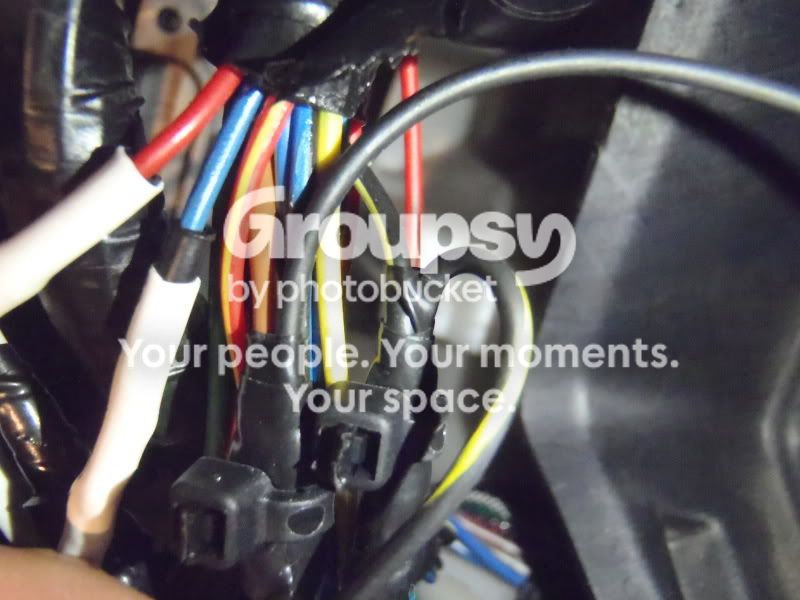
First, you splice in the ECU power and E1 lines... if you come from old school Toyotas, you should be familiar with the E1/T1 ECU interface, which gives you ECU trouble codes on older Yota's.

9ae82e77.jpg~original


Next up, you splice/tap in the Ignition, Crankshaft Position Sensor, and Camshaft Position Sensor wiring. Most of the wiring for the URD kit occurs on the "B" ECU plug.

7b69d29f.jpg~original


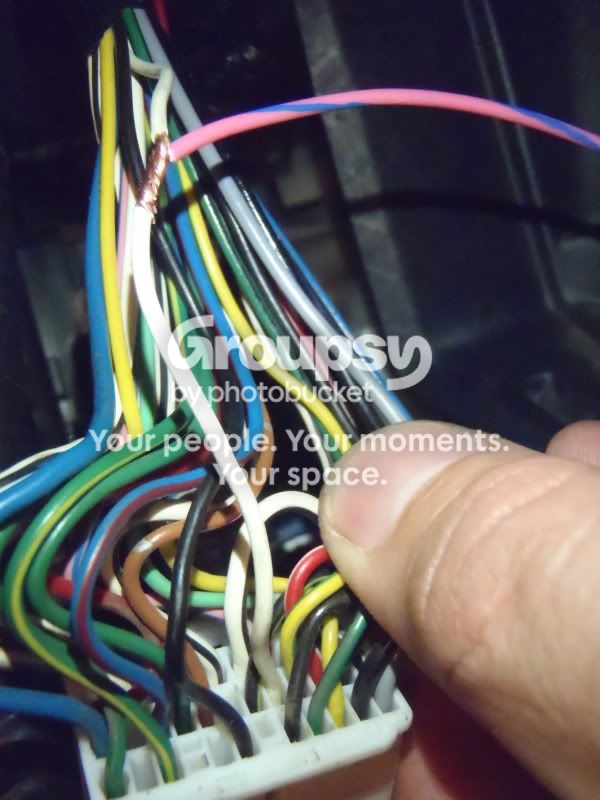
It's somewhat nerve racking to hack into your factory ECU wiring. Eventually you end up at the last connection which occurs on the "A" ECU plug. See that white wire that is pulled out from the bundle, that is about to get cut...

707e6614.jpg~original


And tapped like so...

f3a4ce6b.jpg~original


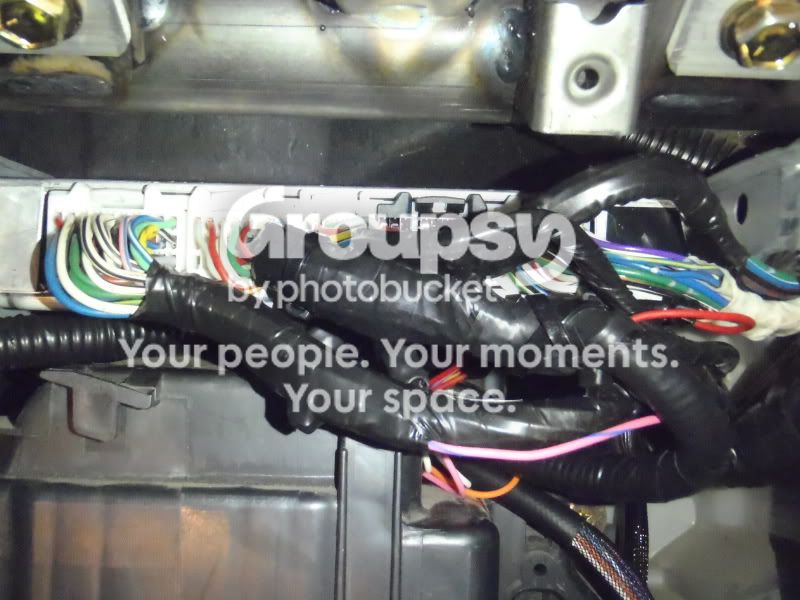
A little bit of solder later, and all the plugs are re-installed into the ECU...IMHO, the URD install looks much cleaner than the TRD electronics finished product....

424ac633.jpg~original


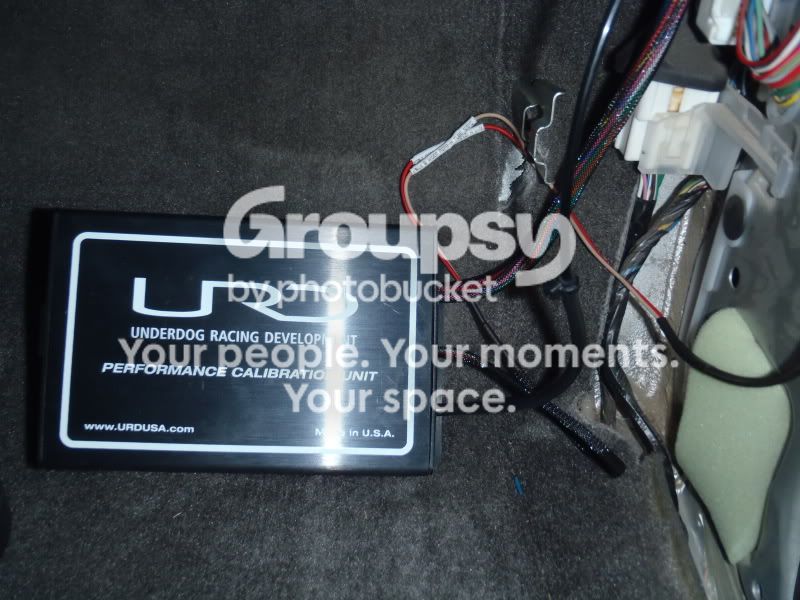
These pictures show my choice for routing the URD Computer wiring, Injector wiring, & Vacuum/Boost line... if you don't follow, don't worry... you WILL if you ever install this system.

a69407e2.jpg~original


7d40261c.jpg~original


3a2fd655.jpg~original


efe09819.jpg~original


52bf2b12.jpg~original


d35f5870.jpg~original


9a432f62.jpg~original


1ec5f12b.jpg~original


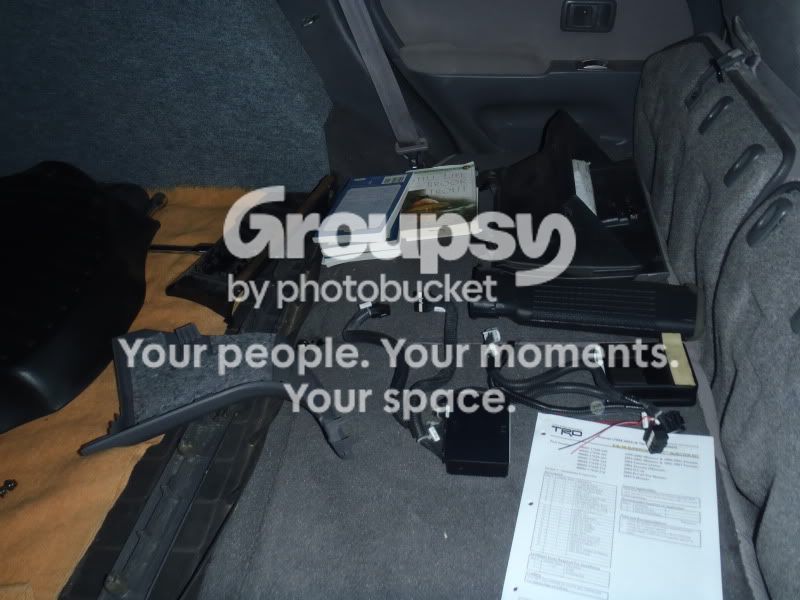
Finally, this is all the crap that gets removed to do the swap...

7ac839df.jpg~original
 
Last edited:
Holy mother load of wires everywhere, that is indeed intimidating dealing with some major vital component wiring system there. Hands down to you BigFish for this tackle itself.

I may never get as far as installing a Supercharger let alone a URD kit but boy, it's always a joy seeing a clean, efficient install.

Well done, Sir!:thumb3:
 
Last edited:
WOW, that is a lot of important wires right there.

I am very glad to see that you completed this cleanly and successfully!

If you still plan on dropping by my place later on the 27th, that is about where I should be when you get there.
 
Holy mother load of wires everywhere, that is indeed intimidating dealing with some major vital component wiring system there. Hands down to you BigFish for this tackle itself.

I may never get as far as installing a Supercharger let alone a URD kit but boy, it's always a joy seeing a clean, efficient install.

Well done, Sir!:thumb3:

Thanks man. It was definitely a little nerve racking. I triple checked every single connection as I was making them, and then double checked again after everything was wired. Then I walked away from it, read the entire instruction manual over again, went back outside and re-checked all the connections. Even after checking them 6X it was nerve racking when I fired it up today.

WOW, that is a lot of important wires right there.

I am very glad to see that you completed this cleanly and successfully!

If you still plan on dropping by my place later on the 27th, that is about where I should be when you get there.

I do still plan on dropping by, so maybe I'll be able to help if you have questions.

A little update on this.....

I got it all buttoned up today, swapping plugs at the injector and connecting the vacuum fitting & line for the MAP (manifold absolute pressure) sensor inside the URD box. I re-checked everything one last time, reconnected the battery, said a prayer and started it...

It fired right up. The idle was a little lumpy because I had erased all of the "learned" behavior from the factory ECU, and the S/C belt was squealing like hell trying to get a hold on the new 2.2 pulley.

I decided to take it for a drive, at first staying within a few blocks just in case anything blew up. I'm always amazed at these Toyota ECU's and how they learn. The truck always has to re-learn how to idle and I'm impressed how quickly it does.

After I pulled over several times to check the belt for fraying/damage, and the injector for leakage, I got it out on some roads w/higher speed limits and got into it a couple times to see how it was behaving. IT DEFINITELY NEEDS A TUNE. The URD startup map works, and it runs w/out knocking, but there is a lot that needs to get smoothed out.

With the TRD 7th, the lowest I could get the AFR's in Open Loop at full boost was about 10.5... I can drive them all the way into the 9's w/the URD setup. I watched closed loop boosting AFR's and they hovered around 13.5, where before they would stick closer to 14.5. So the URD already looks better in Closed Loop, but the Open Loop map is WWWWWWWAY too rich.

After testing it today, I'm doubting that I'll even need the fuel pump because it appears there is plenty of fuel at the ECU's disposal as it sits. The Serial to USB converter that I got was crap, so I'm going to have to find one that works before I can move forward. Also, I think I'm getting some belt slip, because it feels really boggy off the line. If it ain't one thing, it's another....

One day at a time, I guess.
 
I'm considering pulling the trigger on a SC and URD 7th injector set up - good to see you're working out all the kinks for the rest of us!

Great looking ride, can't wait to see the progress once tuned.
 
Over a month now since the last update... Wow. It's amazing how time flies. :zoom:

Most of the work I got done this month was on the '97, but I found some time today to address a small problem I've been having on the 2001.

Ever since I installed the 2.2" URD Pulley, I've been getting some belt slip. The belt has been leaving dust on the pulley and I've been feeling significant power loss when accelerating from a start. I've been watching my boost gauge closely and I usually can't build more than 3-4 lbs of boost off the line and 6 lbs max due to the pulley slipping.

To address this problem, I decided I'd first take a look at the dynamic tensioner. IMHO, they do wear out. There is a spring in there that provides the tension, and like any spring it will eventually become fatigued and lose some of it's tension.

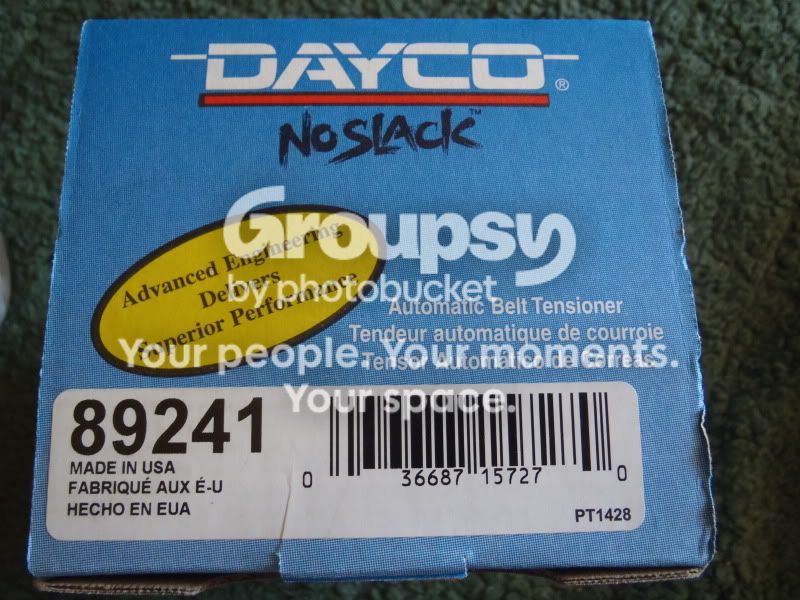
I did some research on replacement options and found out (via a thread on YT) that Dayco makes a replacement tensioner that is nearly identical to the TRD part.

The tensioner itself can be found on Amazon.com (sold by amazon.com), for $31.90 Shipped. It is Dayco Part # 89241 (Link >>> Amazon.com: Dayco 89241 Automatic Belt Tensioner: Automotive )

e031517b.jpg~original


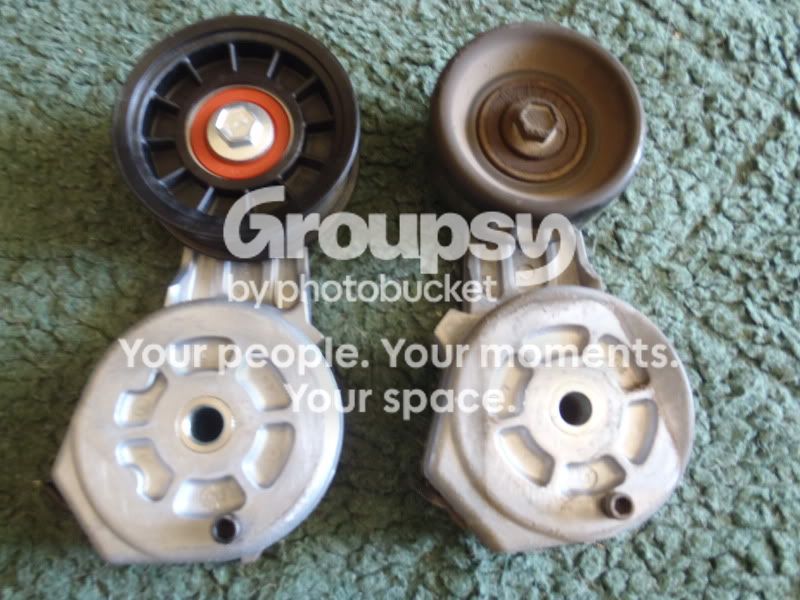
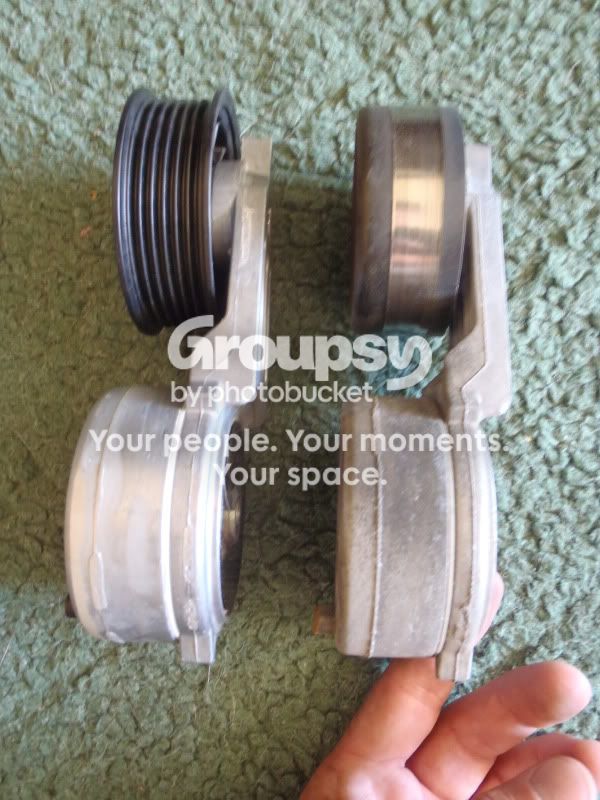
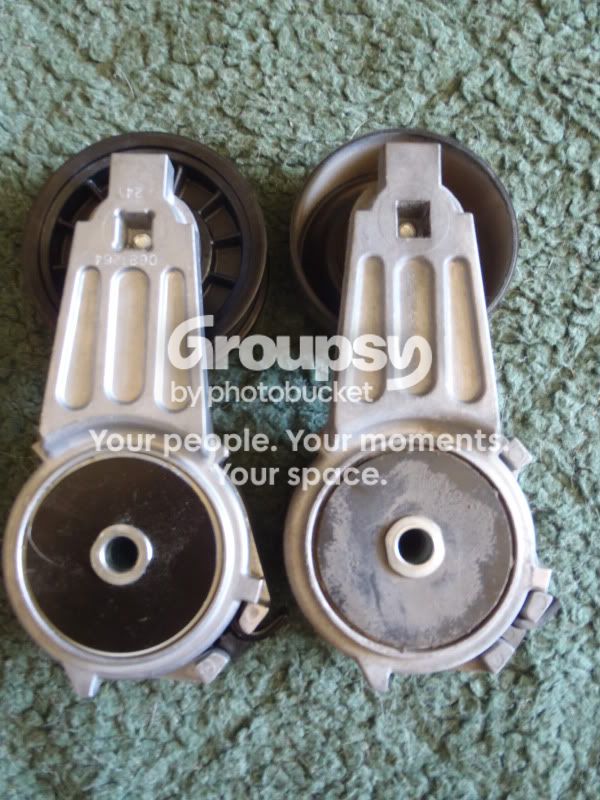
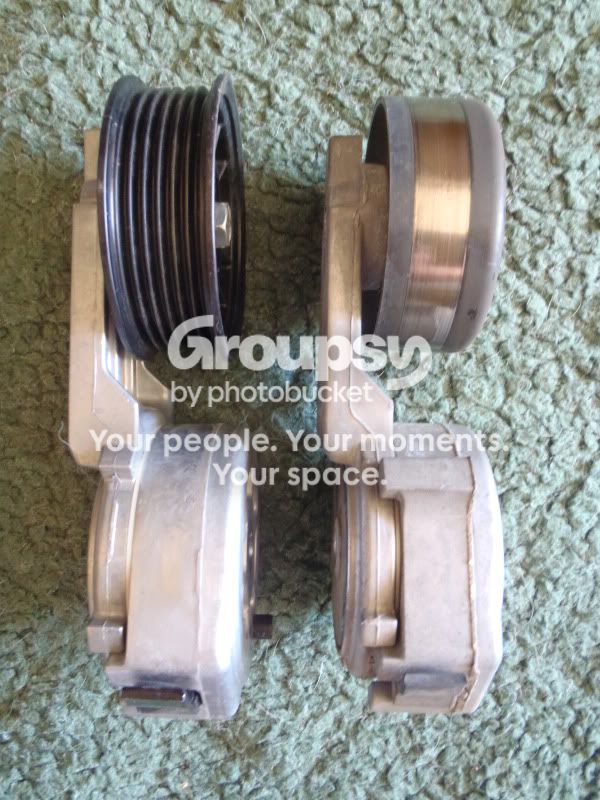
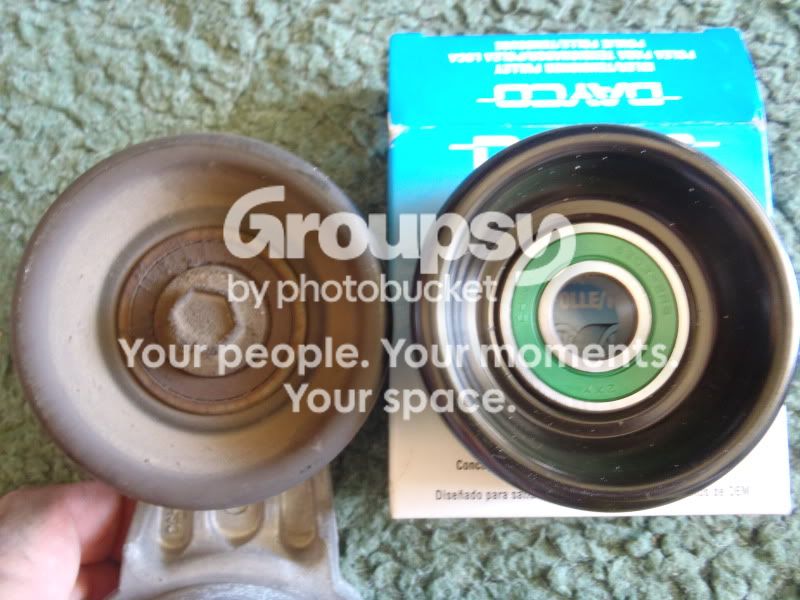
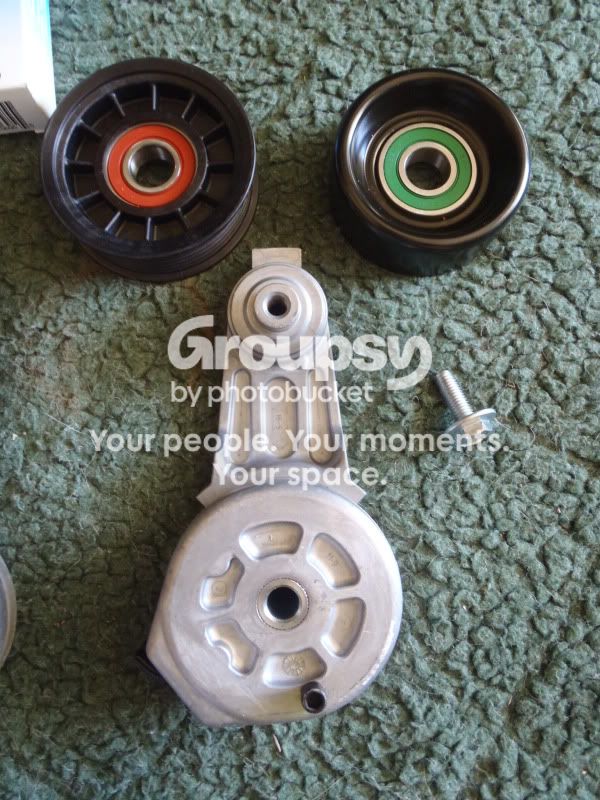
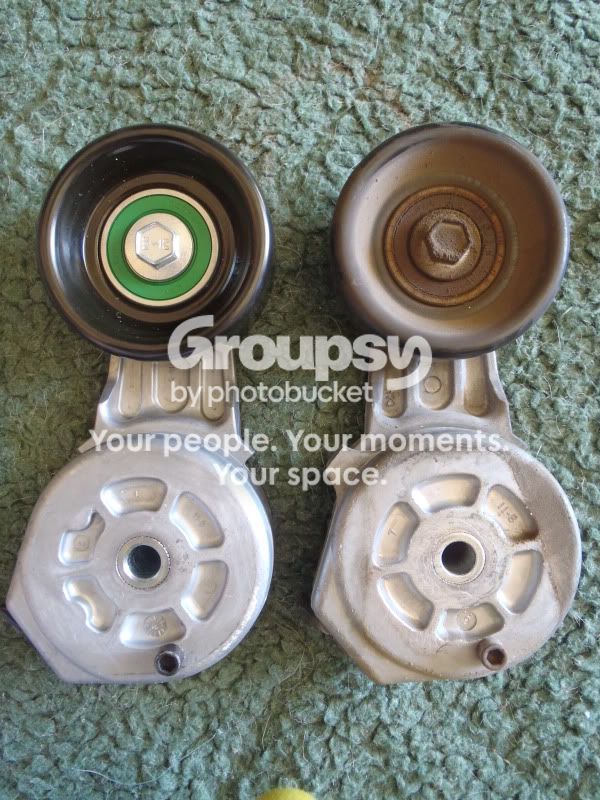
When compared side by side to the TRD Part (TRD Part # is PTR30-35041, by the way), the Dayco tensioner is identical except for two things...

First, it comes out of the box with a ribbed pulley.

34346fd7.jpg~original


520976f3.jpg~original


2b436b57.jpg~original


And second, there is an additional "Stop" cast into the body of the TRD tensioner. Notice in the picture below, the additional stop is near the top of the body, close to the pulley. I didn't see any particular need for this additional stop because the one near the bottom is in the same spot on both parts.

dc5c0ee0.jpg~original


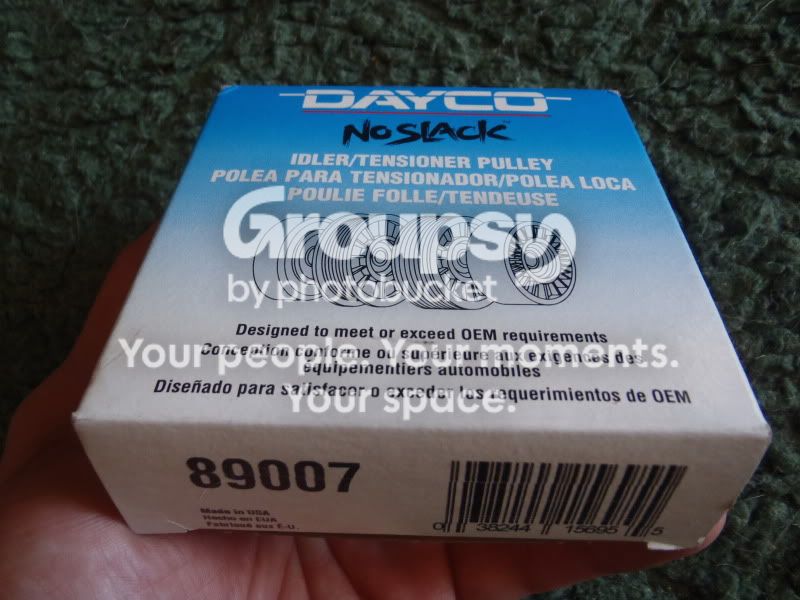
The pulley issue is solved by purchasing Dayco Part # 89007, which is also available on Amazon.com. The pulley sells for $12.68 shipped.

e2d65fca.jpg~original


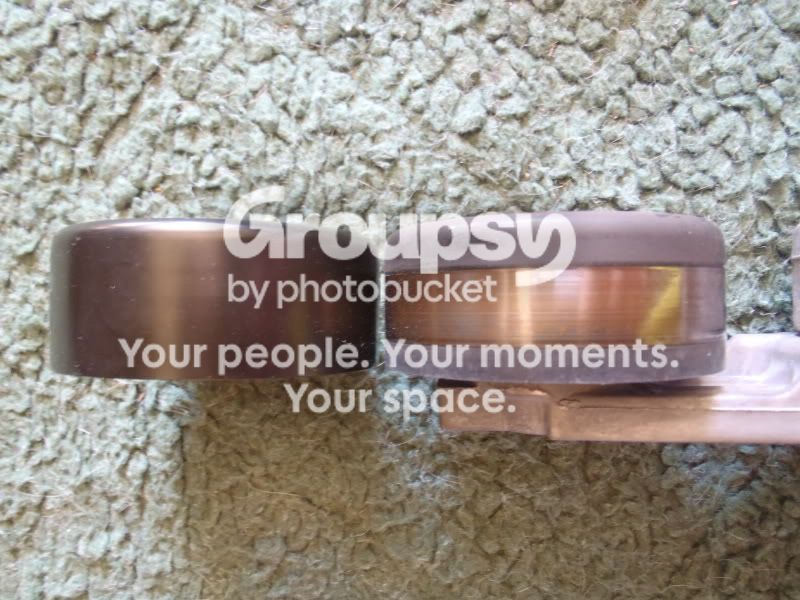
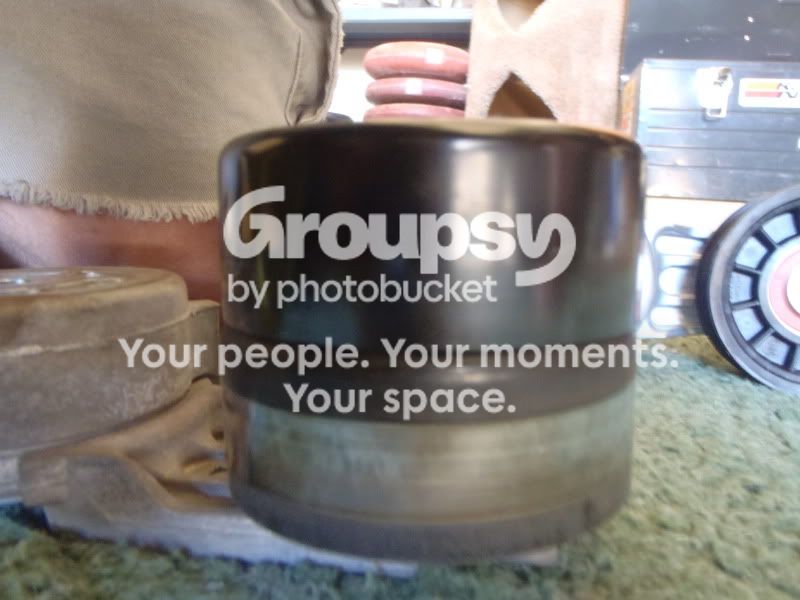
Some comparison shots of the Dayco Pulley next to the TRD pulley...

c5a8c209.jpg~original


I placed it right on top of the TRD pulley to make sure they were the same diameter...

cdb3ba19.jpg~original


1d3d04aa.jpg~original


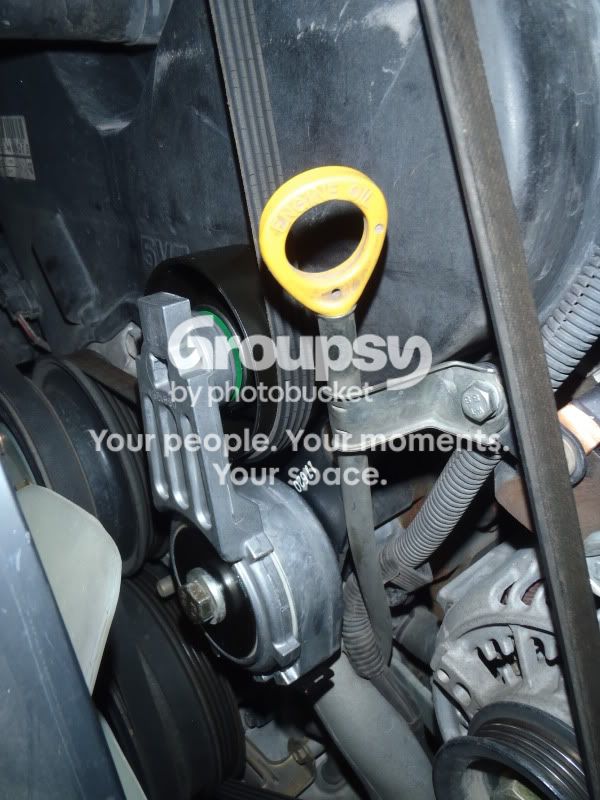
I took a 13mm socket and removed the bolt securing the ribbed pulley, and replaced it with the flat pulley. I torqued it to 40 ft. lbs which is the torque value that TRD recommends for the bolt that holds the tensioner to the engine. They are similar bolts w/a similar purpose, so I figured that value should work. I couldn't really find a spec for the torque value.

0ebe1f3c.jpg~original


Bada bing, bada boom... you just made a TRD Dynamic Tensioner...

10e3b4ff.jpg~original


Total cost for the replacement tensioner going this route is $44.58. I thought this was a screaming deal until I checked TRDParts4U after the install.

They sell the TRD tensioner w/the correct pulley pre-installed for $49.20 + 11.64 shipping for a total of $60.84. ( Link >> Click Me)

So... You save $16.00 by going w/the Dayco setup. After reading the thread on YT, I was under the impression that the TRD part costs upward of $100, but knowing now that it's only $60, I'd probably buy the TRD part next time just to have an OEM part.

Conclusions: My old tensioner was definitely getting weak. As soon as I fired up the engine w/the new tensioner, the belt squeal was gone. I took it out for a drive and found that it is now making full boost off the line and feels alot punchier when I step on it from a light.

I'm now seeing full boost almost instantly and maxing out around 7 PSI. :lookout:


fb2d07ff.jpg~original
 
Last edited:
On another note, I finally got the USB > Serial interface working so I can connect my laptop to the URD AIC and start tuning this mofo. After trying several USB > Serial Converters I found one that works.

I can 100% recommend the TRENDnet USB to Serial Converter (TU-S9) for anyone running Windows 7 64 Bit as their O.S.

And it's CHEAP too, only $10.57 on Amazon ( Link >>> Amazon.com: TRENDnet USB to Serial Converter TU-S9 (Blue): Electronics )

I pulled the pre-loaded Fuel/Timing maps off the URD AIC today and got them saved as a baseline. Also checked functionality w/the engine running and I was getting dead accurate RPM and MAP signals. I can't wait to get started on the tuning! :pimp:

--------------------------------------------------------------------------

The last thing I wanted to get posted here in the build is that I've been running into a little problem with my front suspension. I'm running a SS 1.2 w/the adjustable bilstiens & Tundra coils up front.

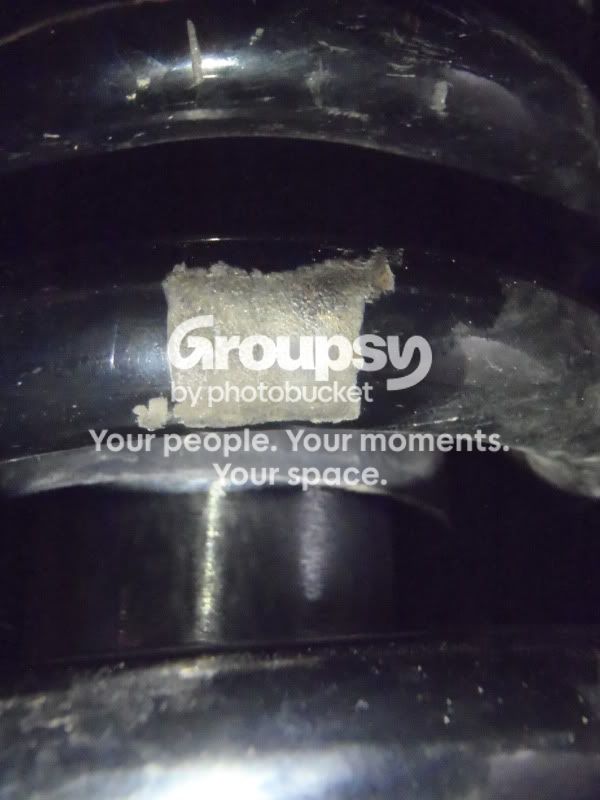
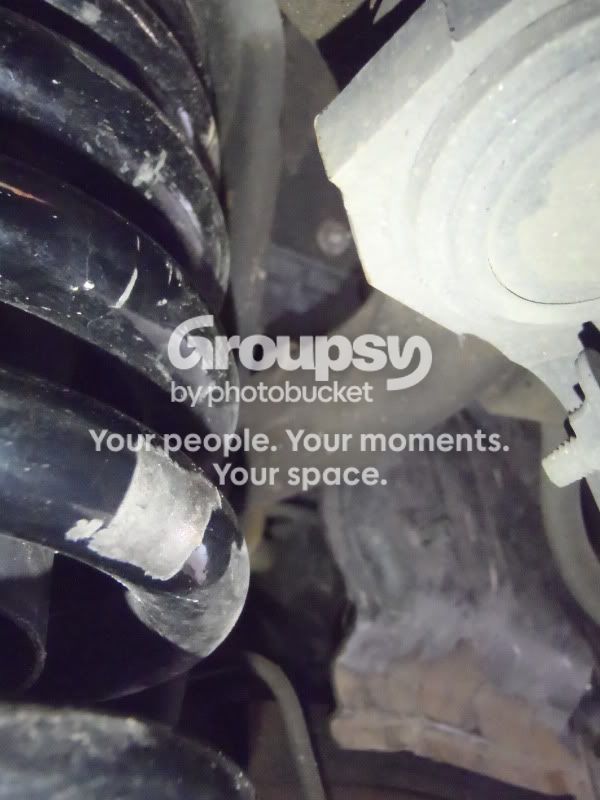
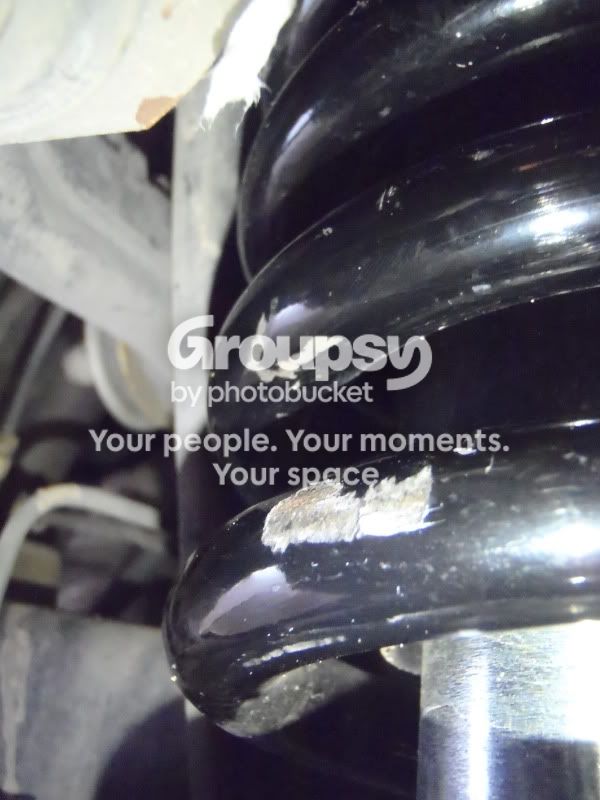
The problem is that the spindles are contacting the coil springs when the suspension unloads. This results in a LOUD chunk-clunk kind of noise as the spindle drags across one of the wraps of the coil on the way down, then again on the way up...

Driver side...

26661839.jpg~original


5b4f3d26.jpg~original


Passenger side...

2138754b.jpg~original


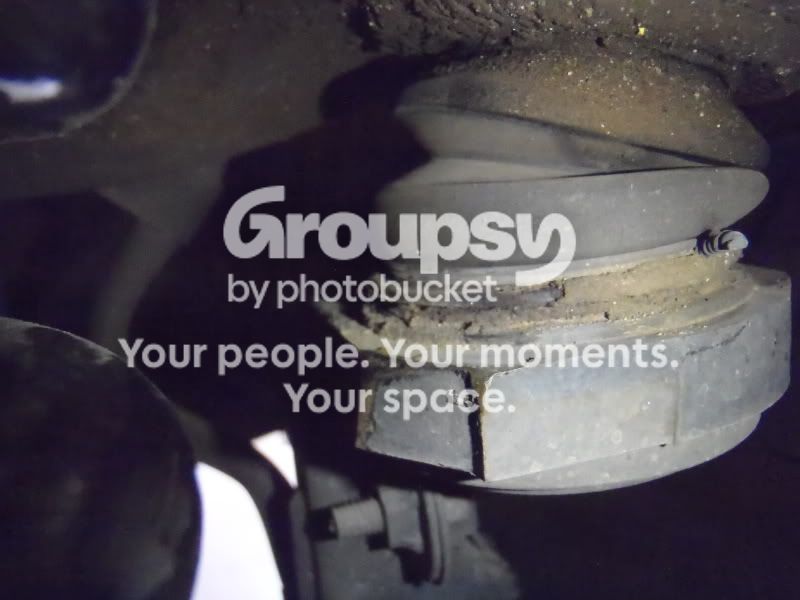
And check out the driver side spindle.. it's actually getting rounded off from hitting the coil... Also, notice how the caked on grease is getting knocked off by the coil hitting the boot around the U.B.J.... not good.

fb571ede.jpg~original


You can see a metal shaving hanging on in this pic...

53ac137e.jpg~original


I've been looking at several options and it looks like I'm going to end up installing limit straps on the front suspension to keep this from happening, so look for a write up on that down the road.

For more information on the issue, check out this thread:

http://www.toyota-4runner.org/3rd-g...bumps-w-ss-1-2-lift-your-thoughts-please.html
 
Last edited:
Nice work man! I love looking at your thread...gives me the inpiration and much needed patience to mod my own!

BTW, I posted an update on my build thread with revisions to my tire carrier.....thanks for forwarding those pics to me of the inners of the rear hatch! I ended up mounting that latch point lower than I wanted....but it worked out great!

Anyway, enough with the thread jack.....congrats again on a job well done! Can't wait to see what else you have cooking!
 
Thanks dude. I did see your thread and I meant to comment on it, I guess I got caught up in all the ingenuity and forgot to write something. You're welcome for the pics.

------------------------------------------------------------------------

I got a wild hair today and decided to go do a little wheeling at a local off road park. Most of it is big sand hill climbs, but there's an arroyo that runs right down the center of it that has alot of flexy sections. I spent a little time in there just practicing lines and getting to know my truck.

Just so the thread isn't ALL business... some poser shots! A build thread can only have so many pictures of parts, wires, and undercarriage.

757ce172.jpg~original


d9892565.jpg~original


cf9f9305.jpg~original


820e5a05.jpg~original


a23c95fb.jpg~original


878e8c7f.jpg~original


adc888d4.jpg~original
 
Good looking 4wheeling photos BigFish, and as always your rig looks great! I think its time you come North a bit and get some of the Colorado action!! W
 
^ it really does look awesome! inspiration to us all.

If my rig is inspirational, it's only so as a conduit of inspiration, as everything that it is has been inspired by those that have gone before me. 4 wheeling truly is a community activity, and we all learn and are inspired to learn, from each other.

Good looking 4wheeling photos BigFish, and as always your rig looks great! I think its time you come North a bit and get some of the Colorado action!! W

Thanks man. I'd live to ride w/the Hulk someday. I spend alot of time in Conejos county. Hit me up if you're ever around the way.
 
BigFishAllDay,

Nice pics! The S/C looks like a lot of work, with the TRD changing to URD and all the meticulous effort you have put in.

By the way, I saw you write that you are selling an 87' Supra for around $2k. Is it still for sale, can I look at the ad?
 
Thanks man. I'd live to ride w/the Hulk someday. I spend alot of time in Conejos county. Hit me up if you're ever around the way.


Well let's make it happen, I am off for the next 6 weeks and am looking to get into some trouble!

I would like to put my eyes on your supercharger, and see one in action. What's the next big project??
 
BigFishAllDay,

Nice pics! The S/C looks like a lot of work, with the TRD changing to URD and all the meticulous effort you have put in.

By the way, I saw you write that you are selling an 87' Supra for around $2k. Is it still for sale, can I look at the ad?

The S/C doesn't have to be a lot of work, but if you want to squeeze out every last drop, it certainly becomes a lot of work.

This is the link to the ad for the Supra > (1987 Toyota Supra Turbo)

Well let's make it happen, I am off for the next 6 weeks and am looking to get into some trouble!

I would like to put my eyes on your supercharger, and see one in action. What's the next big project??

6 weeks!!! Damn, you're a lucky man. I'll be in southern CO from the 10/3 through 10/10 and possibly all the way through 10/16. I might be able to head north for a day and do some wheeling somewhere. There's alot of stuff to do just a couple hours north near silverton/ouray.

As far as the next project, right now I'm just concerned with fine tuning all the existing mods so that they work 100% w/no issues and to their max potential... namely the suspension and S/C. After that the only things I have left on my list are a locker & gearing, the valve body upgrade, and a rear bumper. Then I'll be pretty much done.
 
:bluejump::fro::tongue::party::surfer:

I've run out of accolades to say, so I'm resorting to responding in icons.
 

Members online

No members online now.

Forum statistics

Threads
278,315
Messages
3,554,102
Members
248,016
Latest member
Advally Service

Trending content

Back
Top