2000 limited SleepyDad build

steering rack bushy bushy replacement

My steering rack bushing were in dire shape, I knew it, they knew it, it was time to part ways. it's always sweet sorrow but I set them free.

<a href="https://imgur.com/PUBVzRC"><img src="https://i.imgur.com/PUBVzRCl.jpg" title="source: imgur.com" /></a>

also clean 18 years of oil, ATF and general scum off the rack.
<a href="https://imgur.com/kIdCcMm"><img src="https://i.imgur.com/kIdCcMml.jpg" title="source: imgur.com" /></a>
 
Front UCA and LCA bushing and painting

everything starts with a hole in your wallet

I did a couple of quickie youtube vids on how I removed the UCA and LCA bushings.

<iframe width="800" height="600" src="https://www.youtube.com/embed/OUdORJvTVVg" frameborder="0" allow="autoplay; encrypted-media" allowfullscreen></iframe>
<iframe width="800" height="600" src="https://www.youtube.com/embed/f9yXcRsSrj8" frameborder="0" allow="autoplay; encrypted-media" allowfullscreen></iframe>

<a href="https://imgur.com/34lMw5J"><img src="https://i.imgur.com/34lMw5Jl.jpg" title="source: imgur.com" /></a>

every body has been cleaned up and all the bushings are out
<a href="https://imgur.com/hKlmjNs"><img src="https://i.imgur.com/hKlmjNsl.jpg" title="source: imgur.com" /></a>

I have a local guy who will just sandblast stuff for cheap... $20 and he even wraps them up in plastic to make sure they stay clean.
<a href="https://imgur.com/52b4xkP"><img src="https://i.imgur.com/52b4xkPl.jpg" title="source: imgur.com" /></a>

back from the powder guy
<a href="https://imgur.com/atUDvZC"><img src="https://i.imgur.com/atUDvZCl.jpg" title="source: imgur.com" /></a>

bush installed... sorry only took a shot of this one because they are now installed...
<a href="https://imgur.com/Kq3NrIJ"><img src="https://i.imgur.com/Kq3NrIJl.jpg" title="source: imgur.com" /></a>
 
Last edited:
throttle cable replacement

shot a potato quality vid of replacing my throttle cable assembly. I have run into this 2x times now with both 3rd gens I have owned. I never had any trouble with my T100 but for some reason that rubber grommet get very tiered and rips.

<iframe width="800" height="600" src="https://www.youtube.com/embed/aJJLr-2RPCM" frameborder="0" allow="autoplay; encrypted-media" allowfullscreen></iframe>
 
Last edited:
Hey sleepydad,

I've replaced the bearing in the AC clutch before but never thought to inspect the clutch material. Can worn clutch parts cause noise? My AC compressor has a funny noise at idle and not running, and I know the bearing is fresh. Maybe this is the culprit?

Can you take a look at this page on my thread where I R&R the AC clutch bearings and see if you can tell about the clutch material?

http://www.toyota-4runner.org/3rd-gen-t4rs/228376-jziggys-grown-up-4runner-build-7.html

Thanks!
 
Last edited:
Nice build

Great updates and build on your rig, very nice. I'm jealous and itching to get started on some updates and mods myself.
 
Hey sleepydad,

I've replaced the bearing in the AC clutch before but never thought to inspect the clutch material. Can worn clutch parts cause noise? My AC compressor has a funny noise at idle and not running, and I know the bearing is fresh. Maybe this is the culprit?

Can you take a look at this page on my thread where I R&R the AC clutch bearings and see if you can tell about the clutch material?

http://www.toyota-4runner.org/3rd-gen-t4rs/228376-jziggys-grown-up-4runner-build-7.html

Thanks!

If the AC is off the clutch should not be touching at all. I would take off the belt and turn it, huge pain but if your clutch is rubbing without being turned on, that is bad.

Your clutch plates look plenty well along but as long as it’s not sloppy and not rubbing when off it should not make any noise.

Mine was just sloppy and worn beyond.
 
Last edited:
Great updates and build on your rig, very nice. I'm jealous and itching to get started on some updates and mods myself.

Thanks man I always think I’m done doing things but then... I read the builds and get all kinds of crazy plans going.
 
leaky dipstick o-ring replacment

has been leaking around the bottom for sure maybe this will fix it, figured hey get the top and bottom. splurge!

<a href="https://imgur.com/1XOhdPd"><img src="https://i.imgur.com/1XOhdPdl.jpg" title="source: imgur.com" /></a>
 
supercharger

picked up the URD crankshaft pulle, my old one had some chunks missing. looks like somebody used a prybar or dynamite to get the old one off at some point. it was not eating belts but... this one is sexy as hell.
<a href="https://imgur.com/kKoQ3m3"><img src="https://i.imgur.com/kKoQ3m3l.jpg" title="source: imgur.com" /></a>

while tearing down I notice my vac lines tended to break into multiple pieces so I picked up various sizes from 2mm-10mm and replace as I go.
<a href="https://imgur.com/XCj84zA"><img src="https://i.imgur.com/XCj84zAl.jpg" title="source: imgur.com" /></a>

pile of parts... still waiting on a couple of things so I'm stuck until next week I think.
<a href="https://imgur.com/0FpkLrh"><img src="https://i.imgur.com/0FpkLrhl.jpg" title="source: imgur.com" /></a>

all tore down, now if it would quit storming so the parts would arrive...
<a href="https://imgur.com/7Vq1qwS"><img src="https://i.imgur.com/7Vq1qwSl.jpg" title="source: imgur.com" /></a>

air hose rubber things were not doing so well... ah it's only money
<a href="https://imgur.com/tqT4WvI"><img src="https://i.imgur.com/tqT4WvIl.jpg" title="source: imgur.com" /></a>
<a href="https://imgur.com/jBoLcHF"><img src="https://i.imgur.com/jBoLcHFl.jpg" title="source: imgur.com" /></a>

finally got it done and fired her up
<a href="https://imgur.com/HQMLUFc"><img src="https://i.imgur.com/HQMLUFcl.jpg" title="source: imgur.com" /></a>

sexy sex sauce
<a href="https://imgur.com/jfXWSr1"><img src="https://i.imgur.com/jfXWSr1l.jpg" title="source: imgur.com" /></a>
 
Last edited:
ram mount A pillar

Stealing from Tacoma

I need one more spot to put a phone for my driver’s seat Tacoma guy are the best, stole it from them.

I think the cap head allen is m6x1.0 x 55 mm just got it at home depot. the stock hardware that comes with the ram mount is m8 and will not work in the toyota grab handle socket.

<a href="https://imgur.com/PWYA3Jy"><img src="https://i.imgur.com/PWYA3Jyl.jpg" title="source: imgur.com" /></a>

cut a small aluminum spacer.
<a href="https://imgur.com/aaTTDFF"><img src="https://i.imgur.com/aaTTDFFl.jpg" title="source: imgur.com" /></a>

screw it into the stock nut and we got a ram mount. :)
<a href="https://imgur.com/bHiJkak"><img src="https://i.imgur.com/bHiJkakl.jpg" title="source: imgur.com" /></a>

it's not exactly in the spot I would have liked but.... it's good enough and it's not really in the way. I might try grabbing a shorter bolt but for now I like it. 40mm length might work better?
<a href="https://imgur.com/GJ06IoC"><img src="https://i.imgur.com/GJ06IoCl.jpg" title="source: imgur.com" /></a>
<a href="https://imgur.com/zR8D9ex"><img src="https://i.imgur.com/zR8D9exl.jpg" title="source: imgur.com" /></a>
 
Last edited:
Stealing from Tacoma

this works pretty well... was able to get my broken scuff plate secured back down with all the screws. for now this will work but I'm thinking of trying rivnuts as a better long term solution.

the scuff plates in my truck have been removed one too many times.
<a href="https://imgur.com/UaC0cO2"><img src="https://i.imgur.com/UaC0cO2l.jpg" title="source: imgur.com" /></a>

you can get nylon inserts at NAPPA
<a href="https://imgur.com/MehDG2i"><img src="https://i.imgur.com/MehDG2il.jpg" title="source: imgur.com" /></a>

I cut the existing little finger tabs things that spread out off my sill plates. no going back now.
<a href="https://imgur.com/FiJmXUB"><img src="https://i.imgur.com/FiJmXUBl.jpg" title="source: imgur.com" /></a>

they fit pretty good with the stock tapping screws
<a href="https://imgur.com/ur8hk6A"><img src="https://i.imgur.com/ur8hk6Al.jpg" title="source: imgur.com" /></a>

put one in each of the holes where the little spread fingers from the scuff plates once lived
<a href="https://imgur.com/90HZoVi"><img src="https://i.imgur.com/90HZoVil.jpg" title="source: imgur.com" /></a>

screw them downtown!
<a href="https://imgur.com/5sngNuB"><img src="https://i.imgur.com/5sngNuBl.jpg" title="source: imgur.com" /></a>
 
Awesome idea. I need to do something like this too because the only thing holding down my driver side scuff plate is my Weathertech mat..
 
coming soon, with youtube vid

<a href="https://imgur.com/J1SL7KS"><img src="https://i.imgur.com/J1SL7KSl.jpg" title="source: imgur.com" /></a>

Curious to why you had to replace this and also looking forward to a video how to install a new one. My windows stopped working and is causing a parasitic drain, the shop that I took it to said I would have to replace mine in order to get them to work.
 
Curious to why you had to replace this and also looking forward to a video how to install a new one. My windows stopped working and is causing a parasitic drain, the shop that I took it to said I would have to replace mine in order to get them to work.

sorry I did not shoot a vid, was alone and shooting up under the dash is impossible without a helper. I will edit that post and remove that.

but...

so my power locks stopped working with the keyfob or button I think. I could unlock everything but not lock, there are mini relays inside the drivers side block that burn out eventually. if Toyota had just done standard auto relays you could just replace the relay but because they are inside the block assembly you have to replace the entire thing.

I was
icon8.gif
while doing it so... it's not hard but it's a pain getting all the wire connections off. pretty sure all the connections were unique so you can't screw it up. as long as you take your time it's really something anybody can do. Took me 30 mins, if you take everything apart and get it so you can flip the block assembly around and get at the connections it's much easier.

also a little pick tool or mini screw driver to get at some the connection clips off helps. I hate up under the dash more than any other repairs.

This was a really common problem with Toyota block assemblies I know a bunch of different models had similar block assemblies and they all had these strange little failures. if you do a search I know some people have taken the block assemblies apart and replaced parts of it but it requires solder, diodes, resistor I'm not that ambitious.

Part No.: 82730-35260
BLOCK ASSY, DRIVERS

it's not cheap $230-$250 you might be able to find it cheaper someplace else?
 
sorry I did not shoot a vid, was alone and shooting up under the dash is impossible without a helper. I will edit that post and remove that.

but...

so my power locks stopped working with the keyfob or button I think. I could unlock everything but not lock, there are mini relays inside the drivers side block that burn out eventually. if Toyota had just done standard auto relays you could just replace the relay but because they are inside the block assembly you have to replace the entire thing.

I was
icon8.gif
while doing it so... it's not hard but it's a pain getting all the wire connections off. pretty sure all the connections were unique so you can't screw it up. as long as you take your time it's really something anybody can do. Took me 30 mins, if you take everything apart and get it so you can flip the block assembly around and get at the connections it's much easier.

also a little pick tool or mini screw driver to get at some the connection clips off helps. I hate up under the dash more than any other repairs.

This was a really common problem with Toyota block assemblies I know a bunch of different models had similar block assemblies and they all had these strange little failures. if you do a search I know some people have taken the block assemblies apart and replaced parts of it but it requires solder, diodes, resistor I'm not that ambitious.

Part No.: 82730-35260
BLOCK ASSY, DRIVERS

it's not cheap $230-$250 you might be able to find it cheaper someplace else?

thanks for the reply. seems like we both have the same problem but mine is draining my battery as well. The shop said to replace the whole unit so I went ahead and purchased a new one. Hopefully that fixes the issue.
 
Transfer Case gaskets and shift bushing

while doing dynamat I discovered some jackwagon just decided to cut the transfer case boot
censored.gif


instead of removing the 8 bolts... and unhooking the shift linkage... lets just cut the boot. what kind of sick human being does that?

<a href="https://imgur.com/O5IVBaw"><img src="https://i.imgur.com/O5IVBawl.jpg" title="source: imgur.com" /></a>

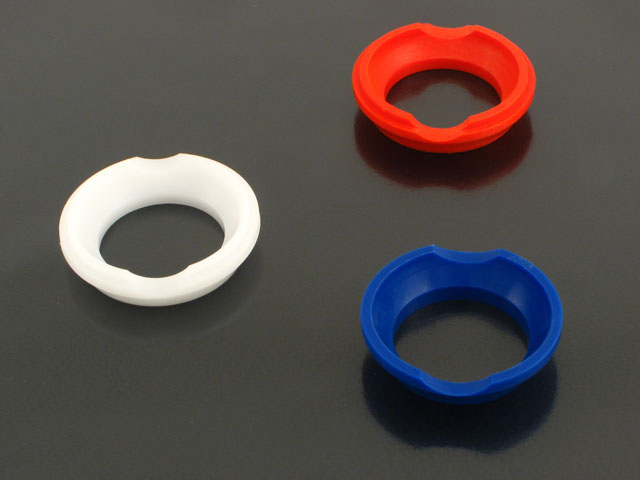
so... off for some parts. I know the transfer case shift seat bushing pretty much disintegrates at some point and I'm pretty sure the only way to get a 100% working part here is to get the marlin crawler shift seat in blue. the transmission R150F has a transfer case top mount for the blue seat.

seats640.jpg


also going to need

Toyota Part No.: 36108-35060
DEFLECTOR SUB-ASSY, BREATHER OIL
and
Toyota Part No.: 36345-35050
GASKET, TRANSFER CONTROL SHIFT LEVER RETAINER

<a href="https://imgur.com/ifElI0M"><img src="https://i.imgur.com/ifElI0Ml.jpg" title="source: imgur.com" /></a>

also needed
Toyota Part No.: 33555-35160
BOOT, SHIFT LEVER
<a href="https://imgur.com/WjTll84"><img src="https://i.imgur.com/WjTll84l.jpg" title="source: imgur.com" /></a>


Toyota Part No.: 36331-35010
BOOT, TRANSFER SHIFT LEVER

<a href="https://imgur.com/FmZAkKO"><img src="https://i.imgur.com/FmZAkKOl.jpg" title="source: imgur.com" /></a>
<a href="https://imgur.com/VHCunCO"><img src="https://i.imgur.com/VHCunCOl.jpg" title="source: imgur.com" /></a>


installing them is super easy... just take out the little steel inserts and pop out the rubber groumit parts and squeeeeeze... then re-insert the steel inserts.

<a href="https://imgur.com/rynJCSq"><img src="https://i.imgur.com/rynJCSql.jpg" title="source: imgur.com" /></a>
<a href="https://imgur.com/bytFe4W"><img src="https://i.imgur.com/bytFe4Wl.jpg" title="source: imgur.com" /></a>

<iframe width="800" height="600" src="https://www.youtube.com/embed/CgDmWNfF27Q" frameborder="0" allow="autoplay; encrypted-media" allowfullscreen></iframe>

 
Last edited:
Stong arm lift gate gas lift strut with aftermarket bushing

Thanks to other T4R members this was easy and it worked out great. I went with the heavy-duty version and my back hatch stays up with authority now.


<iframe width="800" height="600" src="https://www.youtube.com/embed/3OifpDM5lC4" frameborder="0" allow="autoplay; encrypted-media" allowfullscreen></iframe>
 
TRD CatBack Exhaust System (PTR06-89990-14)

I looked for quite a while... could never really find a non double cat back so...

I had an exhaust shop cut off the TRD flange on the muffler, ouch.
<a href="https://imgur.com/4aGSuZS"><img src="https://i.imgur.com/4aGSuZSl.jpg?1" title="source: imgur.com" /></a>

then we added a longer single pipe with a new O2 bung where the old was was... and hooked it up.
<a href="https://imgur.com/bhTJz2D"><img src="https://i.imgur.com/bhTJz2Dl.jpg" title="source: imgur.com" /></a>
<a href="https://imgur.com/FynKQ64"><img src="https://i.imgur.com/FynKQ64l.jpg" title="source: imgur.com" /></a>
<a href="https://imgur.com/NrBCCHp"><img src="https://i.imgur.com/NrBCCHpl.jpg" title="source: imgur.com" /></a>

and added a bung up on top of the cat for a wide band coming soon....
<a href="https://imgur.com/ncv7vTh"><img src="https://i.imgur.com/ncv7vThl.jpg" title="source: imgur.com" /></a>
 

Members online

Forum statistics

Threads
278,313
Messages
3,554,090
Members
248,016
Latest member
Advally Service

Trending content

Back
Top