2002 Operation Blackout

Gettin serious ...

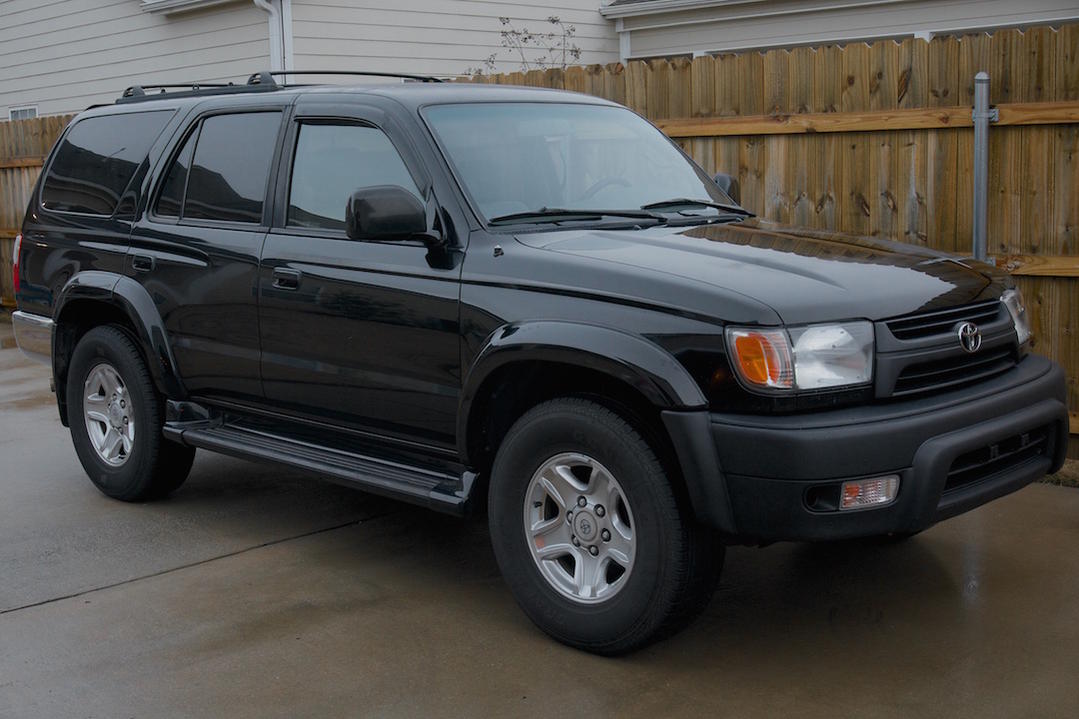
Ok time to tackle the back bumper ... I have a pretty nasty little dent in the back passenger end cap I'm going to try and hammer out ... below are a few pics on taking the back bumper and trim apart ... I decided to do this first because honestly, Im avoiding taping off the body. I know it probably isn't as big of a deal but it still makes me nervous ...

BEFORE:
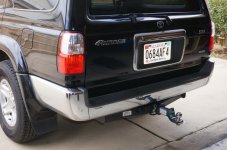
DSC00007.jpg

First take a pry bar (little one used for trim and pry at these points, this top piece is simply clipped in. I popped them all lose except one that snapped, I am not very worried about it though because there are a good number of these bad boys under there ... all of the screws to release the three pieces are under this plastic IT MUST COME OFF FIRST.

EDIT: there is a screw on each side that faces outward, it is screwed through a bracket on the center bumper into the side bumper, this has to be removed to detach the side bumper
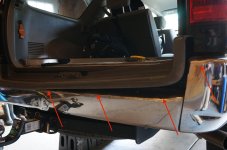
DSC00018.jpg

Here are the MANY tabs you have to pop off ... there are probably about 10-12. I got a couple loose on both sides then just grabbed it and gave it a yank ... gently :lie:
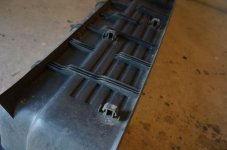
DSC00019.jpg

THEN REMOVE THE LEFT AND RIGHT BUMPER COVERS, there are a couple of plastic clips that are circled in green, they cannot be reached so just pull those mud flaps till they give ... you can get more at the zone-advance-rileys (whichever) and they are pretty cheap. Everything else I was pretty much able to do with an impact driver. I waited to pull them until I had all the screws loose (expect the one under the mud flaps)
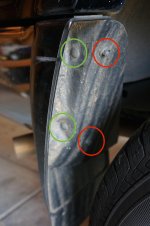
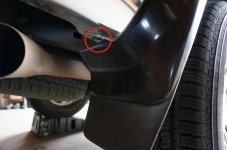
DSC00017.jpg

DSC00016.jpg

DSC00020.jpg

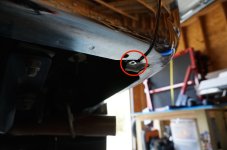
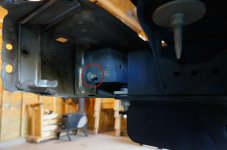
Not sure why but the circle wouldn't upload over the screw ... its ovbiously the only in the frame here ... this pic is looking up into the wheel well from the back underside
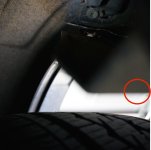
DSC00023.jpg

Now remove the mud flap and the screw behind it (not shown but pretty obvious)

Before you go looking for another screw thinking that bad boy isn't coming loose, be gentle and give it a jiggle ... there is a tab on top in the wheel well that keeps it from simply falling on the ground when you remove the screws
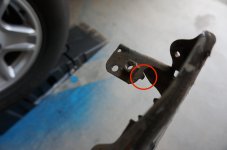
DSC00027.jpg

Now the center piece (after both sides are off ...) SEE EDIT ABOVE
 

Attachments

  • DSC00007.jpg
    DSC00007.jpg
    136.5 KB · Views: 945
  • DSC00018.jpg
    DSC00018.jpg
    127 KB · Views: 770
  • DSC00016.jpg
    DSC00016.jpg
    126 KB · Views: 752
  • DSC00020.jpg
    DSC00020.jpg
    115.1 KB · Views: 756
  • DSC00017.jpg
    DSC00017.jpg
    124.2 KB · Views: 744
  • DSC00023.jpg
    DSC00023.jpg
    116.5 KB · Views: 734
  • DSC00027.jpg
    DSC00027.jpg
    104.2 KB · Views: 748
  • DSC00019.jpg
    DSC00019.jpg
    124.6 KB · Views: 765
Last edited:
Center Bumper

These have to be removed:

DSC00032.jpg

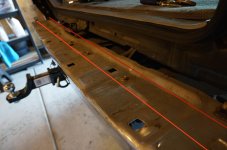
These too ... I ended up being able to fit my hand behind the bumper from the top side, most people are going to have to drop the spare to reach these, there are 4, one left, right and two center directly behind the spare. Also, top left of the pic just almost out of the pic there is a screw as well.

DSC00034.jpg

Boom! You're done ... there is a center bracket that will come loose when you pull the last two center screws just behind the spare. Beware ... it will fall on your head (or in my case, my toe ...)
 

Attachments

  • DSC00032.jpg
    DSC00032.jpg
    125.8 KB · Views: 744
  • DSC00034.jpg
    DSC00034.jpg
    124.4 KB · Views: 727
Last edited:
I tried to be as thorough as possible ... kinda new to posting this kind of stuff so take it easy on me ... I hope some of it was helpful :shrug:
 
Great thread! Your front bumper and grille look outstanding. I'm not sure that I would have tried to do that myself. It will look even better when all your trim and fender flares match.

140982d1419860911-2002-operation-blackout-dsc00005-1-.jpg
 
Last edited:
Great thread! Your front bumper and grill look outstanding. I'm not sure that I would have tried to do that myself. It will look even better when all your trim and fender flares match.

Thanks man, I am slowly but surely getting there ... I keep taking things apart and painting them and letting them cure inside because its chilly out ... the wife is appreciating that.

I am testing out a clear coat over that bedliner to see if it will darken it up ... it is pretty dark now and almost as dark as the black on the runner but hoping to get it to match 100% ... and add a little UV protection ...

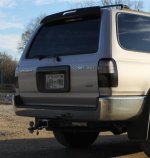
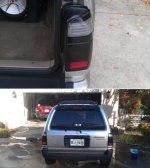
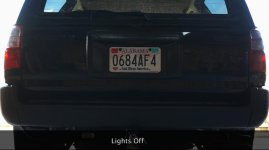
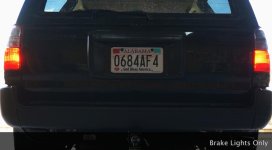
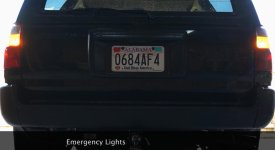
Also ... Decided to tint the lights tomorrow ... really digging these ... what do you guys think looks best? Credit due to those guys who posted these pics ... Tried to find the threads but i lost em ... Thanks to everyone posting pics of their rides ... great ideas here!

Screen Shot 2014-12-30 at 7.04.49 PM.jpg

Screen Shot 2014-12-29 at 10.32.13 PM.jpg
 

Attachments

  • Screen Shot 2014-12-30 at 7.04.49 PM.jpg
    Screen Shot 2014-12-30 at 7.04.49 PM.jpg
    69.7 KB · Views: 745
  • Screen Shot 2014-12-29 at 10.32.13 PM.jpg
    Screen Shot 2014-12-29 at 10.32.13 PM.jpg
    113.5 KB · Views: 684
Thanks man, I am slowly but surely getting there ... I keep taking things apart and painting them and letting them cure inside because its chilly out ... the wife is appreciating that.

I am testing out a clear coat over that bedliner to see if it will darken it up ... it is pretty dark now and almost as dark as the black on the runner but hoping to get it to match 100% ... and add a little UV protection ...

Also ... Decided to tint the lights tomorrow ... really digging these ... what do you guys think looks best? Credit due to those guys who posted these pics ... Tried to find the threads but i lost em ... Thanks to everyone posting pics of their rides ... great ideas here!
/QUOTE]

For anyone wondering, I hit a text piece of PVC with a couple coats of bedliner and topcoated with a couple of coats of clear coat. I expected to be posting a picture but you can't really tell a difference in real life much less a photo ... Obviously it made it glossy but didn't cause it to be darker as i expected. Gonna roll w the bedliner color for now ... if it ever fades i will overspray with another coat of bedliner and a couple top coats of a black enamel ... i don't expect it to be a problem though ...

I did smack quite a few bugs last night and this am before the sun came up and they came right off with a soft bristle brush so i expect that to be what i clean it with ... couldn't be happier with the stuff as it sits right now ...
 
The bumper and grill look great. The instructions on removing the rear bumper are definitely helpful, I may need to use those one day. As for the taillights, I'm not a huge fan. I don't think tinting taillights is a good idea, it just makes it harder for everyone else to see your taillights. I've been behind a few cars with tinted taillights and it was extremely difficult to see when they were braking and I consider myself to be more aware than most other drivers out there too.
 
The bumper and grill look great. The instructions on removing the rear bumper are definitely helpful, I may need to use those one day. As for the taillights, I'm not a huge fan. I don't think tinting taillights is a good idea, it just makes it harder for everyone else to see your taillights. I've been behind a few cars with tinted taillights and it was extremely difficult to see when they were braking and I consider myself to be more aware than most other drivers out there too.

Definitely a consideration ... I am probably just going to do 2 coats ... more of a smoke out than a black-out ... I for sure want people to see me!

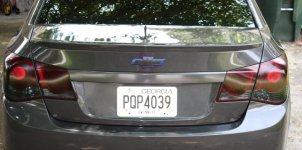
I found a pic of two light coats ... what do you think? I definitely don't want anything on my reverse light so i will tape that off ...

Screen Shot 2014-12-30 at 8.15.13 PM.jpg
 

Attachments

  • Screen Shot 2014-12-30 at 8.15.13 PM.jpg
    Screen Shot 2014-12-30 at 8.15.13 PM.jpg
    51.4 KB · Views: 559
I think the smoke looks pretty good with that grey Chevy. The smoke will look good on your rig as well and I think would be better than complete black. If that's two coats on the Chevy, I wouldn't go more than three on the 4R. I like the idea of not hitting the reverse lens too.

It would also be responsible to replace the stock brake light bulb with a higher output bulb. Maybe an LED? Especially if the insurance company is trying to claim their wasn't enough light to see you braking you can say that the light output is the same as stock.

Overall, everything is coming all nicely!
 
I definitely like that a lot more and it shouldn't affect visibility too much. Most of the one's I see around here it looks like people did the tint with flat black spray paint... It might look strange not doing the reverse lights though because they will still be clear and shiny. You may want to add some sort of auxiliary reverse lights and tint the entire housing if you choose to do so. Our stock reverse lights are pretty much useless anyway. I usually end up leaving my foot on the brake pedal just to get a little more light back there when I'm backing up. Especially on a dark trail at night or so.
 
I think the smoke looks pretty good with that grey Chevy. The smoke will look good on your rig as well and I think would be better than complete black. If that's two coats on the Chevy, I wouldn't go more than three on the 4R. I like the idea of not hitting the reverse lens too.

It would also be responsible to replace the stock brake light bulb with a higher output bulb. Maybe an LED? Especially if the insurance company is trying to claim their wasn't enough light to see you braking you can say that the light output is the same as stock.

Overall, everything is coming all nicely!

I definitely like that a lot more and it shouldn't affect visibility too much. Most of the one's I see around here it looks like people did the tint with flat black spray paint... It might look strange not doing the reverse lights though because they will still be clear and shiny. You may want to add some sort of auxiliary reverse lights and tint the entire housing if you choose to do so. Our stock reverse lights are pretty much useless anyway. I usually end up leaving my foot on the brake pedal just to get a little more light back there when I'm backing up. Especially on a dark trail at night or so.

LEDs are a GREAT IDEA! also, I may stick a brake light in my receiver hitch too ... Thanks for the advise guys ... I dont care too much for the total blackout either ... I basically want to dull not darken the lens - just a little somethin' somethin'. Keepin' it classy ... :fro:
 
I've always kinda wondered about this, and this thread inspired me to finally look it up. You could try tinting your taillights with a film as opposed to the spray on stuff, this way if you don't like it, or it's too dark you can just peel it off.

Here's a decent thread on it I found on a 350z forum.

DIY: Tail Light Tinting - MY350Z.COM Forums
 
I blacked my tails out a while ago, i did three coats and taped off the reverse lights, later i added higher intensity sylvania brake/running bulbs. It has faded some, im thinking about polishing it down and redoing it again. Btw you can remove the tint with a headlight polishing kit if you mess up or want to change it.
 
I blacked my tails out a while ago, i did three coats and taped off the reverse lights, later i added higher intensity sylvania brake/running bulbs. It has faded some, im thinking about polishing it down and redoing it again. Btw you can remove the tint with a headlight polishing kit if you mess up or want to change it.

Cool, I am going to hit it with a couple coats to test it out today ... Gonna put 3 or so coats of clear on it and wet sand it smooth and probably another nice wet coat to smooth it out ... hoping the clear keeps it longer? did you clear yours?

I like the film but there are so many "DIY" ways to get this stuff off I figured this would save me a little $$$ ... I would probably buy new ones if I don't like it ... this is more or less a fix till I can do that ...

Plus ... admit it ... who doesn't like tinkering with their stuff lol
 
Night Shades

So ... tried the tint out today, I was in the garage with the wood burning heater rolling (about 65 degrees) and shot on the first coat ... was DIGGIN' it ... until I put on the second. I consider myself to be pretty good with a spray can but this stuff is THIN AS HELL! It ran all over the place and was SUPER uneven and speckled - WTF? Luckily I grabbed the Goof Off and wiped it clean before it tried, tried again with lighter coats and it happened again. Got it all off and shot it with some clear coat to gloss it back to new because I had already sanded it.

From what I have read of people having similar issues, it is less about the temperature of the light but the temp of the CAN itself.

Tomorrow Im going to try and soak the can in warm water for about 15 min and give it a LIGHT MIST. If it busts again I'm gonna take it back. Normally I would just let it go and move on with life but I feel like that dumb can has in some way one-upped me. :ohwell:

Anyone else ever had this issue or any advise (other than take that sh*t back lol).
 
Back Side

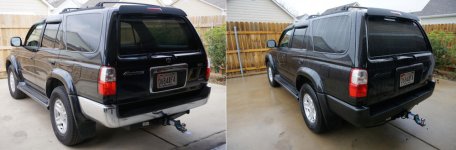
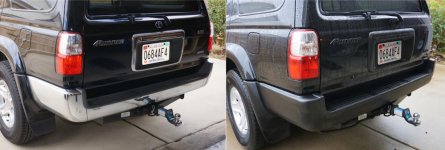
Finally got my emblems and tail light surround done with Plasti-Dip and the rear bumper pieces painted and Re-installed.

Before-and-Afters:

blac1.jpg

Black.jpg

You probably see the missing tail light on the right side, I am working on that now and with lighter coats and a warmer can ... it turned out great! I will post a comparison between the two lights (tinted/not) later ...

Those silver wheels are sticking out like a sore thumb ... after i get those fenders done I will be fixing that nonsense!
 

Attachments

  • blac1.jpg
    blac1.jpg
    63.7 KB · Views: 501
  • Black.jpg
    Black.jpg
    65.4 KB · Views: 465
Last edited:
Looks really good. I'd kill for a clean, black, third gen.

Very lucky to have mine ... actually the second owner (first owner - my grandparents) she had 75K miles when I got her 2 years ago and I have just rolled over 105k. Ive had many different cars/trucks/SUVs but by far my runner is my favorite. I have actually considered buying another one just for the hell of it. Hope she runs to 300k! From what I hear, if you take care of them they will take care of you for a very long time!
 
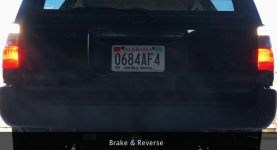
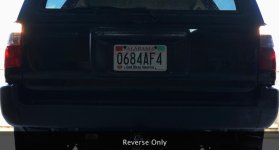
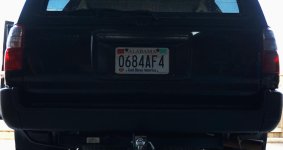
Couldn't figure out how to upload a movie but here are the screen shots of my lights. I just wanted to throw the SUPER RED high gloss off the stocks ... Mission accomplished!

Right is tinted and left is not ...

I put about 6 MIST coats of tint on and then hit it with 0000 Wet steel wool, then about 4 coats of clear, I will smooth it out with the steel wool and some polishing paste in a few days. In my opinion, the tint doesn't hinder the light output to any obvious degree. It does change the look of the light pattern but they are just nearly as bright at night than the stocks. No way anyone could claim they couldn't see me ... Night pics are IMPOSSIBLE or i would have done those ... sorry guys ...

Screen Shot 2015-01-04 at 9.50.32 AM.jpg

Screen Shot 2015-01-04 at 9.51.32 AM.jpg

Screen Shot 2015-01-04 at 9.52.08 AM.jpg

Screen Shot 2015-01-04 at 9.52.46 AM.jpg

Screen Shot 2015-01-04 at 9.53.09 AM.jpg

Screen Shot 2015-01-04 at 9.53.34 AM.jpg
 

Attachments

  • Screen Shot 2015-01-04 at 9.50.32 AM.jpg
    Screen Shot 2015-01-04 at 9.50.32 AM.jpg
    43.4 KB · Views: 426
  • Screen Shot 2015-01-04 at 9.51.32 AM.jpg
    Screen Shot 2015-01-04 at 9.51.32 AM.jpg
    45.9 KB · Views: 423
  • Screen Shot 2015-01-04 at 9.52.08 AM.jpg
    Screen Shot 2015-01-04 at 9.52.08 AM.jpg
    42.5 KB · Views: 424
  • Screen Shot 2015-01-04 at 9.52.46 AM.jpg
    Screen Shot 2015-01-04 at 9.52.46 AM.jpg
    41 KB · Views: 420
  • Screen Shot 2015-01-04 at 9.53.09 AM.jpg
    Screen Shot 2015-01-04 at 9.53.09 AM.jpg
    37.7 KB · Views: 417
  • Screen Shot 2015-01-04 at 9.53.34 AM.jpg
    Screen Shot 2015-01-04 at 9.53.34 AM.jpg
    40.3 KB · Views: 422

Members online

Forum statistics

Threads
278,307
Messages
3,554,056
Members
248,016
Latest member
Advally Service

Trending content

Back
Top