2014 Aim / adjust headlights after level or lift

GiGi's 1996

New member
Hello fellow 4Runner enthusiasts.
Ok, I searched my manual.
I searched with Google search.
I searched with "search this forum".....
I opened my hood, looked to see if by chance I would find the same magic 8 mm bolt head to turn clockwise...no dice.
I really feel I did my due diligence, now I need help.

How do you adjust your headlights down on the new 2014 5th gen?

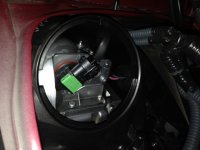
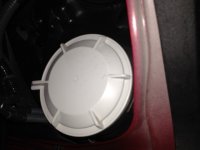
Here are pictures I took. First with the cover on this fancy 'sealed' area.
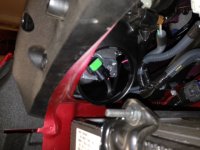
Second pic is of passenger side.
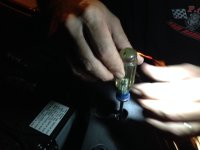
Third pic is of driver side. IF there is an adjustment, I feel that the battery would have to come out just to be able to get in that tight space.

I recently had the Bilstein 5100's installed set at 1.75. I just wanted to level the truck out. Wow, does it look and ride 110% better.

Thanks for any and all help.......

Must say....I was told this adjustment would be needed. Maybe it is not on the internet (at least where I could find) because it is a non issue after level or lift of our beloved 4Runners.......?!
 

Attachments
  • headlight3.JPG
    headlight3.JPG
    76 KB · Views: 11,248
  • headlight2.JPG
    headlight2.JPG
    91.1 KB · Views: 11,760
  • headlight1.JPG
    headlight1.JPG
    98.7 KB · Views: 11,950
Last edited:
Register to hide this ad
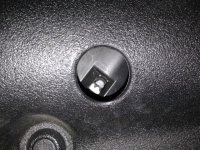
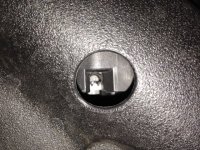
If you look above the headlight area there is a hole in that front plastic engine bay liner. Use a Philips head screw driver. Right is lower, left is higher.
I can see it in your last picture, upper left hand hole of that picture.
 
Thank you sooooo much!

Sure enough, there they are.......
 

Attachments

  • hole.JPG
    hole.JPG
    131.7 KB · Views: 11,019
  • hole2.JPG
    hole2.JPG
    132.1 KB · Views: 11,380
I did mine a couple weeks ago. You'll want a #2 phillips and you'll want to lean it toward the front of the truck to keep it engaged. Expect to do a lot of cranking. After my 1.75" front lift I had to go down around 6".
 
Last edited:
Gigi, do you have a profile view of your rig after the lift? Does it seem level to you or slightly reverse raked?

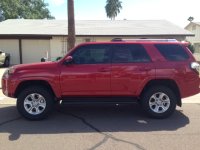
Here is a pic. I was waiting to post a pic since I have not finished plastidipping my roof rack ends. I need to touch up the one end that I did for practice. It was SO much work, I did not have the right supplies, I ran out of tape...I am going to drape the whole truck in plastic (spend most of my time the first time cleaning the overspray...blah!) and wait for a complete day to devote to doing better job.

Anyway, back to the point.....I do not see a reverse rake. The back is empty (no extra weight) in this picture. I actually think she will be level with a little bit of weight in the back. I have not loaded her down yet to see if she sags with a load of kids and gear. I will cross that bridge when I get to it...... I am happy with how she turned out.

I made the mistake and got the tape measure out. My passenger side measures approx. 5/8" taller than driver side. I searched (haha) and found that this happens and not to get OCD about it.
 

Attachments

  • level.JPG
    level.JPG
    115.2 KB · Views: 11,212
GiGi, going to send you a pm, hope that's okay.

Rig looks good. I have done plastidip before so I understand it takes longer than you'd think. So, no visible rake but when you drive it, do you feel like it's raked back at all?

If possible, keep up with how many turns it takes to get your lights adjusted and then come back and post it here.
 
Last edited:
Here is a pic. I was waiting to post a pic since I have not finished plastidipping my roof rack ends. I need to touch up the one end that I did for practice. It was SO much work, I did not have the right supplies, I ran out of tape...I am going to drape the whole truck in plastic (spend most of my time the first time cleaning the overspray...blah!) and wait for a complete day to devote to doing better job.

Those plastic roof rack ends just pop off with a tiny bit of prying with a screwdriver or a plastic wedge of some kind. Put a towel against your roof and a small piece of wood about an inch away from the plastic along it's side, then using a screwdriver carefully pry the center edge of it up with the blade and the driver against the wood for leverage. You'll hear a small pop as one of the catches releases, then a second one and then you can detach the rest by hand. They come off easy and no need to mask anything :)
 
GiGi, going to send you a pm, hope that's okay.

Rig looks good. I have done plastidip before so I understand it takes longer than you'd think. So, no visible rake but when you drive it, do you feel like it's raked back at all?

If possible, keep up with how many turns it takes to get your lights adjusted and then come back and post it here.

No problem.
I do not feel as though she is raked back at all. I feel bigger and taller even though it is a small amount to level.
I will do the headlight adjustment this evening and report back.

Warthog: I will also try popping those endcaps off. Thanks for pointers!
CJ: Going to find #2 Phillips in garage right now, thanks.
 
just do it again a flat wall, 25ft back of the wall. Measure the height to from center of light to ground. I like to aim the headlights 6" below the centerline on the wall.
Could you also take pictures. I want to see what the stock beam pattern looks like on the 2014 with the projectors. I did a hid conversion on mine and wanted to compare.
 
!

Ok, so we followed all the pointers given by you all, we finally found a Phillips screwdriver that would grab the teeth, we took pictures and we took notes....

Parked 4R in our driveway, thought it was fairly level, but pictures say not so much. Hopefully it is our old driveway that is out of whack and the truck is not leaning that bad.

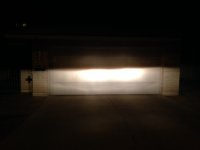
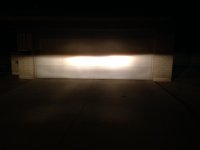
Pics hopefully tell the story. There is a row of block on the house that is different than the rest of the block, use it as a reference point.

We turned the screwdriver a total of 15 complete revolutions and we estimate that the lights lowered 6". At 10 turns, we estimated it to be at 4" lower (no picture) and then we turned it another 5 and stopped.

I then drove down the road and back and confirmed there was no blinding effect going on. We did not do this before we started so we really did not have anything to gauge it against.

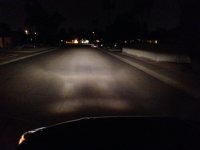
Last picture represents what I think is good projection of lights on street.

And as they say, if Mama is happy, then everyone is happy! Done.
Thanks for all the pointers. Hope to help the next soul that comes along and reads this thread. Next, will work on popping those caps off and plastidipping them. :)
 

Attachments

  • aim1.JPG
    aim1.JPG
    53.5 KB · Views: 10,788
  • aim2.JPG
    aim2.JPG
    78.9 KB · Views: 10,580
  • aim3.JPG
    aim3.JPG
    51.9 KB · Views: 12,249
  • aim4.JPG
    aim4.JPG
    83.5 KB · Views: 11,957
GiGi, going to send you a pm, hope that's okay.

Rig looks good. I have done plastidip before so I understand it takes longer than you'd think. So, no visible rake but when you drive it, do you feel like it's raked back at all?

If possible, keep up with how many turns it takes to get your lights adjusted and then come back and post it here.
"Counting turns" is not going to be the same from vehicle to vehicle. The adjustment is there because of tolerance build up during manufacture, NOT because the engineers knew some wahoo will change the rake of the vehicle lol. Same for tire alignment. No two are the same so they put adjustments there for critical alignment (headlamp and tires) to get uniformity that cannot happen during assembly.

Remember that one guy might have had 15 turns and another guy only had 5! Best idea is to measure the headlights before lift yourself. At night, find a wall and go back 20-25 ft as the distance won't matter as long as you know what it is. Measure this distance from center of wheel on ground to wall. Then measure up on wall the top of the headlight line that is the sharpest. Take a pic so you know where you are measuring. After lift go through the same measurement from the same distance at the same wall using the same method and you will be fine. Counting turns is the lazy man's way that is not accurate. Measurements before and after is the right way.
 
"Counting turns" is not going to be the same from vehicle to vehicle. The adjustment is there because of tolerance build up during manufacture, NOT because the engineers knew some wahoo will change the rake of the vehicle lol.

Understood - not an exact science. Just wanted to get an idea of whether or not we were talking quarters of turns or multiple complete revolutions.
 
Understood - not an exact science. Just wanted to get an idea of whether or not we were talking quarters of turns or multiple complete revolutions.

At one point doing mine I almost wished I had a cordless drill! Not that I would have used it with that setup. LOL.

The 15 turns or so GiGi refers to sounds about right. I read in another thread in here that the goal is about 2 1/2" below the marked level line at 25' I measured my light's center height, then marked the same height on the wall with tape. I was almost 4" high at 25'. After adjustment I think mine might be a little lower than GiGi's pictured on the street, but as 1engineer pointed out a lot of that is objective observation. I did not measure before doing the lift because frankly, it just did not cross my mind until I was driving home on the interstate after picking the truck up. I honestly didn't believe that mild a suspension change would make that drastic a change in headlight orientation, but my high beams were for all intents and purposes useless because the low beams were so high.

As for your rail caps, get something with a small lip on it so you can pull out about 1/4" before you pry up on the cap. I used the bent up corner of an old license plate. But I was looking for a paint can opening tool before I gave up and used the plate. They can be had at Lowe's or HD for almost free.
 
Ok, so we followed all the pointers given by you all, we finally found a Phillips screwdriver that would grab the teeth, we took pictures and we took notes....

Parked 4R in our driveway, thought it was fairly level, but pictures say not so much. Hopefully it is our old driveway that is out of whack and the truck is not leaning that bad.

Pics hopefully tell the story. There is a row of block on the house that is different than the rest of the block, use it as a reference point.

We turned the screwdriver a total of 15 complete revolutions and we estimate that the lights lowered 6". At 10 turns, we estimated it to be at 4" lower (no picture) and then we turned it another 5 and stopped.

I then drove down the road and back and confirmed there was no blinding effect going on. We did not do this before we started so we really did not have anything to gauge it against.

Last picture represents what I think is good projection of lights on street.

And as they say, if Mama is happy, then everyone is happy! Done.
Thanks for all the pointers. Hope to help the next soul that comes along and reads this thread. Next, will work on popping those caps off and plastidipping them. :)

Hope you also adjusted fog lights cause they'll be off too.............:D
 
Hope you also adjusted fog lights cause they'll be off too.............:D

Ikr!! (I just learned that from my daughter, had to use it, love to embarrass my kids any chance I get......)
Dang, now I have to search "how to adjust your fog lights".....

Thanks Antman for the link. I actually found that thread and popped them off after I learned where to pry.....at the 3" and 7" points.
I hope the plasticdip is durable enough up there. We'll see. I bet the Krylon Fusion paint would be a better option up there.
 
Ha-ha-ha I hear yah, that's what parenting is all about!!!!!! Anytime we went to the mail, daughter had to walk in front of us because heaven forbid one of her friends might see us :doh:

Fog light attachment is for 2010-13, but might be a starting point??????? Haven't seen a 2014 up close yet.........................
 

Attachments

Members online

Forum statistics

Threads
278,316
Messages
3,554,105
Members
248,016
Latest member
Advally Service

Trending content

Back
Top