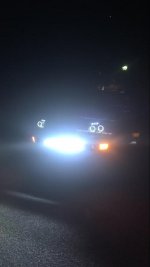
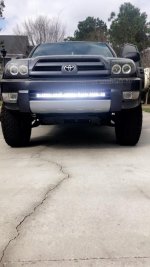
30" LED Bar Behind Lower Grill

For the record, here's what the light output from my HID retrofit looks like. This is the low-beam setting. Flip on the high-beams and the sharp cutoff disappears as the bi-xenon solenoid flips the lid behind the projector lens open. Everything gets lit up. Then add on the additional light coming from the stock high-beam bulbs (effectively quad high-beams). Not a cheap mod, not easy to do, but worth every penny.

212434d1468940274-installed-morimoto-d2s-hid-projectors-my-04-headlight2.jpg
 
Thanks everyone!


It's aimed a little high right now. You're right though, a lot of light right in front so "ideally" it would be mounted higher, but I'm pretty happy with how it turned out. I'll know more once I have time to get out in the open and get it aimed properly.

I haven't done anything with the old bar just yet. I used it for all my test fitting so I wasn't beating around on the good bar, wanted it still together for that. I'll get back to you on this...may let you dig into it.

Yea, I swapped out the spots for the two floods. Much better coverage overall. I also moved them a little further towards the front of the 4runner and put the rear tow hook back on, so it provides a little more protection.

IMG_0465_zps4cc6656e.jpg~original


IMG_0458_zpseeaef78c.jpg~original

Hey! Do you have a write up on how you did the small, thin little light bars on the back/underneath your rig?
 
Yea, I swapped out the spots for the two floods. Much better coverage overall. I also moved them a little further towards the front of the 4runner and put the rear tow hook back on, so it provides a little more protection.

IMG_0465_zps4cc6656e.jpg~original


IMG_0458_zpseeaef78c.jpg~original

Do you have a write up of the rear floods, I'd like to do this as well.
 
Hey! Do you have a write up on how you did the small, thin little light bars on the back/underneath your rig?

Do you have a write up of the rear floods, I'd like to do this as well.

Just now seeing this. I don't have a write-up on them, they were referenced some in this thread though. It's pretty straightforward, just used a 1" metal strip and bolted into factory threaded holes in the frame. My 4runner had the V6 hitch, this is still doable with the V8 hitch but mounting will have to be done a bit differently since these holes are the ones used for the hitch. Other than that, just a matter of running the wiring. I had mine setup to come on automatically when in reverse or manually via a switch. Here's a few pics, not the best but all I have (I've sold the 4runner). If you have any questions just let me know.

Here's the strips I made for mounting the lights.


Passenger side light mounted:


Driver side:
 
Just now seeing this. I don't have a write-up on them, they were referenced some in this thread though. It's pretty straightforward, just used a 1" metal strip and bolted into factory threaded holes in the frame. My 4runner had the V6 hitch, this is still doable with the V8 hitch but mounting will have to be done a bit differently since these holes are the ones used for the hitch. Other than that, just a matter of running the wiring. I had mine setup to come on automatically when in reverse or manually via a switch. Here's a few pics, not the best but all I have (I've sold the 4runner). If you have any questions just let me know.

How did you wire for both reverse and manual switch?
 
How did you wire for both reverse and manual switch?

In my case I was using the factory FJ Switch which is a simple off/on. I used a DPST relay and connected the ouput from the switch to one of the relay inputs. Then I tapped into the reverse wire in the driver side kick panel and connected that to the second relay input. Then connect power/ground to relay and run output wire to the lights. I don't recall the specific terminal numbers on the relay. This thread shows the reverse wire location.

http://www.toyota-4runner.org/engin...essories/115957-my-backup-camera-install.html
 
In my case I was using the factory FJ Switch which is a simple off/on. I used a DPST relay and connected the ouput from the switch to one of the relay inputs. Then I tapped into the reverse wire in the driver side kick panel and connected that to the second relay input. Then connect power/ground to relay and run output wire to the lights. I don't recall the specific terminal numbers on the relay. This thread shows the reverse wire location.

http://www.toyota-4runner.org/engin...essories/115957-my-backup-camera-install.html

Thanks! How did you run the wiring harness back to the lights? I'm guessing you just ran it out of the engine bay along the bottom rails along an already existing routed wire or line?
 
Thanks! How did you run the wiring harness back to the lights? I'm guessing you just ran it out of the engine bay along the bottom rails along an already existing routed wire or line?


Yes, through the firewall behind the kickpanel, then through the door sills with the other stock wiring. Ran through the back (if you look at the amp/sub install link in my sig, there's info on removing the rear cargo panels). Near the very back there's a factory grommet where the trailer wiring passes through the floor, I ran the aux light wiring through there also.
 
To wire this, you need to pop the dashboard off to gain access to the dash lights dimmer dial. There are a bunch of wires on this. Splice into the DARK GREEN ONE. This is the dimmer wire you want. After you connect that, everything should be good to go. make sure connections are solid, taped up, and out of harm's way. Reconnect battery and test it out.

I now have two of these switches (driving & fogs) and will end up with 3 total eventually. What's the cleanest way I can splice all 3 switch's internal parking LEDs into the dark green dash dimmer dial?
 
I now have two of these switches (driving & fogs) and will end up with 3 total eventually. What's the cleanest way I can splice all 3 switch's internal parking LEDs into the dark green dash dimmer dial?

Not sure, I just used a crimp connector to join the three wire ends after cutting the dimmer wire in two. I'm sure most people just use a wire tap, but I didn't have any on hand. You could just use a large enough crimp or twist connector to attach all of the same type of wire to the same junction. Or wire tap them all in separately. It doesn't matter, as long as all the necessary connections are made. I just like to keep everything as secure as I can do that I can avoid annoying rattles in the dash.
 
Not sure, I just used a crimp connector to join the three wire ends after cutting the dimmer wire in two. I'm sure most people just use a wire tap, but I didn't have any on hand. You could just use a large enough crimp or twist connector to attach all of the same type of wire to the same junction. Or wire tap them all in separately. It doesn't matter, as long as all the necessary connections are made. I just like to keep everything as secure as I can do that I can avoid annoying rattles in the dash.

I've found another post that indicates which wire in the dimmer loom to tap in to, just need to understand how to remove the dash. There are two bronze screws in the bottom piece, how do I remove the top piece without damaging it? Where are the clips exactly?
 
I've found another post that indicates which wire in the dimmer loom to tap in to, just need to understand how to remove the dash. There are two bronze screws in the bottom piece, how do I remove the top piece without damaging it? Where are the clips exactly?

the bottom parts of the dash have some bolts but the top section just pops off I'm pretty sure. Just give the edges a tug, should pop off pretty easily.
 
I completed this mod!
I got a 31", 180W light-bar for $36 off of Amazon.

lightbar1.jpg

lightbar2.jpg
 

Attachments

  • lightbar1.jpg
    lightbar1.jpg
    95.2 KB · Views: 807
  • lightbar2.jpg
    lightbar2.jpg
    82.9 KB · Views: 810
i installed mine woth two 6" L brackets from home depot. i cut one end short by an inch. bolt through existing hole on frame and drilled and screw a selft tapping screw on to the second hole. i cut out the plastic grill and it sits flush with the remaining black frame.
 
[MENTION=146758]calebcalandra[/MENTION]

what 31" light bar did you get on Amazon? I saw in your build thread you used the Kawell for the rear lights.

I found these on Amazon for $64
https://www.amazon.com/Nilight-Ligh...&qid=1508418952&sr=8-7&keywords=31"+light+bar

Thanks

Here's the link for the lightbar I got :

https://www.amazon.com/gp/product/B01FQXBSKQ/ref=oh_aui_detailpage_o04_s00?ie=UTF8&psc=1

It actually went up in price since I got it.
By the way, if you order those little kawell lights for something, I recommend sealing the lights with a clear silicone. The 31" lightbar has held up fine. There's no condensation in it.
 

Members online

Forum statistics

Threads
278,310
Messages
3,554,080
Members
248,016
Latest member
Advally Service

Trending content

Back
Top