4lo Actuator Rebuild

Woodless

New member
Ok Ladies and Gentlemen,

I have searched long and hard and have only found bits and pieces of information on the 4lo actuator. I just bought an '03 Limited V8, 239,000 miles for $6K. I knew going in that 4lo was not working but I am not afraid to tackle a problem.

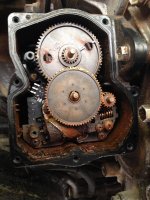
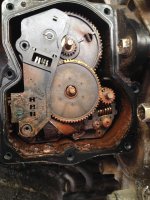
That said, I have removed the actuator from the t-case. When I removed the plastic cover, to my dismay, I was greeted with lots of rust.

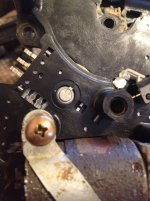
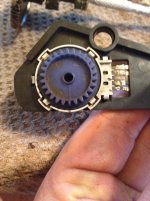
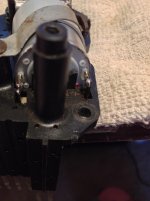
I proceeded to remove the two screws holding the center diff lock position switch in place (as you can see in the first pic) and pulled the switch out.

The next logical step is to remove the lower larger gear, right? Of course, if it were not rusted in place that is. I gently, using two screw drivers, pried on either side of the plastic gear working it out. What should have happened is the gear separate from the shaft, leaving the shaft behind, did this happen? Hell No! Once I pulled the gear/shaft my heart sank as I heard "clink, clank, clunk".

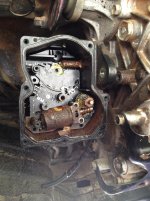
With the lower gear now removed, the top gear simply slides out. Since the shaft on the lower gear came out with the gear itself, the actuator no longer had a connection with the 4lo shaft that is deeper yet in the actuator. At this point I was able to remove the actuator.

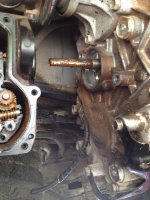
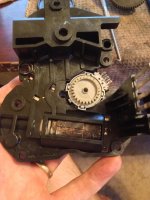
Just for FYI, the fifth picture shows the 4lo shaft and gears deep inside the actuator. The lower, larger gear is the one that is held in place by the shaft that caused all they funny noises above.
 

Attachments

  • IMG_1626.jpg
    IMG_1626.jpg
    137.7 KB · Views: 6,701
  • IMG_1627.jpg
    IMG_1627.jpg
    136.4 KB · Views: 5,896
  • IMG_1629.jpg
    IMG_1629.jpg
    138.6 KB · Views: 5,763
  • IMG_1630.jpg
    IMG_1630.jpg
    134 KB · Views: 5,716
  • IMG_1667.jpg
    IMG_1667.jpg
    135.6 KB · Views: 6,017
Register to hide this ad
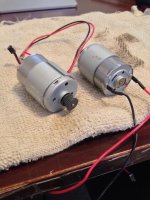
With the actuator on my desk, I started inspecting the motors, gears etc.. I found the center diff lock motor completely seized up and looking like a rusted Model-T in a farmers yard. I found the numbers I needed on the 4lo motor (which still works) to start a search for replacements. Amazon has a package of 2 motors for less than $12 shipped, so I am awaiting delivery, then I will solder them in place.

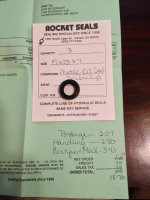
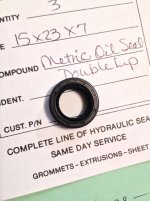
I have ordered new seals for the t-case shafts and plan to use geurillawarfare's method to reinstall the actuator when the time comes. See his method here.

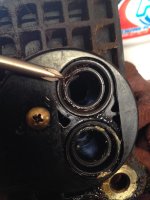
The damage sustained by the seals from the teeth on the shaft is pictured. DO NOT ATTEMPT TO SLIDE THE ACTUATOR OFF WITHOUT SEPARATING T-CASE UNLESS YOU WANT TO REPLACE SEALS!

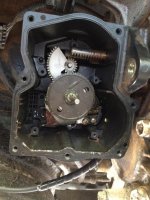
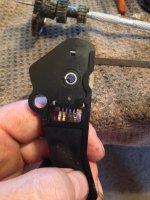
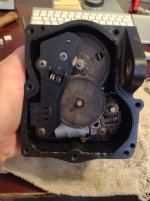
Actuator Timing: From what I have discovered so far, there are timing marks on two of the gears. The bigger, 4lo gear and the bigger center diff lock gear. The indicator on the dash is illuminated by little gears driven by the two gears with the timing marks. Pictures two and three will show you the position of the timing marks of these little gears that is required to power on the dash lights. Not knowing EXACTLY what position they have to be in I will refer back to my initial disassembly pictures for the correct positions of these marks when I reinstall the actuator.

I will update you all with more pics and the end result when the parts come in and I attempt the installation. If you have any suggestions, feel free to let me know.
 

Attachments

  • IMG_1633.jpg
    IMG_1633.jpg
    129.9 KB · Views: 4,963
  • IMG_1654.jpg
    IMG_1654.jpg
    132.4 KB · Views: 6,451
  • IMG_1647.jpg
    IMG_1647.jpg
    136.1 KB · Views: 5,368
By the way, with nothing to lose, I clamped vice grips onto the armature of the rusted center diff lock motor and cranked... It freed up! Not only that, but when I put power to it, it spun! What the hell, I took it apart and cleaned out the rust from the internals and it spins better, but still, I am replacing anyway. Let's see if my $30 in parts fixes a $1000 + actuator...
 
That's a bold venture. $6k for what you got is a deal if the rest of the truck is clean. Get it all working and you could get another 100k out of it. Any idea how much you're saving by repairing and not replacing?
 
That's a bold venture. $6k for what you got is a deal if the rest of the truck is clean. Get it all working and you could get another 100k out of it. Any idea how much you're saving by repairing and not replacing?

The rest of it is SUPER clean, I am stewing not being able to drive it and have to drive my '84 Yota P/U instead. I called my dealer here and they quoted me $1150 for a replacement actuator. In the mean time, I am looking at replacing interior lights with LED's.
 
Those things are not meant to be serviced for obvious reasons... that being said, its a good experiment since the actuator is junk anyways and it doesn't hurt to tear it apart.

Looks like one or more of the position sensors are corroded, you're not going to be able to replace those (Toyota does not sell those individually), MAYBE rebuild them, but I doubt it... That is going to cause problems for you because the actuator won't shift properly, if at all if those don't read properly.
 
Those things are not meant to be serviced for obvious reasons... that being said, its a good experiment since the actuator is junk anyways and it doesn't hurt to tear it apart.

Looks like one or more of the position sensors are corroded, you're not going to be able to replace those (Toyota does not sell those individually), MAYBE rebuild them, but I doubt it... That is going to cause problems for you because the actuator won't shift properly, if at all if those don't read properly.

I have already tested them to ensure they work properly. Good lookin out.
 
I am wondering if someone just pulled the cover on the actuator, sprayed penatrating oil in the actuator then closed it up if that would help free up slightly stuck actuators?
 
Penetrating oil more than likely would not do much good, maybe even harm?

The gears are mostly plastic as you can see, and what seized up was the motor itself which by the time it got that bad would probably be junk anyways...

On a side note, to Woodless; you were able to source the motors themselves? That's surprising! Do they come with gearing on the pinion or just plain motor assembly?

Also how did the differential fluid look? If its that bad in the actuator with a failed seal I'm worried the inside is going to be similarly full of corrosion and gunk...
 
Penetrating oil more than likely would not do much good, maybe even harm?

The gears are mostly plastic as you can see, and what seized up was the motor itself which by the time it got that bad would probably be junk anyways...

On a side note, to Woodless; you were able to source the motors themselves? That's surprising! Do they come with gearing on the pinion or just plain motor assembly?

Also how did the differential fluid look? If its that bad in the actuator with a failed seal I'm worried the inside is going to be similarly full of corrosion and gunk...

I agree, the penetrating oil would not do much. The fluid in the t-case seems to be fine, although I will be replacing it. Here is a link to the motors that I matched up on Amazon. I will be removing the wires and installing some hardware from the existing motors. Should not be a problem as the numbers and measurements match.
 
Awesome thread. Thanks for the pictures.

Please let us know how you get the timmimg correct while installing the actuator back into the tcase. The more detail/pictures the better! Would be helpful for others when they replace their actuatior.
 
New motors and seals came in today! I bought 3 seals to avoid a minimum order charge, but hey, I have an extra and they were shipped fast!
 

Attachments

  • IMG_1683.jpg
    IMG_1683.jpg
    131.6 KB · Views: 3,417
  • IMG_1714.jpg
    IMG_1714.jpg
    128.7 KB · Views: 3,407
  • IMG_1718.jpg
    IMG_1718.jpg
    128.5 KB · Views: 3,359
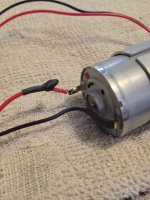
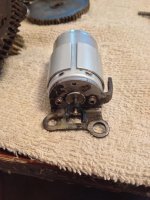
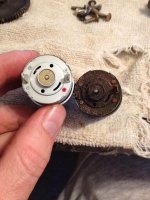
First up is to prep new motors. Had to remove the preinstalled wires and pulley. Then needed to install the old hardware from the old motors. Just as an FYI, these motors seem to be an exact replacement, all the way down to the red dot on the end.

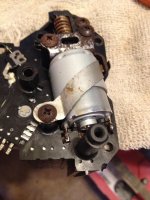
With all the hardware attached, I had to solder the connections. Did this in both motors and reassembled the unit.

Next is installation on the t-case
 

Attachments

  • IMG_1685.jpg
    IMG_1685.jpg
    124.2 KB · Views: 3,371
  • IMG_1687.jpg
    IMG_1687.jpg
    130.5 KB · Views: 3,349
  • IMG_1688.jpg
    IMG_1688.jpg
    132.9 KB · Views: 3,367
  • IMG_1690.jpg
    IMG_1690.jpg
    133.6 KB · Views: 3,514
  • IMG_1693.jpg
    IMG_1693.jpg
    124.2 KB · Views: 3,375
  • IMG_1699.jpg
    IMG_1699.jpg
    128.3 KB · Views: 3,627
Thanks for the update! Glad the motors seem the same as the originals.

Please let us know how you install the atuator back in and set the timming!
 

Members online

No members online now.

Forum statistics

Threads
278,309
Messages
3,554,075
Members
248,016
Latest member
Advally Service

Trending content

Back
Top