4RunAmok

Now that the interior wiring is completed, harnesses are zip tied in place under the hood and firewall grommets siliconed, it's time to layout the SPOD.

  1. Baja Designs 20" OnX6 High Power light bar
  2. Ditch Lights (Future Addition)
  3. Rack Left Camp Light
  4. Rack Right Camp Light
  5. Rock Lights
  6. Cell Phone Booster
  7. Water Pump
  8. Air Compressor

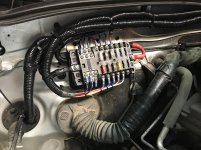
A 12 Circuit Blue Sea Fuse block will be mounted on the passenger side firewall and will handle all of the constant hot items
  • Console USB
  • Fridge
  • Ham Radio
  • Rear Passenger USB port
  • Two Rear Driver USB ports
  • Cigarette Lighter Adapter
  • Two Spare +/- Wires
  • Underhood Cigarette Lighter Adapter
  • Engine Bay Light
 
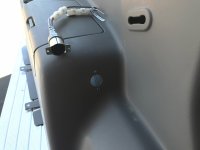
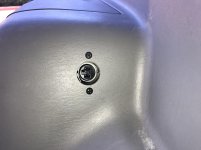
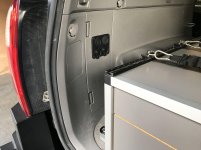
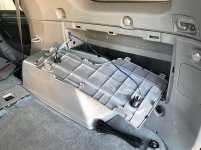
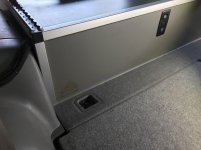
In preparation for the new Engel fridge, and my general distaste for outlets that can be knocked around causing the plug to fall out and melting my ice cream, I picked up an Engel plug socket and got stealthy with the install. It's hidden and covered when the seat the fridge normally sits on is in the upright position.

20171211_203644324_iOS.jpg

20171211_203806241_iOS.jpg

Huge thanks to Will at Sierra Expeditions for shipping this out to me quick(!) when everyone else was out of stock!
 

Attachments

  • 20171211_203644324_iOS.jpg
    20171211_203644324_iOS.jpg
    121.7 KB · Views: 824
  • 20171211_203806241_iOS.jpg
    20171211_203806241_iOS.jpg
    118 KB · Views: 821
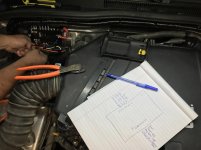
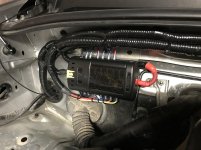
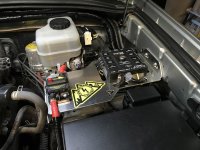
With the interior wiring finished, and the panels reinstalled, it's time to get under the hood and get the power and ground cables connected to the fuse block and connect the individual devices and their grounds to the fuse block.

20171212_211700133_iOS.jpg

Nice and tidy.

20171212_213851858_iOS.jpg

I decided I didn't like the clear lid. I want the fuse panel subdued, not highlighted. So I painted the inside of the cover black. And it came out awesome!

20171212_214218024_iOS.jpg

Now on to the driver side! Can't post that yet though :D
 

Attachments

  • 20171212_211700133_iOS.jpg
    20171212_211700133_iOS.jpg
    106.7 KB · Views: 810
  • 20171212_213851858_iOS.jpg
    20171212_213851858_iOS.jpg
    137.5 KB · Views: 830
  • 20171212_214218024_iOS.jpg
    20171212_214218024_iOS.jpg
    122.6 KB · Views: 847
Last edited:
1. Damn dude, you do wiring the way my OCD approves of.
2. We need to chat about a couple of projects for my 4Runner (which is also a silver SE)
3. How have I not seen this until now??
 
Did I say I was done with the interior wiring? With the pre-wiring, yes. Time to put in the devices that will enjoy all that power!

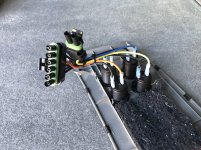
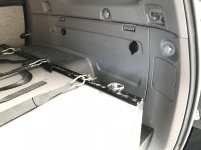
The charging station is on the left rear pocket that houses the jack and tire tool bag. This had to be removable, so pull out the weather-pack kit and make a plug set.

20171214_211957225_iOS.jpg

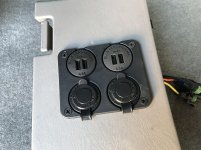
Two Blue Sea dual high-amp (4.8 amp) USB chargers, and two CLA's (cigarette lighter adapters) make up the charging station.

20171214_212016976_iOS.jpg

20171214_212056982_iOS.jpg

20171214_231944499_iOS.jpg

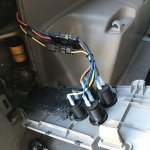
The passenger side gets the Living Overland water pump and another Blue Sea high-amp USB port. This particular USB is a remnant from the previous electrical setup when there was a fuse block inside this pocket. It was installed on a whim when Apryl told me she wanted a constant USB port for charging her phone. With the fuse block hiding behind that door, it was an easy install, and placed where she could leave her phone to charge worry free.

Well, the problem with that is it's right behind where the Scepter MWC will sit, and won't be accessible when the can resides in the truck (we don't always have it in there), but with four more USB's on the opposite side, we won't miss it. A little further back is a dual Anderson powerpole port where the water pump will plug in. They don't sell these in singles, so I got the double, and just looped the wiring into the second port. I have no idea what I would ever need to plug in the second port, but its there if I ever need it.

20171214_212138563_iOS.jpg

20171214_231959285_iOS.jpg

Now the back end is completely finished, with the exception of the second SPOD control head, which won't be here for a couple weeks, it's time to move to the front of the Goose Gear drawer box.

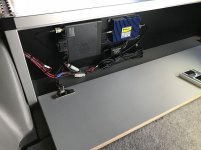
Some of you might remember when we built this box, my intention was a semi-hidden compartment for guns/etc. But when the fridge is in its home behind the driver seat, and camping gear is on the seat on the passenger side, getting into this compartment is somewhat of a pain, and we've never really used it for anything. So I decided to put the ham radio and the cell phone booster in there. These used to live in the storage pocket behind the water pump. This is what I should have done in the beginning.

20171214_220918070_iOS.jpg

With the door closed, these are well protected from anything!

20171214_220930097_iOS.jpg

I don't think Apryl will have a hard time choosing between the EIGHT constant hot USB ports placed strategically around the 4Runner to charge her phone and her little camp flashlight!
 

Attachments

  • 20171214_211957225_iOS.jpg
    20171214_211957225_iOS.jpg
    144.8 KB · Views: 815
  • 20171214_212016976_iOS.jpg
    20171214_212016976_iOS.jpg
    135.8 KB · Views: 836
  • 20171214_212056982_iOS.jpg
    20171214_212056982_iOS.jpg
    127 KB · Views: 816
  • 20171214_231944499_iOS.jpg
    20171214_231944499_iOS.jpg
    103.6 KB · Views: 802
  • 20171214_212138563_iOS.jpg
    20171214_212138563_iOS.jpg
    131.9 KB · Views: 791
  • 20171214_231959285_iOS.jpg
    20171214_231959285_iOS.jpg
    90.2 KB · Views: 799
  • 20171214_220918070_iOS.jpg
    20171214_220918070_iOS.jpg
    95.4 KB · Views: 787
  • 20171214_220930097_iOS.jpg
    20171214_220930097_iOS.jpg
    99 KB · Views: 792
Last edited:
Wiring looks clean man!!! Look forward to seeing more work!

So curious question...if you didn't like the fact that the Switch Pros shut down when closing the app and they addressed that, why did you switch to SPod? I have the Switch Pros and love it. Mine is a newer unit that doesn't shut down and has external triggers which is nice. So never had the issue you did which WOULD have driven me crazy.

Also, why run white camping lights on the side? Do you have covers for red as to not attract bugs? That's the sole reason I went with red camping lights and can use lamps or magnetic white LED motion lights I found on Amazon. Love these things! I strategically put the metal mounts on the hatch, under my RTT when deployed and going to put one inside my awning. That way you don't have to keep on turning on and off lights when walking around car.

https://smile.amazon.com/gp/product/B06XCGY71V/ref=oh_aui_detailpage_o00_s00?ie=UTF8&psc=1
 
Wiring looks clean man!!! Look forward to seeing more work!

So curious question...if you didn't like the fact that the Switch Pros shut down when closing the app and they addressed that, why did you switch to SPod? I have the Switch Pros and love it. Mine is a newer unit that doesn't shut down and has external triggers which is nice. So never had the issue you did which WOULD have driven me crazy.

Also, why run white camping lights on the side? Do you have covers for red as to not attract bugs? That's the sole reason I went with red camping lights and can use lamps or magnetic white LED motion lights I found on Amazon. Love these things! I strategically put the metal mounts on the hatch, under my RTT when deployed and going to put one inside my awning. That way you don't have to keep on turning on and off lights when walking around car.

https://smile.amazon.com/gp/product/B06XCGY71V/ref=oh_aui_detailpage_o00_s00?ie=UTF8&psc=1

I have a great relationship with SPOD, they're always top notch with customer support and getting product to me. And the whole thing with switch pros not replacing my unit under warranty when the problems were brought up to them just left a bad taste in my mouth.

Red has it's place, which is why I chose red/white lights for the hatch lighting, but for the rack side lighting, we only wanted white. They're only used for scene illumination. We turn them off and rely on campfire lighting when we want mood lighting :)
 
Not very many photos today, in fact, none really.

A mid-morning start, I finished the rock light installation by placing the four front lights, two in front of the wheels and two behind, wired them together and tied them into the SPOD.

After that, I ran the new wire for the lightbar to the SPOD.

A remnant from the prior electrical work, a CLA was hastily wired with an inline fuse that directly to the battery, and grounded at the fender with the battery. I originally put this power port in to plug the tent in so we could open and close that, but it has also been used as a constant hot port for charging phones, as well as where I would plug in my solar panel controller for quick and easy charging. I've grown used to it being there, and we definitely need it for the tent still, so I kept the location the same, but redid the power and ground over to the fuse block to keep the wiring at the battery clean, even though the port is literally one inch from the battery.

Lastly, I chose the location for the SPOD HD Control panel and mounted, and programmed it.

We're going camping this weekend, so with all the electrical finished, we're wasting no time testing it out! I'll be watching Apryl as she does her tasks around the truck (making her coffee with her aeropress, mainly), and while helping with cooking, cleaning, etc, I'll be taking notes on what she wants changed, if anything, or seeing if there's something that needs to be done differently. I doubt we'll need to change anything, we've both put so much thought into this, and I think we've knocked it out of the park for the lighting and other little conveniences.

Things that Apryl wanted changed/added that was completed with this rebuild:
Constant hot charging ports at the front seats and rear of the truck (A)
Better lighting at the tailgate for cooking, making coffee, etc. (B)
Put the water pump back in! (C)
Ability to turn on/off lights and water pump from the back. (D)

A) Mission accomplished on the charging ports.
B) Lighting is now overhead from the hatch in both red and white providing plenty of light.
C) The water pump now has a more reliable power connection.
D) And finally with the addition of a rear control head for the SPOD, we can now turn on the rack left and right camp lights, the water pump, the rock lights (providing light for things you might have dropped under the truck was taken into consideration when placing the rear rock lights), and air compressor from the back, eliminating the need to always back to the driver seat like we used to have to do.

Items I wanted corrected with this rebuild:
Get rid of that damned switch pro. (A)
Properly power each device separately and correctly, and remove the fridge from the switching system. (B)
More power ports than we could fill between the both of us (room for friends to charge their stuff too!) (C)
Make sure that devices get their power as close to the actual device as possible. (D)
Be able to show off the 4Runner to potential customers without having to make excuses for how it looks. (E)
Expandability. (F)

A) Now that the switch pro is gone, I can reliably use the bluetooth app and not worry about other devices I want left on losing their power.
B) Prior to this build, one of the switches called "Rear Power" operated a 75 amp relay that powered the fuse block that lived in the back of the 4Runner powering the ham radio, cell phone booster, rear USB port and the Fridge. So if that switch lost power, all of those items shut off together. I should have never put the fridge on a switched power source. Yes, it's nice looking down at the switch panel and knowing immediately if I forgot to turn it off when it wasn't being used, but it just wasn't worth losing a switch over. Now the fridge, ham radio, and USB ports have constant power. The water pump and cell phone booster now have their own switches on the SPOD and will only be turned on when actually needed.
C) Before, we had four total usb ports in the truck, two switched with the ignition, and two hot in the back, we would sometimes have to wait for the other to finish charging something to open one up. Not anymore, with six easily accessible constant hot USB ports, and two more when the water pump isn't in the truck, there'll be room for all of our stuff plus a port or two for friends that need something charged.
D) The last setup with all power in the back coming from the rear passenger storage pocket, the fridge power cord ran across the truck out in the open and it was just messy. Now, the fridge power port is within 10" of the fridge, the water pump power is within 12", and the charging station will have convenient pockets above to hold phones and other things while they're charging.
E) This has already been discussed, but I'm very excited for these changes. Apryl's smile while I showed her around the new conveniences and features made it all worth the work, and I think I know how my customers feel when they see the work I've done and think about how cool it will be to use it in the wild. And it's finally done with the same care and thought I put into my customers vehicles, so I can be comfortable showing it as a proper example of how I do my craft!
F) Within the harnesses are spare power and ground wires. And now that the wires are cleanly run through the factory channels, there's room for more if need be. Also because I tied the new wires to the factory harness behind trim panels, there's no wires criss-crossing around things back there, moving the panels to add more things down the line won't be such a nightmare.

Doing it right the first time is so important, removes so much worry and stress. When you have to pull it all apart again later to perform a fix or add a new item, you'll thank yourself. I guarantee it.

The only casualty: The rear hatch plastic trim panel. $75 at a local junk yard for a new panel because I drilled the holes for the lights to close to the window area, and the spot I chose to mount the switch was directly over the metal of the hatch, and there was no space for the wiring. There was no way I was going to leave three holes in the panel, so I replaced it. Live and learn, LOOK BEHIND before you cut, and measure measure measure.

 
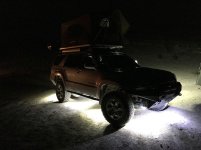
A shot of the rock lights at our campsite this weekend. Very happy with the light coverage! Off Road Only's LiteSPOTS are awesome!

20171217_013022579_iOS.jpg
 

Attachments

  • 20171217_013022579_iOS.jpg
    20171217_013022579_iOS.jpg
    96.6 KB · Views: 760
The wiring saga continues... Well, coming to a close actually.

20171212_230457020_iOS.jpg

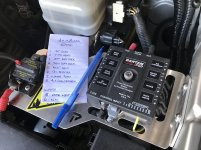
I've been given the go-ahead to show some snippets of the SPOD Bantam installation.

20171213_000345882_iOS.jpg

PowerTrays allowed me to buy a custom one-off tray specifically for the Bantam, his final product will be quite a bit different, but will be available to the public, and hopefully coincide with the release of the Bantam to the retail market.

Don't ask me the price, please, none of the testers know that info. Being a SPOD dealer, I was chosen to help beta test this unit, and when I turn this in, I will be buying a production model.

The new SPOD has some cool features that I'm taking advantage of to automate some things for me. Input triggers that sense either + or - will turn on corresponding outputs.
20171228_230336391_iOS.jpg

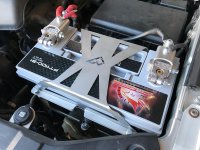
My battery cage used to be an Artec Group 31 cage, but on our last trip, for some reason it just stopped holding on to the battery, allowing it to rattle around, causing a horrible banging noise, and I could feel it in the footwell along the trail. So that's gone.

Immediately picked up a Pelfreybilt mount, which contrary to some opinions does in fact fit the 4th Gen 4Runners perfectly (I forget where I heard someone say it wouldn't fit). Now the battery is in tight, and won't move again. Those SLEE Offroad battery terminal extensions are pretty awesome too.

20171221_223021946_iOS.jpg

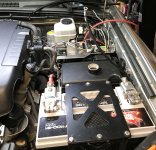
This is almost it, really. All of the crimping and zip-tying is done, a couple small things here and there, but otherwise, the re-wire is complete. The SPOD Bantam will change slightly from this version to the production version.

I'll get some interior shots of the installation sometime soon, I chose to go with two control heads for the Bantam, one on the dash, and one at the rear of the 4Runner, so I'll include those shots.
 

Attachments

  • 20171212_230457020_iOS.jpg
    20171212_230457020_iOS.jpg
    137.7 KB · Views: 802
  • 20171213_000345882_iOS.jpg
    20171213_000345882_iOS.jpg
    136 KB · Views: 799
  • 20171228_230336391_iOS.jpg
    20171228_230336391_iOS.jpg
    137.9 KB · Views: 1,366
  • 20171221_223021946_iOS.jpg
    20171221_223021946_iOS.jpg
    137.6 KB · Views: 769
Just discovered this build and sadly most of the companies or products you used are no longer available :(

I love your approach. I hope to build out my 4runner similarly. I just wish I had you wiring skills.
 

Members online

No members online now.

Forum statistics

Threads
278,306
Messages
3,554,045
Members
248,016
Latest member
Advally Service

Trending content

Back
Top