4Runnin2000 "FAM4RNR" Build Thread

Well this weekend I decided to tackle my rear axle seals. Job wasn't too bad. The brakes were the biggest pain in the butt. Working alone and trying to get all of this done in one day made it a little hard to snap pics of every step. But there are enough writeups for this job already I think.
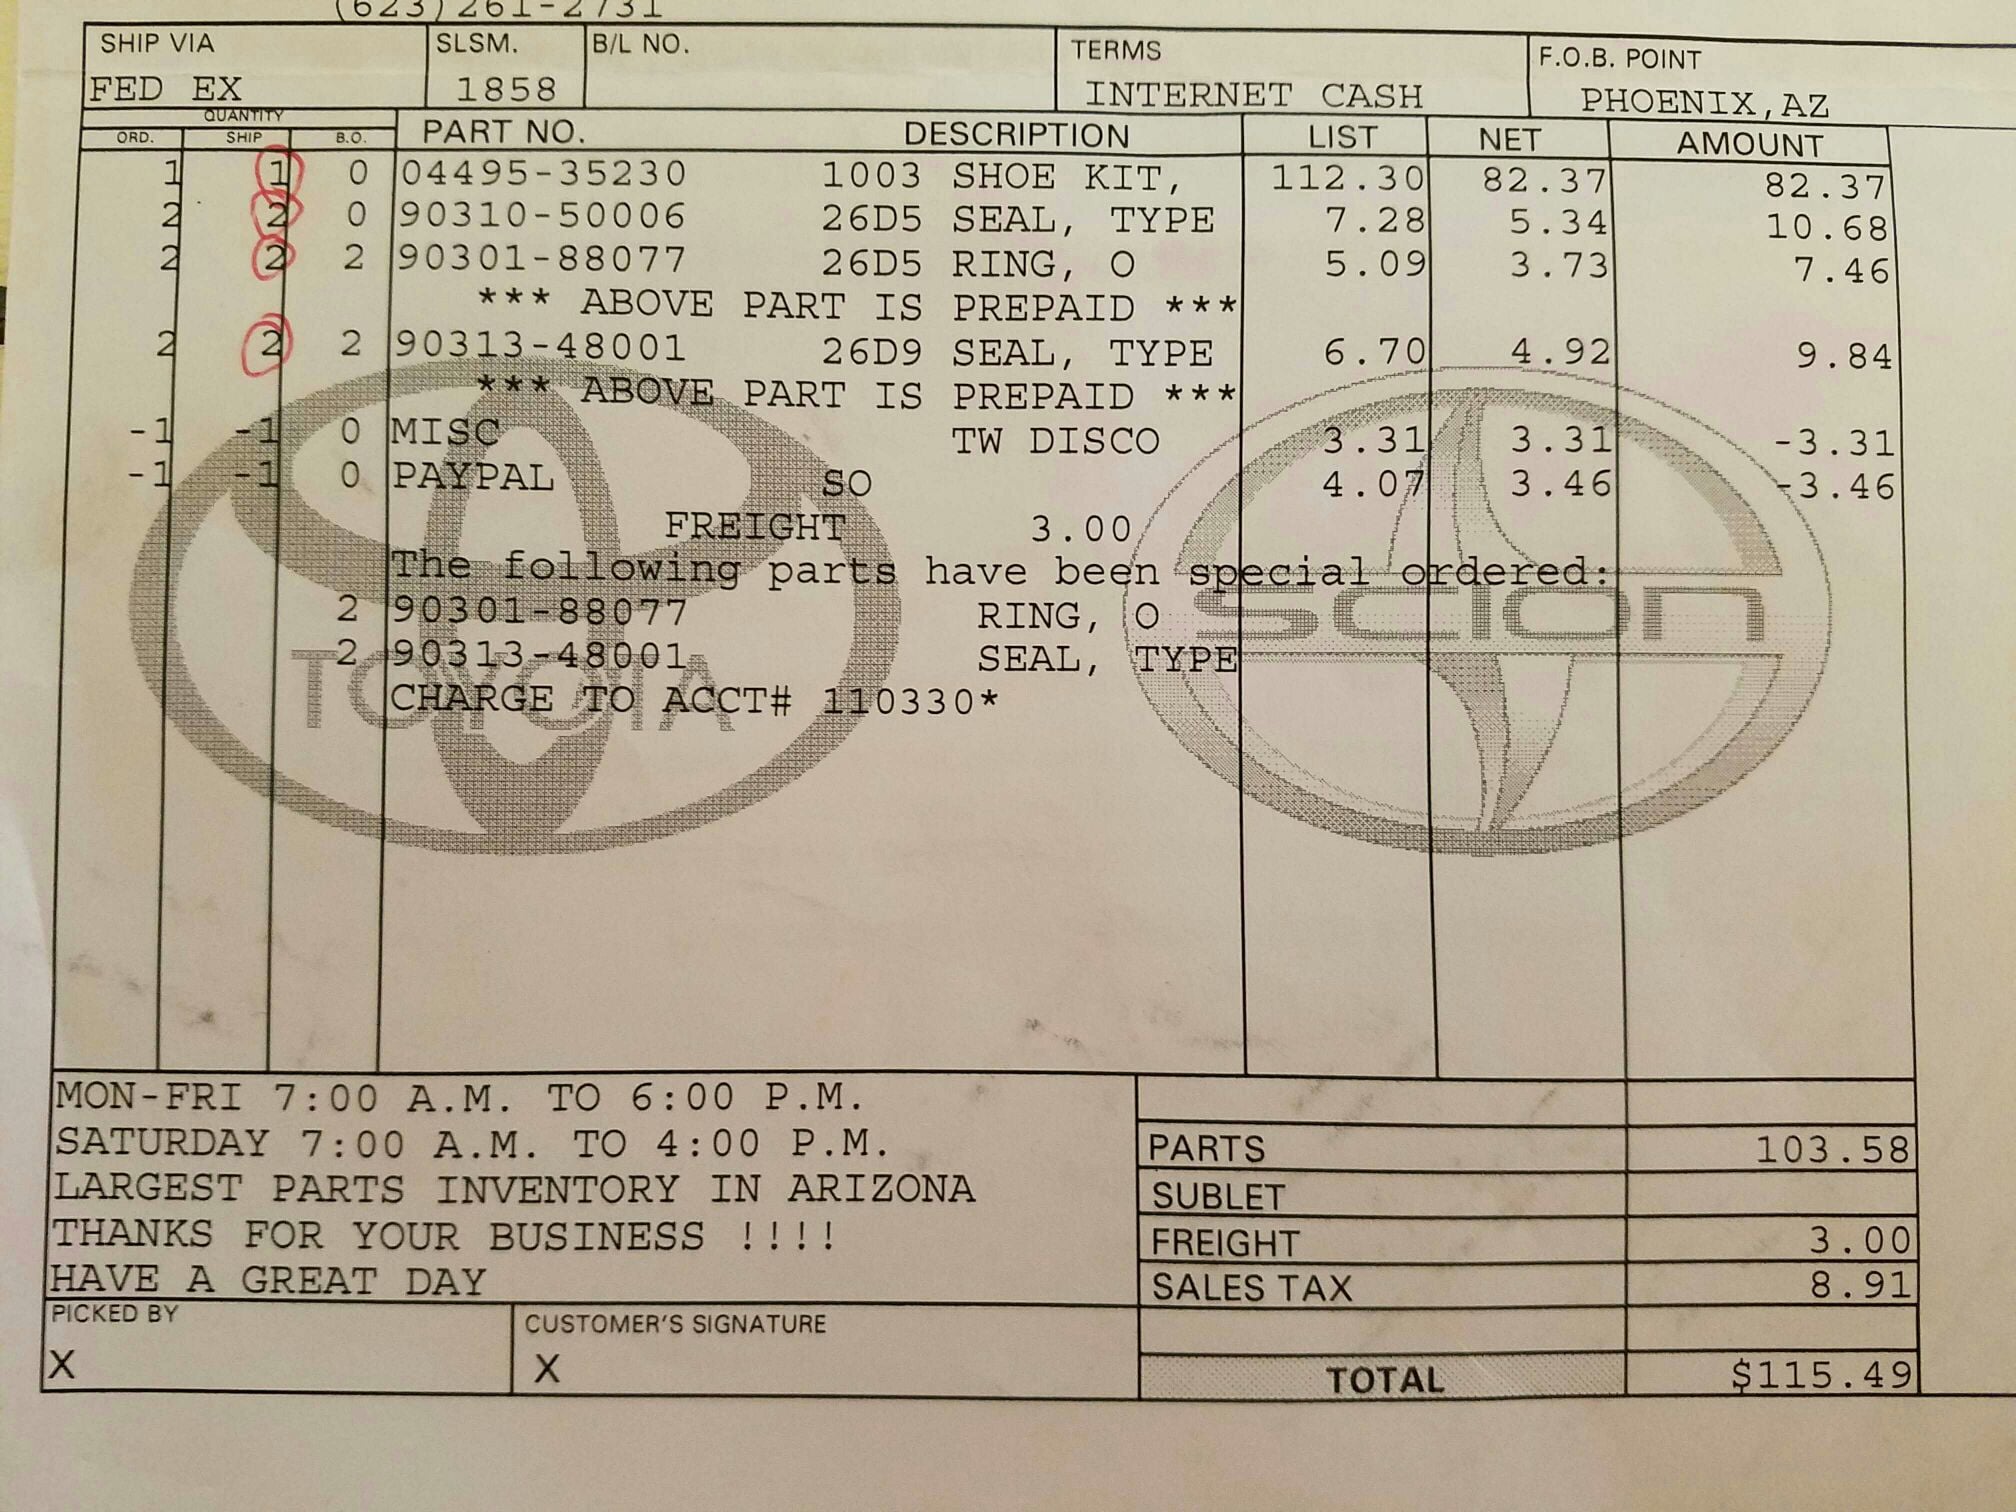
Here is a picture of the parts list
4fb4a39a850b13b91df6550ac82070d6.jpg

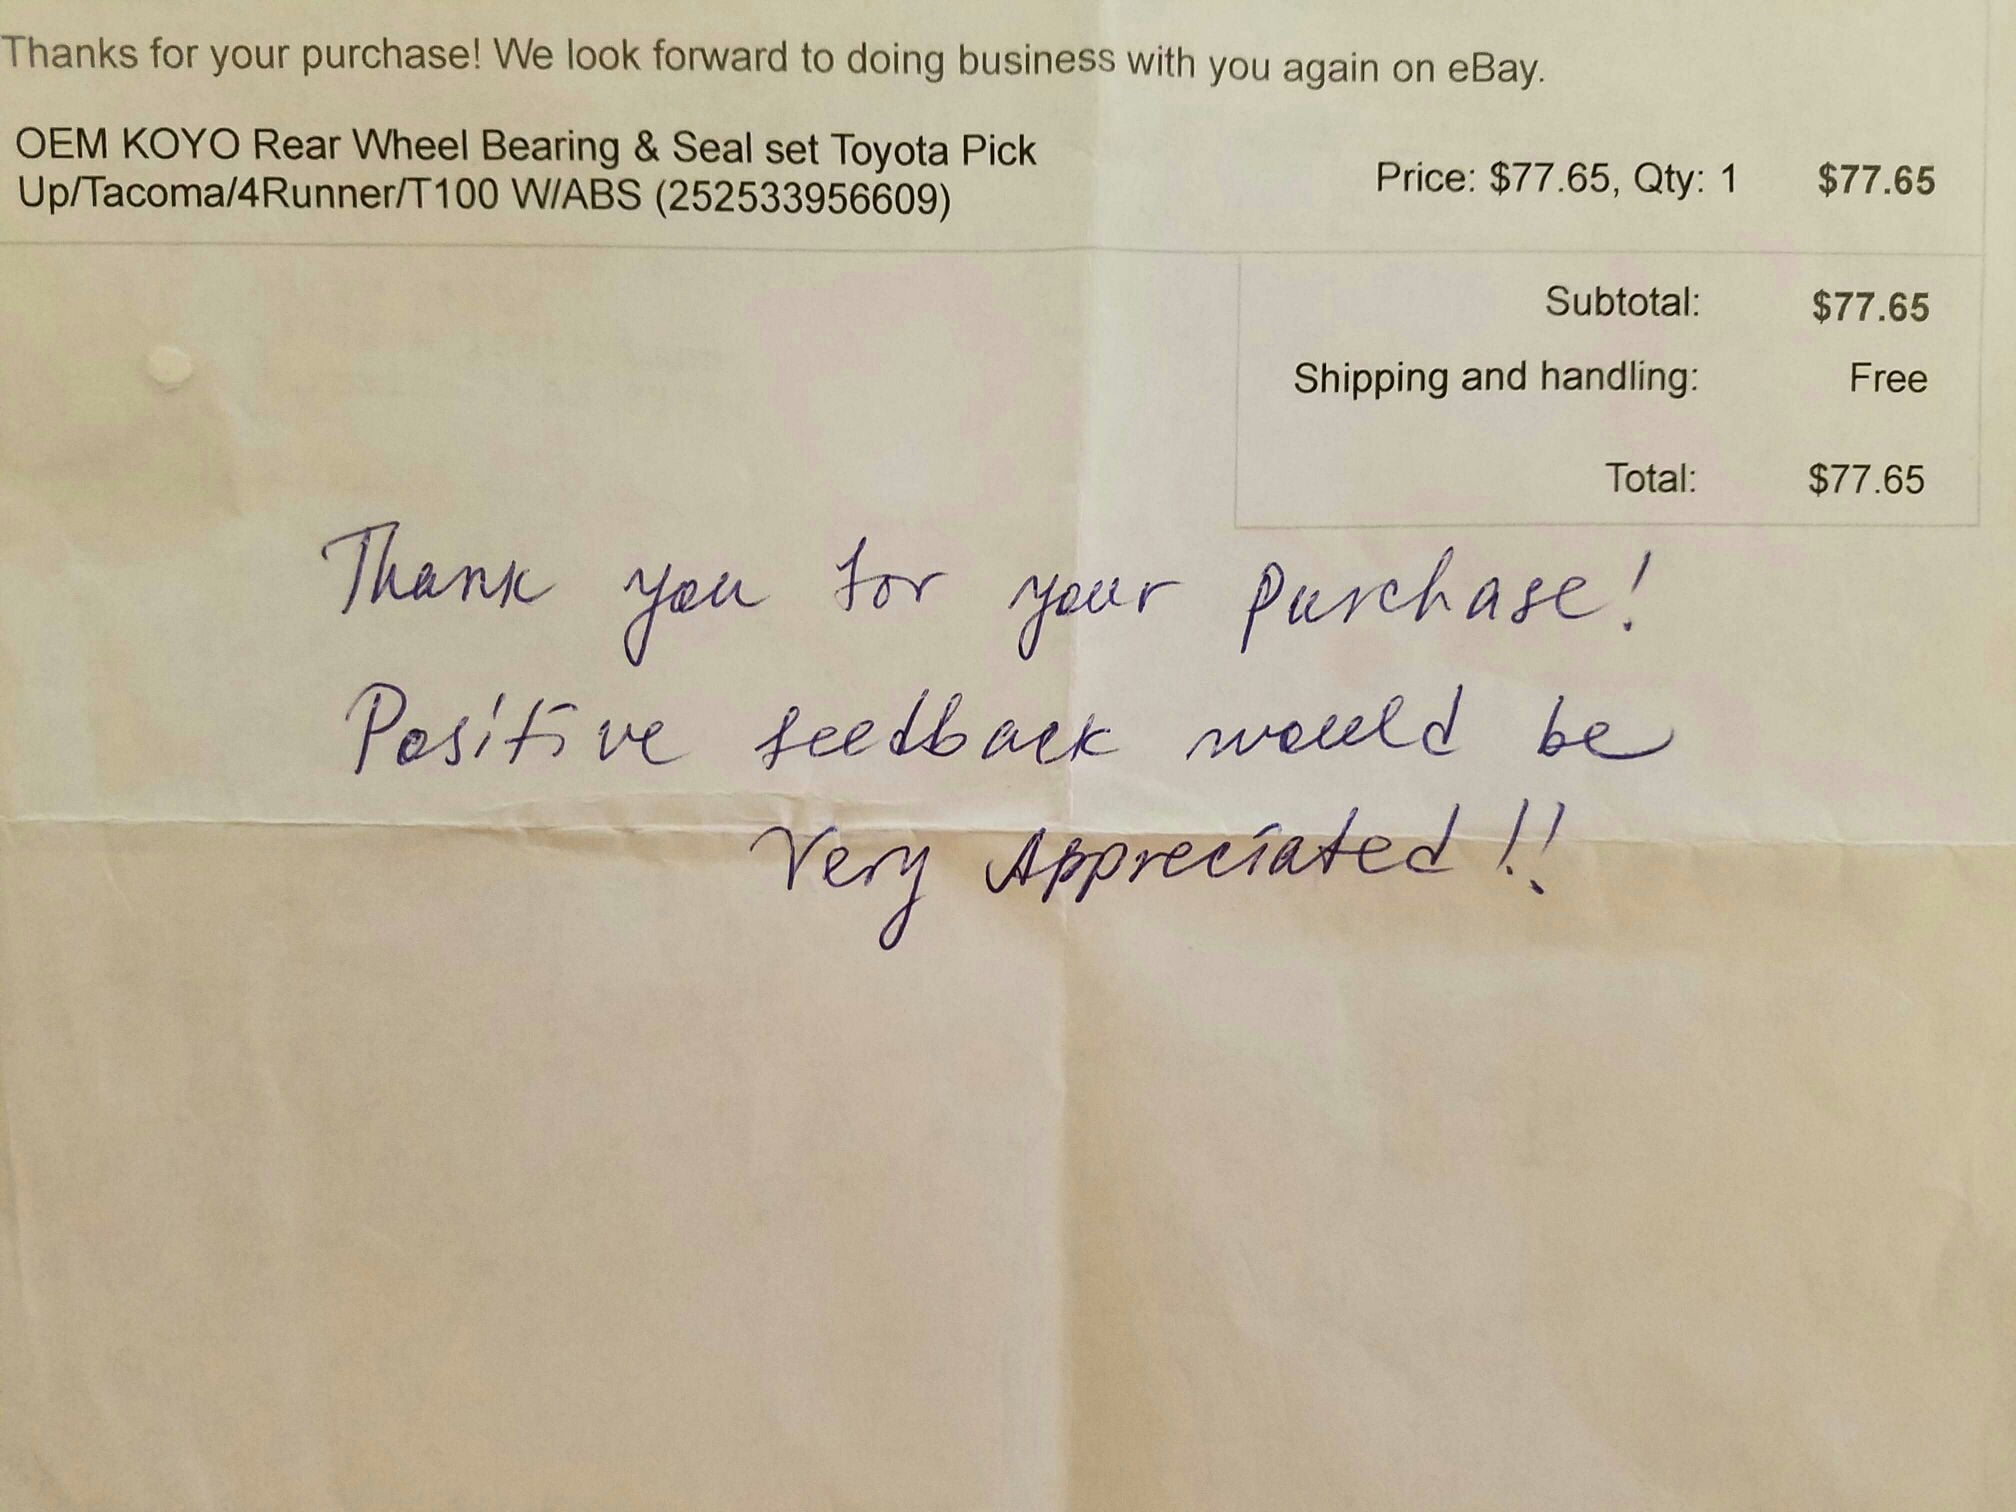
Decided to go with Koyo bearing for half the price. Got the full kit but only used the bearings.
328e7fe93ab3022ce9d3b300faae8966.jpg


Other tools, parts, and expenses

3 cans of brake cleaner $2 a can at walmart
Brake fluid $6
3 quarts of Gear oil. I used Chevron Delo full synthetic 75w-90. Used to use their oil in my wrx and liked it. Also it was only 6.99 a quart at Autozone.
Brake pliers kit at Harbor freight for 12.99(only used when putting them back together and removing retainer springs) job can be done without it.
Seal puller at autozone for 10.99
Brake lube 4 packs at 1.99 each
Needle nose vise grips at Harbor freight for 4.99
Also had to rent a seal driver kit from O'Reilly. $60 deposit refunded when I returned it. So free.
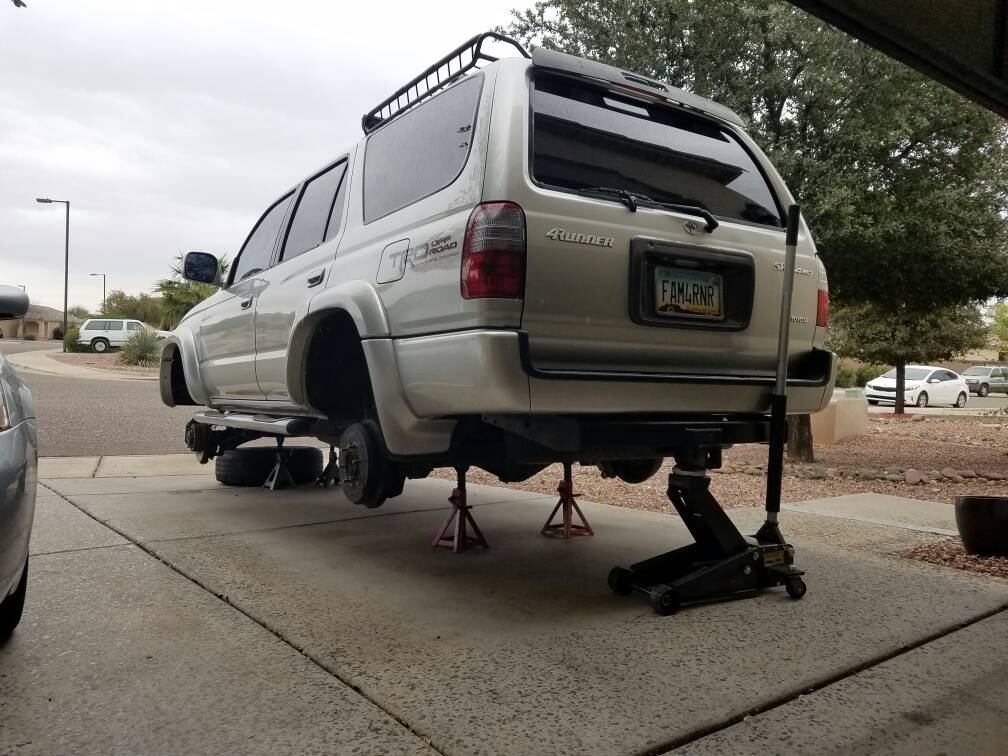
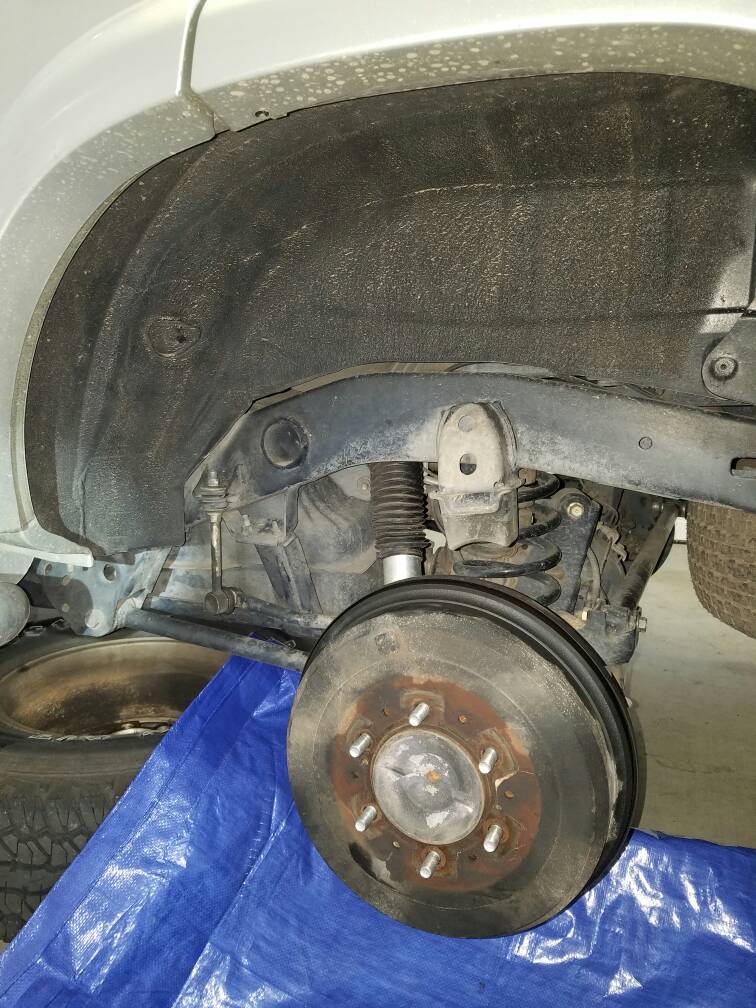
Got it jacked up and started with the bad side.
a5b59eb4d691c17dd75beac114f67c3a.jpg


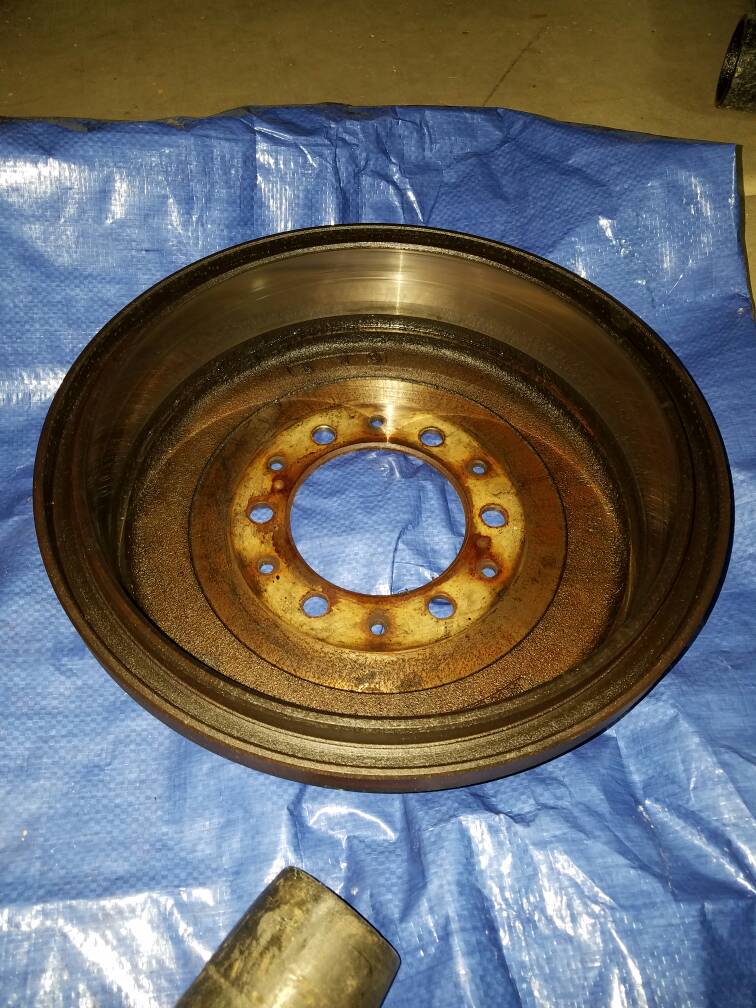
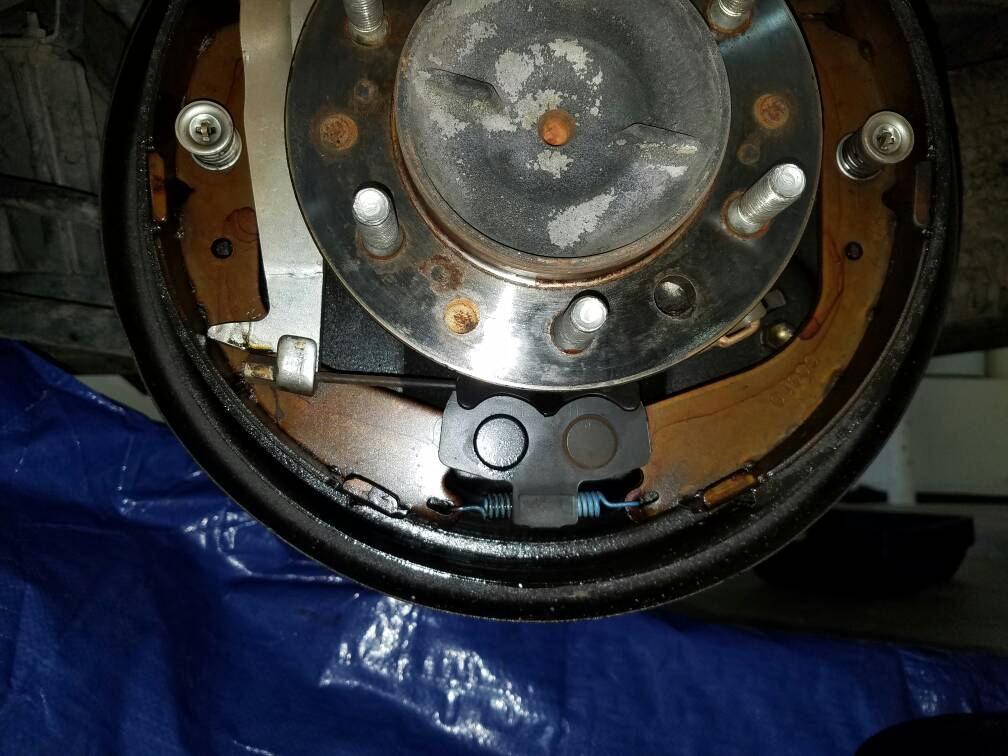
Took the drum off to find everything covered in gear oil
7a783944b1d94ad65d8418c58299db7e.jpg


4b7a7715841eca5acfb77d281c427987.jpg


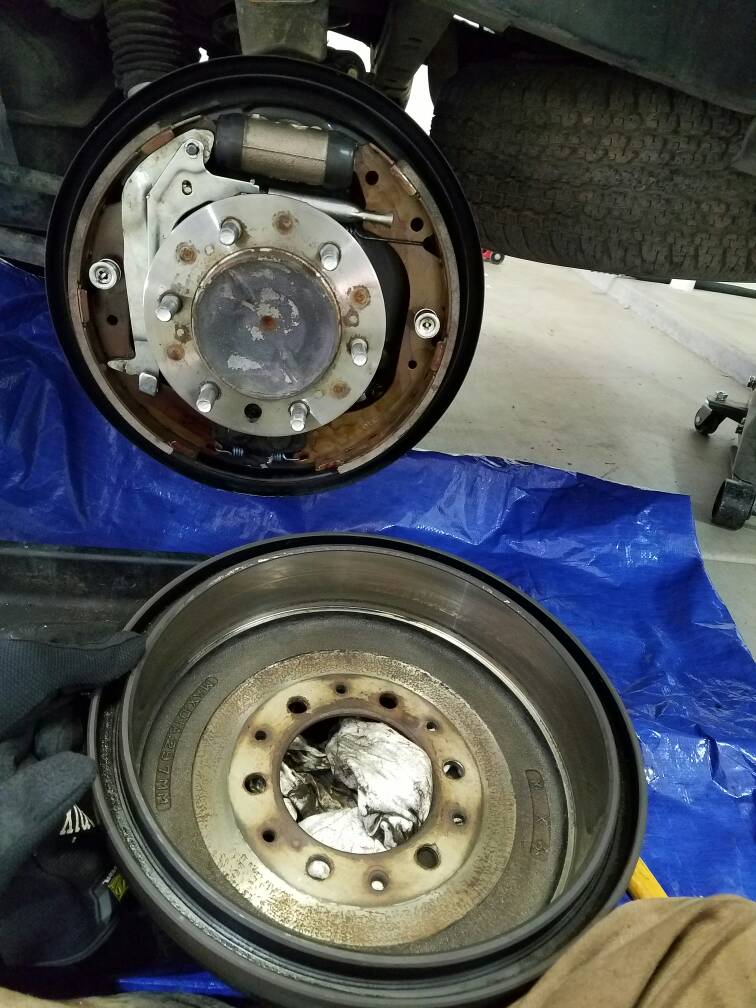
Got it all cleaned up and new shoes put on
6e511728e1639d4077f51ee6e658baed.jpg


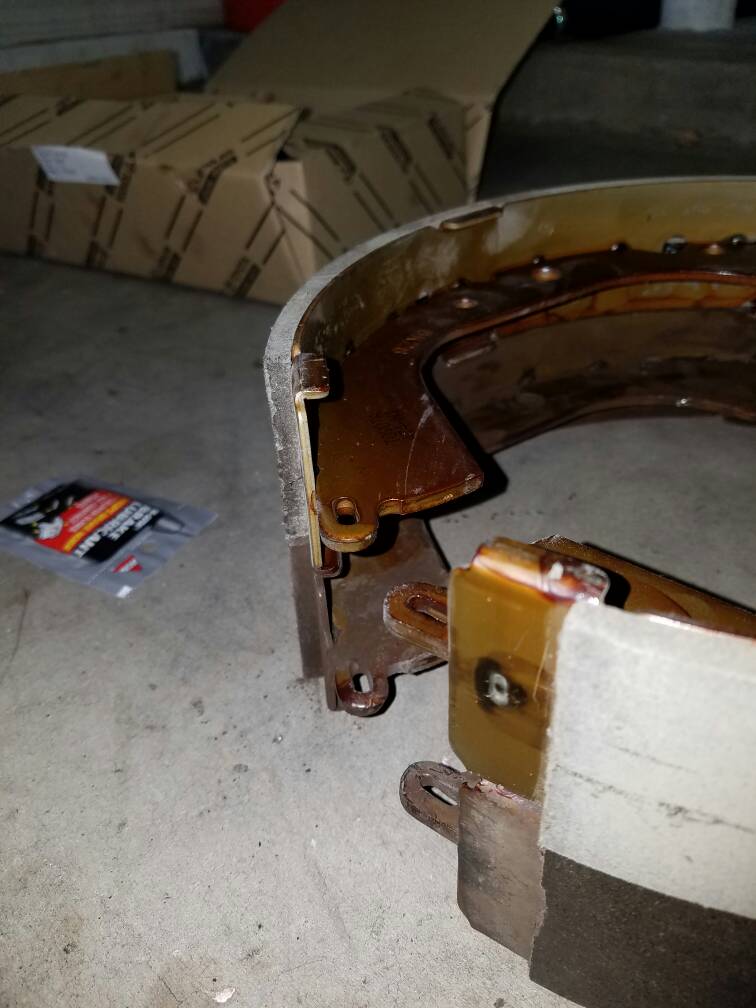
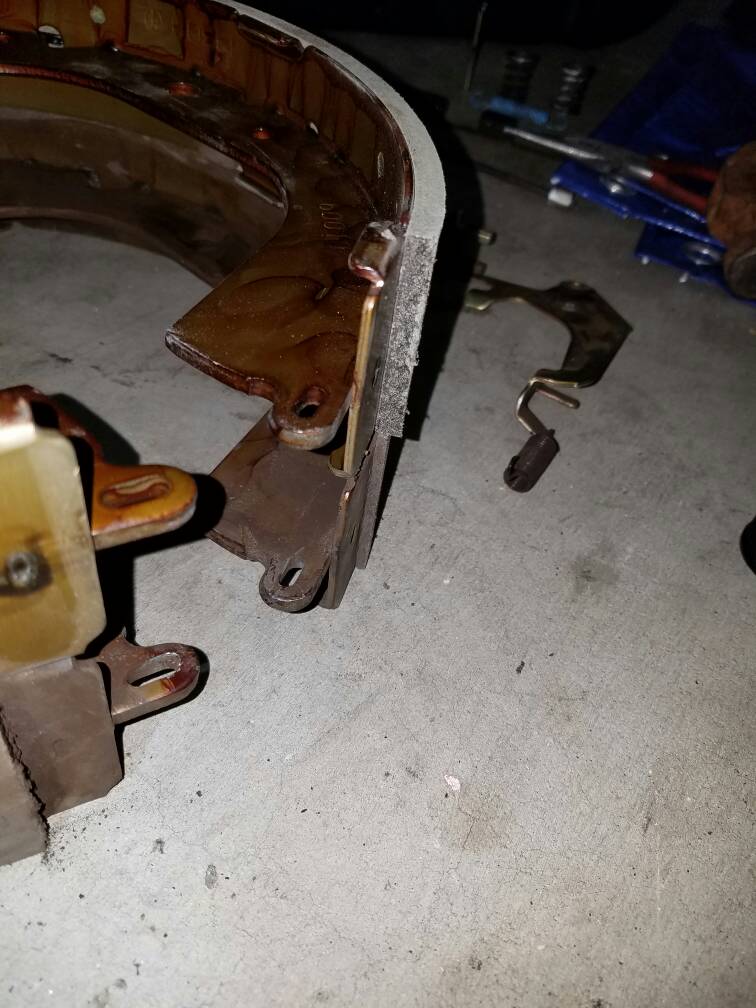
When I removed the side that wasn't leaking I noticed that one of the shoes was worn all the way down and the other still looked new. Wondering if it was sticking for a while or what
8bf8757aa6a3e0735e1660999599a8e1.jpg

8466037a4505e2cedd49d82c77a19352.jpg


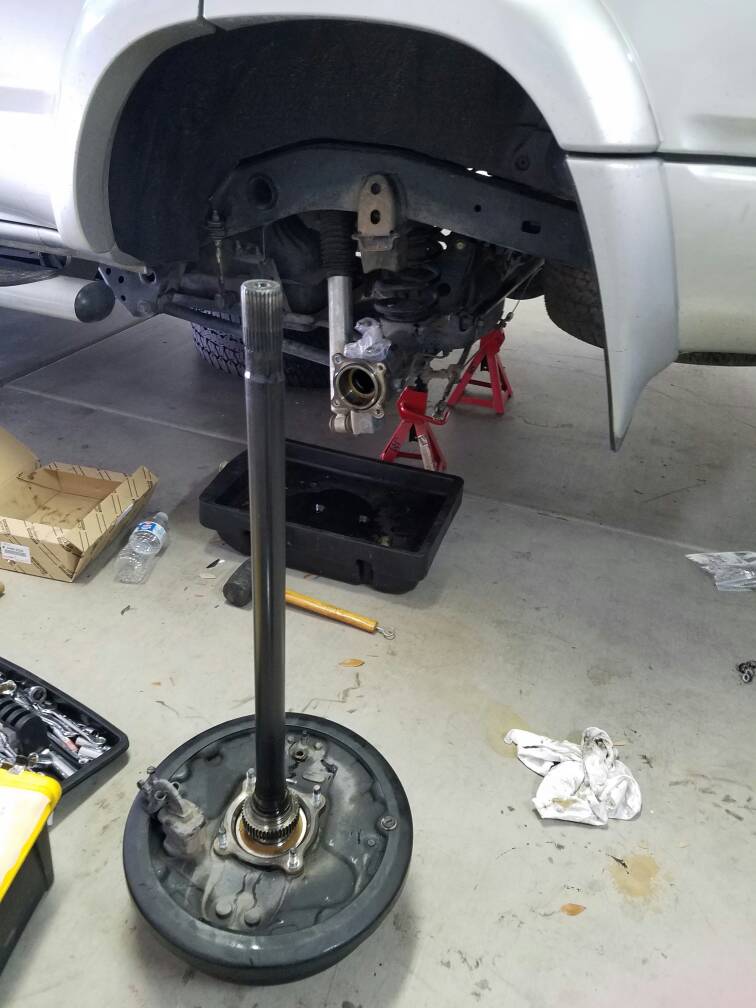
Then removed the axles
bdbd5cb6a77def5e27671f416ccc3a47.jpg


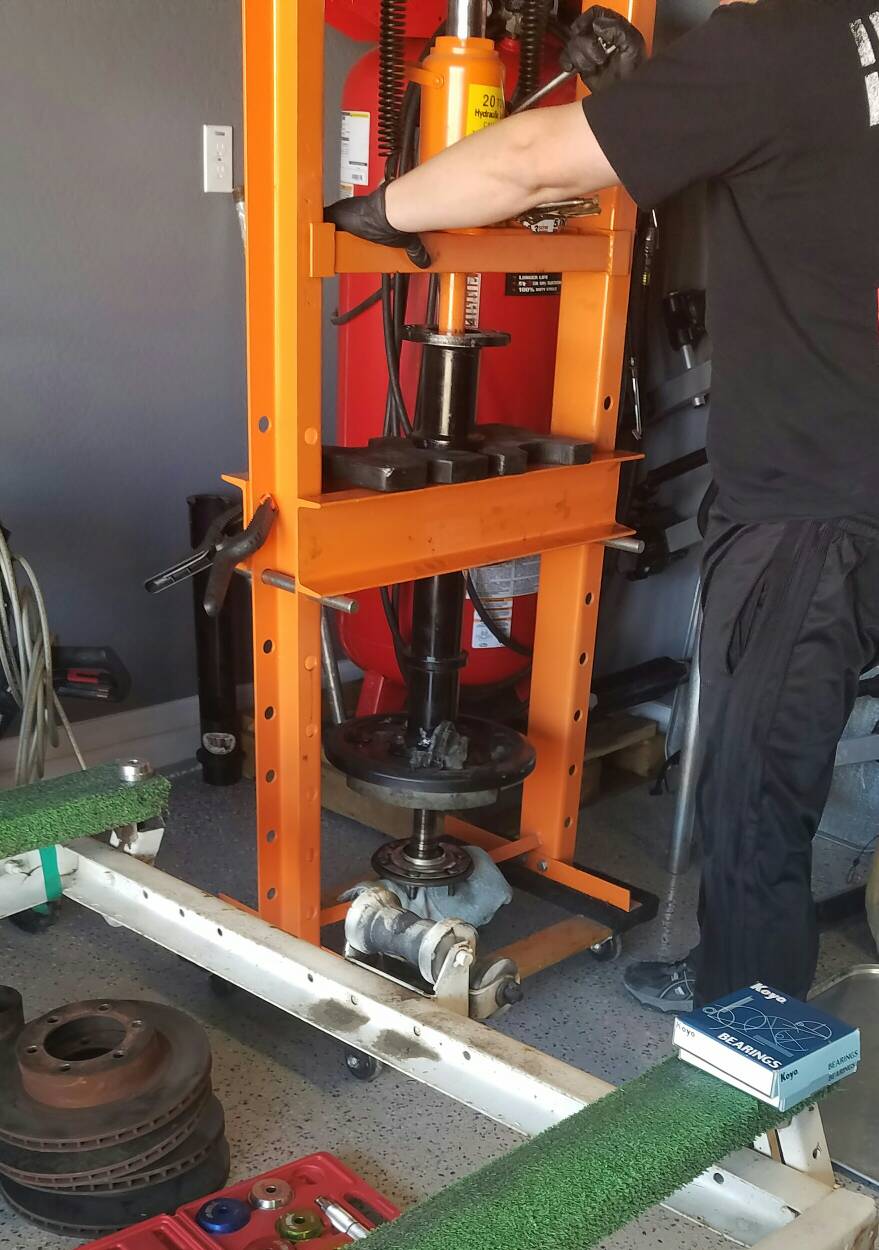
Then loaded them up and was off to [MENTION=123173]Jhelms[/MENTION] place for the press work!
85281da5094ce755a612b1c021ab8d2d.jpg


Put it all back together, Adjusted the brakes a little, put in new synthetic gear oil, and did a brake flush. Next weekend will be the dif breather mod.

I really couldn't have done this job without this forum.

This writeup helped a lot
Rear Axle Seals: The Ultimate Information ... - Toyota 4Runner ...

And [MENTION=123173]Jhelms[/MENTION] answered a lot of questions that I had leading up to the job. He also gave me a lot of tips for completing the job! Big thanks to him too!

Total price for this job with labor and everything I needed was $413.85.
Not bad compared to what a shop would have charged. Also got to get the experience of doing this job and a little wrenching time.


Sent from my SM-G935V using Tapatalk
 
Last edited:
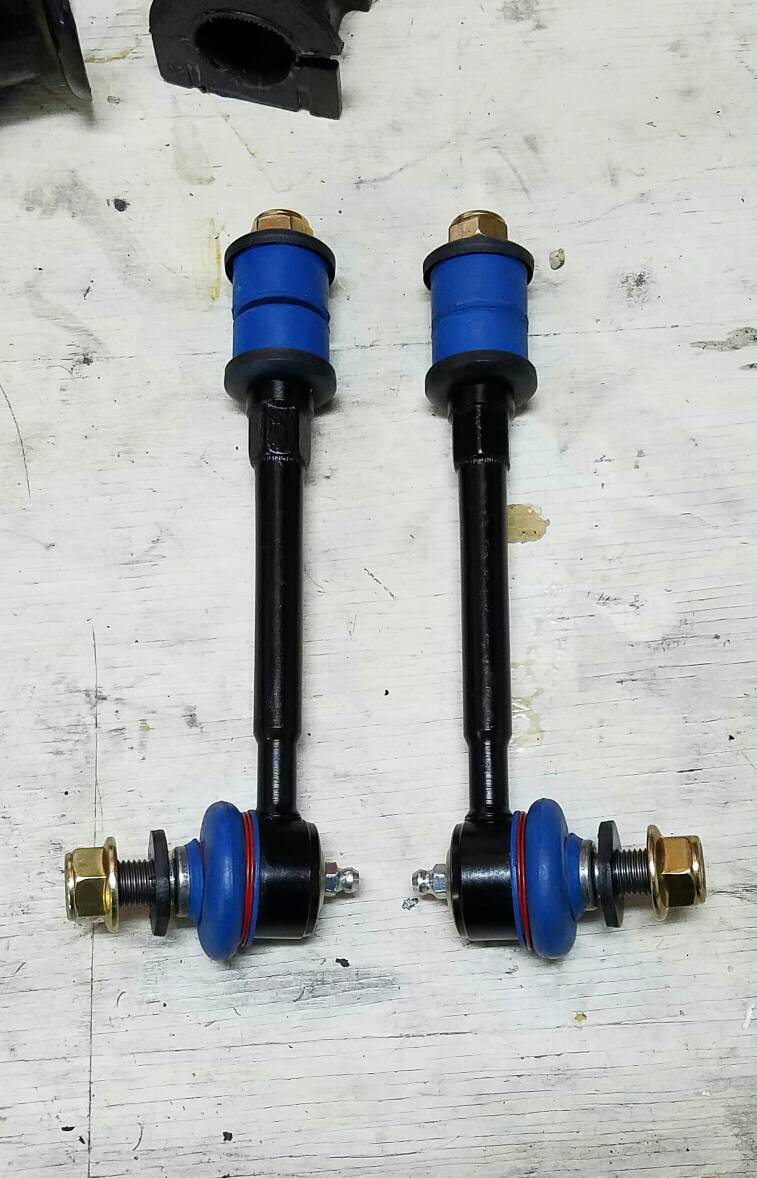
Found that one of my front end links broke. So I got some new ones off of ebay. They have the moog part number K90681 stamped on it. Kinda weird. Built pretty solid and came with a grease zerk.

8d5b456e6fc47ff7e789f8d7b5a3dede.jpg


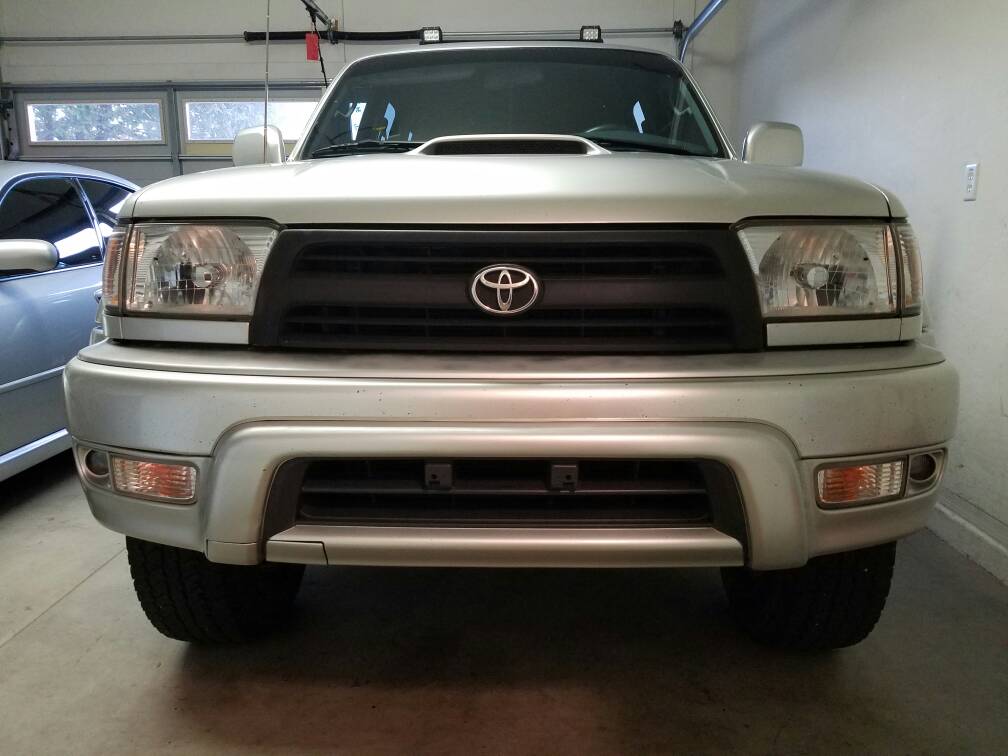
I also removed my Plastidip from the bottom Grille. Looks a lot cleaner now!

67fdc5bf0377d21d8410a92282746d6a.jpg

Came off pretty easily. Sprayed wd40 all over it and then let it sit for about 15 minutes. Then came out and wiped it off.
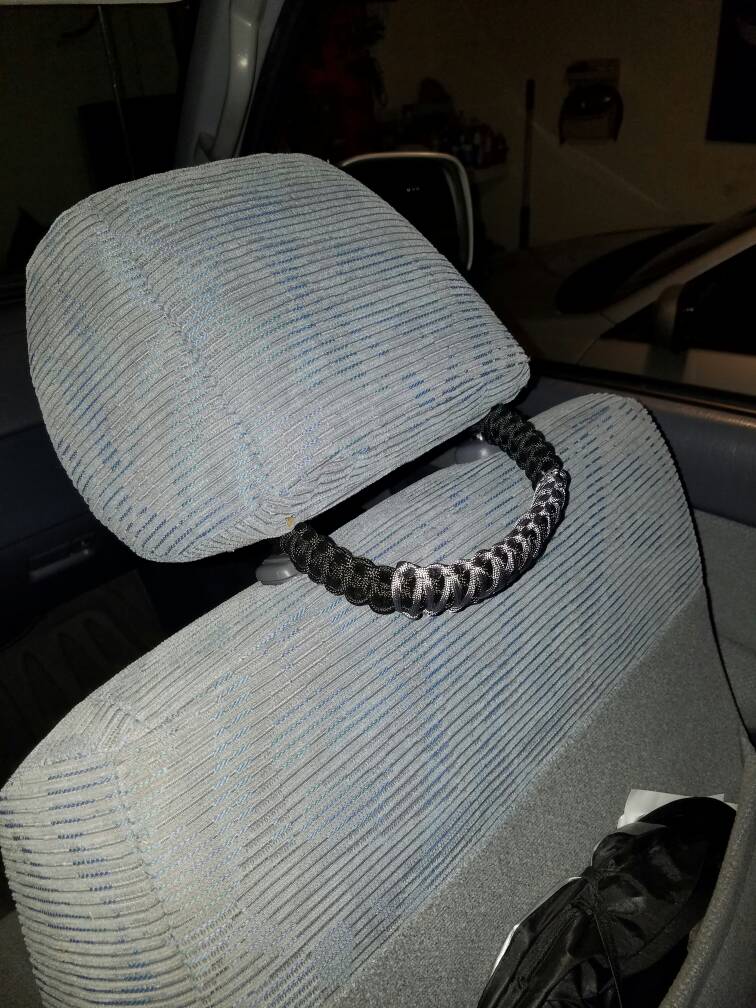
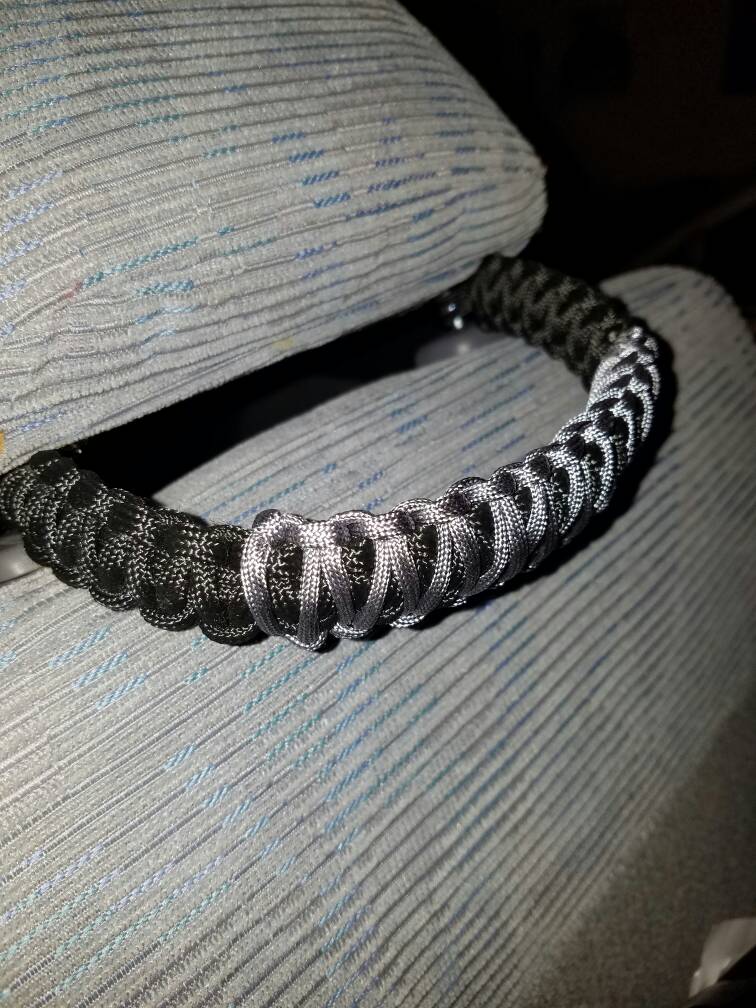
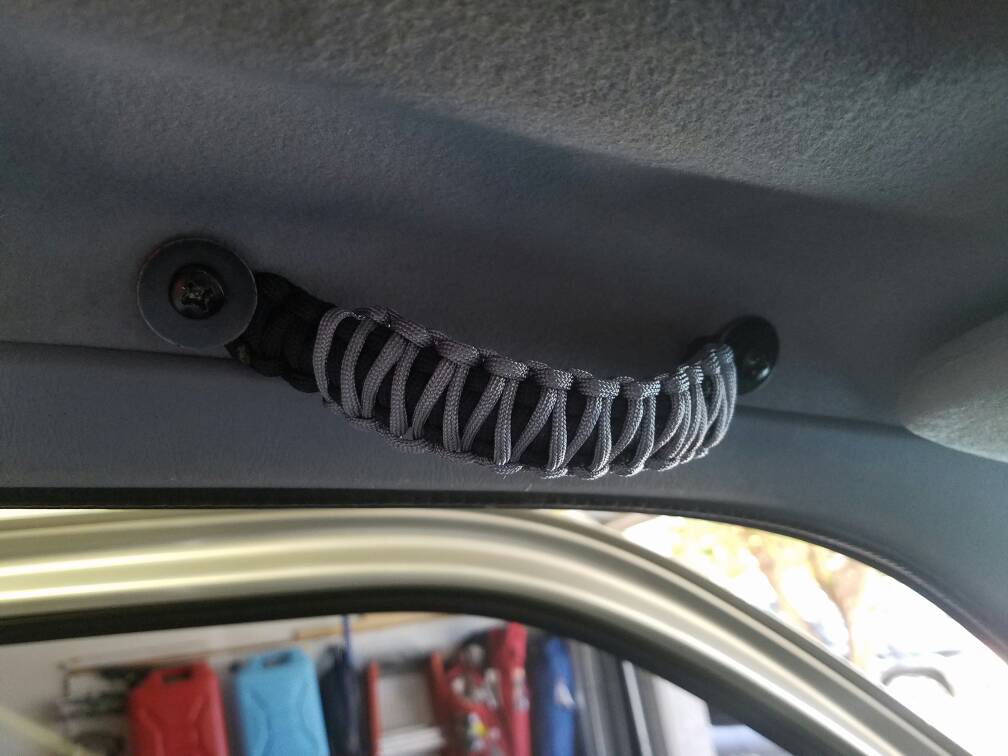
Also Got bored yesterday and finished up my paracord handles. Definitely helps the kid get in and out of her carseat.
I went with gray and black. They turned out pretty well for my first ones
c6225906f69b8d7e92710e6f5ec60a72.jpg

595006df0f8f54b0b85e14964a927196.jpg


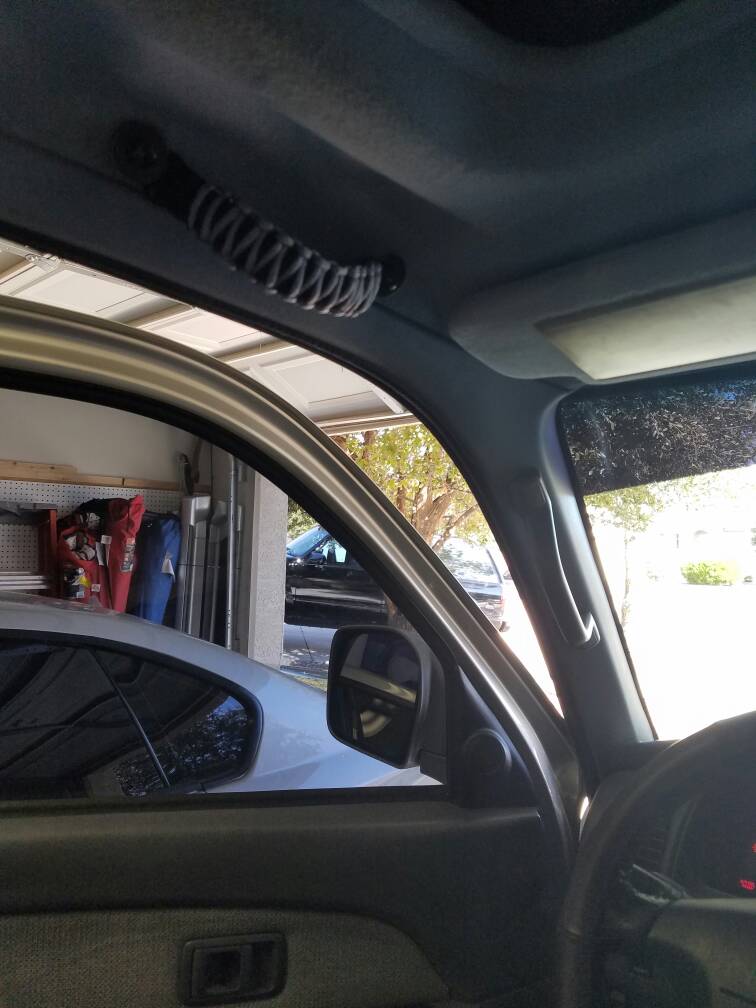
Also did the Oh shit handle for the driver side. Hate that it never came with one but also glad that the holes are there if you want to add one. Have to head to ace hardware and get some washers and bolts and then I will post pics of that one.
Here it is

5ad9afb0b5ee98c5a191869ec85f3192.jpg

b20621d29e4e859542029537bf6ce267.jpg


Sent from my SM-G935V using Tapatalk
 
Last edited:
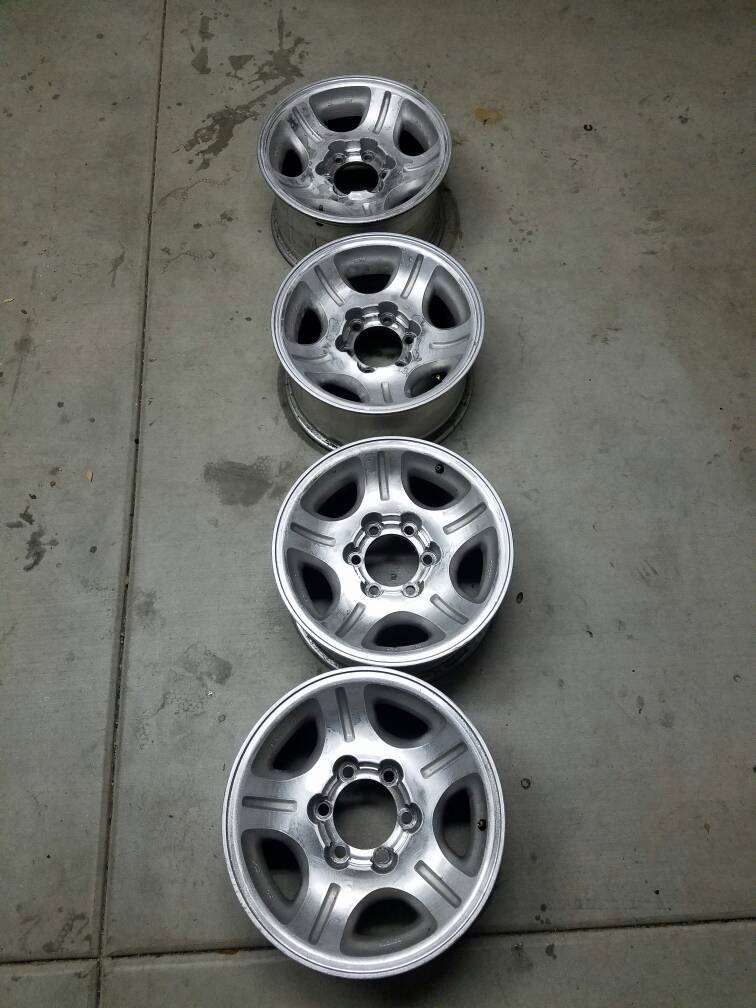
Scored 5 Lx450 rims on Craigslist last weekend! For cheap! Been looking for a while! Painting starts this weekend. Can't wait to get them on!
e35ac1e33de4c439bf20d4409d4f2f5b.jpg


Sent from my SM-G935V using Tapatalk
 
Last edited:
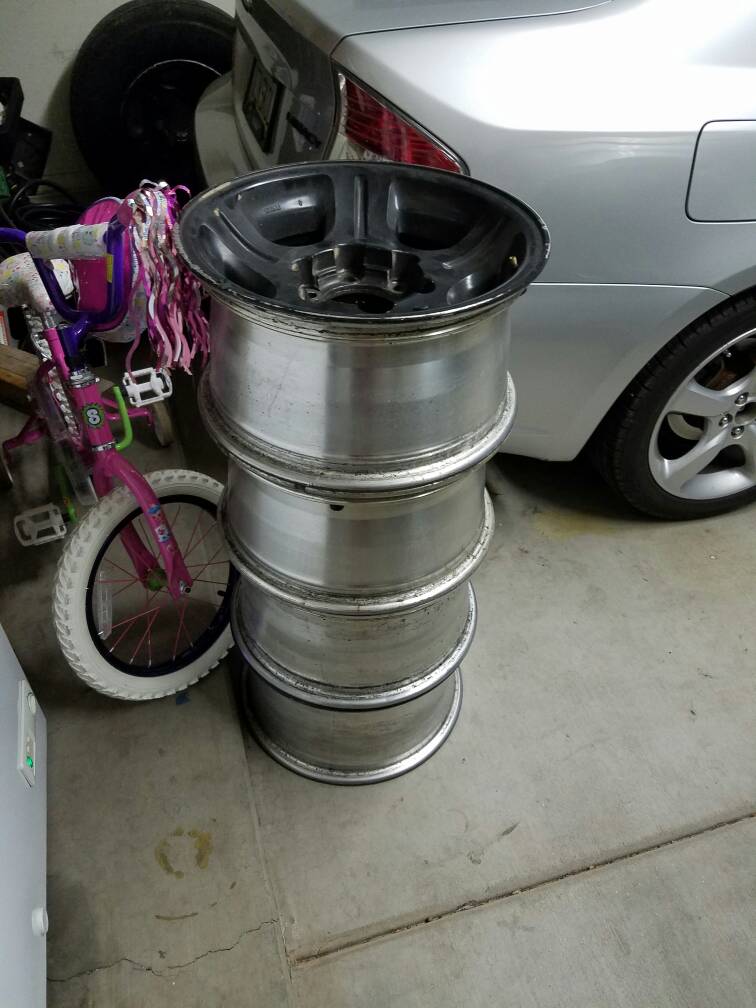
Ok. So I decided to tackle the rim painting this weekend. The first step was to get all of the old black paint off of them. When I bought them, 4 looked like this... Minus the pink bike..
a0570eef8fa764a95e92bb6e8467b82c.jpg


And only one was factory color still. I decided to only do 4 of them because the 5th one needs a little more work and I don't have a tire for it now anyway.

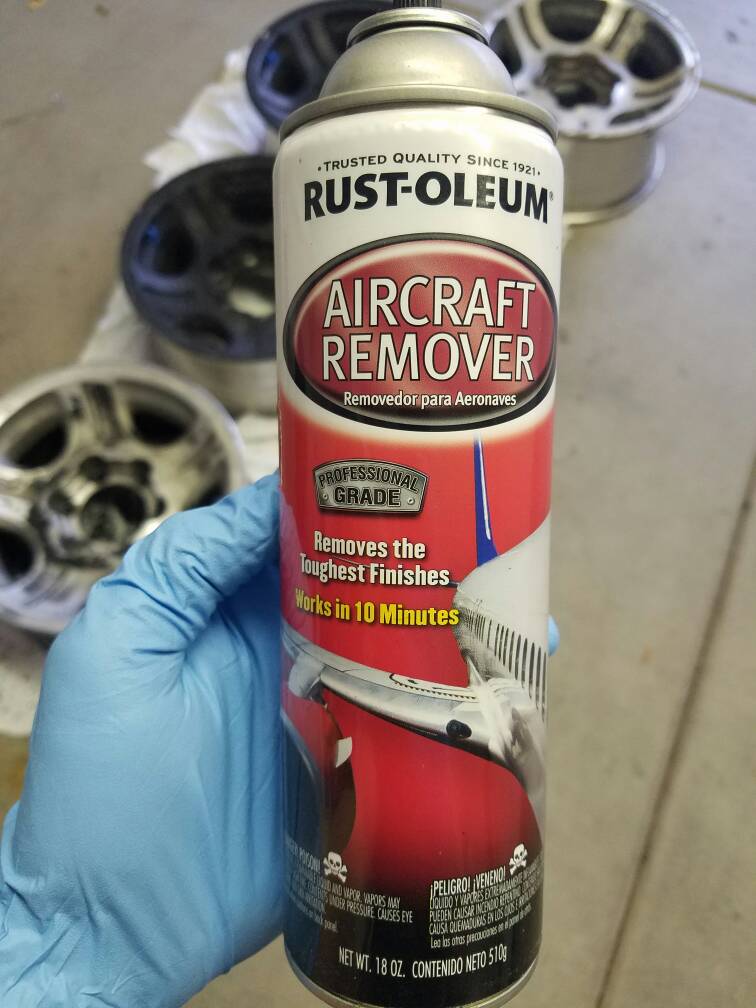
So after searching I found this stuff
70508fc5feb0bba1838512af84258b3a.jpg


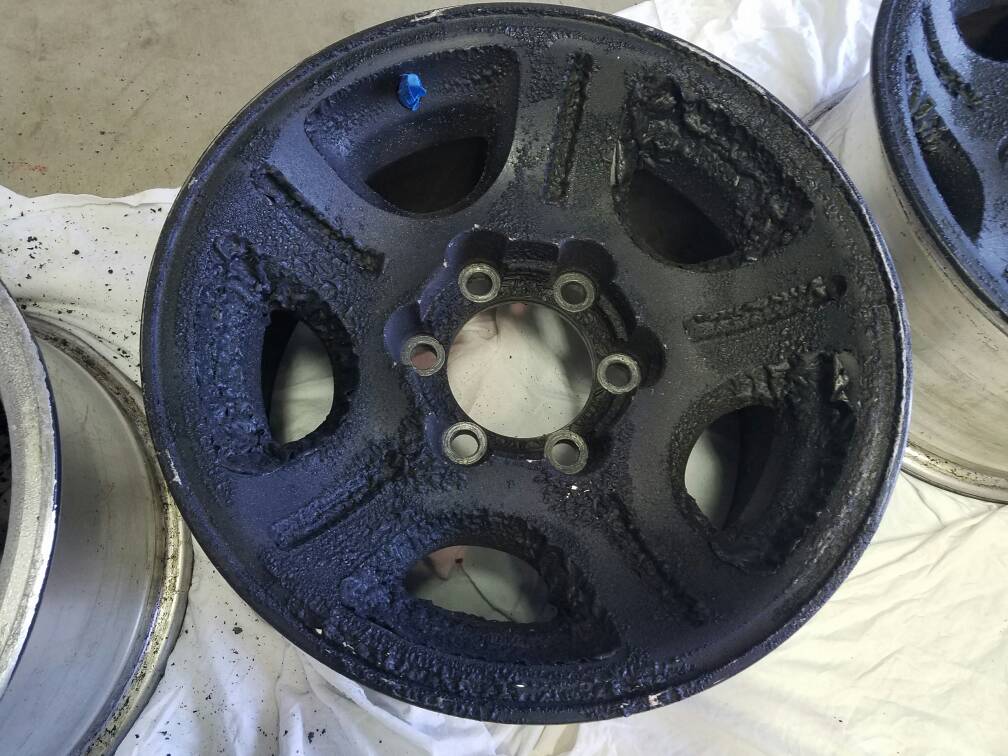
Pretty cool to see it in action. I used 2 cans
94e3bee46b3be4de8fe387ceab37fa7e.jpg


After one coat and wiping it off I was left with this
1c05442e9c9e8471584e9627a7c053b2.jpg


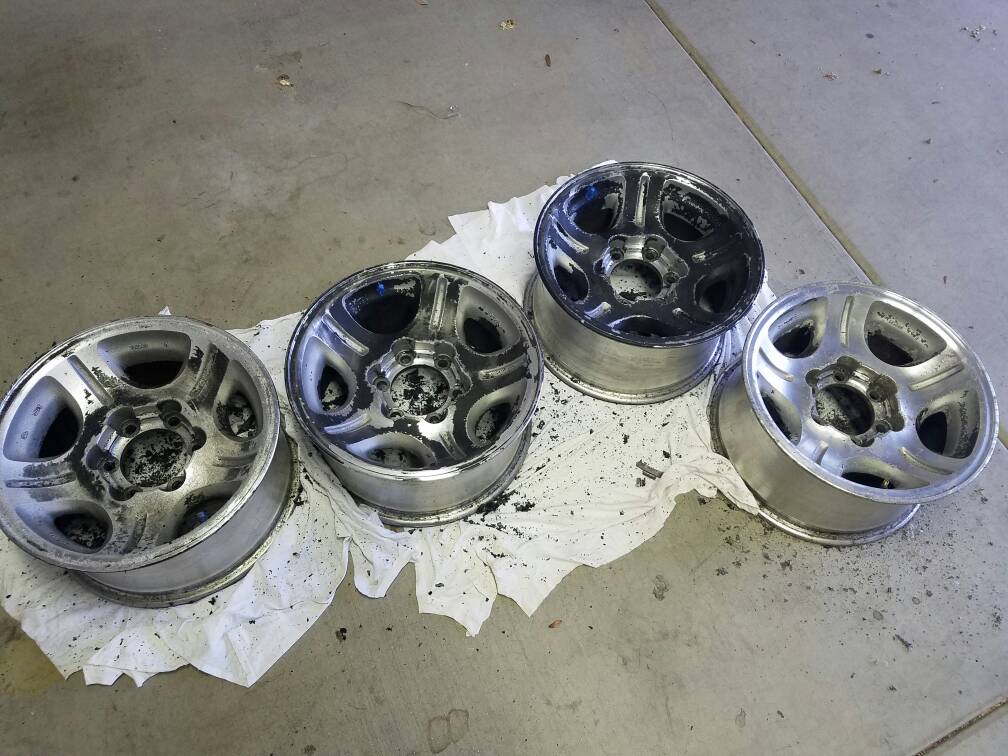
After 2 coats and 3
a80c378924c9690c29214a098c6429f3.jpg

edcb02c5a7ab2fe73bfeb18627fbe1ae.jpg


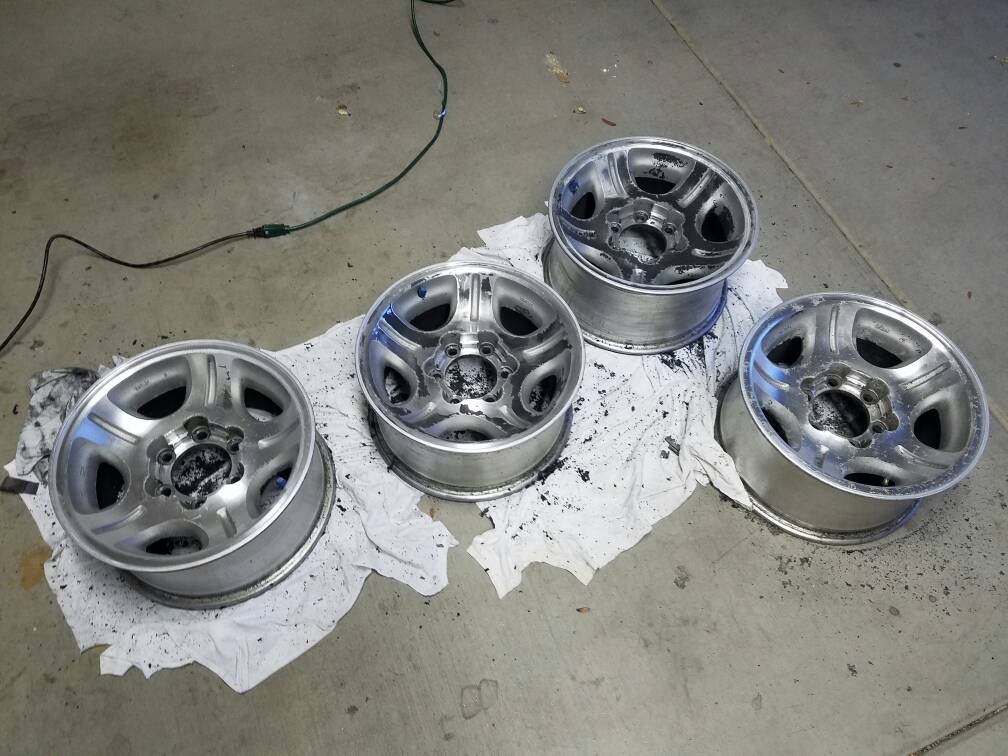
Then I sanded down some of the rash that was on there with some 200 grit and
Used a wire wheel to get the rest of the paint off. A 3rd can of that stuff would have been good. Guy had a lot of paint on these!

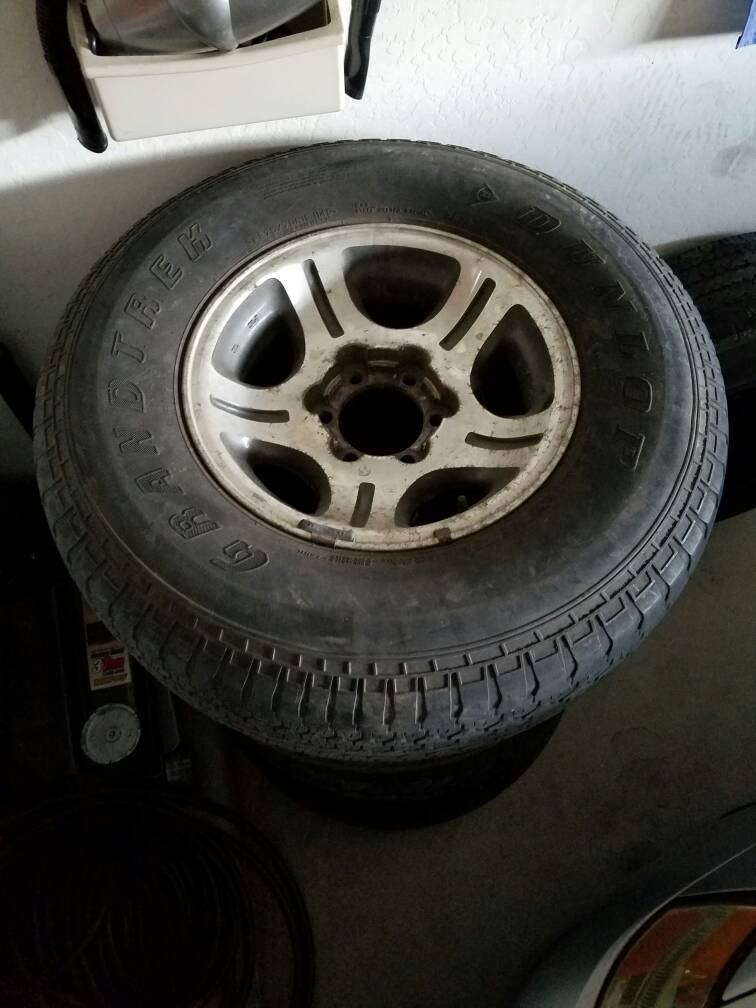
Then I went and got them mounted on my tires. Didn't want them to mess up the new paint job. Look good silver...
128e27bccf3ae7e1ac44e31e48e0fe5e.jpg


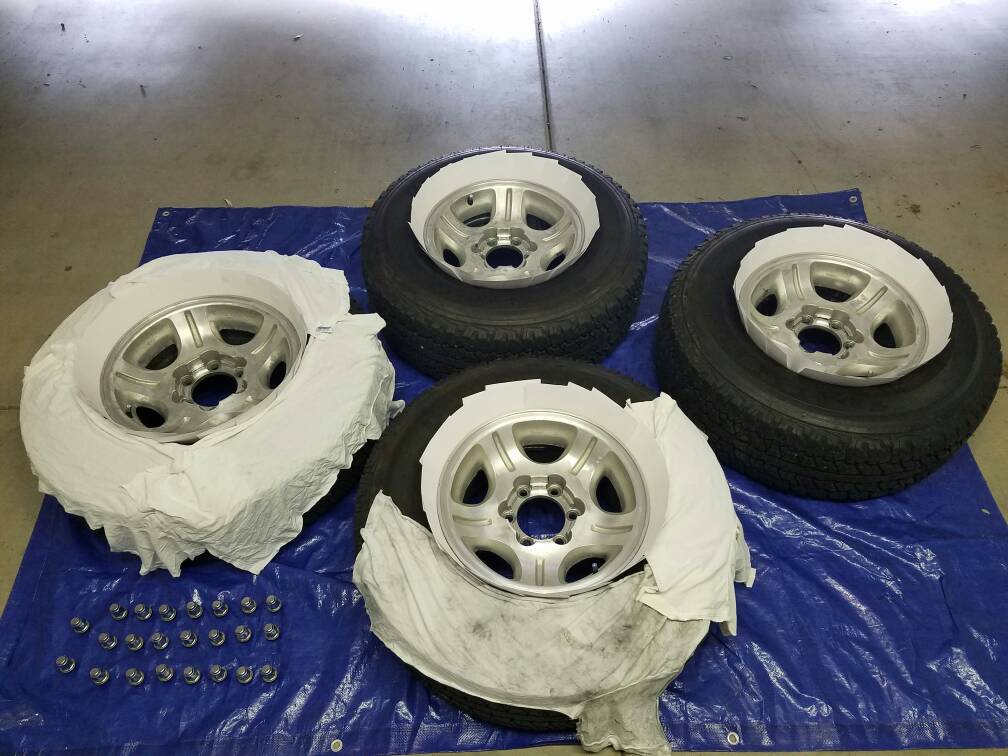
So then it was off with all the wheels and in the garage for paint. I'm sure the association loved seeing this if they drove by. It was raining outside so I had no choice.
2a818a4009052d5b2de0106ea7d5f917.jpg

Went with the index cards because the dollar store was out of playing cards..
Prepped the wheels with rubbing alcohol to get all finger prints and grease off
61654dfad47655ec319af2b0d2f5b215.jpg


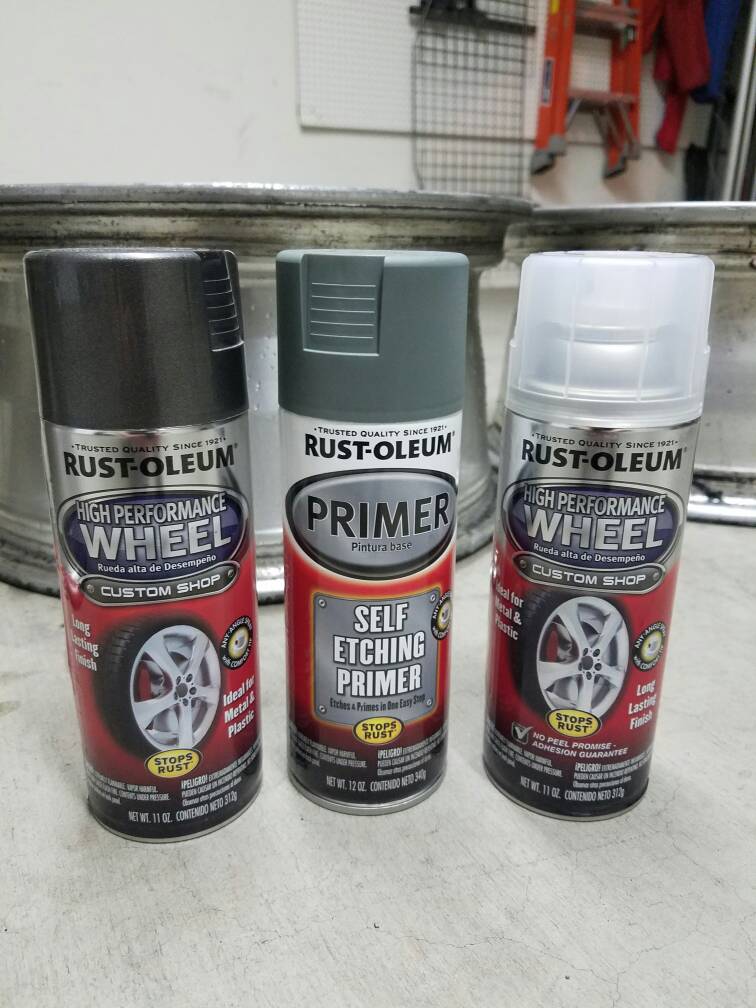
Time for paint
I used these three
0fed7323ffc37d3212bed9cc8509d08c.jpg


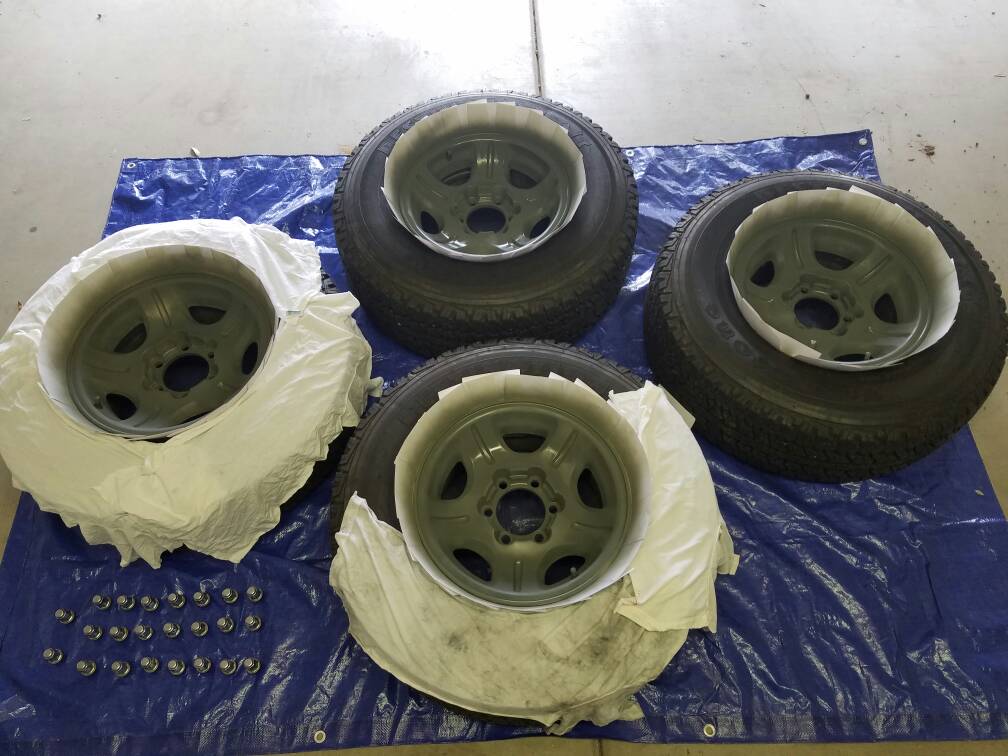
Did 3 coats of self etching primer
f6f37b9149d4805494af4ebe390146d5.jpg

4e14119ffe907b113cd02dca12bb9935.jpg


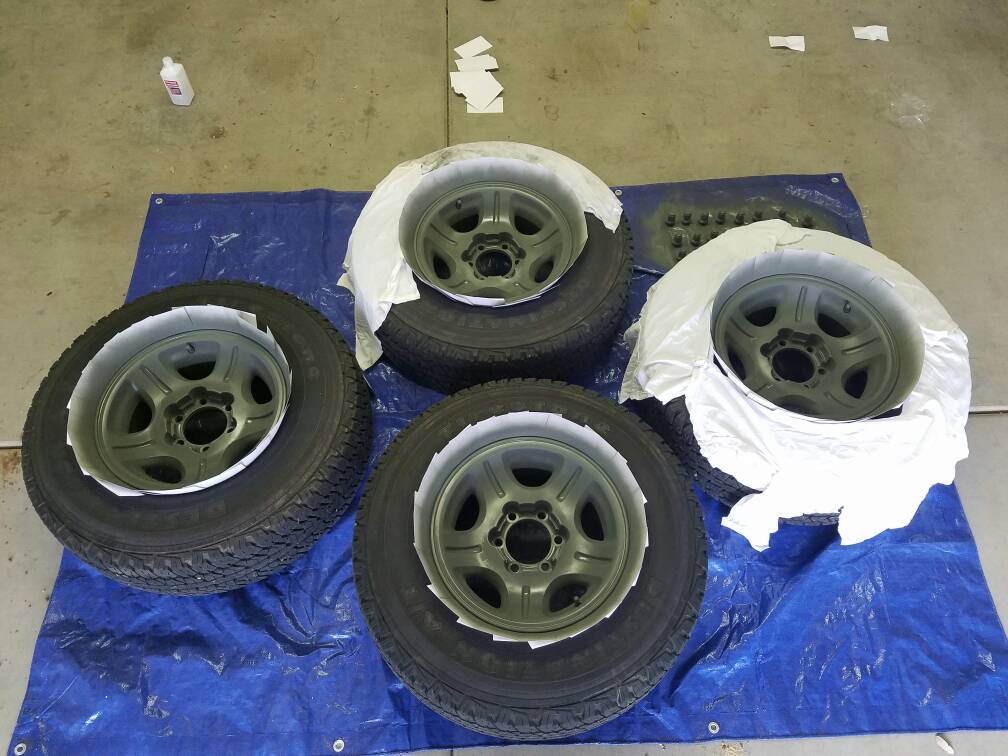
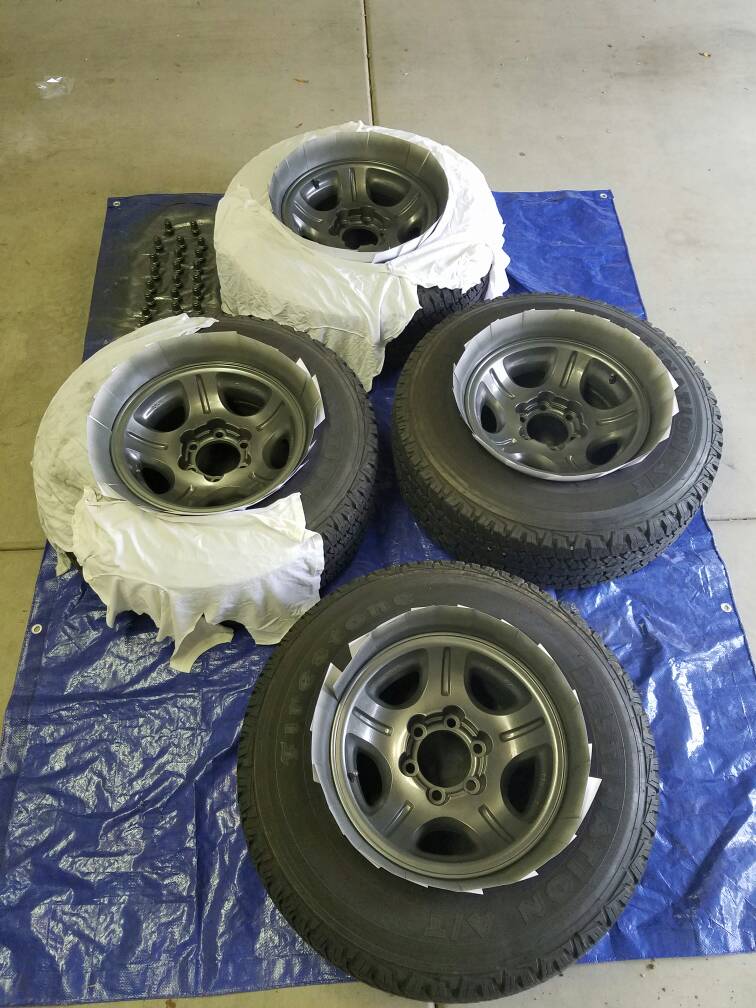
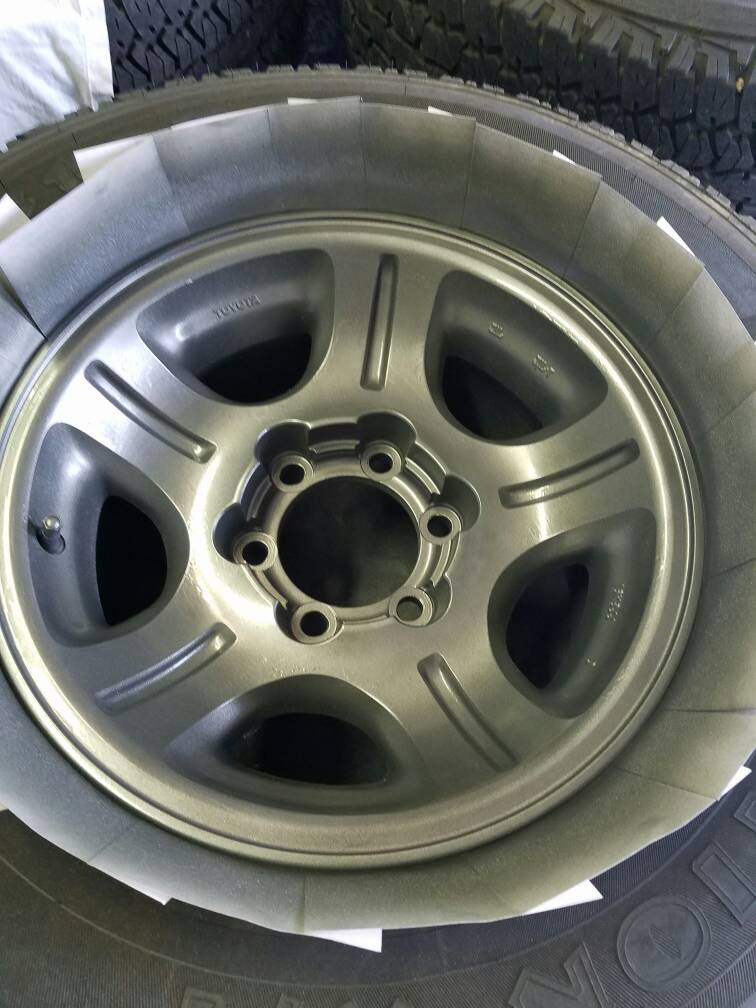
Then 3 coats of Rustoleum Graphite
e92a3ddf344ab0215d0a2db4546db738.jpg

9aa69e79bed0fa1dcb71e2fa08b5ec4c.jpg

35b96299560a41b6a0f817ede2ac4ada.jpg


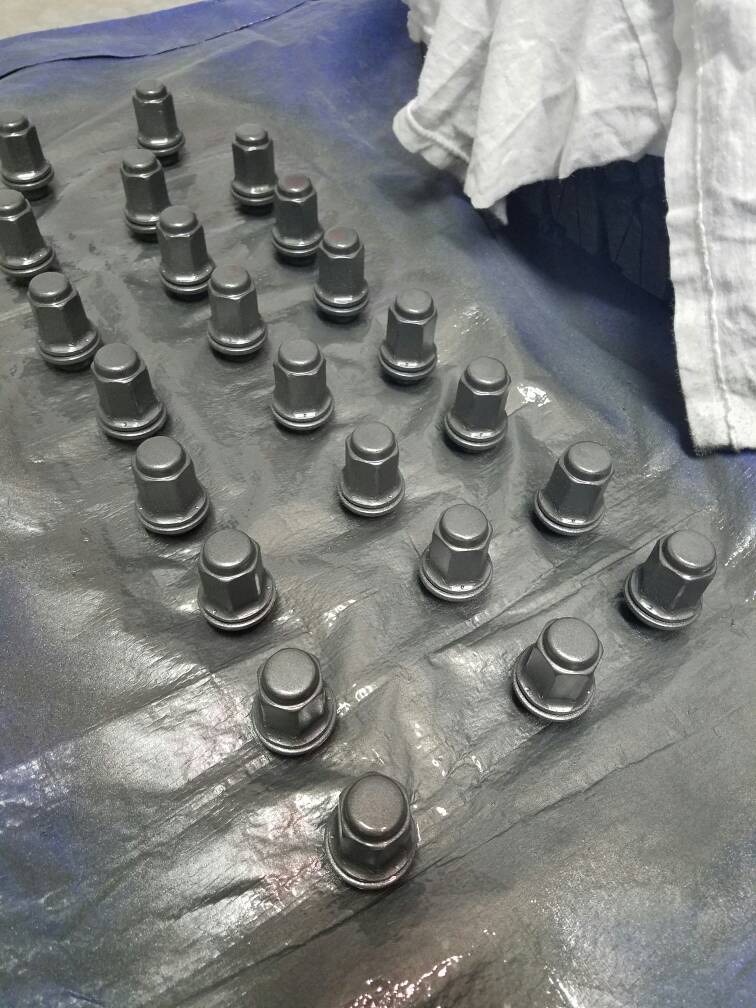
Used all the same steps on the lug nuts too
bfec9976e064d3976f00678a9c3f280a.jpg


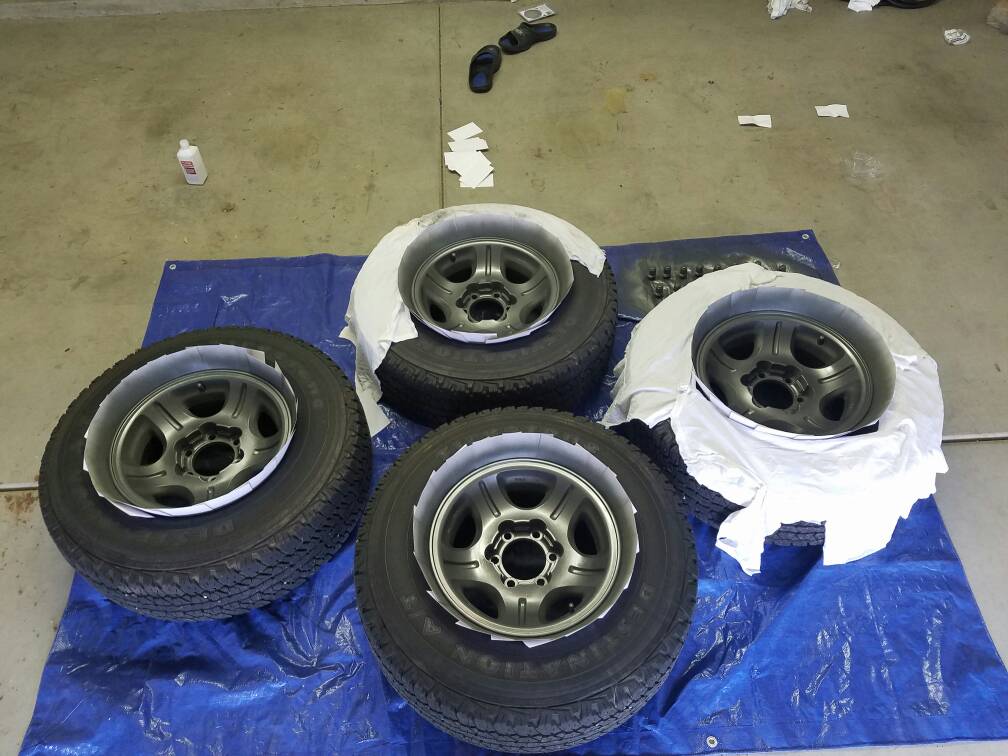
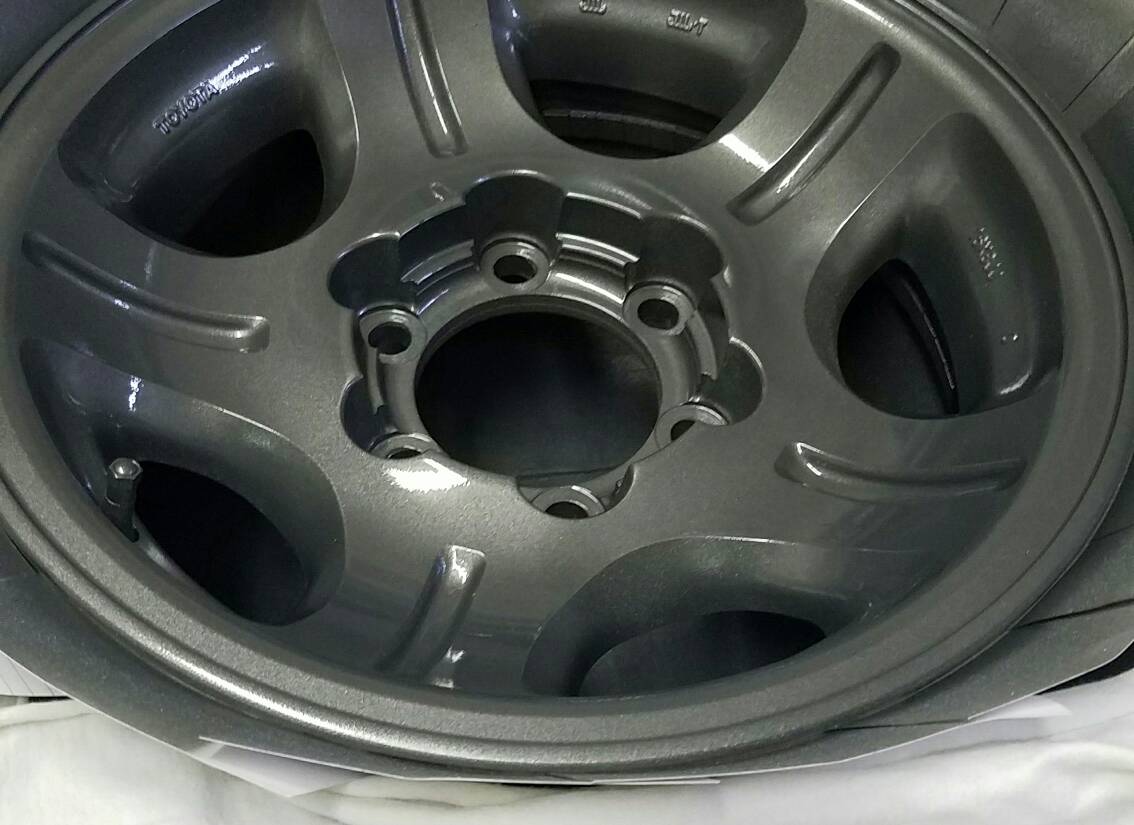
Then I used 3 coats of clear. That made the color really come out!
a665ee1d6dac5c449699f1c3c1421b20.jpg


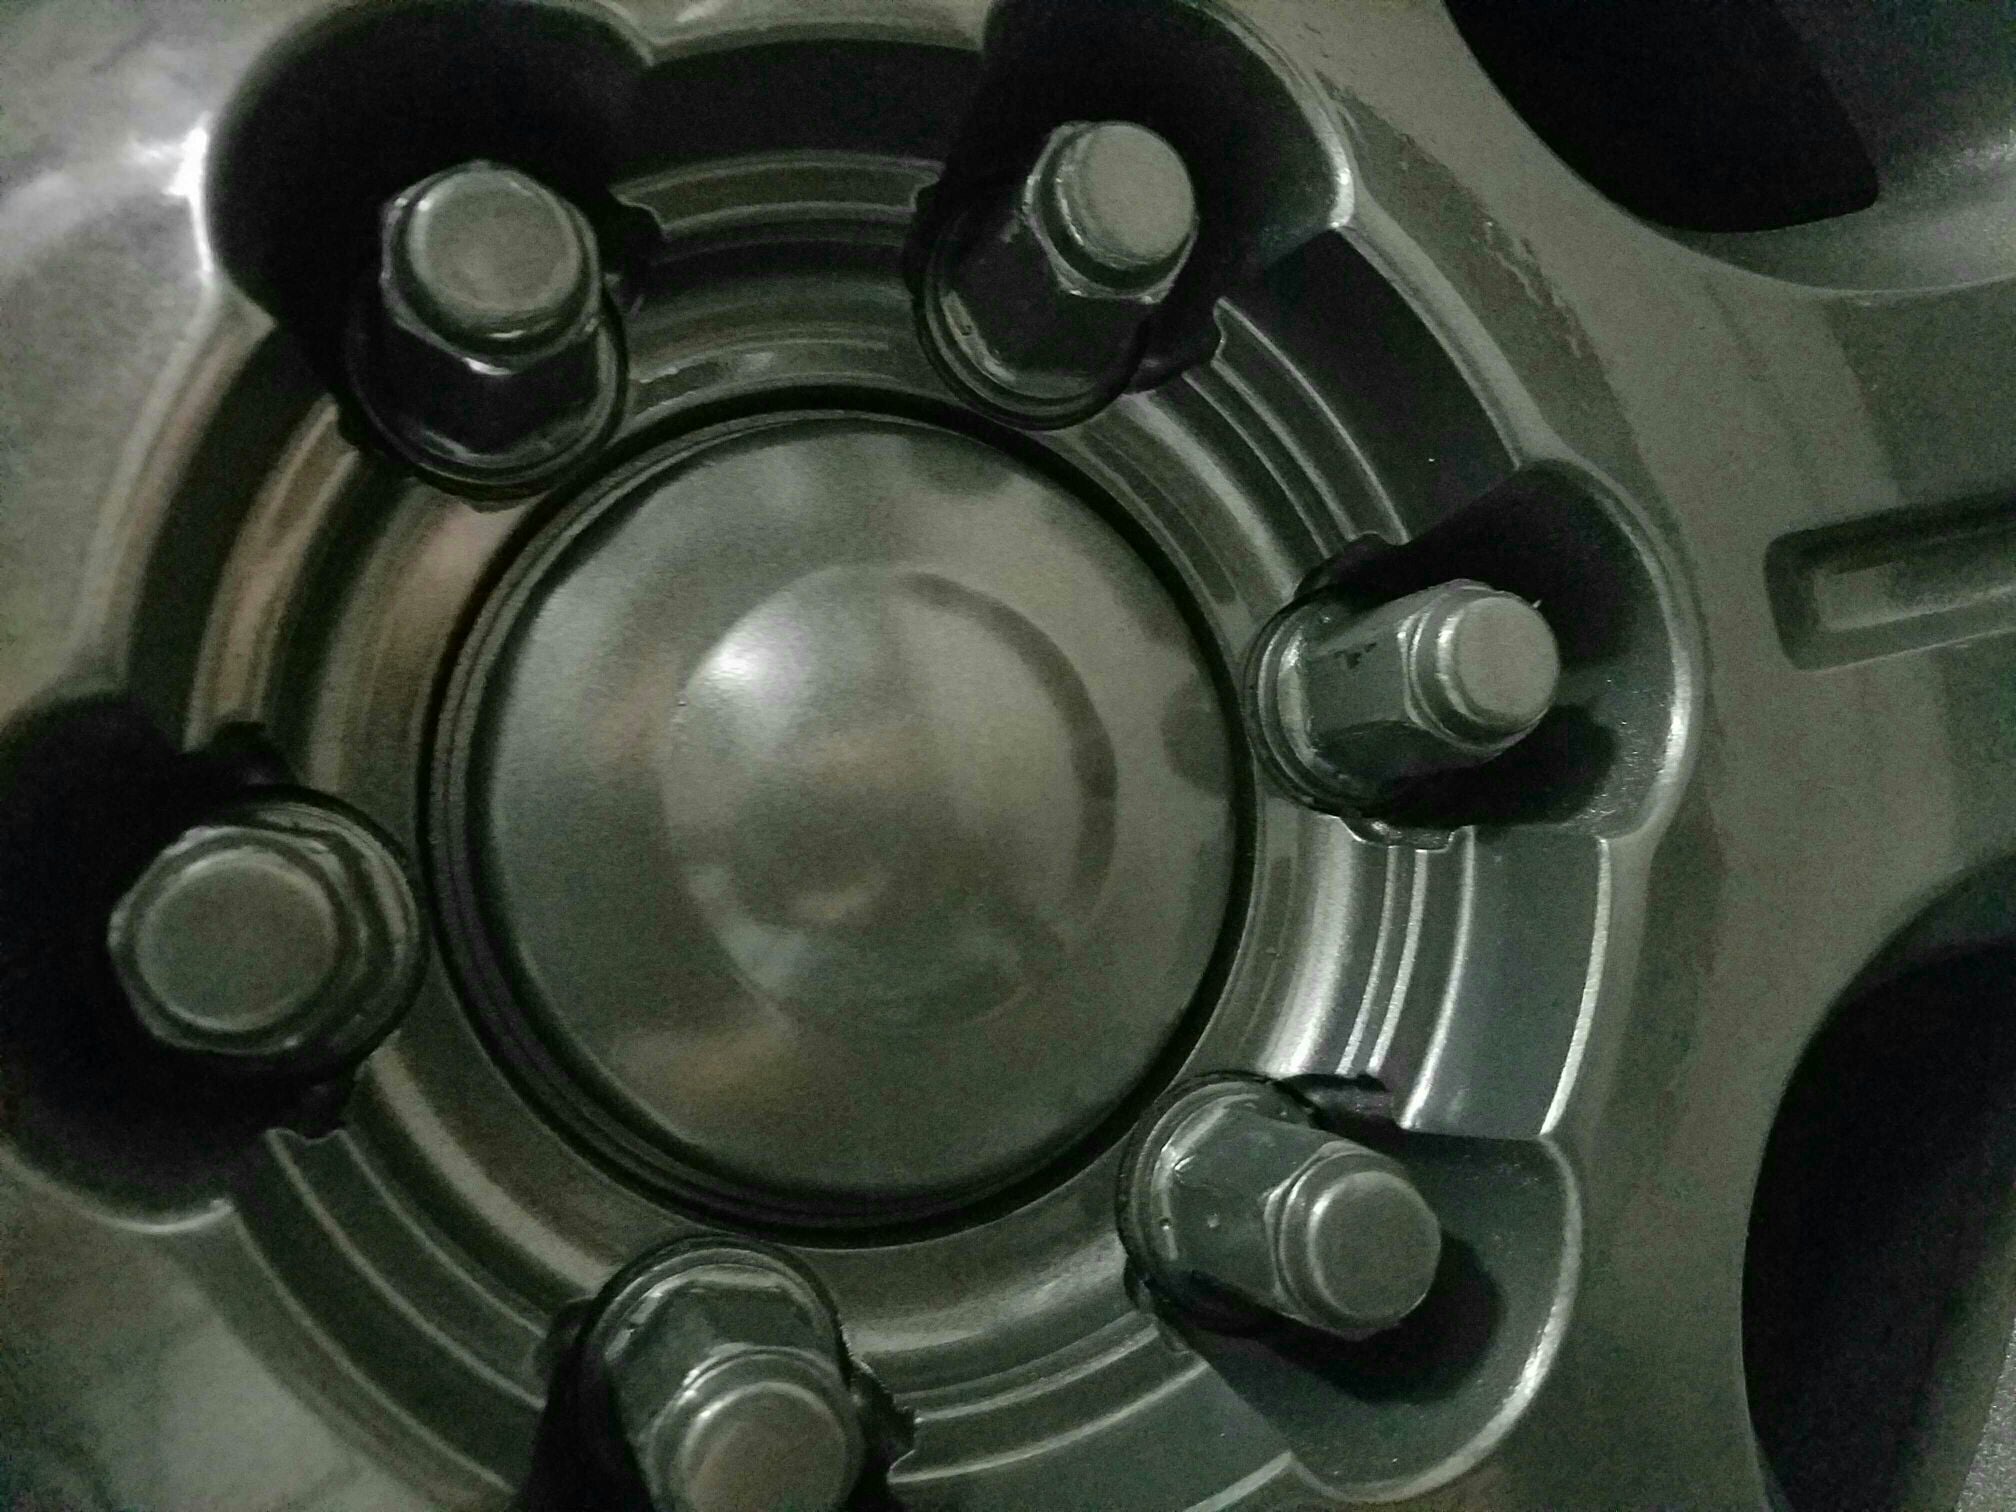
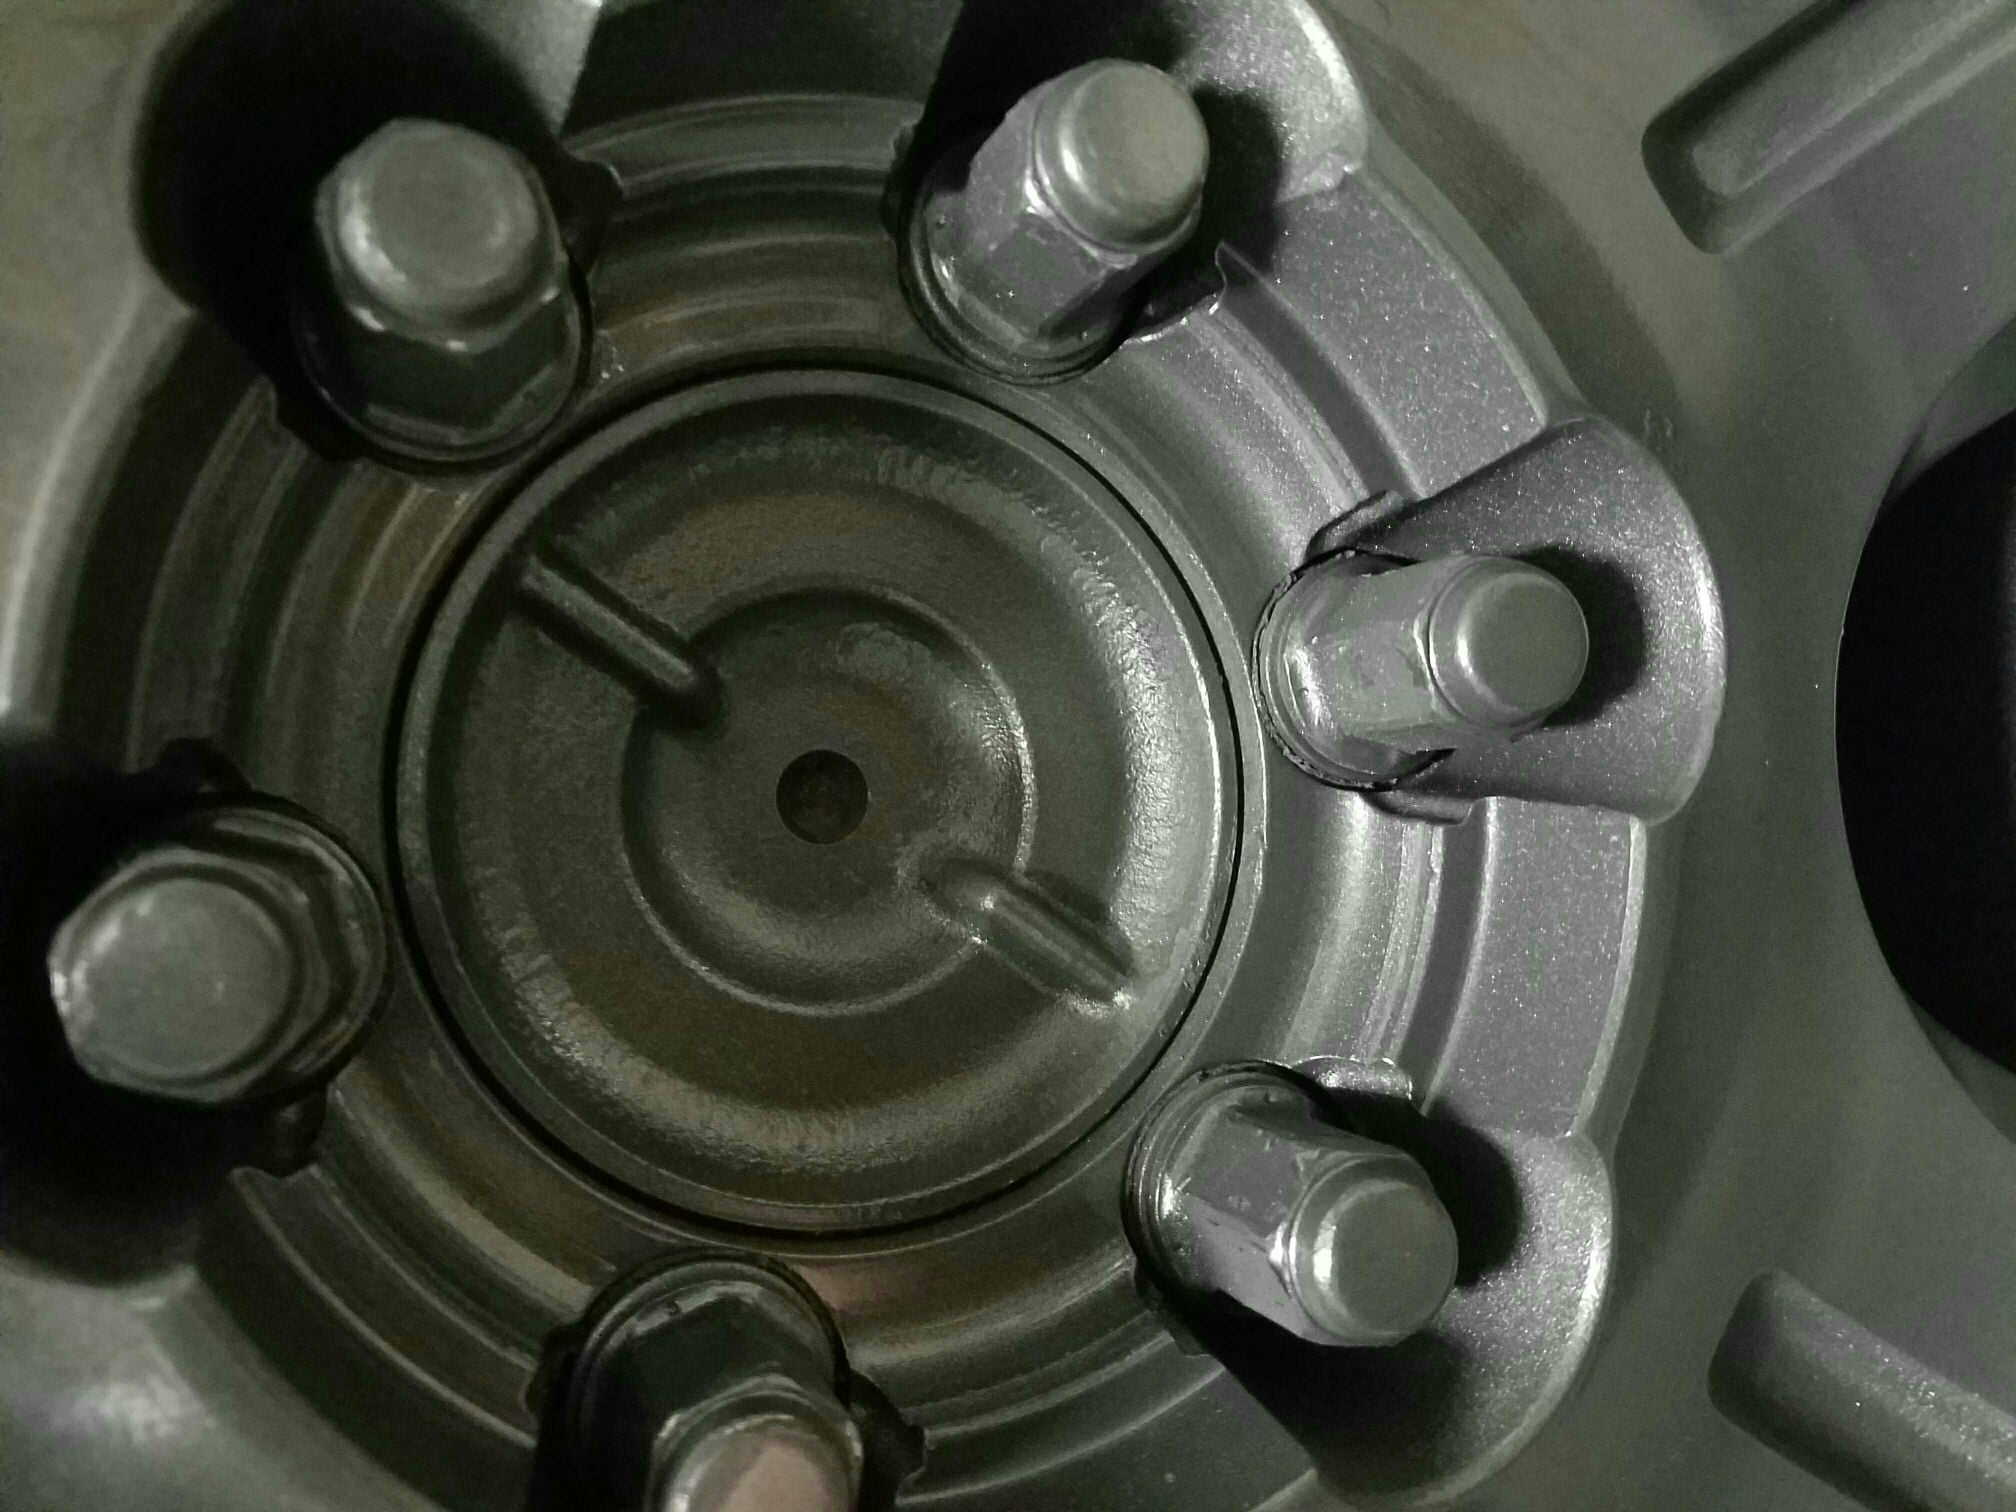
I also painted the hubs in front because I don't have center caps yet. Wanted it to look decent.
e585dc7ebf832a94d04f9897f873f3cd.jpg

And the visible part of the drum in the rear
5fe50d0bd10e4297a9f6afd78f30d633.jpg


After about an hour I carefully mounted them so I could roll the rig back into the garage. Lug nuts got a little messed up. But not noticeable unless up really close. Counted on that though.

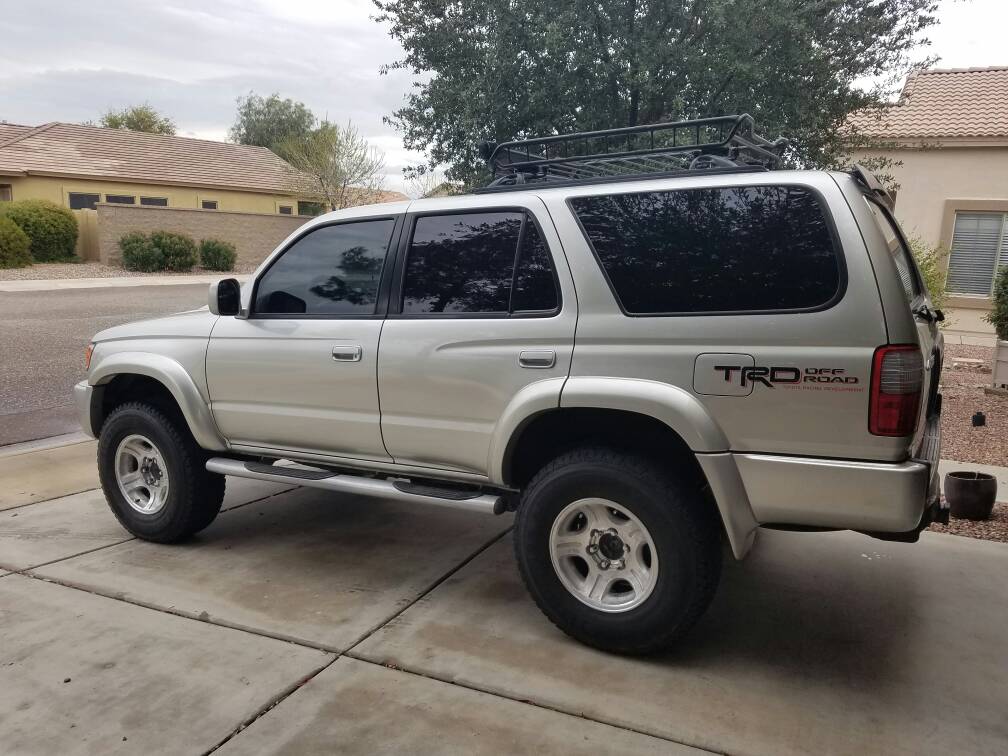
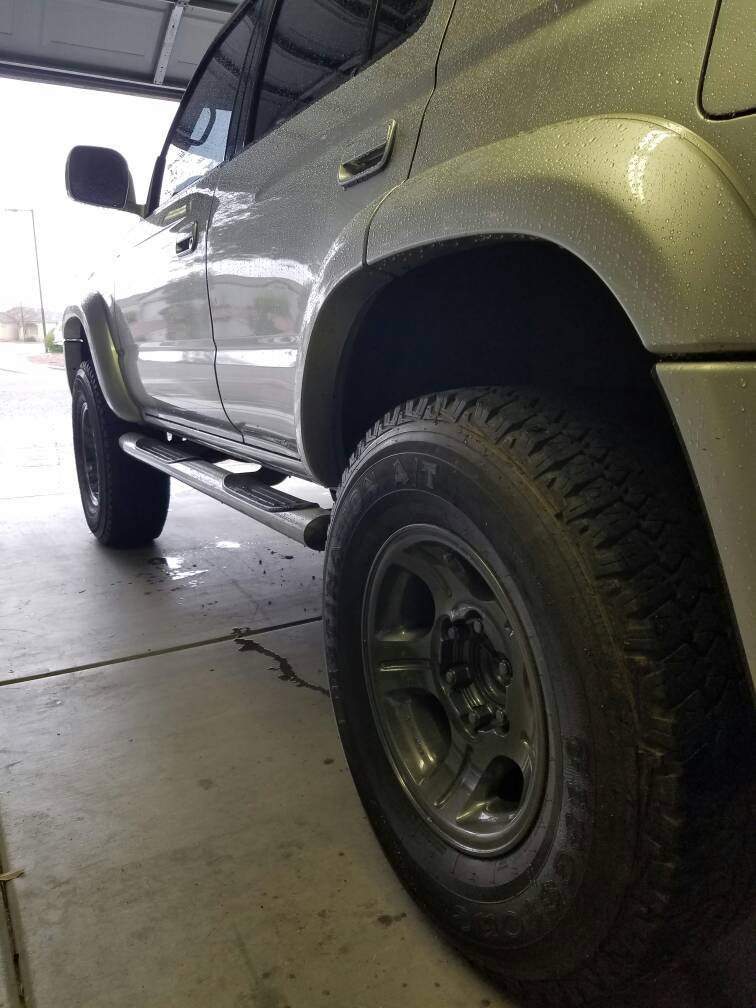
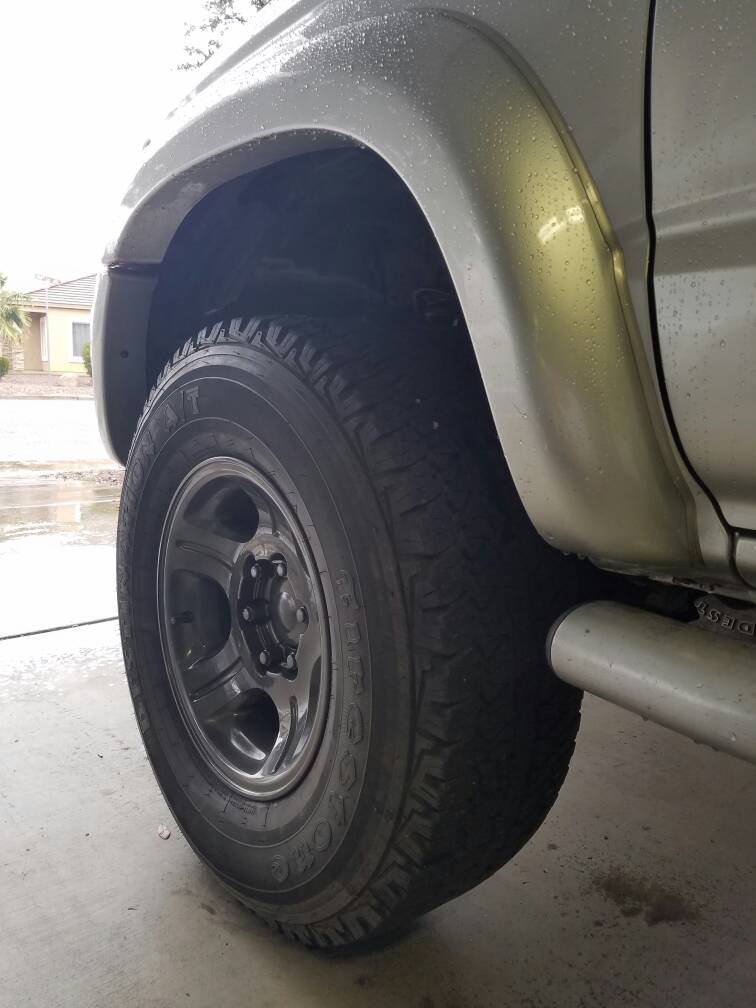
A shot of them on the rig. Its raining so I still haven't cleaned it up or the tires.
2a38e108a8c26433752cec277e96968a.jpg


Sent from my SM-G935V using Tapatalk
 
Last edited:
1afcf2e0c4f6bdc825949d4f71f32860.jpg


I am happy with how they turned out! Spray paint has come up since the last time I used it! Any angle spray from rustoleum is ideal for painting rims. I used 2 cans of clear, 2 cans of primer, and 2 cans of graphite. 30 dollar paint job! Obviously prep is the important part as usual but this paint makes it easy.
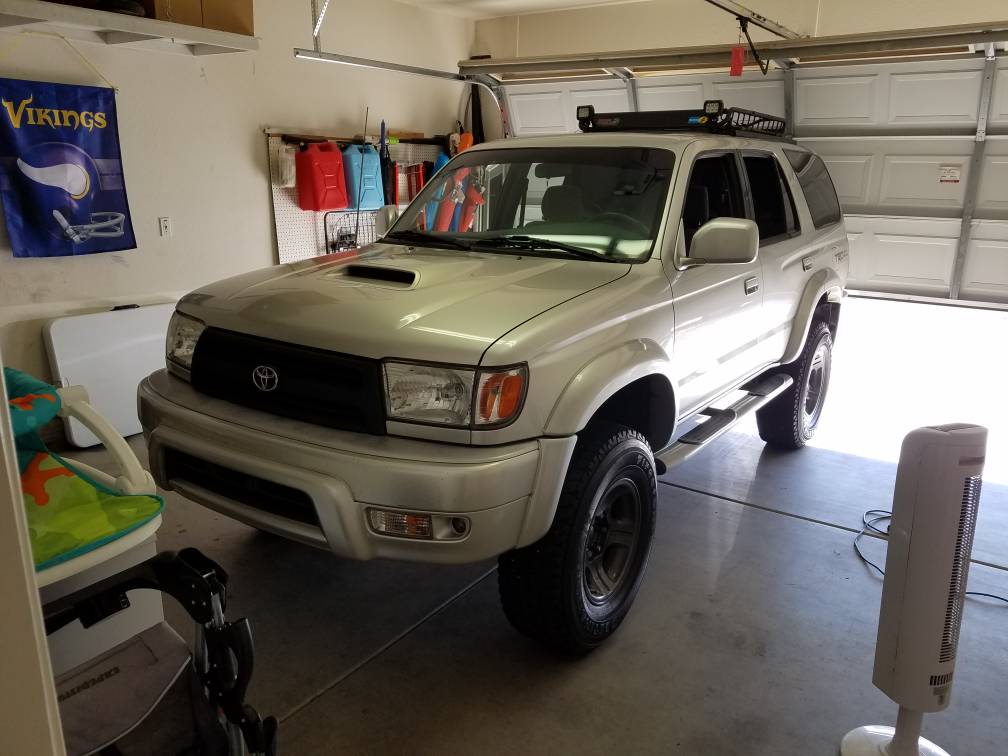
Once I clean it up I will post a better pic of them on there. The stance looks so much better with these rims. They sit flush with the flares now. No more skinny stance!

Sent from my SM-G935V using Tapatalk
 
Last edited:
Took my truck to the Fletcher's Tire at Bell and 12th St for tires and an alignment on Friday and they told me that my radiator is leaking too. Figured I'd replace it all before a hot Arizona summer makes it even worse.

I ended up ordering a Denso radiator as well from Rock Auto. Was it as high quality as the OEM radiator?
 
Took my truck to the Fletcher's Tire at Bell and 12th St for tires and an alignment on Friday and they told me that my radiator is leaking too. Figured I'd replace it all before a hot Arizona summer makes it even worse.

I ended up ordering a Denso radiator as well from Rock Auto. Was it as high quality as the OEM radiator?
Yeah it actually was. I was surprised to see how much it was like oem. Even came with the mounting brackets which I didn't think would happen.

Sent from my SM-G935V using Tapatalk
 
Glad to hear! The LC wheels look great on there, although I almost prefer the look of the five stars slightly better.
I do like the 5 stars. But the new ones are 16x8s and sit flush without spacers. I didn't want to go the spacer route.

Sent from my SM-G935V using Tapatalk
 
Got it all cleaned up finally
edd549966b40f1ea678d460d9e98a28b.jpg


Also just received some toytec superflex Springs. So I should finally get the little bit of rake that I want.

Sent from my SM-G935V using Tapatalk
 
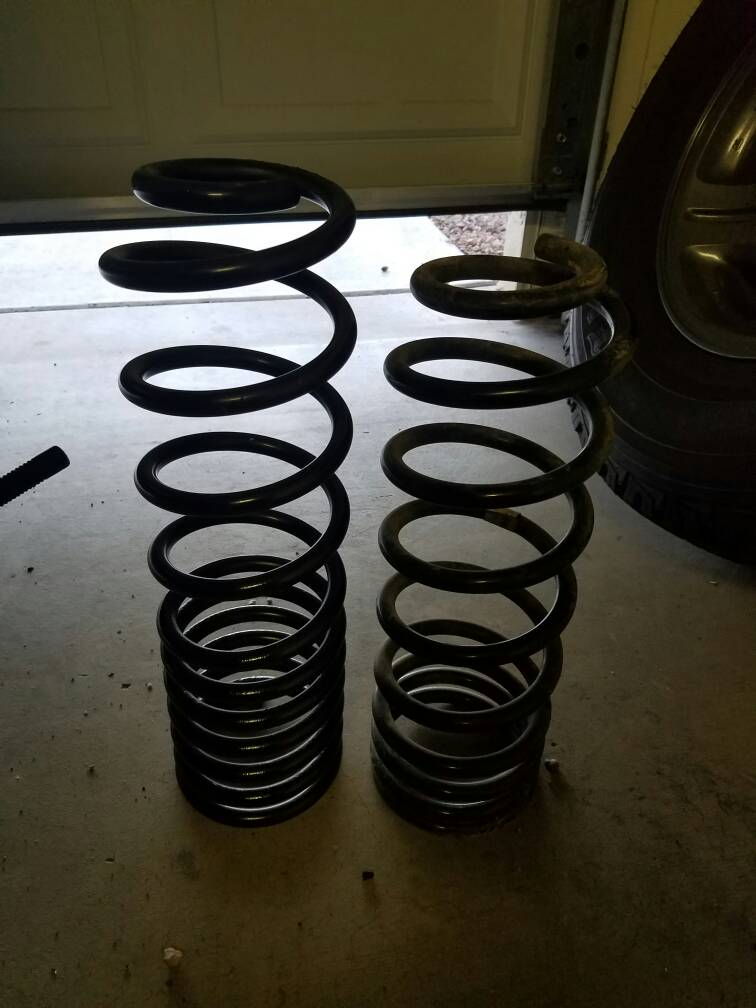
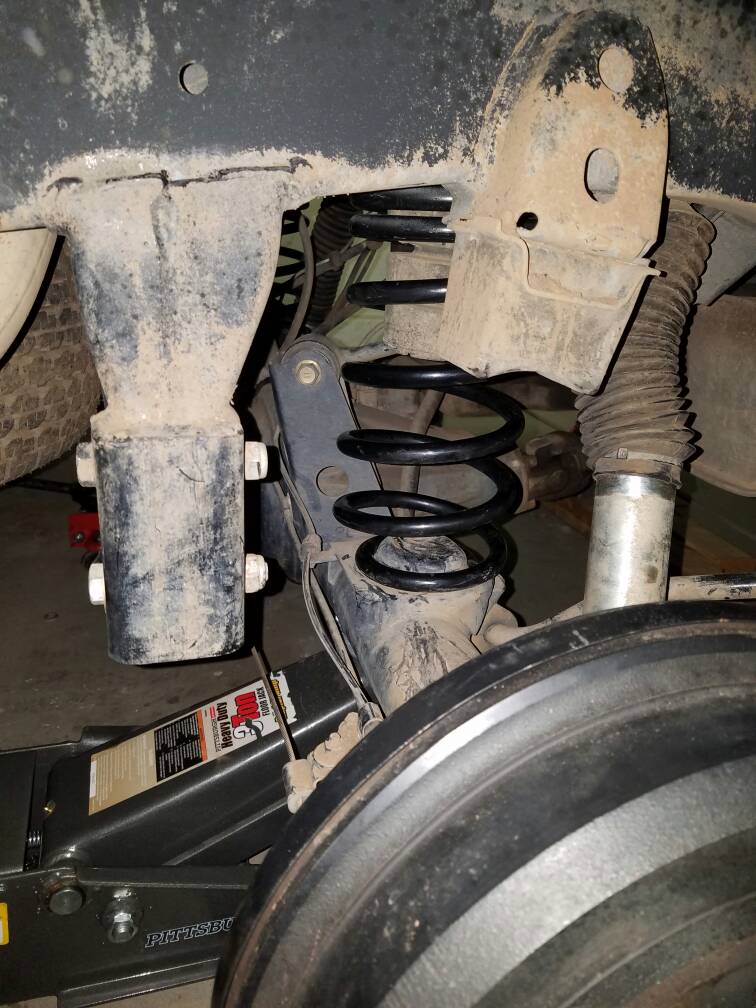
So this weekend I did the Superflex Springs. Damn those things are tall.
Compared to the 890s
a324367b97c62ed7b5a05328ecd4e945.jpg


And I added the trim packer on the driver side. Glad I did. Leveled it nicely.

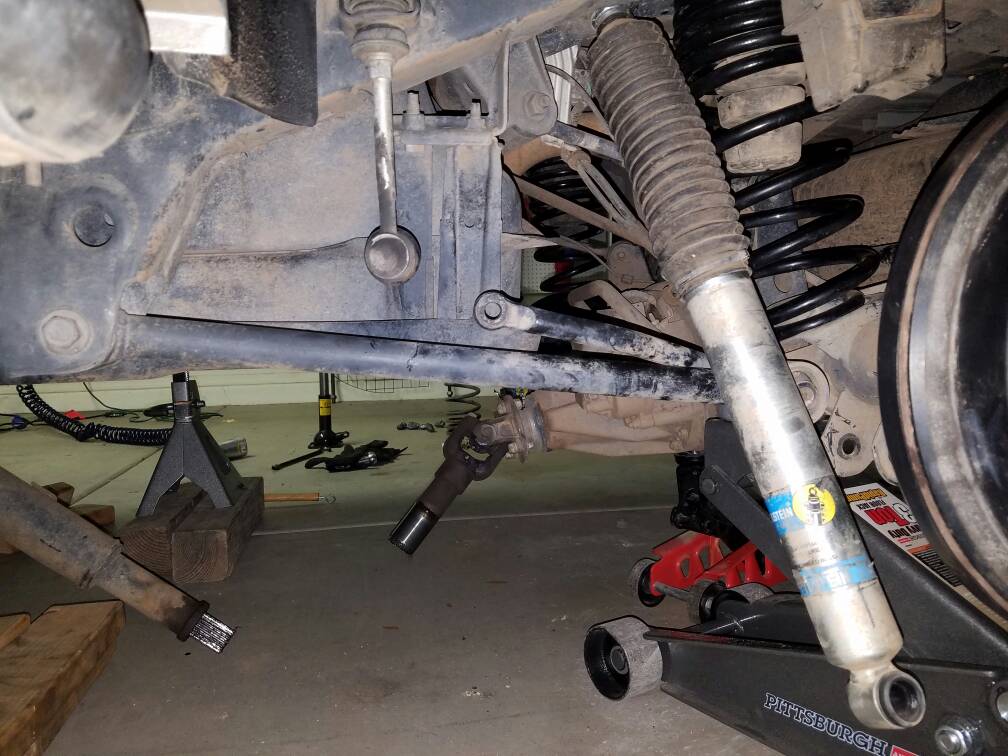
These things kicked my ass. I tried to do one side at a time. But had to disconnect the control arm to get enough room for the driver side. Big mistake
c31147efb9c600f9ec179c10620a9fc7.jpg


Drive shaft fell and made me nervous. Took the springs back out and got it back in. Big pain in the ass! Then re connected the control arms and just dropped the axle all the way down with Jack stands under the frame. Should have done this in the beginning. That rear trim packer didn't help matters at all. Even with the rear axle all the way down, still had to fight it.
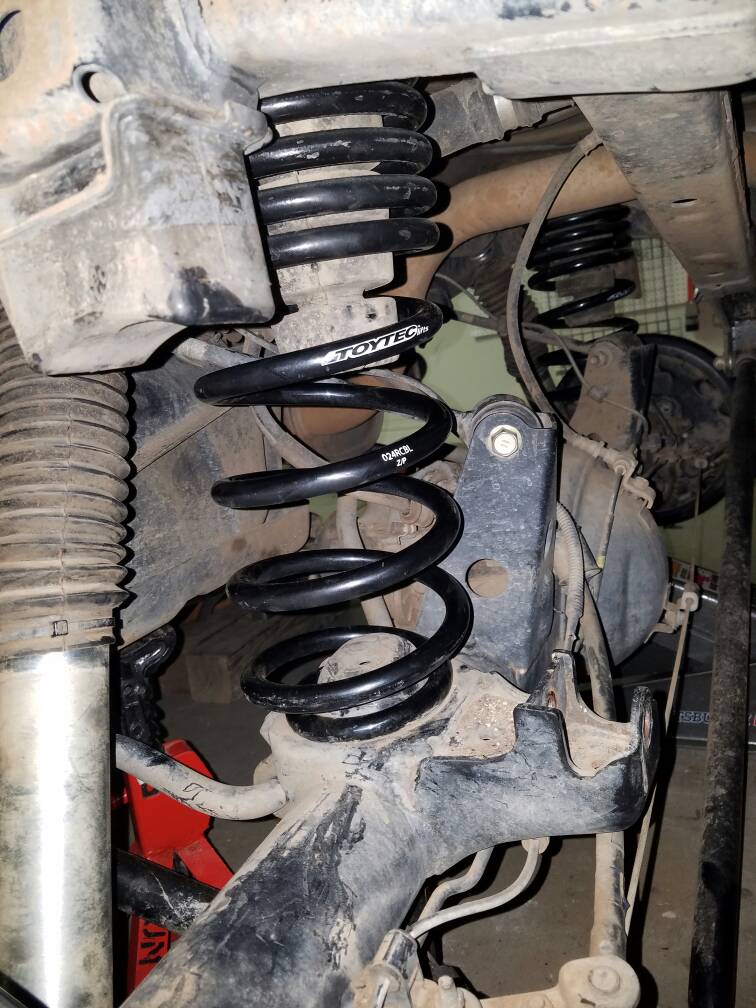
As usual, not a lot of pictures. Sorry about that. Once I get involved, I don't stop. Here they are finally in
616edca93d1b83a73f7a5c79e7703bc5.jpg

94a1bd9115b2d5862464d02775b64622.jpg


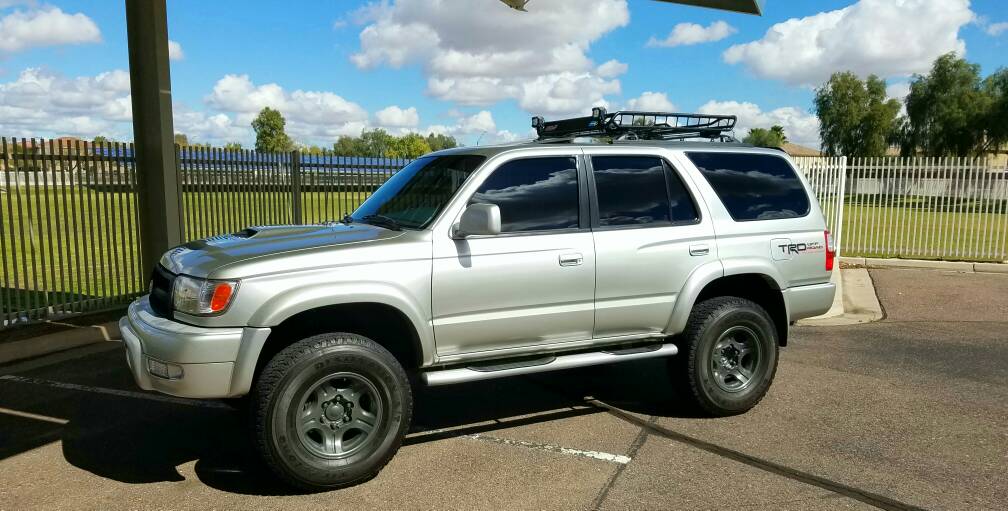
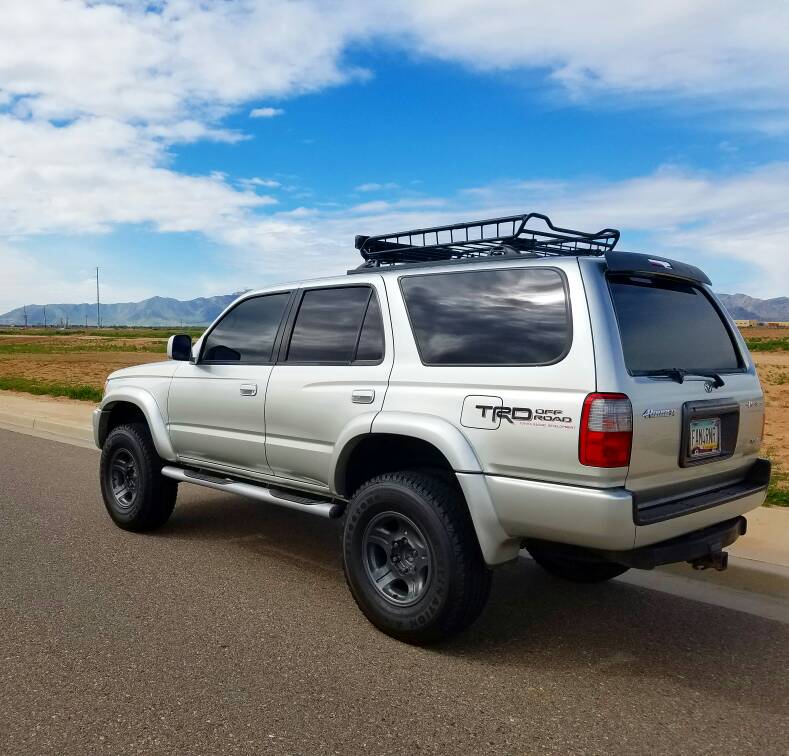
So it gave me about 3/4" more in the rear than the 890s. Exactly what I wanted. I now have a 1" rake in the back. Took a picture of her to compare to the other. Looks a lot better. No more saggy ass!

a6d66214519fff559f0fb5f9c8e338e7.jpg


Not sure what's next as of now. More maintenance probably. Bushings here and there.

Sent from my SM-G935V using Tapatalk
 
Last edited:
Took my truck to the Fletcher's Tire at Bell and 12th St for tires and an alignment on Friday and they told me that my radiator is leaking too. Figured I'd replace it all before a hot Arizona summer makes it even worse.

I ended up ordering a Denso radiator as well from Rock Auto. Was it as high quality as the OEM radiator?

Yeah it actually was. I was surprised to see how much it was like oem. Even came with the mounting brackets which I didn't think would happen.

Sent from my SM-G935V using Tapatalk

Denso made the OEM part for Toyota.


Awesome truck!
 
Little update: The rig needs front brakes. Might as well upgrade! Found some Tundra 199 calipers at a local junk yard for 80 bucks. Rotors and pads are on order and will be here in a couple days. Can't wait to finally upgrade these spongy brakes. I don't really tow or haul that much on a daily basis so 199s seemed practical without any trimming.
fd45b58a7f4797ba0c526a4eb6a52f38.jpg


Sent from my SM-G935V using Tapatalk
 
How does your truck ride with the 881s on the second perch? Mine are currently on the first perch, but I'm going to have to bump them up to the second one when I install my RPM Fab bumper to account for the weight.
 
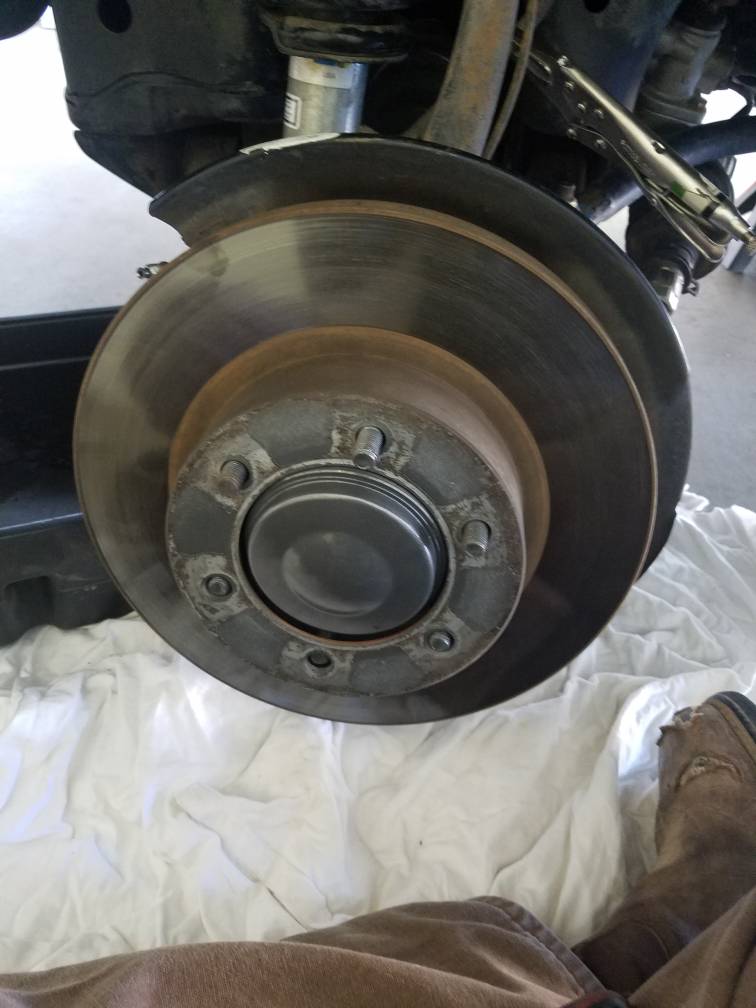
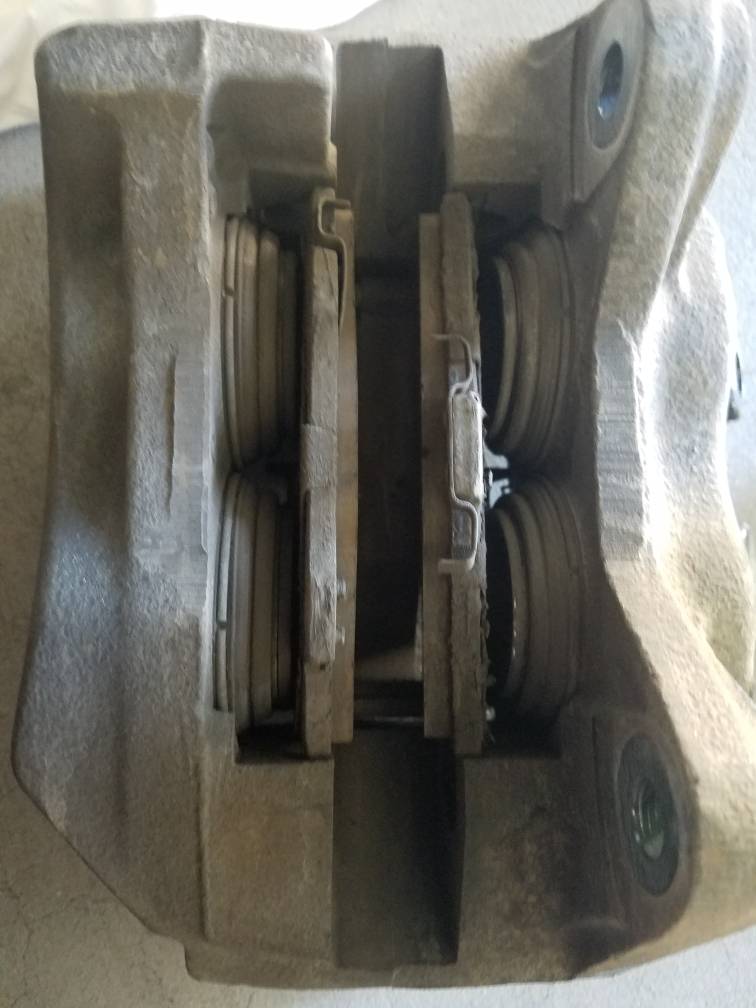
So last night I went ahead and did the Tundra Brake Upgrade 199s. There are plenty of write ups on this so I won't bore anyone with the process. But here's a good link to a write up I used

https://www.yotatech.com/forums/f2/01-tundra-brakes-installed-98-gen-3-4runner-146160/

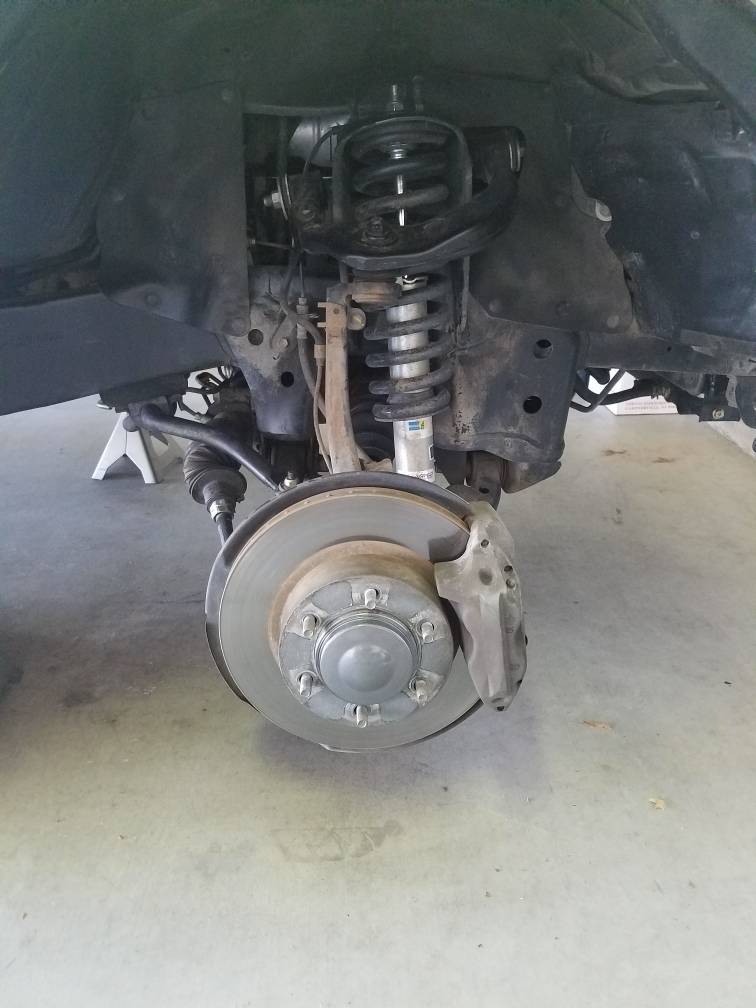
Here's what they looked like when I took the wheels off.
f42f55aadb7699ea40591ae5823fd656.jpg


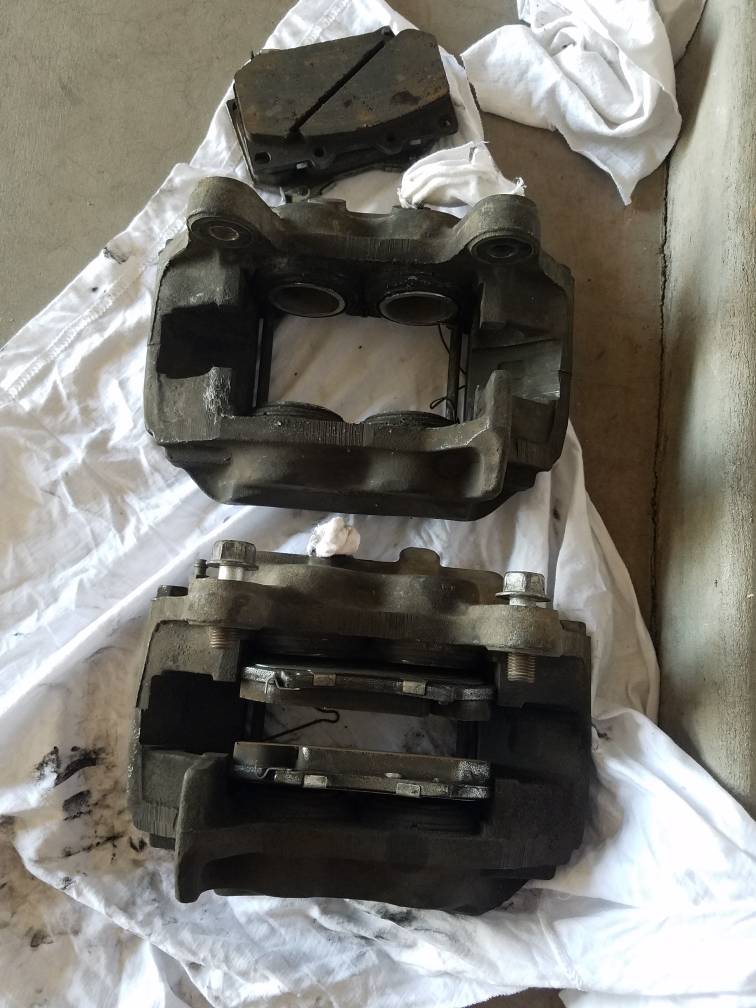
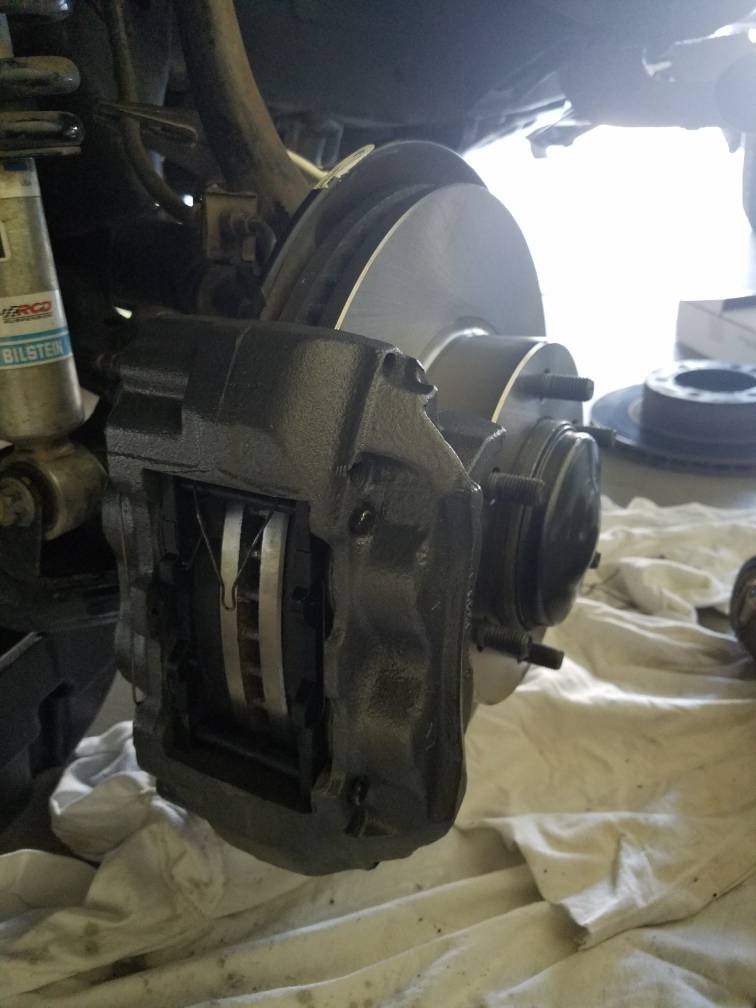
And then with the calipers off.

43a026888aea7411619574d8c3d01335.jpg


Pads were definitely a little on the low side. Other side was to the wear indicator.

a3388924ce78c25ed7b0a400084ee8f9.jpg


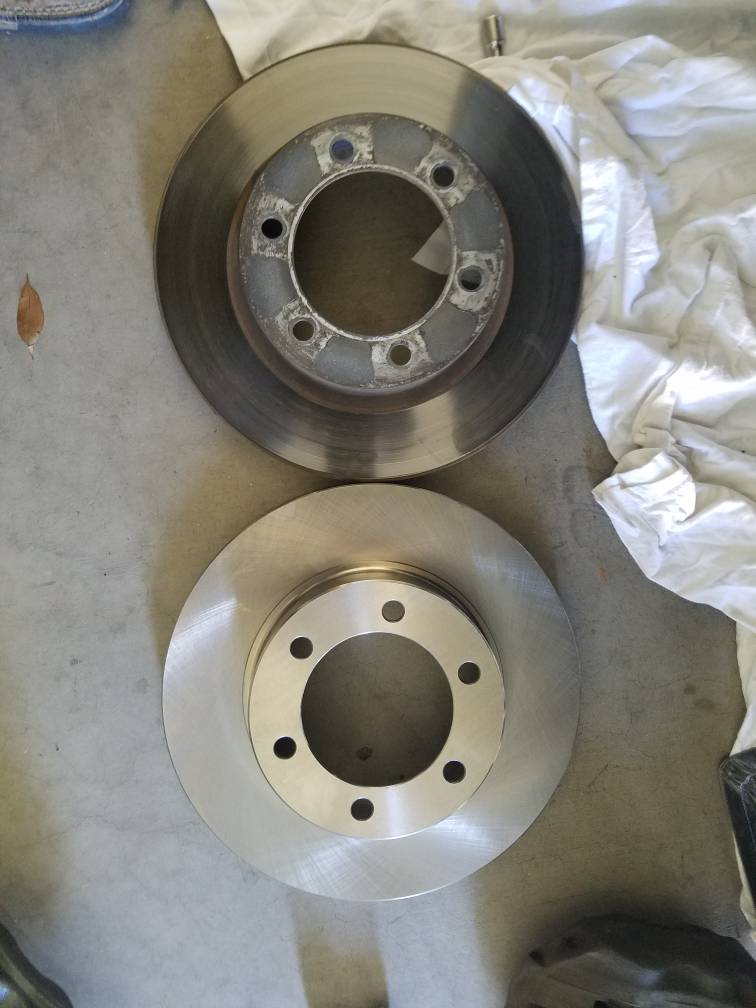
Side to side

914872f966cba9d092b8ceb71799e8c6.jpg


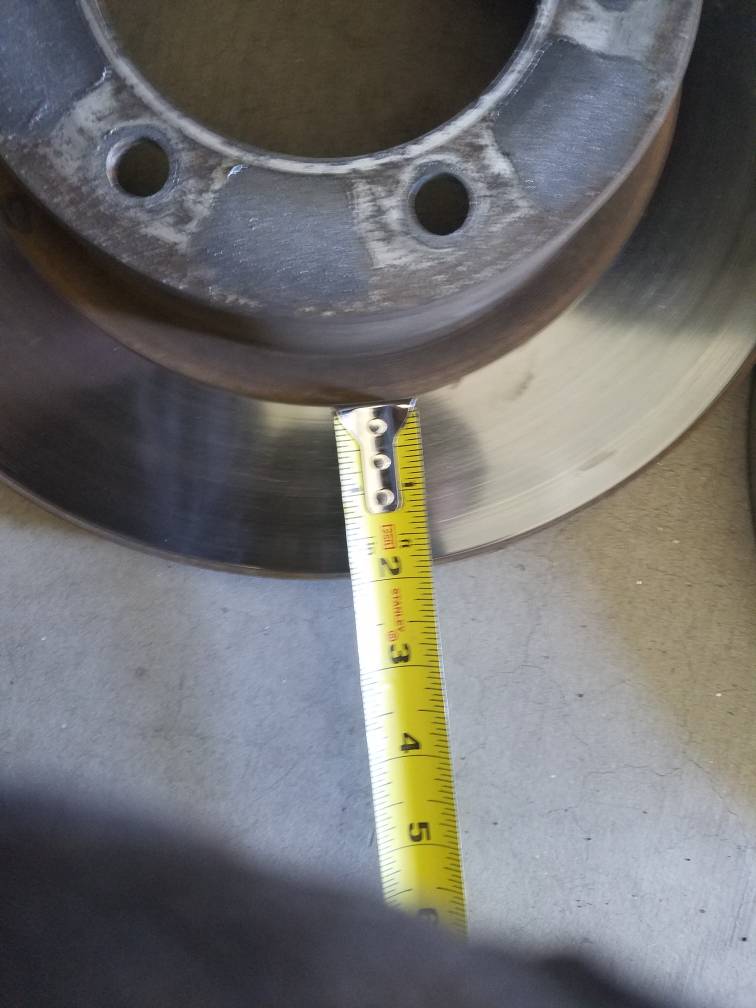
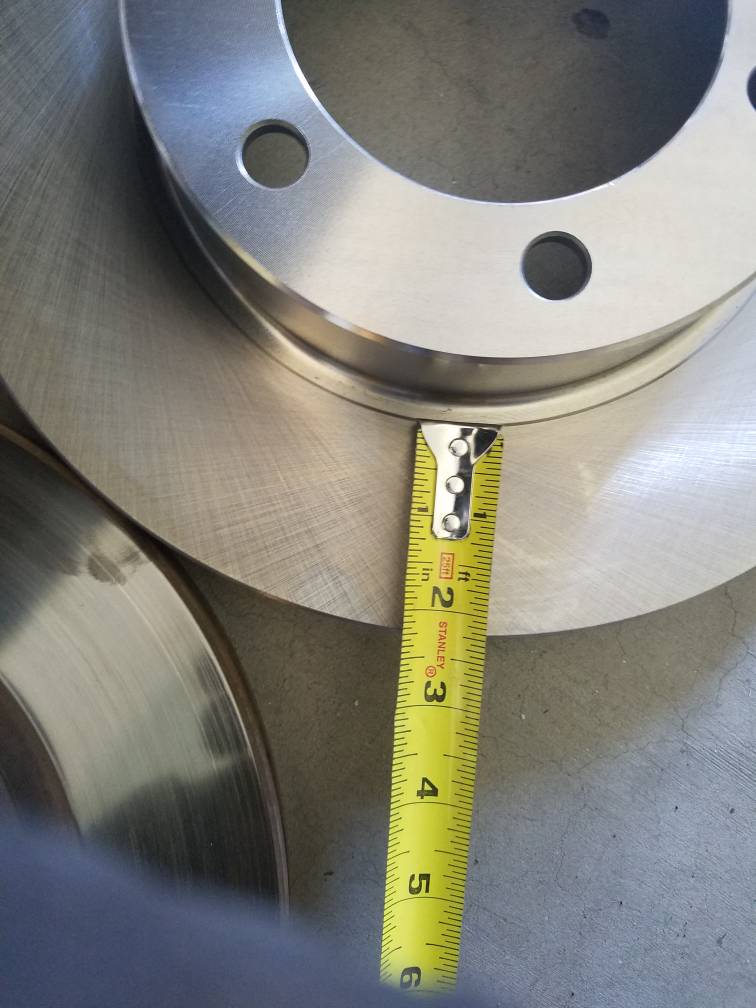
Quick shot of the difference in brake surface

7636cc3243b67925254931ce778fec9d.jpg


b9597587e408836fb32abc3726ab9c82.jpg


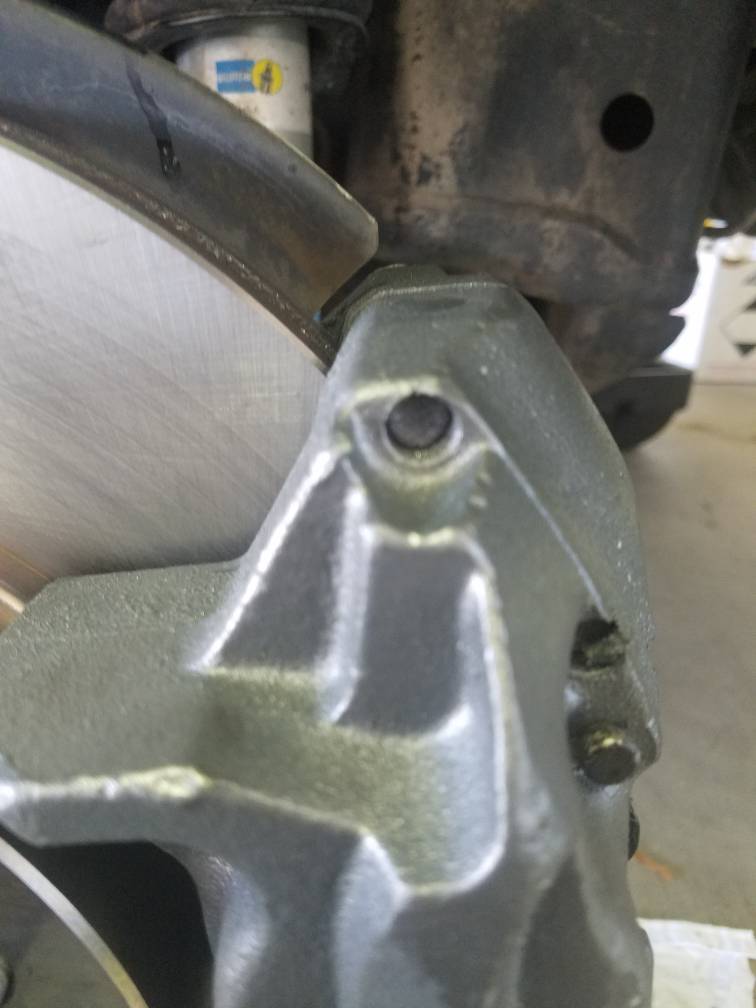
Real close to the dust shield but didn't have to trim so that's good

8e26fcb0bd6ef6c2f43d2d9592b53659.jpg


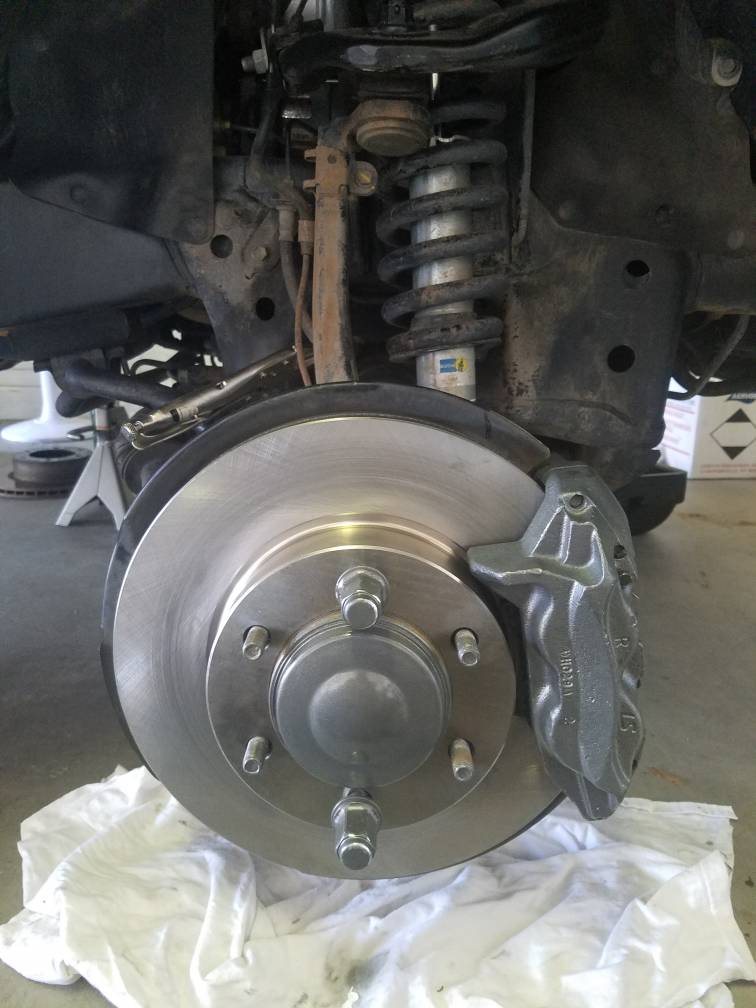
All mounted up and shiny new!

e0b576f2b106ef0745c6ce5cb8611e86.jpg


bddf8dfde78f82596c9515cb2c4011f6.jpg


After mounted up I did a brake flush and was all done! I thought.

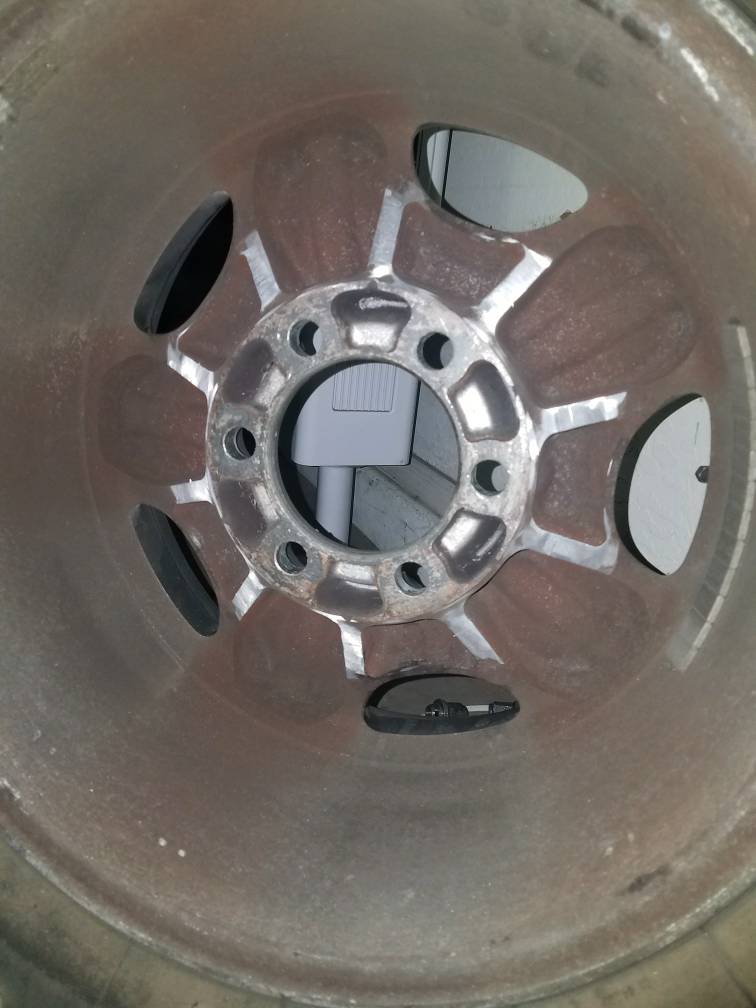
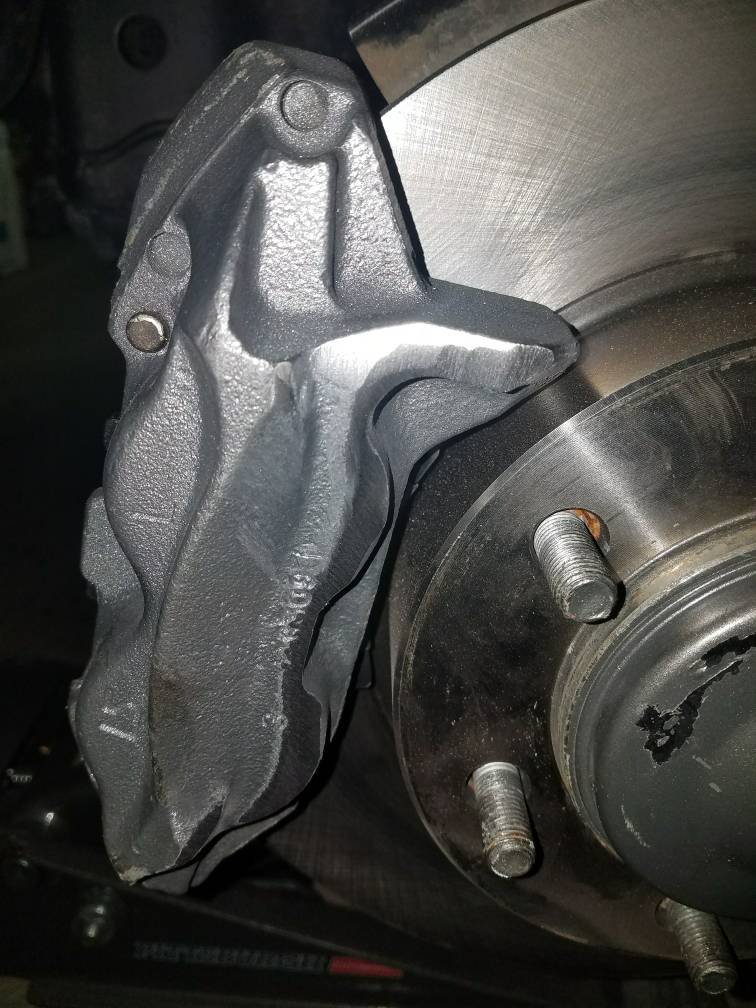
So... This process took me all of an hour to do. Everything was going smooth until I decided to put the wheels on. I knew everything was going too easy. Apparently these brakes do not clear Landcruiser or lx450 rims! They rub pretty good! After a few swear words and thinking of all the time and effort I wasted, I was not gonna go back to stock! So off to harbor freight to get a grinder and some sanding discs.
I had to grind down the back of the rims and front of the calipers. I chose to do the calipers a little more than the rims. Then threw more paint on the calipers so they don't rust.

534a1dbe8d4f616ffe94e714396b1b17.jpg


b4630f86a5812e5995934447d3a3cdcc.jpg


One hour job turned into 3. But I'm glad I was able to get them to fit without too much trimming. They definitely stop a lot better and aren't as mushy as the factory ones. I'm glad I did it!

Sent from my SM-G935V using Tapatalk
 
Last edited:
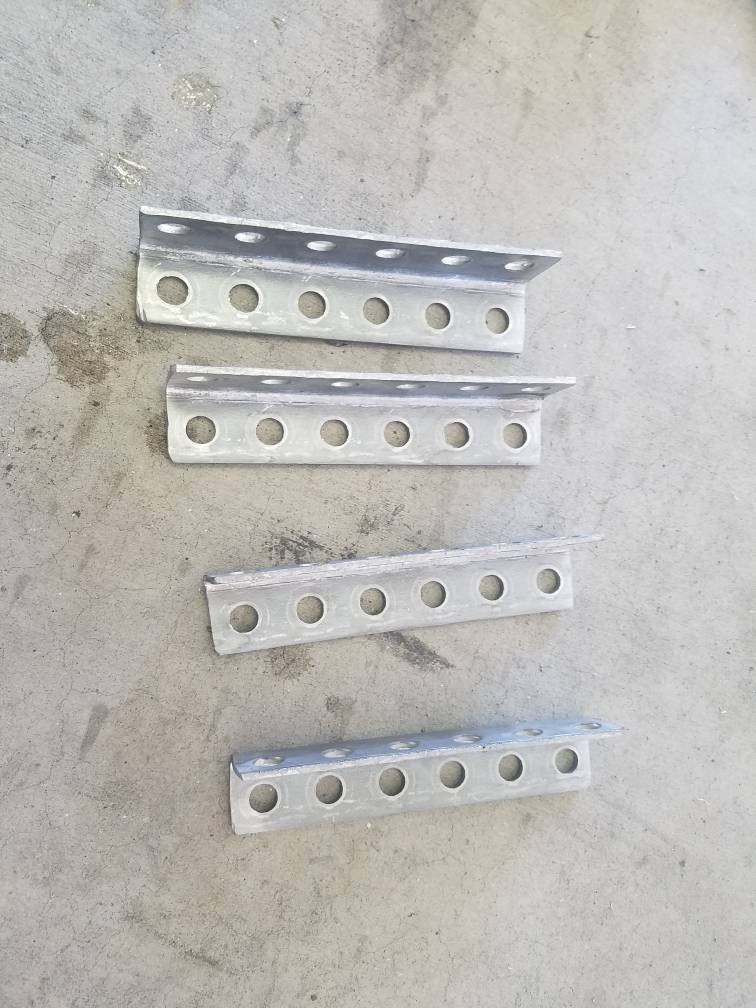
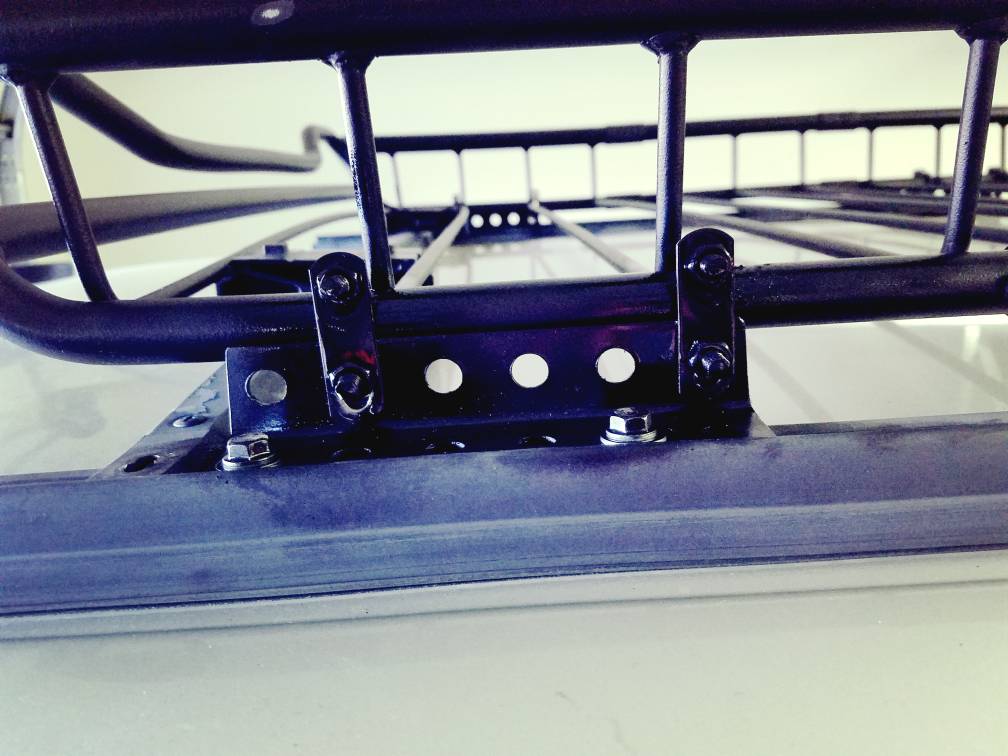
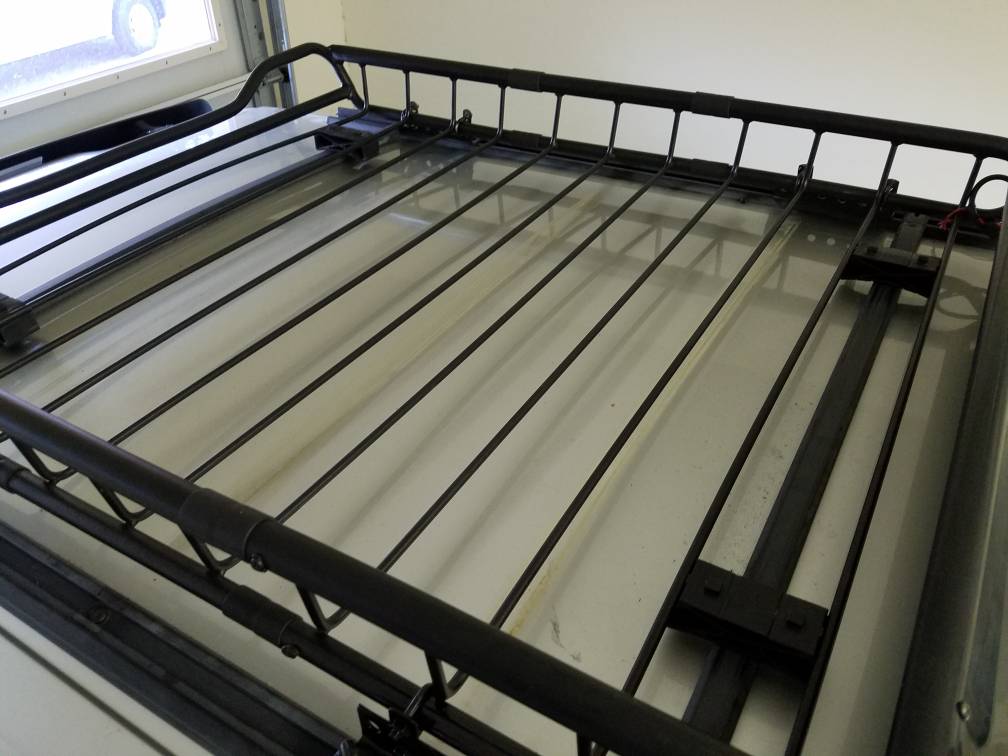
Changed the oil yesterday. And lowered my rack with some angled steel brackets and some u bolts. Seems pretty solid. Cut some 6 inch pieces of 12 gauge brackets. Mounted them in the factory cross bar locations with some M6x1.00 bolts. Painted everything black to match. Sits a lot better now. I used the pads that came with the rack and set them on the little cross bars for added support. Didn't want it resting on the roof once I add weight.

87ac03d320473613643fb39e80ad9bf1.jpg

702d39106ee59a3caf273be40357d53b.jpg

03e4c618de12873ddc48ea363b91aff6.jpg


Sits a lot lower now. I like it

dcb07ec4995391d8d66d4dd95eb62f25.jpg


Sent from my SM-G935V using Tapatalk
 
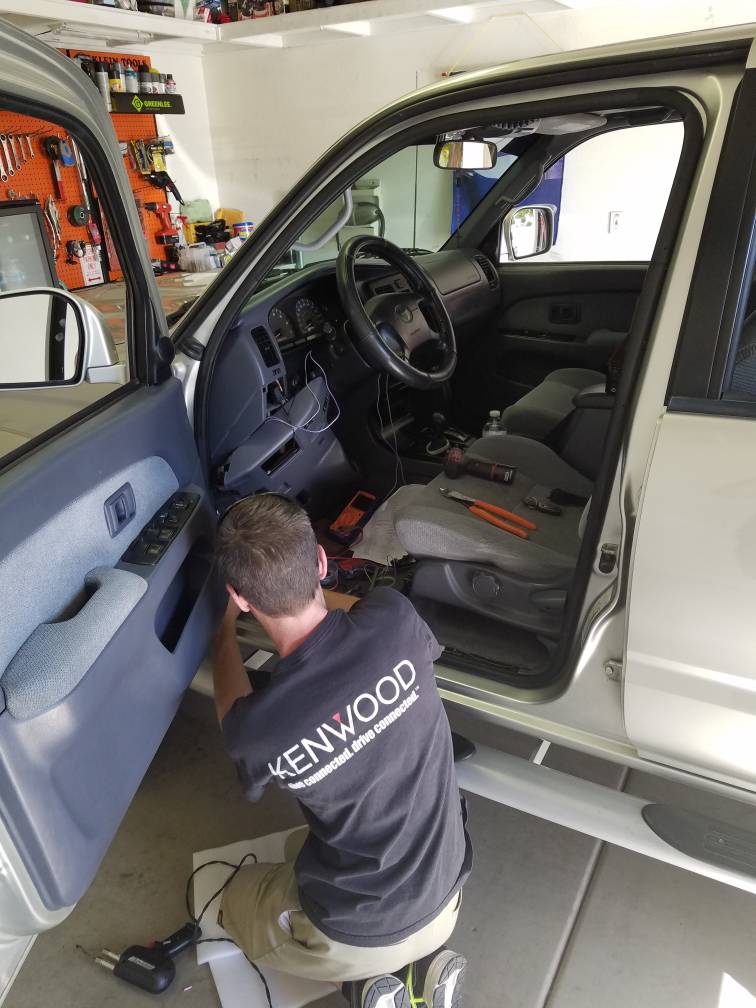
Also had the brother-in-law, who has his own business, come over and install an Avital remote start. Just the basic one. With the 2 kids and being hot as hell out, it was a good little addition. Makes the wife happy too.
0b0c51327ff75733d1a8e6b1ba5ab799.jpg


Sent from my SM-G935V using Tapatalk
 
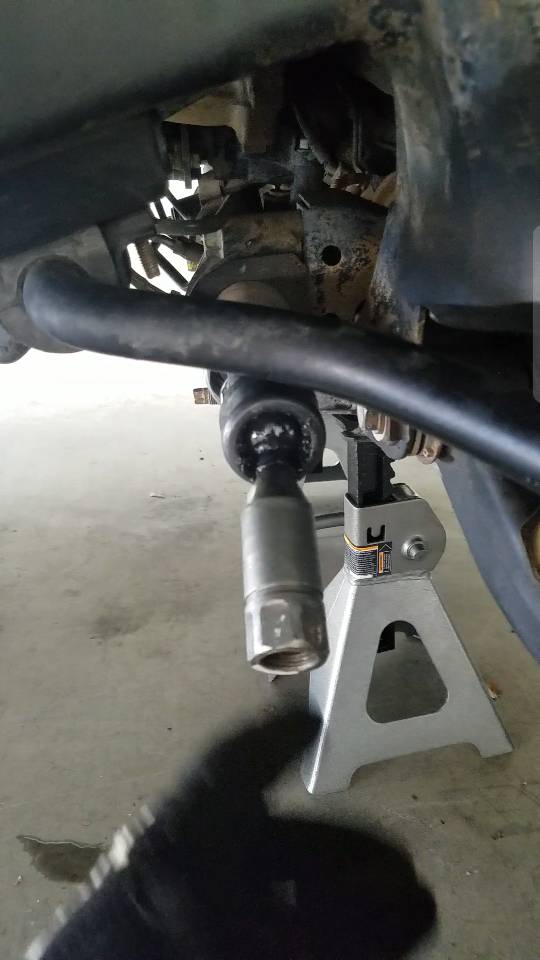
Changed out my inner tie rods this evening. Went with the Napa ones. Leaving town Sunday and didn't have time to get cheaper oem ones online. They seemed pretty solid. We will see how they do. It definitely needed to be done! Floppin around like crazy
3072f40faf2d02c177a22f5fd0e795af.jpg


Sent from my SM-G935V using Tapatalk
 

Members online

Forum statistics

Threads
278,310
Messages
3,554,080
Members
248,016
Latest member
Advally Service

Trending content

Back
Top