86 4Runner build "El Chapo"

jsmith7

New member
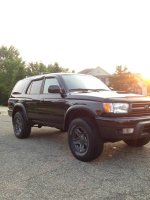
Ever since I got into Toyota 4x4's a couple years ago, I've always wanted a 1st gen 4Runner. Long story short, I finally picked up an 86 5 speed 4x4 with 180,000 miles from Florida. Living in northeast Ohio, I've learned to never buy cars from here.

My plans for this aren't anything crazy considering I'm a poor college student and I want this to be a daily driver to replace my 2000 Audi A4. The Audi is super nice, I just don't like how I have to play dodge the pothole while I drive it so I don't break anything. Plus, it doesn't have the street cred of a 1st gen T4R :biggrin2:

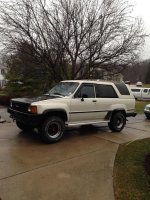
This is how she looked when I bought it. Pretty tacky, but a good base for a light build
86 4Runner (13).jpg


Here's my Yota history before I start:

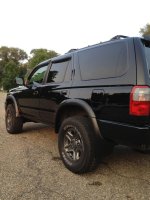
99 4Runner:
99 4runner (63).jpg
99 4runner (58).jpg


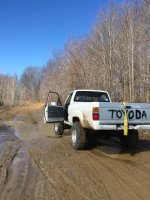
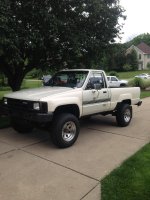
86 Pickup (Don't mind the tacky blacked out lights. I was selling this so I swapped them from the truck I had just bought at the time)

86 Toyota (66).jpg


with the custom tailgate..

86 Toyota (43).jpg


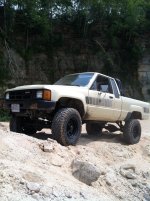
85 Extra Cab that I currently still have:
IMG_3904.jpg


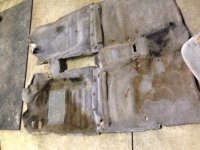
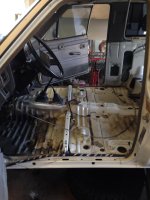
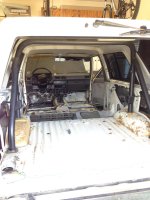
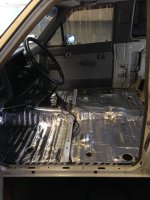
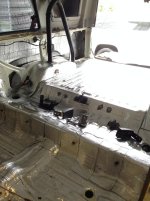
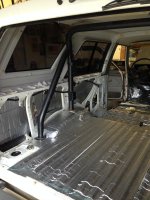
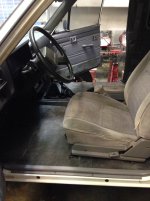
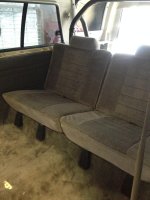
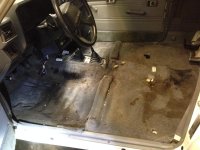
OK, back to the new 86. The carpet was trash, so I completely gutted it, sound proofed it, and put a new carpet in. While gutting it, i removed the panel right behind the front passenger seat to find a bag of about 30 syringes.. needless to say i called the police for them to take care of it. They said it was either heroin or cocaine. and that is how the name was created, El Chapo. I would post a picture of it, but I don't think posting pictures of drugs on here is allowed.


Carpet before..
86 4Runner (31).jpg
86 4Runner (32).jpg
 

Attachments

  • 86 Toyota (43).jpg
    86 Toyota (43).jpg
    134.7 KB · Views: 2,292
  • 99 4runner (63).jpg
    99 4runner (63).jpg
    135.5 KB · Views: 2,370
  • IMG_3904.jpg
    IMG_3904.jpg
    138.5 KB · Views: 2,268
  • 86 4Runner (31).jpg
    86 4Runner (31).jpg
    133.7 KB · Views: 2,202
  • 86 4Runner (32).jpg
    86 4Runner (32).jpg
    132.8 KB · Views: 2,184
  • 99 4runner (58).jpg
    99 4runner (58).jpg
    137 KB · Views: 2,316
  • 86 4Runner (13).jpg
    86 4Runner (13).jpg
    138.6 KB · Views: 2,776
  • 86 Toyota (66).jpg
    86 Toyota (66).jpg
    135.8 KB · Views: 2,520
Last edited:
Register to hide this ad
Gutted:
86 4Runner (38).jpg

86 4Runner (37).jpg


Sound Proofed:
86 4Runner (39).jpg

86 4Runner (42).jpg

86 4Runner (41).jpg


New Carpet in: I obviously didn't have the passenger seat in. Didn't want to ruin the picture with the torn up seat. Currently looking for some replacements.

86 4Runner (46).jpg


86 4Runner (43).jpg
 

Attachments

  • 86 4Runner (38).jpg
    86 4Runner (38).jpg
    122.9 KB · Views: 2,200
  • 86 4Runner (37).jpg
    86 4Runner (37).jpg
    128.3 KB · Views: 2,189
  • 86 4Runner (39).jpg
    86 4Runner (39).jpg
    129.3 KB · Views: 2,232
  • 86 4Runner (42).jpg
    86 4Runner (42).jpg
    134 KB · Views: 2,111
  • 86 4Runner (41).jpg
    86 4Runner (41).jpg
    131.9 KB · Views: 2,566
  • 86 4Runner (43).jpg
    86 4Runner (43).jpg
    135 KB · Views: 2,149
  • 86 4Runner (46).jpg
    86 4Runner (46).jpg
    131.2 KB · Views: 2,157
Now for the cargo area..

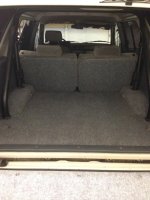
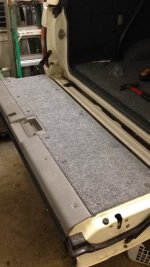
I repainted the side panels because they were so faded. After the sound proof was down, i put down the factory mat the was there before and then covered that with some indoor/outdoor carpet from home depot. Covering the tops of the wheel wells was fun... I covered some panels I made for the back of the rear seats and made a new panel that i also covered for the tailgate.

86 4Runner (57).jpg

86 4Runner (56).jpg
 

Attachments

  • 86 4Runner (57).jpg
    86 4Runner (57).jpg
    135.1 KB · Views: 2,163
  • 86 4Runner (56).jpg
    86 4Runner (56).jpg
    92 KB · Views: 2,096
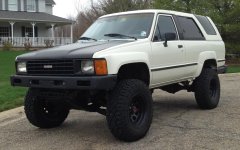
Next was improving the look of the outside. Removed the cheesy step sides, rubber fender flares, cracked rain guards and the roof rack that was held together with coat hangers.


Before:

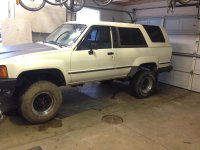
You can see the fender rust because of the flares. there is some light body damage on the rear corner you can kind of see. I also mocked up what it would look like without a saggy rear.


86 4Runner (14).jpg

After removal of stuff and threw some 3rd gen coils under the back for a no cut zuk mod. threw some longer shocks (about 2 inches) that i had from the 85 extra cab that were like brand new. I did a full OME setup on the truck, so these were just laying around. This time i mocked up the front to what some ball joint spacers would do.


I found out that one of the tires had about an inch different back spacing than the other 3. Luckily the spare was the same type of wheel and the correct backspacing, but different size and type of tire....


86 4Runner (18).jpg


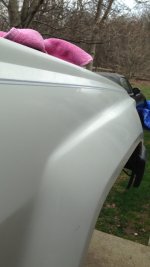
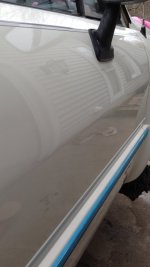
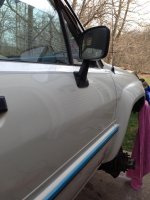
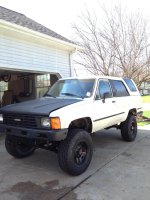
you can't really tell because its white, but the paint is the furthest thing from shiny. So, i softscrubbed the whole thing really good, wet sanded it with 1200 grit paper and gave it a buff. pictures don't do justice of how bad the paint looked before. the sand paper i was using was definitely much smoother...

after a wet sand:
86 4Runner (65).JPG


after buffing:
The paint turned out amazing, looks brand new

86 4Runner (66).JPG


86 4Runner (67).jpg


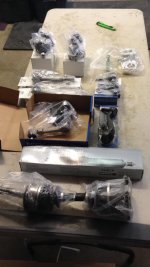
Time for some front end maintenance. The upper and lower ball joints were shot, so those were definitely getting replaced. perfect reason for some ball joint spacers too right?? some steering bushings were shot, some were ok, so i did the right thing and replaced it all. went with Beck and Arnley stuff too... my wallet hurts.


New inner & outer tie rods for both sides, Pitman arm, idler arm, steering stabilizer, upper and lower ball joints for both sides, and a cv axle for the driver side. threw some new brake pads on there too.


86 4Runner (48).jpg


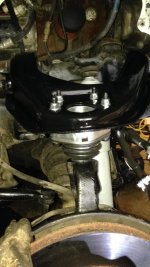
all buttoned up with the ball joint spacers. not sure if the bolts are supposed to be installed that way, but when they were installed the other way, the ends were a little to close to the boot of the ball joint for my liking.


86 4Runner (55).jpg
 

Attachments

  • 86 4Runner (14).jpg
    86 4Runner (14).jpg
    128.5 KB · Views: 2,183
  • 86 4Runner (18).jpg
    86 4Runner (18).jpg
    128.2 KB · Views: 2,232
  • 86 4Runner (65).JPG
    86 4Runner (65).JPG
    132 KB · Views: 2,099
  • 86 4Runner (66).JPG
    86 4Runner (66).JPG
    113.2 KB · Views: 2,079
  • 86 4Runner (67).jpg
    86 4Runner (67).jpg
    131.1 KB · Views: 2,091
  • 86 4Runner (48).jpg
    86 4Runner (48).jpg
    80 KB · Views: 1,998
  • 86 4Runner (55).jpg
    86 4Runner (55).jpg
    92.5 KB · Views: 1,993
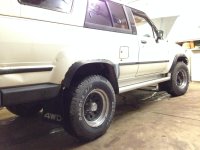
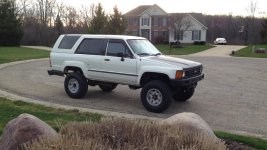
With it lifted a little, the 30.5x9.5 tires were just too small looking. The one time i get a vehicle with basically brand new tires and I don't keep them. Needless to say I picked up some 265/75 r15 cooper discoverer at3 for a price that i couldn't beat. That isn't really my go to tire, but it was such a good price. As much as I wanted a bigger, meatier tire, this is going to be a daily driver, where I am currently driving 50 miles a day. I also found some OEM wheels of craigslist with 2 good coopers on them (The source for me going with coopers, 2 full size spares about 75% tread)


86 4Runner (64).jpg


threw some paint on them (the hood lines up, it is just popped)

86 4Runner (69).jpg


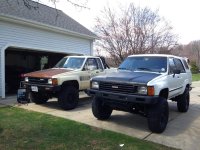
Picked up my 85 Extra from storage. they look so happy together.
And different colored hoods is not a thing i do, haha. the hood on the truck was rust experiment i did with a spare hood, i just haven't changed it back. the 4runner has a black hood because it was involved in some front end damage, also the source of the 2wd grille. the hood will eventually be painted when i fix the surface rust on the fenders and the little bit around the windshield, which will eventually be replaced.

86 4Runner (71).jpg


threw the duratracs from the truck onto the 4Runner.... Houston we have a problem, I don't think I can change it back, it looks too good...


86 4Runner (72).jpg
 

Attachments

  • 86 4Runner (64).jpg
    86 4Runner (64).jpg
    115.4 KB · Views: 2,098
  • 86 4Runner (69).jpg
    86 4Runner (69).jpg
    136.5 KB · Views: 2,405
  • 86 4Runner (71).jpg
    86 4Runner (71).jpg
    137.6 KB · Views: 2,262
  • 86 4Runner (72).jpg
    86 4Runner (72).jpg
    139.3 KB · Views: 5,740
I am interested in finding that grille. Is that a 2wd grille? I want a black one just like that, as opposed to my busted up chrome cross hair one.
 
pretty clean.
was the sound proofing you used actually a roofing product?

It was 50mil thick automotive sound deadening. The brand is Noise Control Mat.


I am interested in finding that grille. Is that a 2wd grille? I want a black one just like that, as opposed to my busted up chrome cross hair one.

Yea, it is a 2wd grille, it came on the runner when I bought it. I'm currently looking for a black 4wd grille.
 
love the stance on your rig. I'm also running 3rd gen rear coils, can you give me a link where you bought your BJ spacers? I would like mine to sit just like yours, it looks very level. Thats all you did right? 3rd gen coils and BJ spacers?
 
love the stance on your rig. I'm also running 3rd gen rear coils, can you give me a link where you bought your BJ spacers? I would like mine to sit just like yours, it looks very level. Thats all you did right? 3rd gen coils and BJ spacers?

Thank you. Correct, I used newer 3rd gen rear coils. I believe before '99 they were a bit shorter/weaker, but I could be wrong. And then BJ spacers on the front. I did put slightly longer shocks in the back to compensate for the smal amount of lift, but that had no effect on the lift height. i still need to get longer shocks up front. The link for the spacers is below.

4Crawler Offroad Toyota 2WD/4WD IFS Front Ball Joint Spacers for Pickup, 4Runner and T100
scroll down and you will see "Buy Now"
 
Thanks dude! How did you like the 265/75s? I just picked up some trail edition rims but they are 17s. I was thinking of 265/70 but like i said i love how yours is set up! What does the 75 make the tire like 32"?
 
Thanks dude! How did you like the 265/75s? I just picked up some trail edition rims but they are 17s. I was thinking of 265/70 but like i said i love how yours is set up! What does the 75 make the tire like 32"?

Not a problem. they are great! They don't stuff the fender has much as my 31x10.5 duractracs, but the Coopers are great for DD. the 265/75r15 comes out to be about 30.6". they end up sitting a little taller and narrower than the 265/70.

in your case, a 265/75/17 will simply give it an extra 2 inches, so 32.6".
 
Nice looking 4runner! Interior turned out great, how did you get the carpet to follow the contour of your wheel wells so good, looks like it was pre-formed and made for it!
 
Nice looking 4runner! Interior turned out great, how did you get the carpet to follow the contour of your wheel wells so good, looks like it was pre-formed and made for it!

Thank you!
The carpet was a bit difficult at first. I did the wheel wells separate. I mocked it up with a big piece of paper. I laid it on the top of the wheel well, smoothed it down the middle, about where the hook is to strap cargo down. Because this just has 1 90 degree angle, the paper could contour to both the top and side. This gave me basically a max width of what the paper would have to be. I trimmed a long strip of paper to be this width, and the length was a bit longer than the whole wheel well. Then, I laid it back on the top and side (in the middle again) and started forming towards the back of the wheel well, you keep the top edge of the paper butted up against the wall, and the Bottom of the paper butted up against the floor. As you make your way down the wheel well, you will get excess paper as the wheel well starts to angle down. Pinch the excess paper to ensure the paper is flat on the top and flat on the sides. Once you do this all the way down, and at the bottom, you should have the paper laying flat on all parts of the wheel well with excess hanging around. Make sure to make a hard crease where the excess. Then remove the paper and cut at your fold lines. You will have an interesting looking piece of paper, but it will form together to follow the whole contour of the wheel well.

To make things easier, I did the front and back of the wheel well on separate pieces of paper, but added the templates together when cutting out the carpet.then the template for the one side is just the opposite for the other side, so you only have to make a template for one side.

Test test test. Do a lot of tests and trimming where needed to ensure that the carpet is close after the first cut. You can always trim a little more when you are forming the carpet on the wheel well, so obviously leave a little extra everywhere just in case.

I then used some spray adhesive to keep it down. I'm actually quite happy about how it turned out, and even when close up, you can't see the seam along the curve of the wheel well.

Sorry if this makes no sense at all, pictures would probably help. I can take some pictures of the process if you would like. I am no professional, this was my first time laying carpet over contours, but it does look pretty good.
 

Members online

Forum statistics

Threads
278,313
Messages
3,554,090
Members
248,016
Latest member
Advally Service

Trending content

Back
Top